The first thing that we will do on this path to breaking down a mockup is recreate our page structure in HTML.
Reorganize layers
Some designers have a tendency to organize their content in a mockup in a way that already considers its web integration. Layers are already organized in folders that contain content. For example, you will find a header folder that contains all layers dedicated to the header of your site. The folder underneath would then contain the content under the header that comes next in the page, and so forth.
In our case, the designer has created a header and a footer folder. Great!
On the other hand, you might notice the folders are not in the right order. I recommend you take five minutes to reorganize the layers in a way that mimics the alternate HTML structure of the page. This will make certain elements easier to find while you're coding.

If the mockup you find doesn't have any folder structure at all, I recommend creating one and inserting the correct layers into each folder so you end up with the folder for the header, the body, and so forth. To add a folder, click on the small icon that's shaped like one at the bottom right of the layers section.
Getting to know your mockup
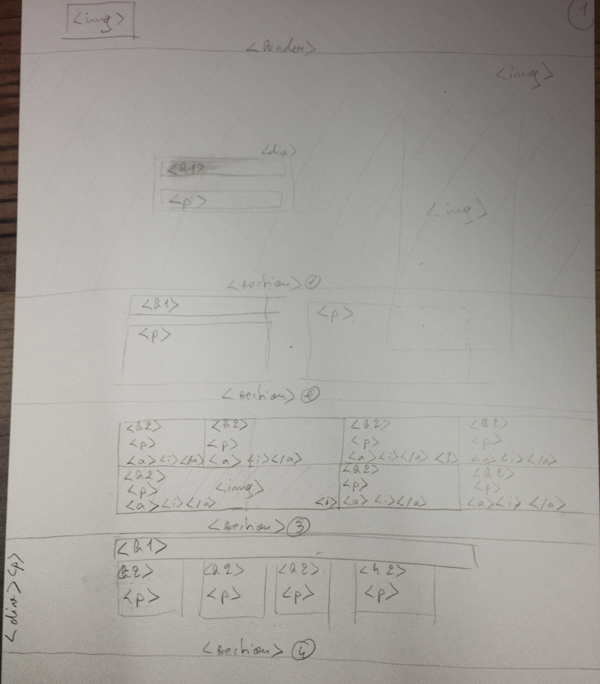
Take some time to become familiar with the mockup's visual elements by disactivating and reactivating different layers. This will help you understand the order of priority for each visual element, as well as how your resultant HTML will ultimately be structured.
You can also started to distinguish different forms of content like text, images, gradients, and geometric forms. In general, it isn't a bad idea to write out the mockup elements that will be ultimately translated into HTML. Here is also a good place to add elements that don't necessarily show up in the mockup itself like a <ul> tag for lists or a form tag for forms.

What if you don't know any HTML and you think I'm speaking Chinese? Don't worry! Still do the exercise and just write out the different content types, for example text, image, icon, title. We will look in the second part of this course at these elements' equivalents in HTML.
You might notice by looking at my drawing that I didn't respect proportions exactly. This is not a big deal, because the goal for now is just to be familiar with the elements you will be integrating in HTML. We'll get into proportions and sizes in the next chapter!