Let's move past devices and simulations, and dive into the nine tabs seen in this menu. We'll first tackle the first tab of the Google Chrome developer tools, and my personal favorite: Elements!

Learning how to inspect elements and having it become a mindless part of your workflow will change your life as a developer. Inspecting an element within the developer tools is like having an intricate map just of your webpage. You'll better understand your page layouts, elements themselves, and what your browser is interpreting when it receives HTML and CSS.
The magic workflow is this:
Right-click the element you want to know more about.
Click "Inspect."
Do this with a variety of elements on the test page! You can even try it on some live websites. Do it once, twice, 10 times. You should practice doing this until it becomes second nature.
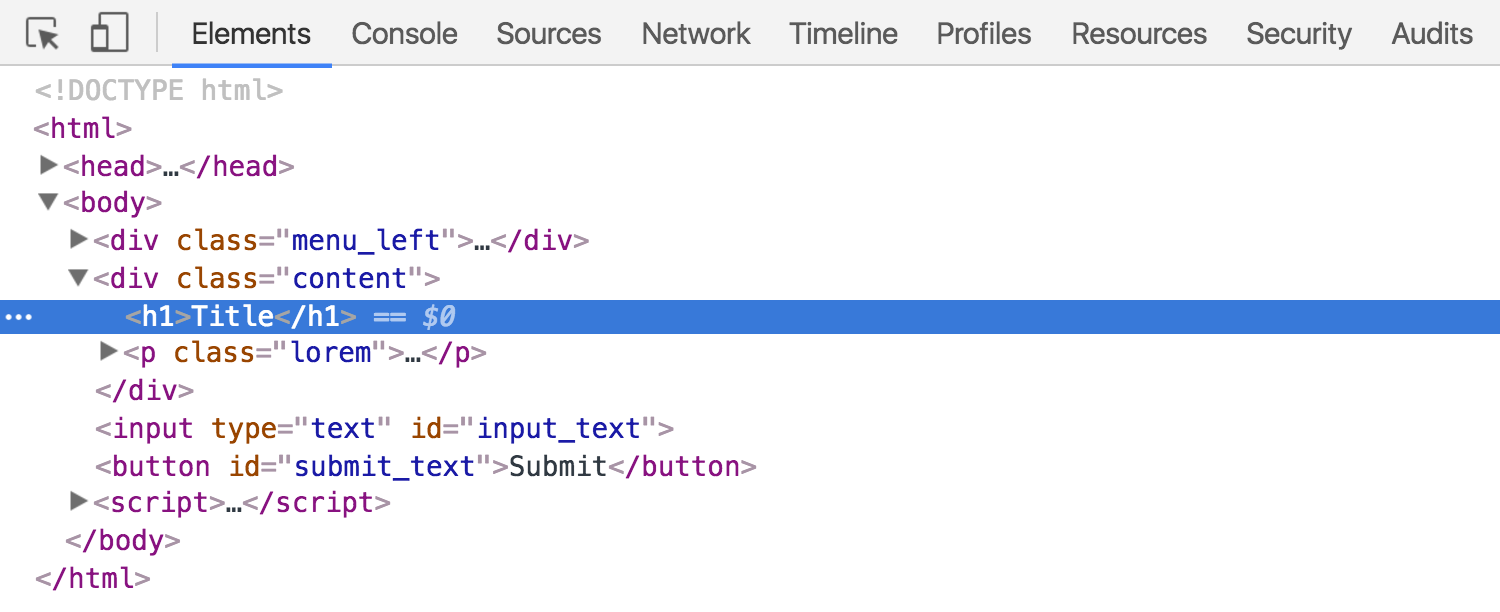
As we have already seen, by inspecting the item, we arrive on the Elements screen with a focus on the element that we wanted to inspect: the title.
Inspect element
Let's see what we can do with this "inspected" title!
HTML
You have many options for interacting with the HTML in your page. Take the highlighted h1, for example. If you double click on either the tags or the contents ("Title"), you'll have the ability to modify them!
For even more options, right click the element to access this menu of options.
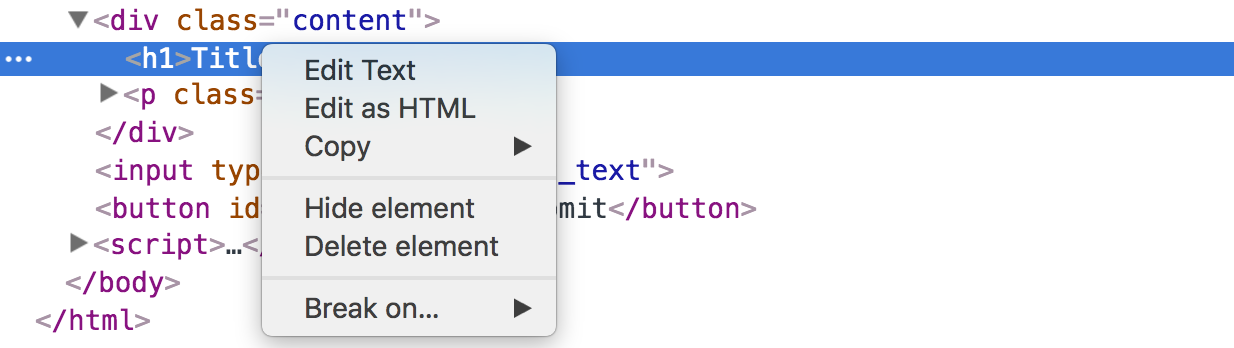
I personally use "Edit as HTML" all the time. This lets you modify your element's HTML however you like! You simply have a text box with the current contents inside, and it's up to you to do whatever you want next with it.

Try performing some intuitive operations on the elements. You can select an element and:
hit the delete key
drag it around in the markup
fold up its contents
CSS
One half of inspecting elements is getting access to cool HTML stuff. On the other side, you'll see the CSS view! I've expanded it in the image below.
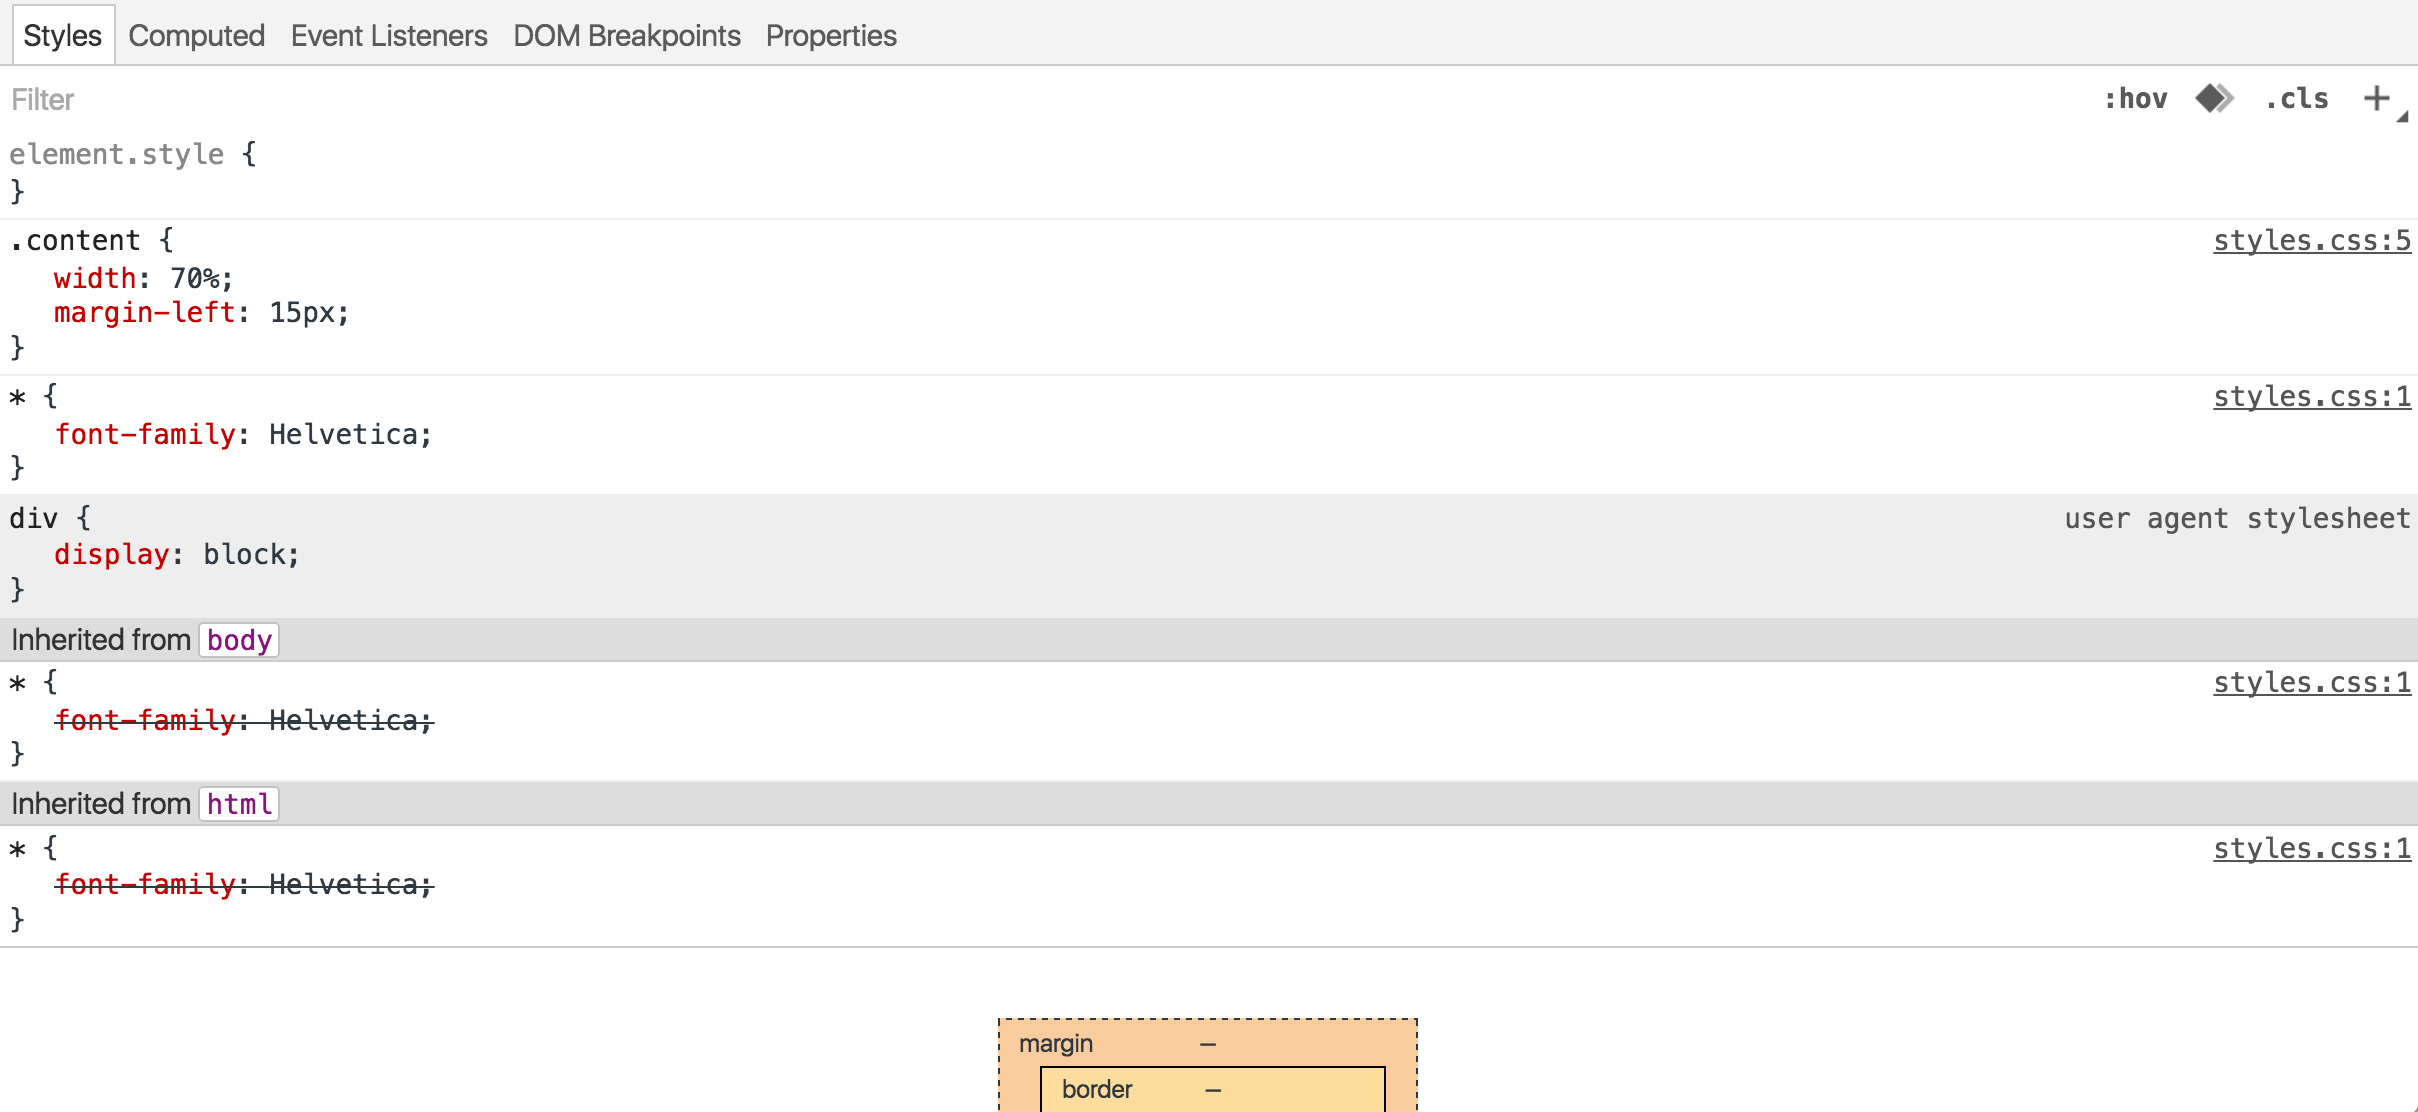
You can see all the style rules associated with the selected element and where they're inherited from. You can even add style rules manually! Try to add a color: green; to the selected title, and see what happens.
This pane also allows you check and uncheck current style rules. This is very helpful if you're not sure where a particular rule is coming from.
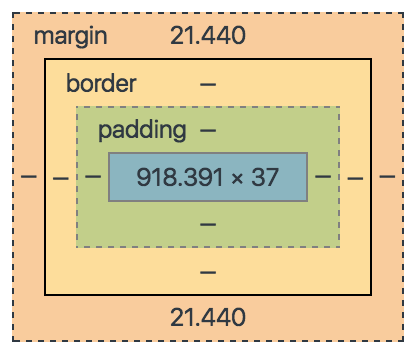
You'll also notice that, upon hovering, the title has orange, green, and blue colors that appear around it.

Colorful! These three colors represent spacing properties of the element. Scroll to the bottom right of the CSS tools section, and you'll see a more detailed diagram with precise pixel measurements.
DOM
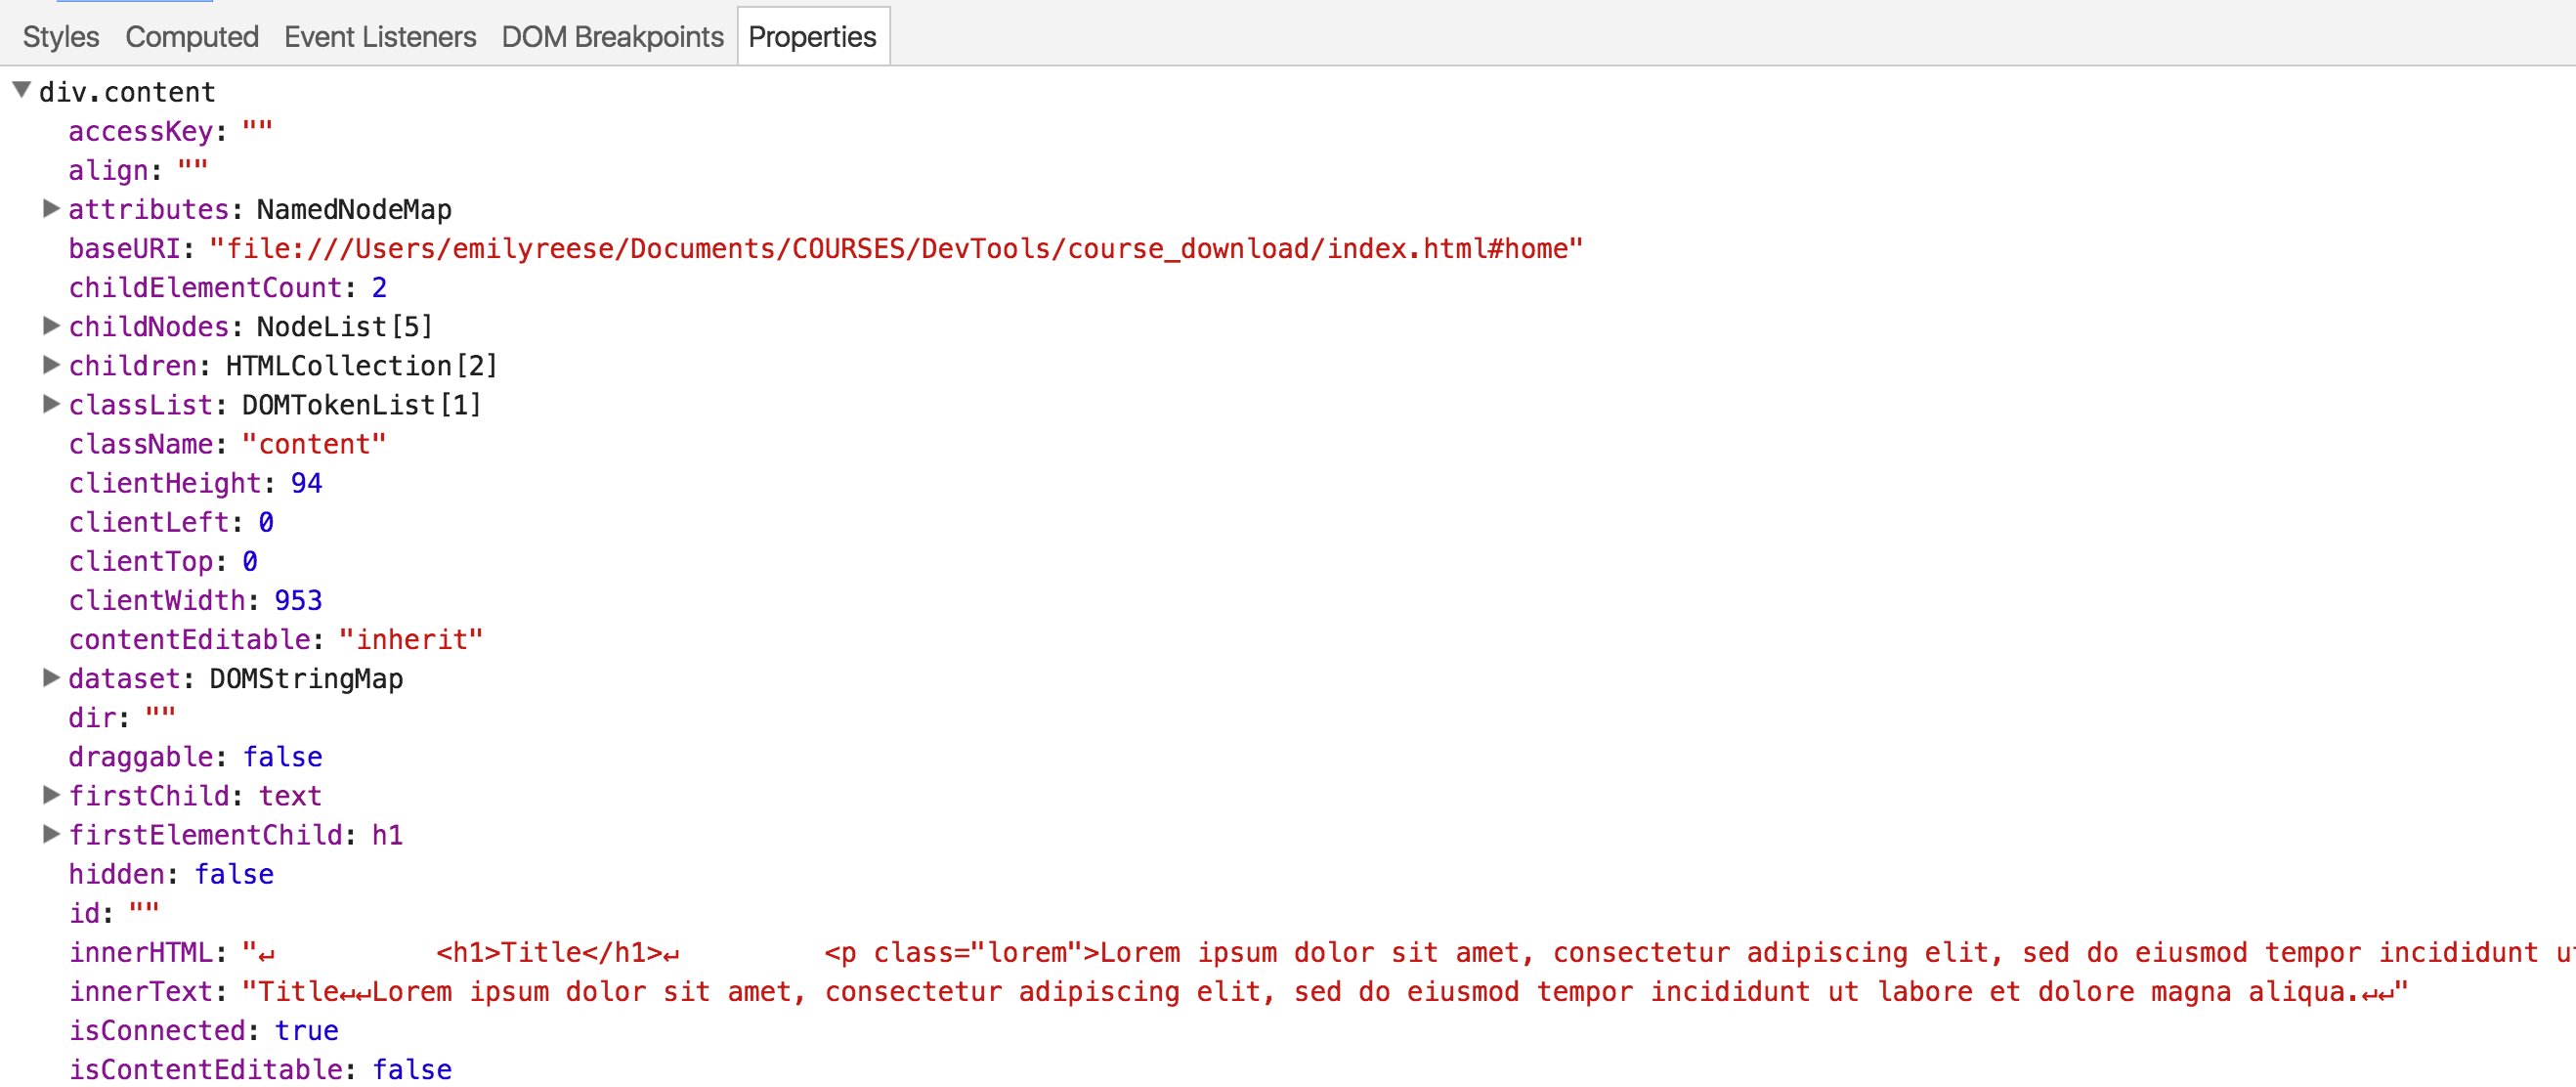
Lastly, you should click on the Properties tab, over where you saw the style rules. You can see all the DOM (Document Object Model) related information about an element. This is helpful if you're a JavaScript developer in particular!
For example, I always have trouble calculating element relationships (children elements, etc). Luckily, in this Properties view, you can find out everything about elements' relationships to one another within the DOM tree.
There's plenty more to see in the Elements tab, but I recommend you take it for a spin yourself now!
