Discover Artboards & Layers in Sketch
An introduction to Sketch
Sketch is an app for Mac that lets you create graphical elements. In order to build prototypes for mobile and desktop, we need to design and create the individual screens first. We will use Sketch for this task. Bohemian Coding is the company that build Sketch. Their website describes Sketch as follows:
Sketch gives you the power, flexibility and speed you always wanted in a lightweight and easy-to-use package. Finally you can focus on what you do best: Design.
Installing Sketch
Go to https://www.sketchapp.com/ and click on free trial to start a download of Sketch. Install the app and you then have 30 days (at the time of writing!) where you use the software without needing a license key. After 30 days, you have to purchase a license key to continue using Sketch.
Buying a Sketch license for the first time will cost $99 USD and gives you a year of free updates. Sketch will continue to work after a year; you don't have to renew your license.
Getting Started in Sketch
There are two basic concepts that we need to understand before we can really be productive in Sketch:
Artboards
Layers
You can think of an artboard as being like a canvas. Within this canvas, you want to add a number of layers that then make up your desired design.
Let's take an example:
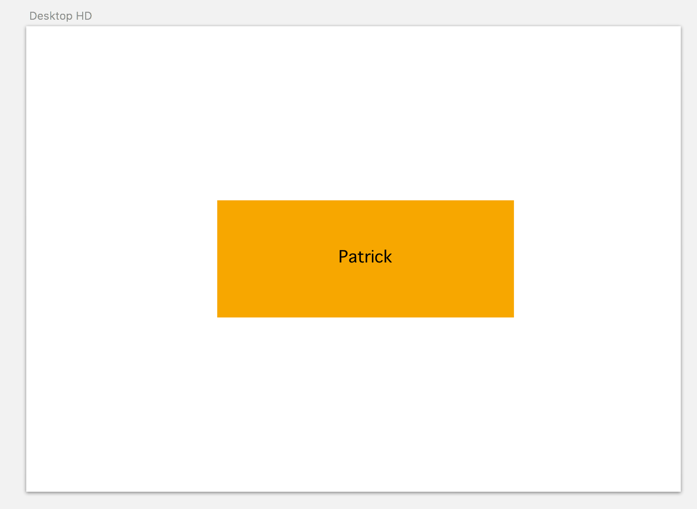
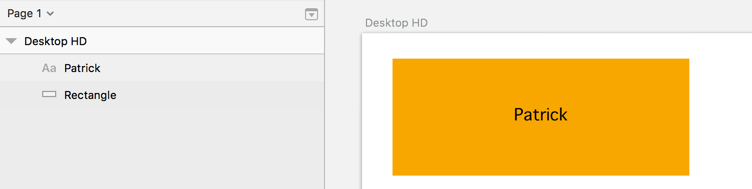
If you create a shape such as a rectangle in Sketch, this rectangle is one layer.
If you create some text such as the word "Patrick", this text is another layer.
Both of these layers then exist on our canvas (which we call an artboard in Sketch!).
Thus, our artboard contains two layers.
Sketch Windows
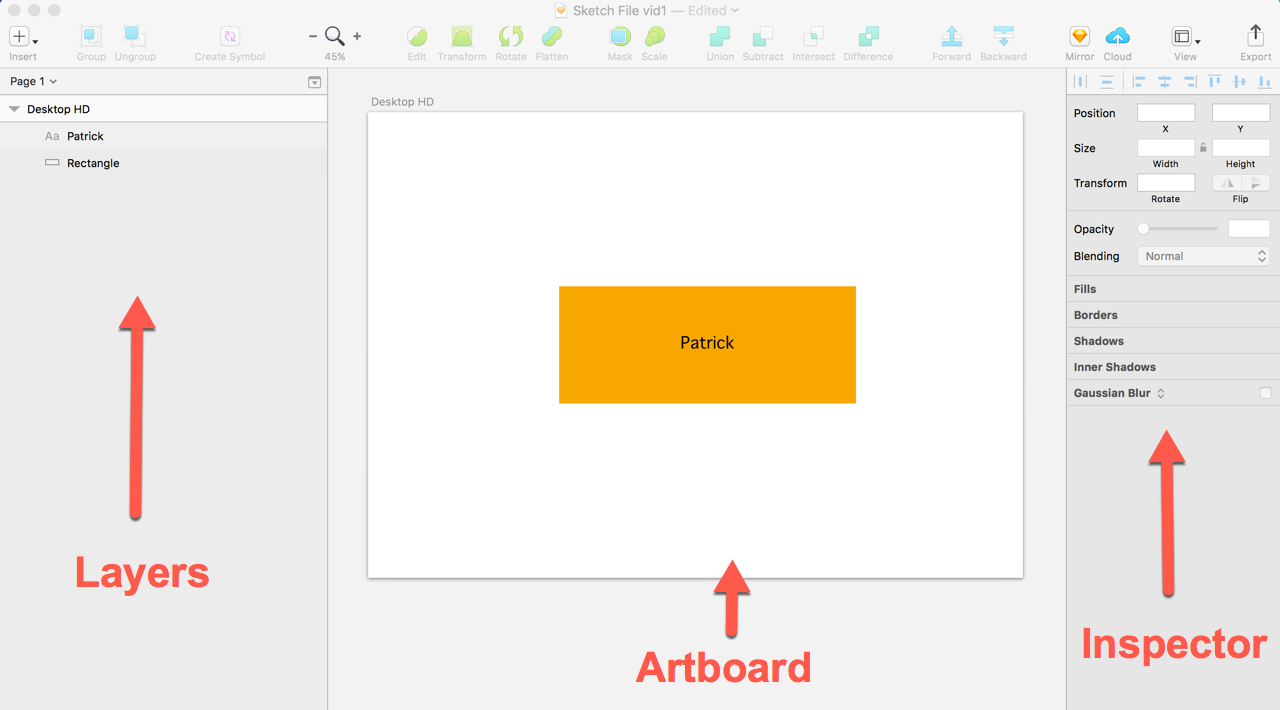
There is a Windows option in the Sketch menu that allows you to show/hide various windows. The three most important elements of your Sketch interface are:
Artboards: contain a set of layers
Layer List window: shows a list of the layers of currently selected artboard (and their ordering)
Inspector window: shows the properties (so you can edit them) of currently selected layer
Creating Artboards
During this course, we will create one artboard for each mobile app screen that we need for our prototype. If our prototype has eight screens, we will create eight artboards - one for each screen!
You can create an artboard by using the menu option Insert > Artboard and then choosing the size of the artboard you wish to create. The artboard options are grouped in dropdown:
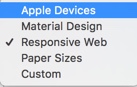
For a web page, I would typically choose Responsive Web > Desktop HD
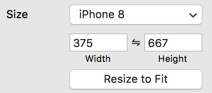
For a mobile app on iOS8, I would choose Apple Devices > iPhone8. Sketch then creates an artboard suitable for iPhone 8 designs (an artboard is created of width 375 pixels and height 667 pixels)!
Creating Shapes and Text
In the menu, you can choose Insert > Shape > Rectangle (or another shape).
You can choose Insert > Text to create a text layer.
Shapes and text are the most common elements that you can create. Take a few moments now to create a few of each (shapes and text) and practice creating shapes and text until you are comfortable doing so.
Ordering Layers
One thing to note is that if layers are overlapping on our artboard, then the ordering of layers in the Layer list (the left-hand window) will determine which layers are "on top" of other layers.
You can drag the layers in the Layer list to re-order them.
If I move the Patrick layer underneath the Rectangle layer, then the text layer for Patrick is hidden by the rectangle.

Summary
Installing Sketch and understanding Artboards and Layers means we are ready now to have some fun in the next chapter creating different types of shapes (layers) and editing their properties!
Additional Resources
