Create the Ideal User Story Wiki Page

As you saw in the last chapter, we often build features that break down into a set of user stories. We created the Feature wiki page (for a feature called Quiz), and we'll make the User Story wiki page in this chapter. They are quite similar in terms of the format.
You will recall that we created a table of user stories on our Quiz wiki page.
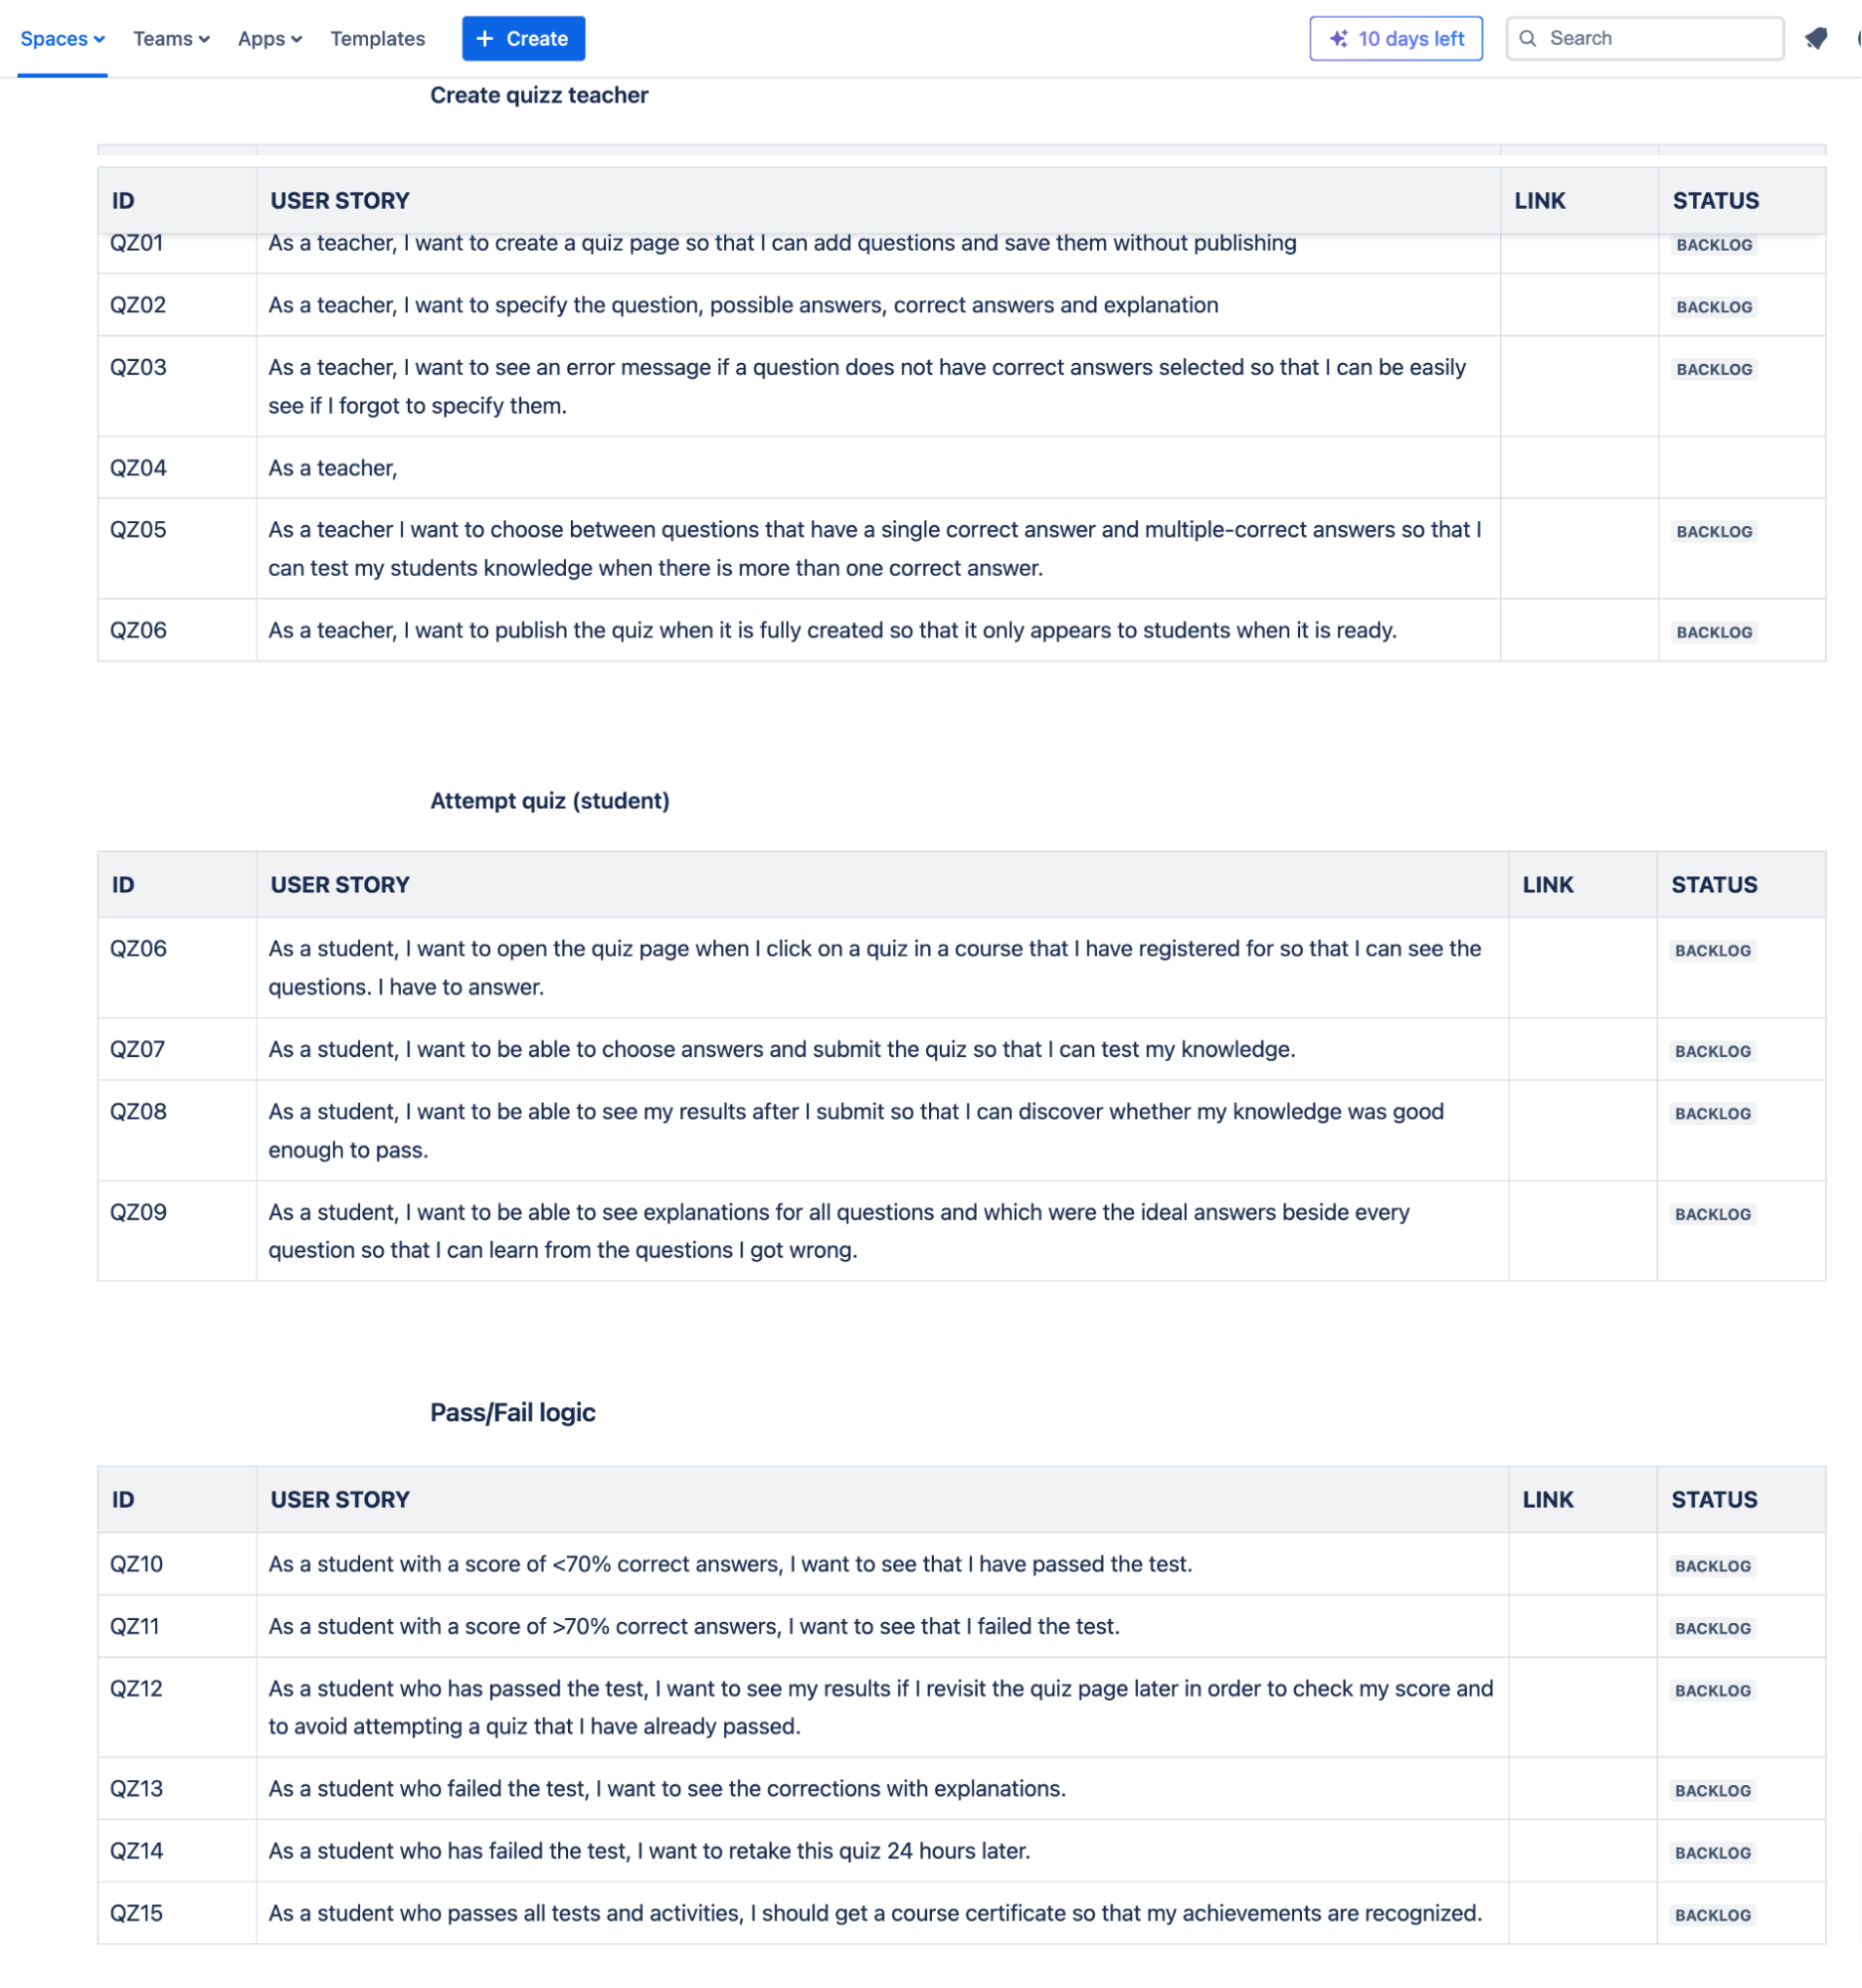
Let's create a User Story wiki page for the Retake Quiz user story.
Format a User Story Page
An ideal User Story page has the following sections:
Background
Screenshots
Acceptance tests
Additional links (if any)
Let's create this wiki page for the Submit Quiz user story, which is as follows:
As a student, I want to be able to choose answers and submit the quiz so that I can test my knowledge.
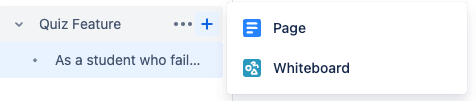
To create a new page in the Quiz feature page, click on the + and new page. It will then be considered a child page of the Quiz feature.
Background
The background should give a little general information about this user story. For example, the background section for the feature had a high-level description of a quiz. Now, the background section for choose answers and submit the quiz should provide a high-level description for submit a quiz. Here is an example:
The student can see all the quiz questions.
Questions contains single or multiple answer choices.
When the student clicks on a choice, the button is checked and at the end the quiz can be submitted.
Until all questions have been answered, the submit button remains disabled.
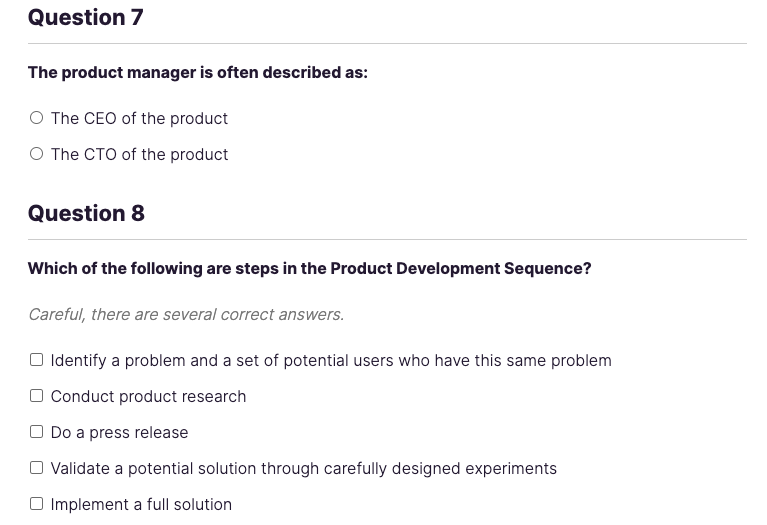
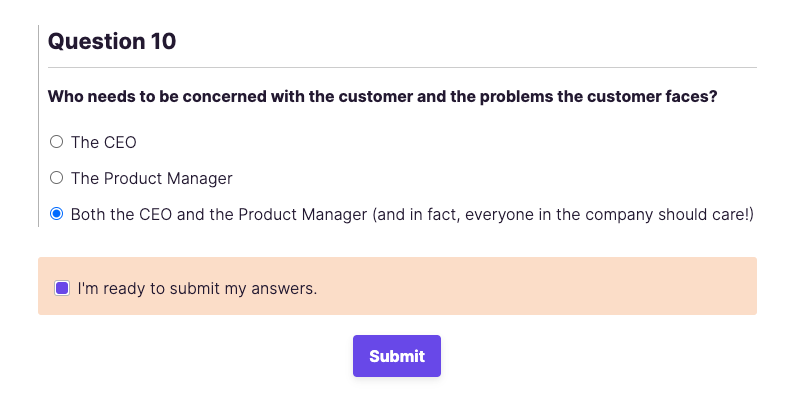
Screenshots
The Feature wiki page provided a couple of screenshots of a quiz's appearance. For the user story, you want to provide all the screenshots necessary for this user story. For example, Submit Quiz could have screenshots for:
A student answers questions
A student submits a quiz
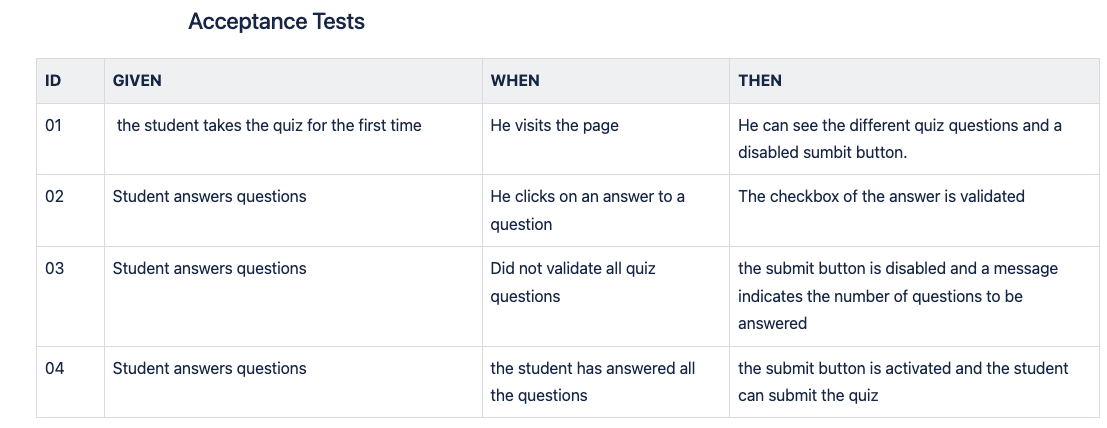
Acceptance Tests
The acceptance tests should be listed here in a table (or several tables depending on how you group them). You can group them by rule as you saw in the chapter on acceptance tests.
Here is an acceptance tests table for Submit Quiz:
Reformatting User Stories
Sometimes, you figure out that it might be best to add or delete a user story as you're writing acceptance tests. If the acceptance tests for one story seem to overlap a lot with another user story, you might want to merge them (which might require a small rewrite). According to the INVEST model, user stories should be independent. However, there are times when you realize that things would be tidier if you added or removed a user story or two while writing acceptance tests.
We’ll take a look at that scenario in the next chapter.
You Turn!

Create a User Story Page for “As a student who failed the test, I want to be able to retake this quiz 24 hours later”. Add the following sections:
Background
Screenshots
Acceptance tests
Provide the content for different sections. This will include the context, some screenshots and a table that outlines the acceptance tests.
When you've finished, check your work by taking a look at the user stories and acceptance tests here.
Let’s Recap!
Wikis are a great place to capture essential user story items such as background, screenshots, acceptance tests, and additional links.
Having a wiki site for each level of the classification (PBIs, features, and epics) may help a team see the value in their work.
If you use a wiki to organize key decisions, problems, and related items, you can help a team improve by:
increasing collaboration.
reducing the time for creating documentation.
facilitating the updating of documentation.
improving collaboration and transparency.
Our user stories are done, but we will need to add and remove some. Let’s see how to do that in the next chapter.
