Read Data in a List View and Detail View
What Is a CRUD Interface?
In Part 3, we spent a lot of time working in the backend of the application - performing CRUD operations in the shell and on the admin site.
In Part 4, we’ll turn our attention to how our end-users will interact with the application. They’ll want to do things like:
Read through a list of the latest listings.
View details about a particular listing they’re interested in.
Add a listing of their own.
Change the details of their listing.
Remove their listing.
As our users carry out these tasks on the site, they may not realize it, but they are performing CRUD operations: creating, reading, updating, and deleting objects.
Most websites you use are like this. Think about how you post on social media: you create posts, edit (or update) them, and occasionally delete them. You can see a list of all posts (usually called a “feed”), and you can click through to a specific post to see more details like replies and comments.
As we build out the user interface to our site, you could say that we are building a CRUD interface.
Let’s begin with the ‘R’ in CRUD - Read - and learn about the different ways we can display data to our users:
A list view that displays a list of all of the objects of one model in minimal detail, e.g., just the listing title, or just the band name.
A detail view that displays one object in full detail with all fields displayed.
As with previous chapters, we’ll first look at the concepts together using the Band model, and then, in the exercise, you’ll apply what you’ve learned to the Listing model.
Display All Objects in a List View
If you look at our hello page, you can see that it’s already displaying a list of bands.
Perhaps it’s time to tidy up this page into something we’ll use in our final app.
First, we’ll rename the template file. We could just call it ‘bands.html,’ but by the end of this part we’re going to have lots of templates related to bands, so let’s start a naming convention. The format will be “<model nametype of view>.html”.
So we rename hello.html to band_list.html .
Now let’s update the template contents. This is going to be the main list view for our Band objects, so let’s update the header and remove the paragraph:
# listings/templates/listings/band_list.html

{% extends 'listings/base.html' %}

{% block content %}

<h1>Bands</h1>

<ul>
 {% for band in bands %}
  <li>{{ band.name }}</li>
 {% endfor %}
</ul>

{% endblock %}
Now let’s update the view. We’ll rename the function using the same convention as the template, and also point it to our newly renamed template:
# listings/views.py

def band_list(request):  # rename the view function
   bands = Band.objects.all()
   return render(request,
           'listings/band_list.html',  # point to the new template name
           {'bands': bands})
Finally, let’s update the URL pattern. This view is currently mapped to the path 'hello/' , but let’s use 'bands/' instead:
urlpatterns = [
   ...
   path('bands/', views.band_list),  # update the path and the view
   ...
]
Test the view in the browser:
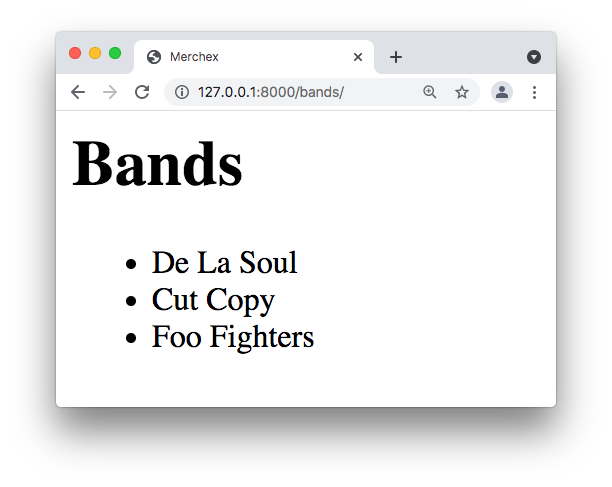
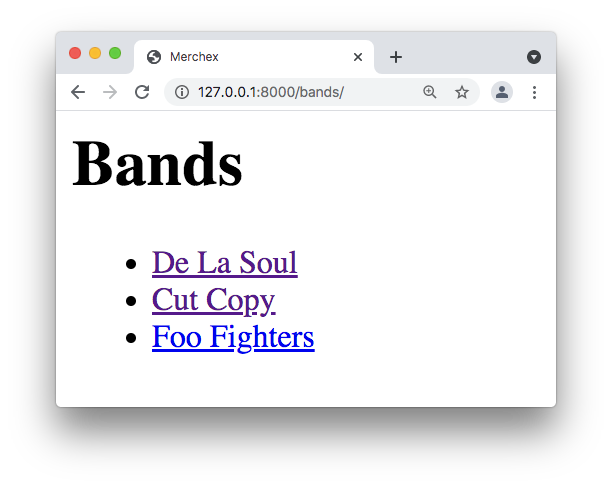
We now have a Band list view, displaying all of the Band objects in minimal detail, showing just the name field.
Display One Object in a Detail View
We need to choose a suitable URL path for displaying a single object to the user. But what should it be?
We can get some ideas from web applications we already use. Take a moment to open your favorite web applications in a browser and click through to an individual item - for example, a specific social media post, blog post, photo, or course.
What sort of URL do you see in the address bar before and after you click through?
Here are some that I found:
https://twitter.com/djangoproject/ takes us to the Django Twitter feed, but if we click through to a specific tweet we go to:
https://twitter.com/djangoproject/status/1379372684400861185https://openclassrooms.com/en/courses shows us the full list of courses on OpenClassrooms, but if we click through to a course we go to:
https://openclassrooms.com/en/courses/6902811-learn-python-basics
These examples vary in their approach, and I’m sure yours will too, but one technique often seen is to “tag on” some kind of id to the end of the list view URL in order to get through to the detail view.
If we follow the same format, and our list view path is ’bands/’ , then the details of our first three bands would be located at:
’bands/1/’’bands/2/’’bands/3/’
Let’s see how to represent this in a new URL pattern:
# merchex/urls.py

urlpatterns = [
…
   path('bands/', views.band_list, name='band-list'),
   path('bands/<int:id>/', views.band_detail),  # add this pattern under our other bands pattern
…
]
With this path, we’re matching ‘bands/,’ followed by any integer, followed by a final slash (‘/’). We “capture” the integer from the path by adding <int:id> into the path. The int is the datatype we expect to be passed - an integer. The id becomes the name of an argument that gets passed to the view. Let’s create that view now:
# listings/views.py

…
def band_detail(request, id):  # note the additional id parameter
   return render(request,
          'listings/band_detail.html',
         {'id': id})  # we pass the id to the template
…Finally, we need to create the template:
# listings/templates/listings/band_detail.html

{% extends 'listings/base.html' %}

{% block content %}
 <h2>The id is {{ id }}</h2>
{% endblock %}
Let’s visit http://127.0.0.1:8000/bands/1/ and then http://127.0.0.1:8000/bands/2/:
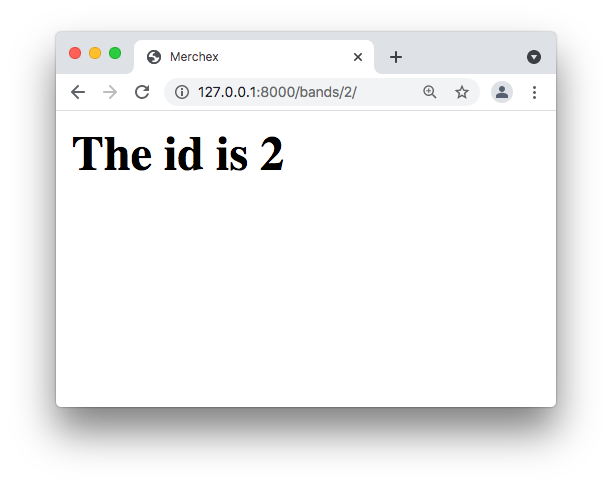
Can you see how any id you type into the URL address bar gets passed to the view and then to the template?
We need to somehow convert that id into its respective Band object in the database. Back to the view:
# listings/views.py

...

def band_detail(request, id):
  band = Band.objects.get(id=id)  # we insert this line to get the Band with that id
  return render(request,
          'listings/band_detail.html',
          {'band': band})  # we update this line to pass the band to the template
...
Here we see a new method, Band.objects.get() , whose purpose is to return just one object. In our code we write .get(id=id) which is to say “get me the object that has this id.” Then we pass that band to the template. Let’s update the template now:
# listings/templates/listings/band_detail.html
{% extends 'listings/base.html' %}
{% block content %}
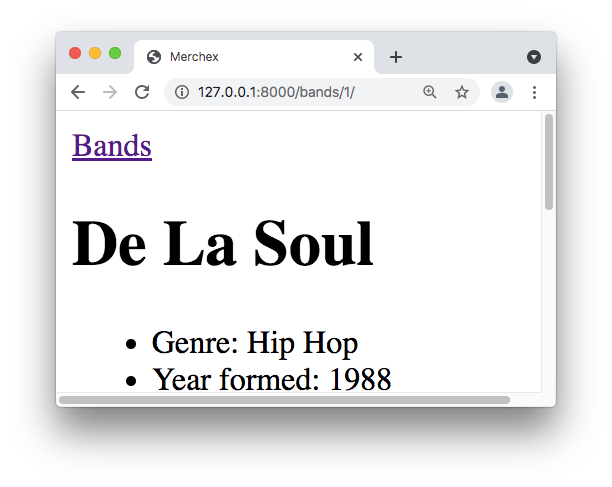
<h2>{{ band.name }}</h2>
<ul>
<li>Genre: {{ band.genre }}</li>
<li>Year formed: {{ band.year_formed }}</li>
<li>Active: {{ band.active }}</li>
<li>{{ band.official_homepage }}</li>
</ul>
<p>{{ band.biography }}</p>
{% endblock %}Let’s take another look in the browser:
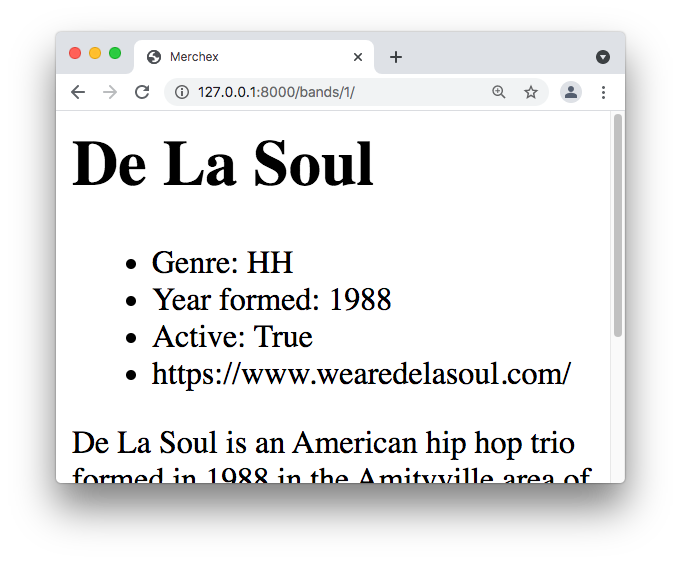
And there’s our band detail page!
We could have 100’s or 1000’s of bands in our database, and we could display any one of them in this view just by placing its id in the URL.
Hmm, something doesn’t look right with the genre - it’s displaying ‘HH’ instead of ‘Hip Hop’. Can we fix that?
Well spotted. Luckily, Django provides some “magic” we can use when a field is using a TextChoices class like genre is. Update this line of the template:
# listings/templates/listings/band_detail.html

   <li>Genre: {{ band.get_genre_display }}</li>
Django added this method get_genre_display for us to convert genre database values (e.g., ’HH’ ) into their display format (e.g., ’Hip Hop’ ).
Let’s also use the yesno template filter on the active field to convert ‘True’ to ‘Yes.’ We'll make the official homepage into a clickable link.
We should also remember that official_homepage might be empty (it’s a nullable field), so we should first check that it exists with an if statement.
# listings/templates/listings/band_detail.html

   <li>Active: {{ band.active|yesno }}</li>
   {% if band.official_homepage %}
   <li><a href="{{ band.official_homepage }}">{{ band.official_homepage }}</a></li>
   {% endif %}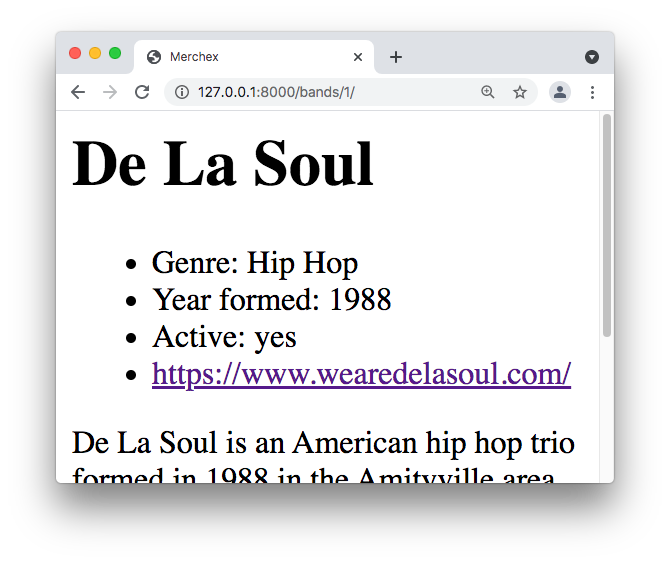
Link the List View and the Detail View
It’s great that we can access the page for De La Soul by visiting http://127.0.0.1:8000/bands/1/ - but do we really expect our users to know that ‘1’ is the id for De La Soul and to type that into the address bar? Of course not!
Many users won’t even look at the address bar while they’re browsing a site. This is evident by the fact that some modern browsers like Safari now hide the URL path in the address bar!
Most users implicitly expect to be guided through the site by intuitive navigation elements, like hyperlinks.
Let’s update the list view template so that each band name becomes a clickable link that takes us to the detail view for that band.
We begin by wrapping the band name in a link:
# listings/templates/listings/band_list.html

...
    {% for band in bands %}
      <li><a href="">{{ band.name }}</a></li>
    {% endfor %}
  </ul>
...
What will we use for the href attribute?
We could do something like this:
# listings/templates/listings/band_list.html

...
        <li><a href="/bands/{{ band.id }}/">{{ band.name }}</a></li>
...This will generate a working link - feel free to test it out! Why is it an anti-pattern? Because it’s repeated code: we already construct this path in a similar way in urls.py:
# merchex/urls.py

path('bands/<int:id>/', ...)
For example, if we wanted to change the path to the detail view to ‘all-bands/1/,’ we’d have to change it in urls.py and in every template where we repeated the link.
How can we avoid repeated code and make our links easier to maintain?
Let’s start by giving the URL pattern a name argument:
# merchex/urls.py

path('bands/<int:id>/', views.band_detail, name='band-detail')
I’ve used a hyphenated version of the view name here, but the name can be anything you want.
The URL pattern is now our “single source of truth” for this link. To render this link in our template, we’ll use a template tag:
# listings/templates/listings/band_list.html

…
   <li><a href="{% url 'band-detail' band.id %}">{{ band.name }}</a></li>
…Now, if we refresh our band list, we can see each band name is now a link, and we can click through to the band detail view:
Let’s now do the same thing back in the other direction - the band detail view should have a link back to the band list:
# merchex/urls.py

   path('bands/', views.band_list, name='band-list'),
# listings/templates/listings/band_detail.html
<p>{{ band.biography }}</p>
<a href="{% url 'band-list' %}">Back to all Bands</a>
{% endblock %}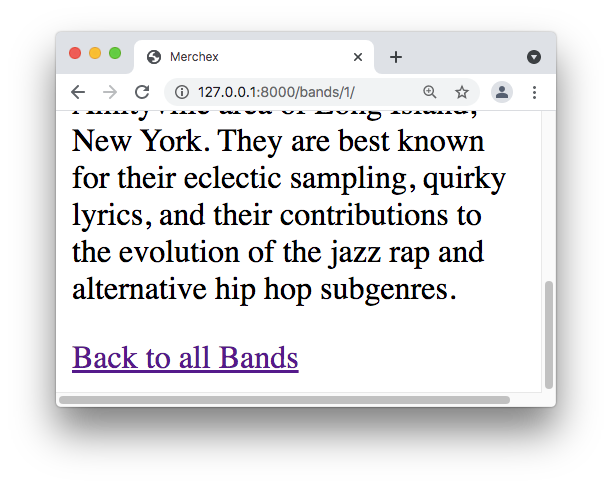
While we’re working with links, let’s take this opportunity to add a nav bar to our site and add a link to the bands list there too. We’ll add this in the base template, as the first element inside the <body> tag - because the navbar should appear at the top of every page:
# listings/templates/listings/base.html

...
   <body>

   <nav>
     <a href="{% url 'band-list' %}">Bands</a>
   </nav>

   {% block content %}{% endblock %}

  </body>

...
If you want to go over any of the previous steps for creating list and detail views, check out the screencast!
Now You Try! Create List and Detail Views for the Listing Model
 Now it’s your turn to create list and detail views for the
 Listing model and add links between the two. Also, add a link to the list view onto our navbar.
Once you have done this, you can also add links to each band's listings from the band detail page. To loop through the listings for a band in the template, you can use {% for listing in band.listing_set.all %} .
Let’s Recap!
A list view displays all objects of a particular model. You can get all the objects with, e.g.,
Band.objects.all().A detail view displays just one object, but in more detail. You can get one object with, e.g.,
Band.objects.get(id=some_id).To create links in templates, rather than repeating URL paths instead, give your URL pattern a
name, and then use the{% url %}template tag to render the link.
That’s the ‘R’ in CRUD covered - Read. For all the other operations, we need a way to send data from the browser to the server. That’s where forms come in.
