Write Acceptance Tests
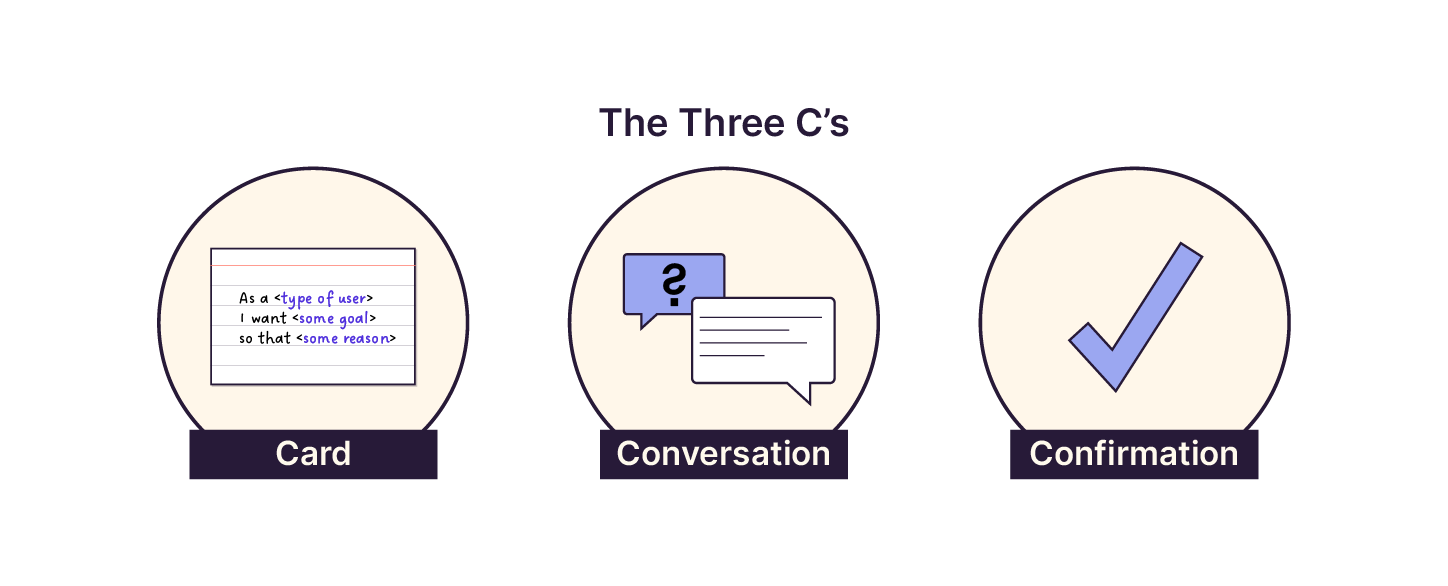
Use the 3 Cs approach: Card, Conversation, Confirmation
Before we begin, let’s backtrack a little. We’ve seen that user stories are deliberately simplified versions of requirements and short enough to be written on a sticky note or an index card.
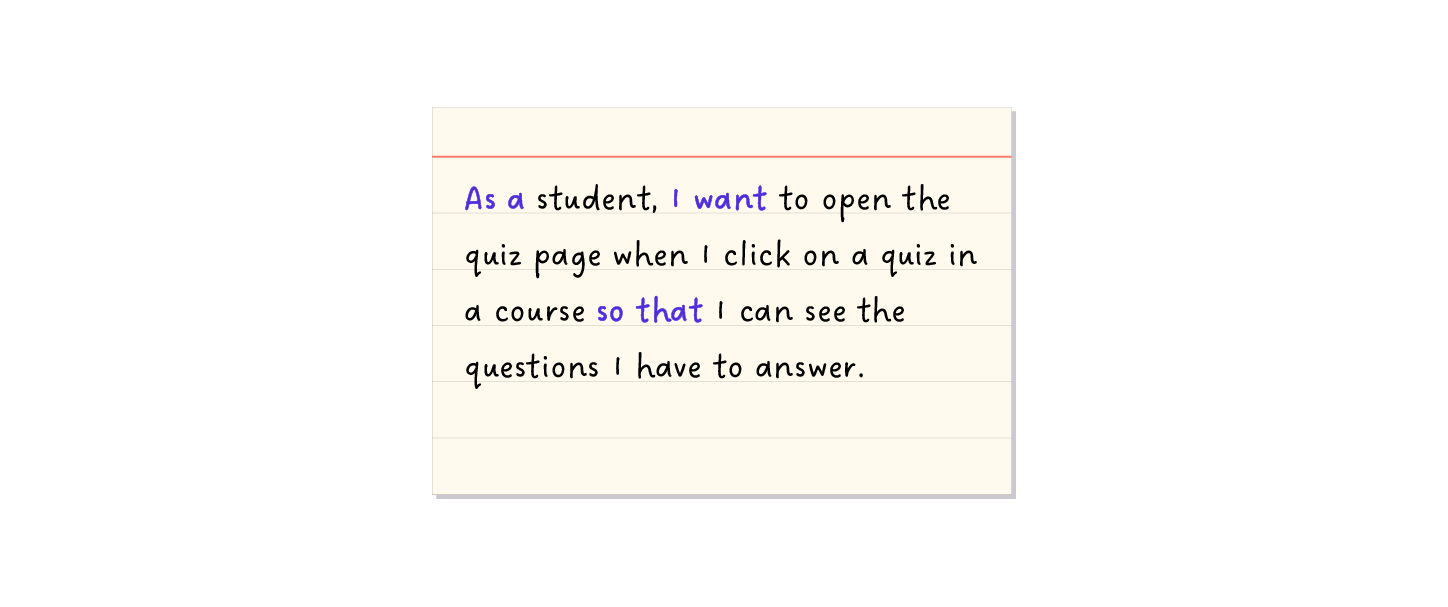
Since the user story does not contain all the detailed information required to start work on it, the next step is to have a conversation with your entire team (perhaps during a planning session) to discuss all the details before implementing a solution.
The additional details that come out of these conversations enable you to decide as a team which rules (i.e., which tests) represent how best to execute this feature. Writing these details down allows confirmation later on when you are ready to build and test the feature. Define upfront what has to work (what tests it should pass) for this feature to be acceptable. For this reason, these additional scenarios are often called acceptance tests.
In 2001, Ron Jeffries coined the three Cs (card, conversation, and confirmation).
The most common way to specify what is required to confirm user stories is to create a set of acceptance tests for each one.
Create Acceptance Tests Using the Given - When - Then Format
When writing acceptance tests, it is best to consider examples of how the system should behave. For instance, take the following three criteria for how an ATM might work:
If the customer tries to withdraw $20 and her account balance is over $20, then allow the withdrawal and reduce the account balance by $20.
If the customer tries to withdraw $20, but her account balance is under $20, then do not allow the withdrawal.
If the customer tries to withdraw $300, then do not authorize the withdrawal and show the message: "maximum withdrawal is $200."
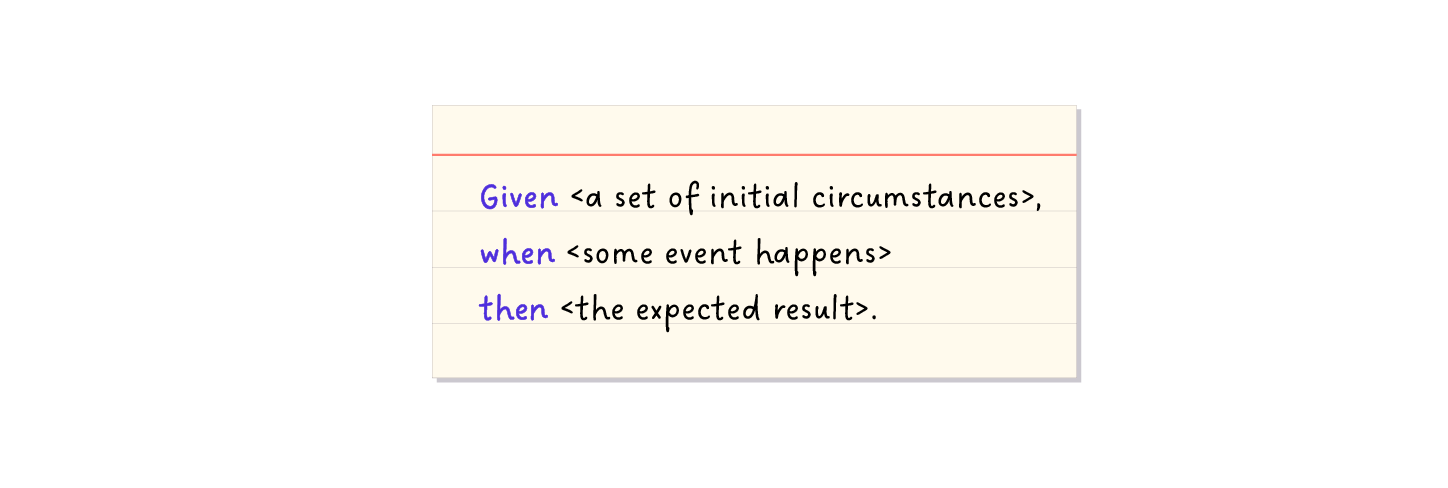
Then write this set of examples in the Given-When-Then format where:
Given: A set of initial circumstances (e.g., bank balance).
When: Some event happens (e.g., customer attempts a withdrawal).
Then: The expected result as per the defined behavior of the system.
There are benefits to using the Given-When-Then format:
It is easy to see the set of initial conditions, the event, and the outcome.
This makes it easy to understand and easy to test.
Let's look at the first example from above:
If the customer tries to withdraw $20, but her account balance is under $20, then do not allow the withdrawal.
Writing that in Given-When-Then format will look like this:
ID | Given | When | Then |
01 | User balance = $23 | User asks to withdraw $20 | Withdrawal is authorized AND User balance is now $3 |
Review Some Given - When - Then Examples
Note that the "User balance = $23."
You might be asking yourself, "Why did he pick $23 and not $24?" The answer: it doesn't matter. The acceptance test would have been just as good using other numerical examples.
Sometimes, the rule is also written as part of the acceptance test.
RULE: Only allow withdrawals when there is a sufficient balance.
ID | Given | When | Then |
01 | User balance = $23 | User asks to withdraw $20 | Withdrawal is authorized AND User balance is now $3 |
If you think about it, the two examples of withdrawing $20 (one with a $23 balance and one with an $18 balance) are part of the same rule. Look at the second example:
Rule: Only allow withdrawals when there is sufficient balance.
ID | Given | When | Then |
01 | User balance = $23 | User asks to withdraw $20 | Withdrawal is authorized AND User balance is now $3 |
02 | User balance = $18 | User asks to withdraw $20 | Withdrawal is NOT authorized AND User balance is still $18 |
Now look at the daily withdrawal limit example and write it in Given-When-Then format:
Rule: Only allow withdrawals up to the $200 limit
ID | Given | When | Then |
03 | User balance = $230 | User asks to withdraw $190 | Withdrawal is authorized AND User balance is now $40 |
04 | User balance = $230 | User asks to withdraw $210 | Withdrawal is NOT authorized AND User balance is still $230 |
Putting it all together, you would end up with something like this:
Rule: Only allow withdrawals when there is sufficient balance
ID | Given | When | Then |
01 | User balance = $23 | User asks to withdraw $20 | Withdrawal is authorized AND User balance is now $3 |
02 | User balance - $18 | User asks to withdraw $20 | Withdrawal is NOT authorized AND User balance is still $18 |
Rule: Only allow withdrawals up to the $200 limit
ID | Given | When | Then |
01 | User balance = $23 | User asks to withdraw $20 | Withdrawal is authorized AND User balance is now $3 |
02 | User balance = $18 | User asks to withdraw $20 | Withdrawal is NOT authorized AND User balance is still $18 |
Imagine that you are a new developer on the team, and you missed the planning session last week. But someone shares these acceptance tests with you. Ask yourself the following questions:
Are these acceptance tests easy to understand?
Were they quick to read?
Does having the example and the rule help?
Do you think you would know what to build?
Most people would answer "yes" to all these questions. The advantages of user stories and acceptance tests are that they are brief, clear, concise, easy to understand, and easily updated. It’s much more likely that your team members will remember them rather than a ten-page document !
Your Turn!

Based on the user stories you’ve created for Pass/Fail logic about the quiz in the last chapter, write some detailed acceptance tests using the Given-When-Then format. This approach helps clarify expectations and ensures that all scenarios are covered.
For each user story, write at least two acceptance criteria using the Given-When-Then format. This should include the context (Given), the action (When), and the expected outcome (Then).
Ensure the criteria are clear, testable, and directly related to the user story they support.
When you’ve finished, take a look here to compare your acceptance criteria with the ones I came up with.
Let’s Recap
Writing a user story (or other Product Backlog Item) can be summarized by card, conversation, and confirmation.
Given - When - Then is a good format to consider for expressing acceptance tests in a business readable format.
Acceptance test provide clarity to the team and help confirm that you have achieved your user story goals
Great job! Let’s take a look at specification workshops in the following chapter.
