Run a User Story Mapping Workshop
Create User Story Maps
A user story map is ideally created as a team during a workshop.
One of the best ways to achieve team consensus on the direction of future iterations is to encourage the entire team to participate in the process.
Here are the four steps you can use to run a workshop:
Frame
Map the big picture
Add user stories
Map out releases
1. Frame your Story Map
The first step in the workshop is to decide the context for creating the story map.
This example will involve booking a holiday as the context of a user story mapping workshop. The focus of the workshop will be on mapping an experience that allows our user to book a holiday in the fastest, easiest way possible.
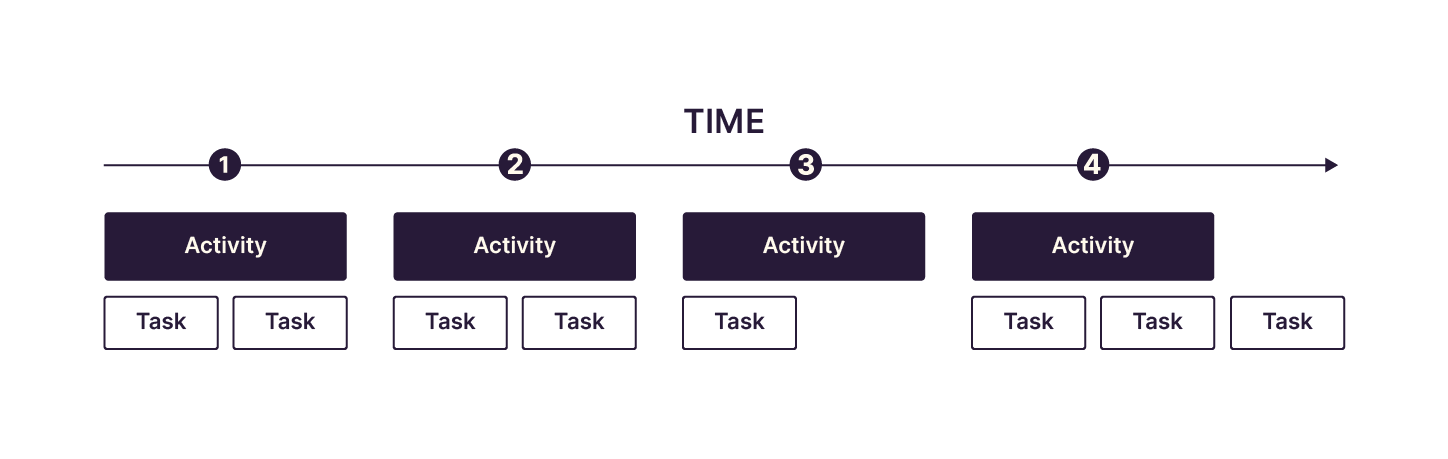
2. Map the big picture
In this step, you want to generate a backbone of activities and tasks.
There are a number of steps you may consider following:
Make a list of "things people do." The team should add sticky notes to the board or wall without speaking to or consulting each other. This encourages independent thinking (and speeds the workshop up).
Once you are done, get rid of duplicates (some team members will have added the same or similar items).
Cluster the items on the lists into logical groups. For example, some items may relate to online credit card payments.
Give these groupings a name (e.g. pay with credit card).
These groupings are now your activities and the individual sticky notes are your tasks.
Order the activities chronologically from left to right so that the first tasks that users do are on the left. For example, you need to choose a hotel before you pay for it with your credit card.
Then arrange the tasks underneath each activity and order those also chronologically from left to right.
Now that you have your backbone, the next step is to add user stories to the story map!
3. Add User Stories
The next step is to take existing user stories from your backlog and add those to the story map. As you do this, you may find that there are other user stories that aren't in your backlog that you would need. Now is the time to add them.
Agile expert and author Jeff Patton suggests some great questions to ask during this phase of the workshop:
What else might users of the system have done?
What could go wrong, and what would the user have to do to recover?
What might other types of users do to reach their goals?
Wouldn’t it be cool if... ?
Once you feel like you have added the necessary set of user stories, then it is time to prioritize them. You should order the user stories vertically so that the most important are at the top.
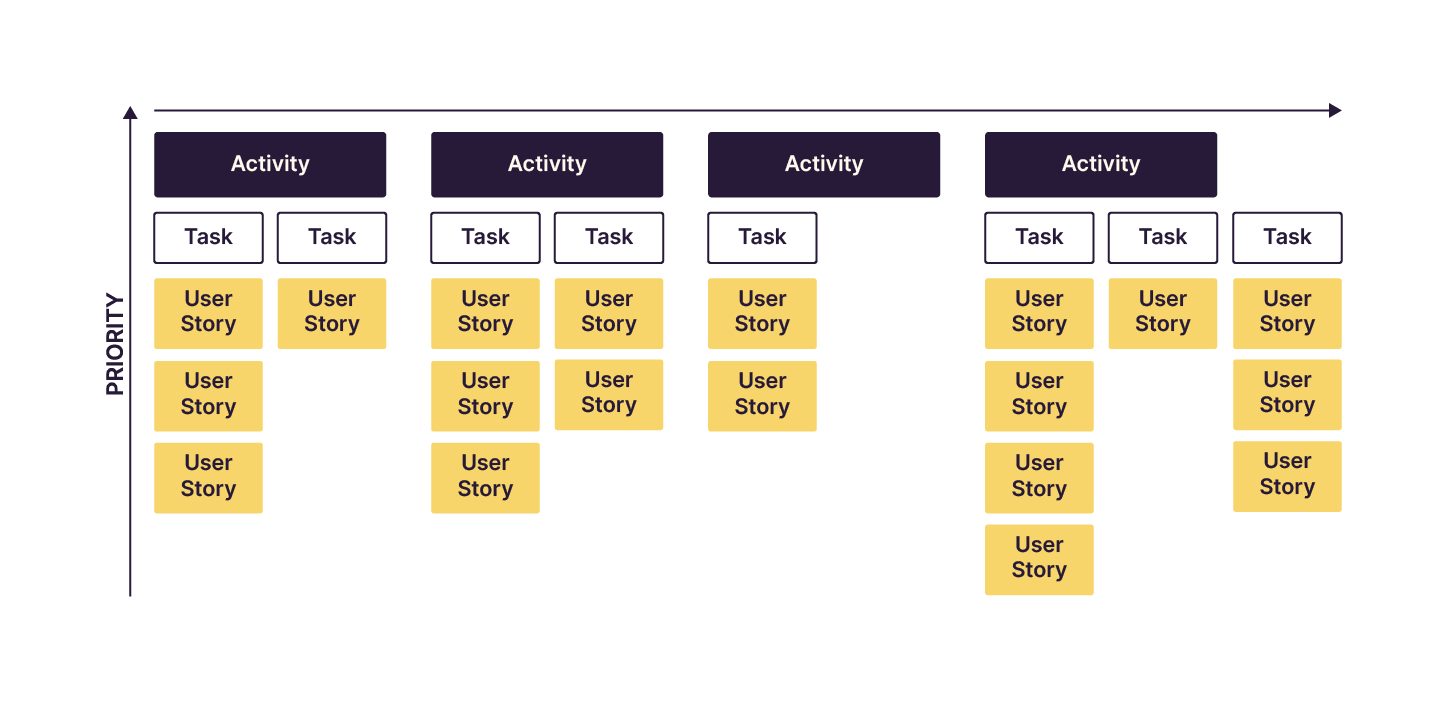
Once the user stories are ordered vertically in terms of priority, then you can map out releases.
4. Map out Releases
In order to create releases, you first create swim lanes by adding horizontal lines to our story map (in the diagram below these lines are in red). The space between these lines is called a swim lane. Each swim lane represents a release. All of the user stories that should be in the first release go in the first horizontal lane. The user stories that go into the second release are placed in the second horizontal line, and so on.
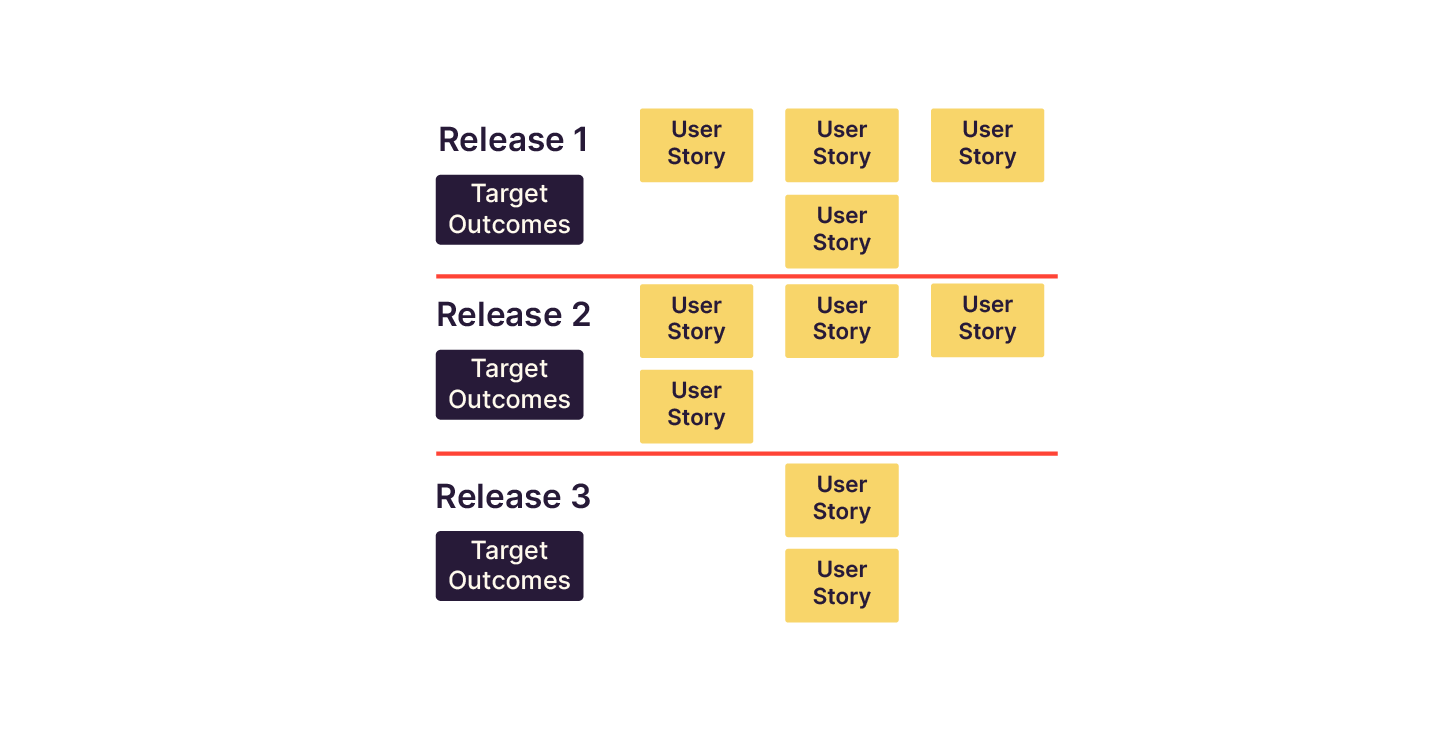
It is also good practice to think about the outcome your users should be able to achieve after each release. Consider adding a sticky note to the board with the target outcome of each release. (see the grey notes in the diagram above)
Discover some Tips for Mapping Releases
Pick a subset of users for first release.
Remember that not every task needs to be represented by user stories in the first release.
Identify assumptions and risks (adding color coded dots to the user story cards in your story map).
Ask what things can you do without. The goal of the first release is to provide something of value to customers even if it is basic.
Let's Recap!
Creating story maps is best done with a team during a story mapping workshop.
The steps you should follow for running such a workshop are:
Frame
Map the big picture
Add user stories
Map out releases
Additional Resources
How to prepare for a story mapping workshop.
Jeff Patton's quick reference for story mapping.
Want some hands-on practice at creating a user story map? The next chapter is for you!
