Create Your First Project

Hopefully you are warmed up and ready, because there's no turning back now!
During this course, we're going to build a game called TopQuiz, a quiz app that tests your knowledge about all things "top": top model, top of the shelf, and top of the morning to you! No, not really – TopQuiz will quiz users on normal top-ics (see what I did there?).
Create the Project
Open Android Studio, and click Start a new Android Studio project.
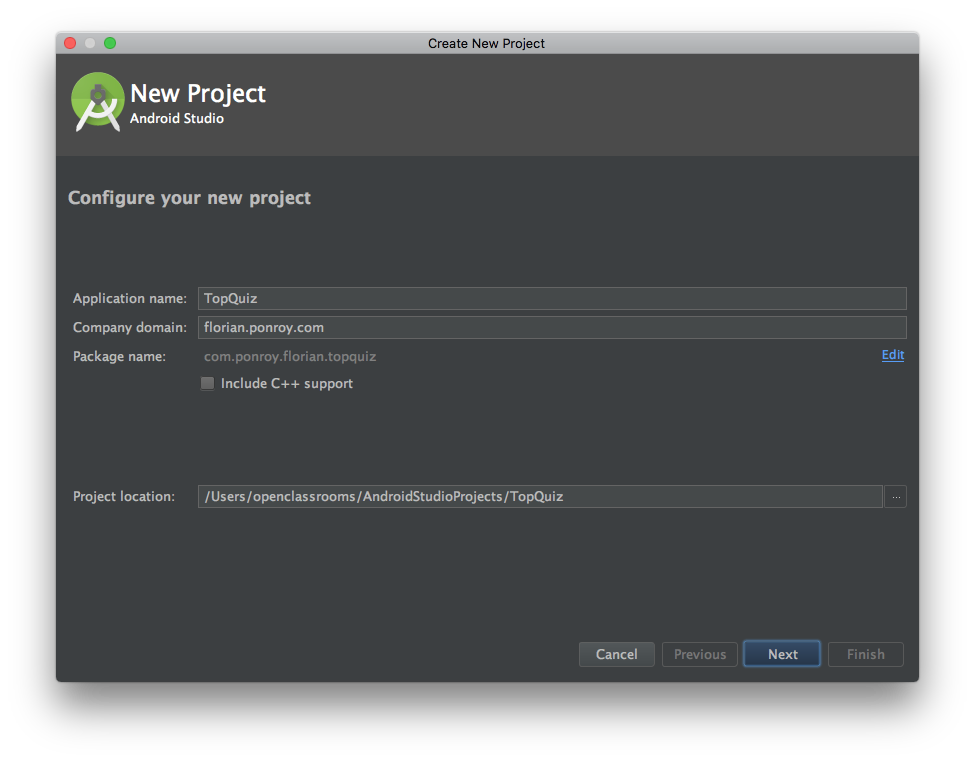
Project Configuration
In the Application name field, enter the name of the app (TopQuiz). By default, this will be the name that appears below the application icon and in the application's title bar. You can always change this later. If you haven't already, type TopQuiz (or any other name you prefer, like maybe Quiz-o-rama, QuizBizz, Kwiz...).
The Company domain field determines which package name your application receives. This allows you to distinguish your application from another application that has the same name. By convention, inverse notation is used.
For example, if you work at Corporation Incorporated, you could specifyandroid.corporation-incorporated.com. After that, you are free to specify the name of your choice. Do not use a domain name that does not belong to you. This will ensure you don't have conflicts when you try to publish your app on the Google Play Store.
Leave the Include C ++ support checkbox unchecked, change the project path in Project location (if necessary), and click Next.
Target Platforms
On this screen, you can define the target(s) for which your application will support. This will determine which SDKs to include with your project.
You can choose between:
Phone and Tablet (this is the default option)
Wear: watches and connected objects
TV: the equipment that supports Android TV
Android Auto: Android for cars
For now, only phones and tablets interest us, so leave the first box checked and click Next.
You must also specify the minimum SDK version to use for your project in the Minimum SDK field. Without going into too much detail, using a higher API (more recent) allows you to benefit from the latest features offered by Android.
However, when using recent APIs, your application will not install or run on out-of-date devices. To help you decide, click on the Help me choose link. You will see the following screen:
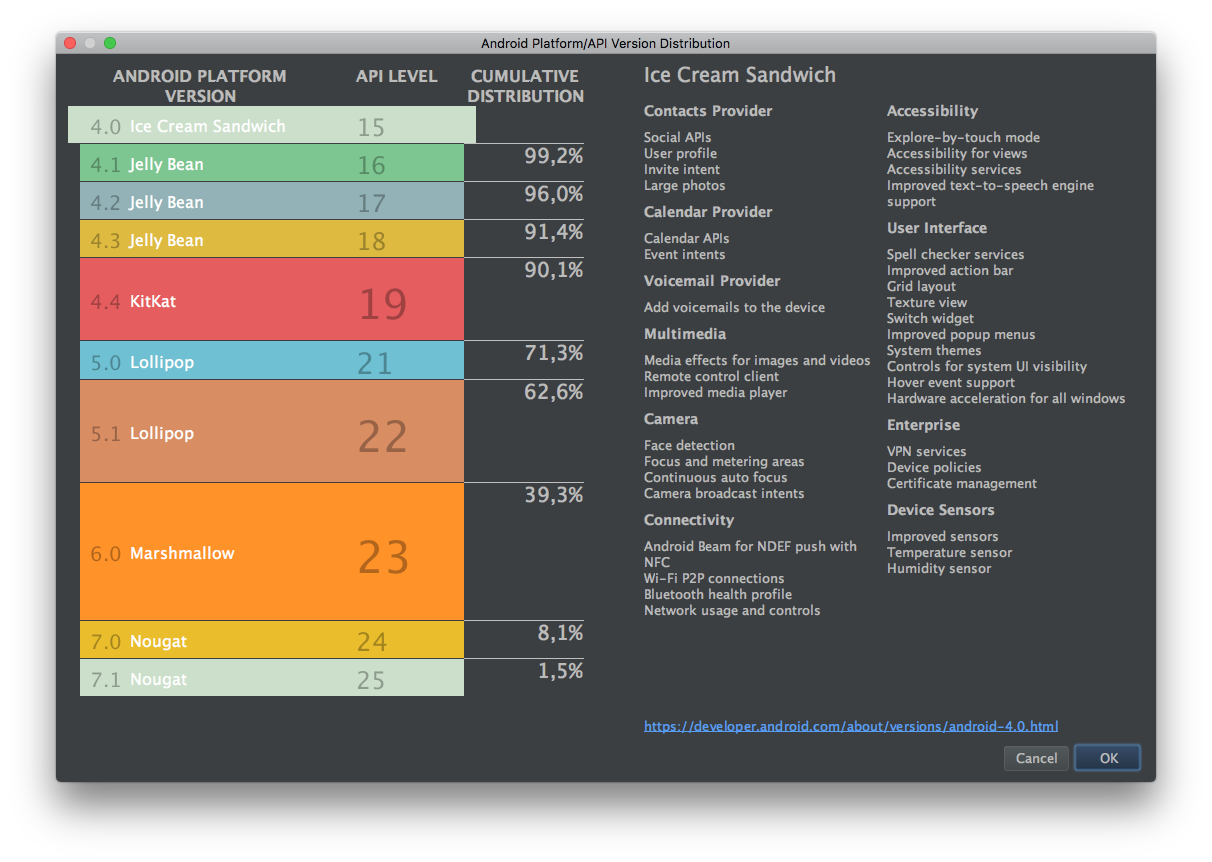
This graph shows you the approximate percentage of all devices that will be able to install and launch your application. The closer you get to 100%, the better, but you'll be sacrificing newer features. Tricky business, eh?
To date, by choosing API 15: Android 4.0.3 (IceCreamSandwich), Android Studio specifies that the application will run on 100% of devices. Perfect! Click Next. A new window appears, indicating that the components required for your project are installed. Click Next again.
Choose the Main Activity
An Activity is a fundamental building block of the user interface. Activities contain all the graphic elements such as text, buttons, titles, etc.
To help the developer, the creation wizard offers predefined Activity templates - for example, an Activity that displays a Google Map or an Activity that offers a landscape view for tablets.
In our case, we will choose an "empty" activity, by selecting Empty Activity. Yes, that means we will develop everything ourselves - truly the best way to learn! Click Next.
Configure Your Main Activity
By default, the name of the Activity is MainActivity. We don't need to change that, because it will act as our main activity (the first screen the user sees after launching the application).
The Generate Layout File box determines whether a "layout" file should be generated for the Activity. This "layout" file, commonly referred to as the layout, determines which graphic elements to display. We will see its characteristics in more detail in the next chapter. For now, leave the box checked.
The Layout Name field is used to name the layout file. By convention, if it is linked to an Activity, its name always starts with activity, followed by the name of the Activity. In our case, the name proposed by default suits us perfectly.
Leave the Backwards Compatibility (AppCompat) box checked. We'll learn what that means later on.
Click the Finish button. Android Studio will display a window titled, Building 'TopQuiz' Gradle project info, complete with a loading bar. After it finishes downloading and preparing the necessary files, then Android Studio will reveal the main screen.
Let's Review With a Demo
You can see these steps in the video below:
Discover Android Studio
Looking at an IDE for the first time is like the first day at flight school: you're facing a cockpit with hundreds of buttons and lights flashing in all directions. You first reaction might be to turn around and run away, because touching things is the shortest path to breaking things! Don't be afraid, we will take it step-by-step.
Main Screen
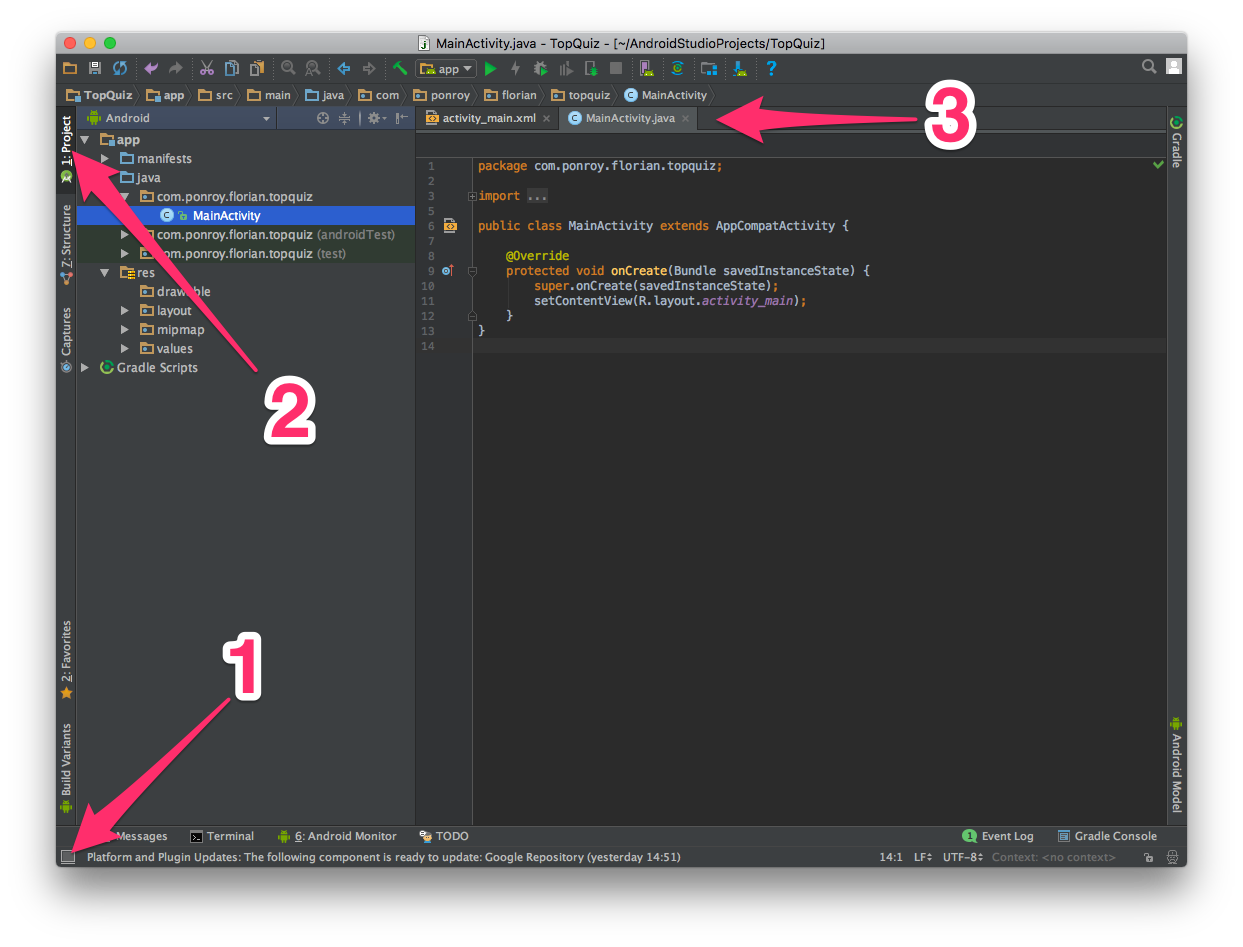
In classic IDE style, the left side features the file tree and the right side features the active file.
You will find that in addition to the traditional buttons at the top of the screen, several buttons adorn the edges of the main window: four on the left edge, six on the bottom edge, and two on the right edge. Who doesn't love a good button?
For the moment, the button that interests you the most is button #2 (see screenshot above): it allows you to hide and reveal the project files. Each open file is associated with a tab (#3 in the screenshot).
Feel free to explore and have fun clicking each button on the edges to bring up content. If you click the button again, the window will disappear once more.
The File Tree
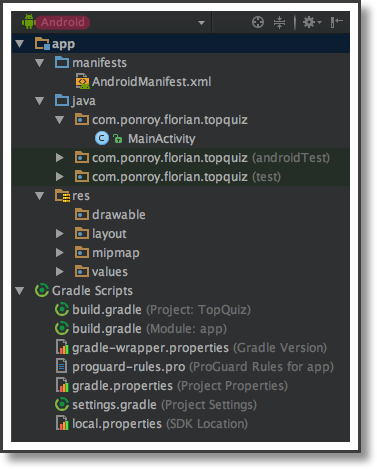
Your project's file tree should look something like this:
In the project structure window, you have the option to change views.
The Android view displays the essential files specific to Android development. For example, if you want to view all of the application packages, you can select the Packages view. Take a moment to flip through the other options to familiarize yourself with the IDE.
The three main sub-directories for Android development are manifests, java, and res. Let's explore them.
Manifests Directory
This directory usually contains only one file: the AndroidManifest.xml file. This file represents your application's identity. Among other things, it allows you to specify the name of the application, the package, the icon to display, or which Activity to launch at startup.
Java Directory
This directory contains all the Java (or Kotlin) application source code, as well as any associated tests. In our example, we see the MainActivity file (the .java extension is automatically hidden by the IDE). As the project progresses, we will fill this directory with files and sub-directories in order to isolate functional components.
What is Kotlin? 🤔
Java is no longer the only officially-supported language available to Android developers. Google recently announced support for Kotlin. If you are curious, do not hesitate to read more here.
Res Directory
This directory contains all the application's resources and includes four sub-directories:
Drawable folder: contains all the images and contents displayed on the screen (for example, a graphic, logo, icon, etc.)
Layout folder: contains all the layout files of your application (we discovered these earlier)
Mipmap folder: stores the application icon
Values folder: contains various settings and values (for example the colors we use in the application), alternative translations for written text, graphical styles to apply, and more
And that's enough to get you going.
Let's Recap!
To create a project in Android Studio, you have to configure it and set the main Activity—this is the visual entry point to your application.
An Android project is composed of three main directories: manifests, java, and res.
Ta-dah! You’ve created your first project and are becoming familiar with the Android Studio interface. So what’s the next step? Designing the user interface of your first Activity!
