Reference Graphical Elements In Your Activity
 The GUI is ready - now it's time to look at the Activity's Java code. Open MainActivity located in
 thejava/name.of.your.package directory.
Displaying the Interface
The MainActivity class was created automatically by Android Studio when we chose the Empty Activity template. The only implemented method:
@Override
protected void onCreate(Bundle savedInstanceState) {
    super.onCreate(savedInstanceState);
    setContentView(R.layout.activity_main);
}
The onCreate() method is invoked when Android creates the Activity (we'll learn about the Activity life cycle at the end of this course). The line that interests us here is line 4: the setContentView() determines which layout file to associate with this Activity.
We specify the layout file with a special syntax:R.layout.filename (without the XML extension). When compiling the project, Android Studio generates a Java class called R (for Resources), which contains numerical identifiers for every project resource. These resources can be layout files, text strings, images, and so on. We will take a closer look at this class after compiling the project.
Referencing Graphical Elements
Declare Variables
As a reminder, we have three graphic elements in our interface:
The welcome text
The input field for the user's first name
And the play button
To interact with these elements in code, we have to reference them in our Activity. Add three member variables to the MainActivity class:
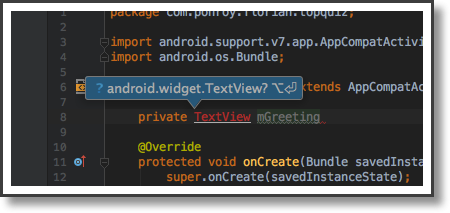
private TextView mGreetingText;
private EditText mNameInput;
private Button mPlayButton;
As you type these (e.g. TextView ), the type appears in red. That's because this type is unknown: we have to import the class wherever we define this type. For example, for the TextView type, import the TextView class located in the android.widget package by typing the following line at the top of the file:
import android.widget.TextView;To save yourself countless hours of typing lines character by character, place your cursor anywhere on the demarcated line and click alt + enter (return). Android Studio will offer import options corresponding to the unknown class name. Select the correct one, then hit enter once again to import the class. Time: saved.
Identify the Graphic Elements
Imagine that you have five TextView elements, one after another. How would you distinguish them? By providing each with an identifier. To do this, we use the android:id attribute, and its value must always be "@+id/{your-identifier}." For example:
<TextView
    android:id="@+id/activity_main_greeting_txt"
    android:layout_width="wrap_content"
    android:layout_height="wrap_content"
    android:padding="20dp"
    android:text="Welcome! What's your name?"/>

<EditText
    android:id="@+id/activity_main_name_input"
    android:layout_width="match_parent"
    android:layout_height="wrap_content"
    android:layout_marginStart="20dp"
    android:layout_marginEnd="20dp"
    android:hint="Please type your name"/>

<Button
    android:id="@+id/activity_main_play_btn"
    android:layout_width="wrap_content"
    android:layout_height="wrap_content"
    android:layout_marginTop="20dp"
    android:padding="30dp"
    android:layout_gravity="center_horizontal"
android:text="Let's play"/>Linking Variables
Now we are ready to reference the three graphical elements from code. We will use findViewById() to accomplish this. The method requires one parameter: the integer identifier of the view that we want. The method returns the corresponding view (if found). The syntax we use for the parameter is specific: you must specify R.id.{view_identifier}.
Also note that findViewById() returns a View. Therefore, in most cases, we need to cast View to the specific type we need.
Here is the sample code you can add to onCreate() :
mGreetingTextView = (TextView) findViewById(R.id.activity_main_greeting_txt);
mNameInput = (EditText) findViewById(R.id.activity_main_name_input);
mPlayButton = (Button) findViewById(R.id.activity_main_play_btn);
With our three graphical elements properly referenced, we can start playing with them.
Let's Review With a Demo
You can see these steps in the video below:
Let's Recap!
We can only use the
findViewById()method after using the setContentView() method.Use
findViewById()to access layout elements in the Activity.An element must have an id attribute in the layout file for us to reference it from the Activity.
In this chapter, we’ve seen how to reference graphical elements in the Activity. Now let’s find out how to interact with the user and respond to their actions!
