Add images to your web page
A picture is worth a thousand words! That's why you'll likely include images in your web pages at some point, whether it's to display a user's profile picture, show a vacation photo, add some visual enhancement to an article, or something else!
Creating images in HTML will allow us to re-explore attributes because, as you saw with links, they are necessary for the image element to actually show anything.
The <img> tag
As you've come to expect, everything in HTML is added via a tag. Additionally, every tag you've seen up until now has had a closing tag. For example, to show a paragraph, you have both a <p> opening tag and </p> closing tag around the content.
The tag for images, which is <img>, is different in this regard. Image tags can just stand by themselves: <img>. No closing tag necessary!
All the information necessary for the image to be displayed is placed in the attributes of the first tag. You will often see three attributes on images:
src
alt
title
Here's what the HTML for an image might look like:
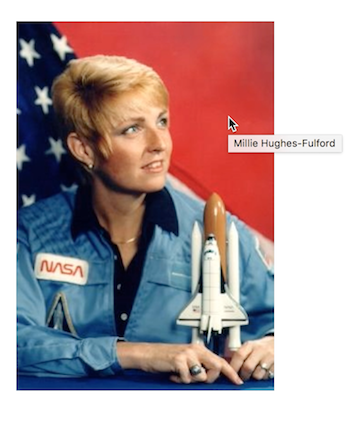
<img src="https://upload.wikimedia.org/wikipedia/commons/7/77/NASA-MHughes-Fulford.JPG" alt="Astronaut Millie Hughes-Fulford displays the modernist Blackburn & Danne NASA logotype." title="Millie Hughes-Fulford">And here's the result it produces:
Notice the three important attributes for images are, indeed, included in the code above:
src
alt
title
The src attribute
The first attribute to include in an <img> element is src. The contents of the src attribute indicate where the image is stored. An image can be loaded from:
A URL that's already online (like an image on another website)
A file that's loaded from elsewhere in your codebase
Either way, you're loading a file. The only difference is how you describe its location. Take the above photo as an example.
Pay attention to the If you loaded the image from Wikimedia directly, you could write the following within your img tag:
src="https://upload.wikimedia.org/wikipedia/commons/7/77/NASA-MHughes-Fulford.JPG"If you saved the image among your own files, you could write:
src="images/NASA-MHughes-Fulford.JPG"Storing images in among your own files is a good habit to get into (but only if you have the rights to the image! More on that in the next chapter). Even if Wikimedia were to remove the image above from their site or change the link, you'd still have it in your own files and would thus be spared the embarrassment of a broken image.
The alt attribute
Once you have told the <img> tag where the image is located (via the src attribute), you must add a description of the image within another attribute: alt.
Think of "alt" like "alternative text." If someone is using a screen reader and can't see your image with their eyes, they will see the descriptive text of the image instead. So will search engines, which is important for SEO.
A good alt text to describe the Millie Hughes-Fulford photo would be: "Astronaut Millie Hughes-Fulford displays the modernist Blackburn & Danne NASA logotype." It's sufficiently descriptive so that even users who can't see your page won't miss any of the important information contained in the photo!
However, if an image truly adds no additional information to the page and is purely decorative, you can leave the quotation marks empty (like for a decorative dot image):
<img src="images/decorative-dot.JPG" alt="">The title attribute
The title of your image appears when a user hovers over the image itself, as in the Millie Hughes-Fulford image above. See how hovering with the cursor brings up the contents of the title attribute?
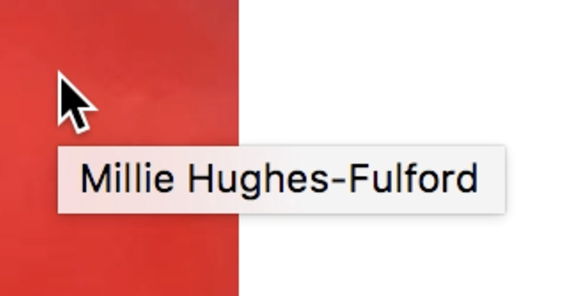
Image placement
You can place images wherever you like on your page, but you'll get different results even with subtle changes.
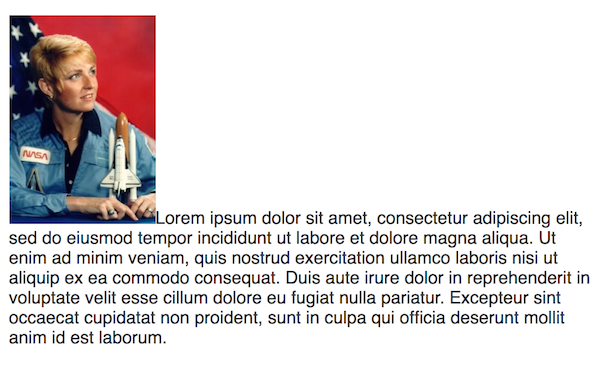
For example, placing the image within a <p> tag makes the image appear on the first line of the paragraph:
<p>
    <img src="https://upload.wikimedia.org/wikipedia/commons/7/77/NASA-MHughes-Fulford.JPG" alt="Astronaut Millie Hughes-Fulford displays the modernist Blackburn & Danne NASA logotype." title="Millie Hughes-Fulford">Lorem ipsum dolor sit amet, consectetur adipiscing elit, sed do eiusmod tempor incididunt ut labore et dolore magna aliqua. Ut enim ad minim veniam, quis nostrud exercitation ullamco laboris nisi ut aliquip ex ea commodo consequat. Duis aute irure dolor in reprehenderit in voluptate velit esse cillum dolore eu fugiat nulla pariatur. Excepteur sint occaecat cupidatat non proident, sunt in culpa qui officia deserunt mollit anim id est laborum.
</p>
Placing it above a <p> tag makes it appear above the paragraph:
<img src="https://upload.wikimedia.org/wikipedia/commons/7/77/NASA-MHughes-Fulford.JPG" alt="Astronaut Millie Hughes-Fulford displays the modernist Blackburn & Danne NASA logotype." title="Millie Hughes-Fulford">
<p>Lorem ipsum dolor sit amet, consectetur adipiscing elit, sed do eiusmod tempor incididunt ut labore et dolore magna aliqua. Ut enim ad minim veniam, quis nostrud exercitation ullamco laboris nisi ut aliquip ex ea commodo consequat. Duis aute irure dolor in reprehenderit in voluptate velit esse cillum dolore eu fugiat nulla pariatur. Excepteur sint occaecat cupidatat non proident, sunt in culpa qui officia deserunt mollit anim id est laborum.</p>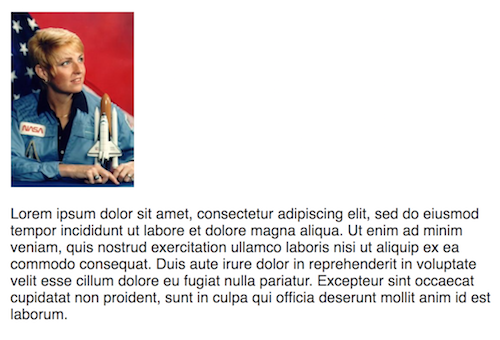
But putting two consecutive <img> tags makes the images appear right next to each other. 🤔
<img src="https://upload.wikimedia.org/wikipedia/commons/7/77/NASA-MHughes-Fulford.JPG" alt="Astronaut Millie Hughes-Fulford displays the modernist Blackburn & Danne NASA logotype." title="Millie Hughes-Fulford">
<img src="https://upload.wikimedia.org/wikipedia/commons/7/77/NASA-MHughes-Fulford.JPG" alt="Astronaut Millie Hughes-Fulford displays the modernist Blackburn & Danne NASA logotype." title="Millie Hughes-Fulford">
<p>Lorem ipsum dolor sit amet, consectetur adipiscing elit, sed do eiusmod tempor incididunt ut labore et dolore magna aliqua. Ut enim ad minim veniam, quis nostrud exercitation ullamco laboris nisi ut aliquip ex ea commodo consequat. Duis aute irure dolor in reprehenderit in voluptate velit esse cillum dolore eu fugiat nulla pariatur. Excepteur sint occaecat cupidatat non proident, sunt in culpa qui officia deserunt mollit anim id est laborum.</p>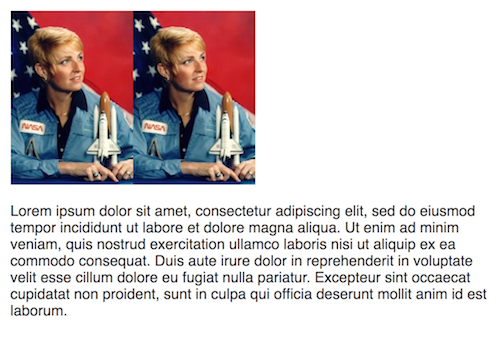
This is due to CSS behavior that you'll learn more about later in the course. It's just good to be aware of it now in case you're inserting images and encountering weird positioning behavior. Keep following this course to learn how to fix it!
Figures
Now that you know how to insert images plain and simple, HTML also offers a specific kind of image tag for figures. A figure is an image that could be moved around in your web page without dramatically altering the "flow" of the page. This is similar to how we think of figures in an encyclopedia, for example. Because they're labelled, they can be next to one paragraph or another, and it doesn't really matter.
Figures also allow for captions. Fun fun! To insert a figure, surround your <img> tag with two other tags: <figure> and <figcaption>.
<figure>
    <img src="https://upload.wikimedia.org/wikipedia/commons/7/77/NASA-MHughes-Fulford.JPG" alt="Astronaut Millie Hughes-Fulford displays the modernist Blackburn & Danne NASA logotype." title="Millie Hughes-Fulford">
    <figcaption>Millie Hughes-Fulford</figcaption>
</figure>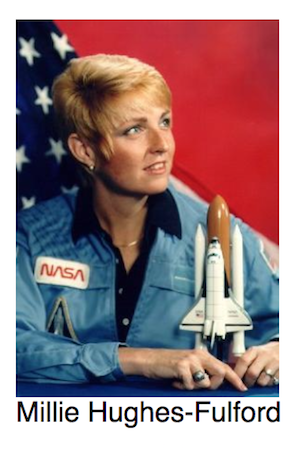
Using <figure> is a great way to write semantically wonderful HTML. "Figure" is more descriptive than "image", so if figure suits your content, it's a good choice to use it.
Practice!
Try adding images yourself in this interactive exercise! In this activity, you'll make an image from Wikimedia Commons appear in your HTML document. Head to this CodePen exercise and follow the instructions below.
Select an image from Wikimedia Commons' featured images. Right-click the image and select "Copy image address" to get its URL:
https://commons.wikimedia.org/wiki/Commons:Featured_picturesAdd the image to your HTML document using an
<img>tag. Remember to include three attributes:srcfor the image's location (in this case, the URL to the image on Wikimedia),altfor a description of the image, andtitlefor a brief image title.See your changes appear. If you don't see the image, double-check your
srcattribute and that you properly used the equal sign and quotation marks for each attribute.Once your image appears correctly, turn it into a
<figure>by surrounding it with<figure>tags and adding an appropriate<figcaption>.
