Discover elements as boxes
Web pages are composed of elements like headings, paragraphs, images, articles, and more. These elements are created in HTML, and their appearances are customized in CSS.
Customizing an element's appearance often means setting where it lives on the page and how much space it takes relative to other elements. In other words, the layout of your web page can make the difference between a great, well-designed user experience and a confusing one!
In order to understand the extent to which layouts are important, consider which of the following looks like a more realistic website layout:
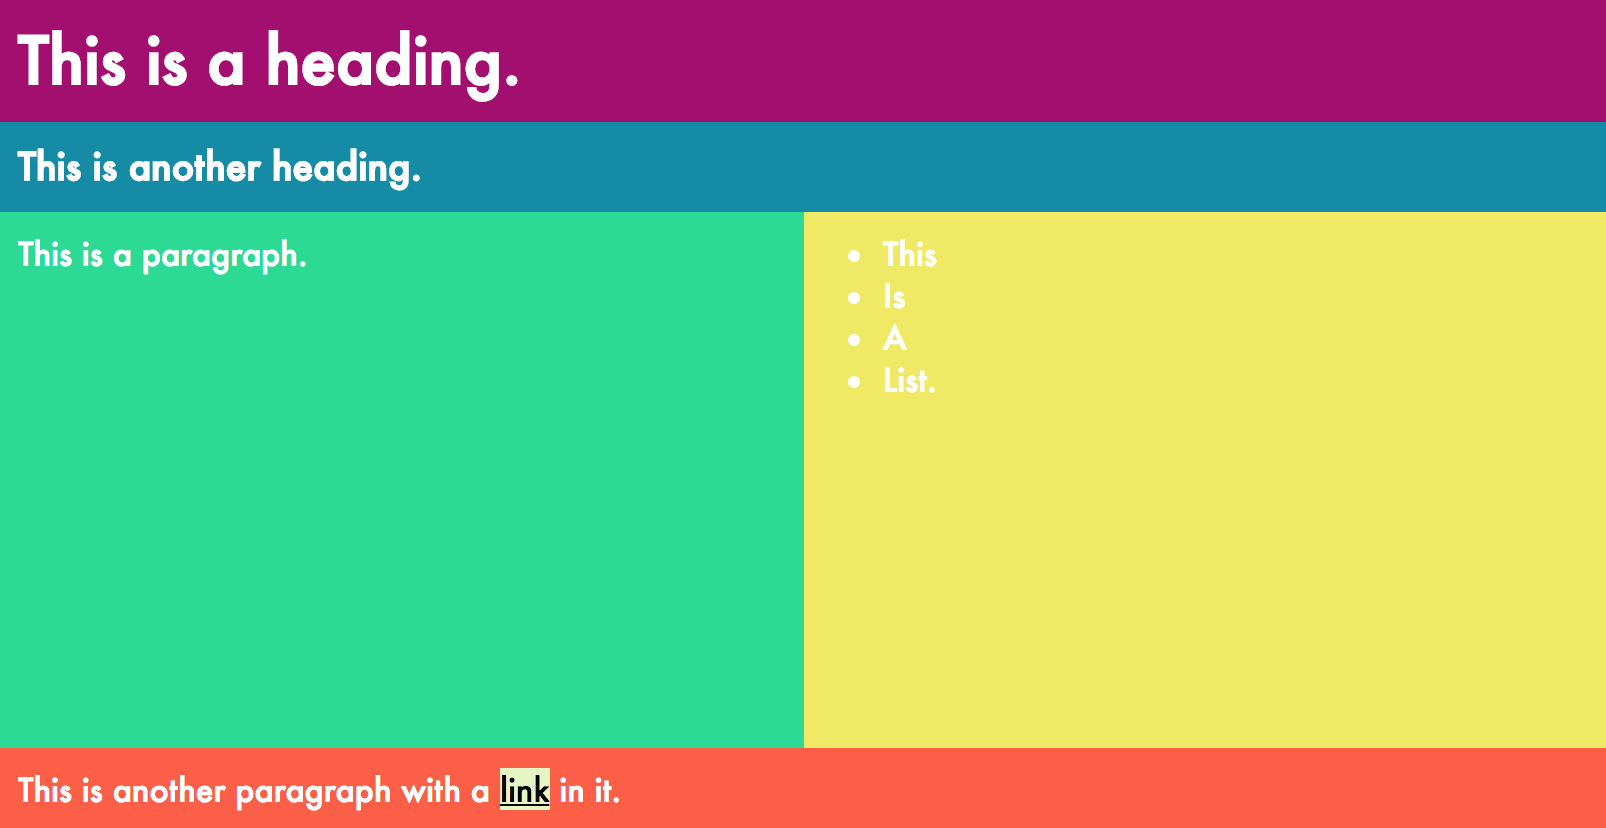
I'll bet you picked layout B! There are several great reasons to do so, including:
less unnecessary white space between elements
increased space between the text and the edge of its background color
two blocks that appear next to each other instead of everything stacking vertically.
In this course, we'll go even further than this simple example and dive into several ways to create organized layouts using CSS, so that your pages look their best.
Elements as boxes
Creating layouts requires complete understanding of one key concept: every HTML element lives in its own box. This concept is called the box model.
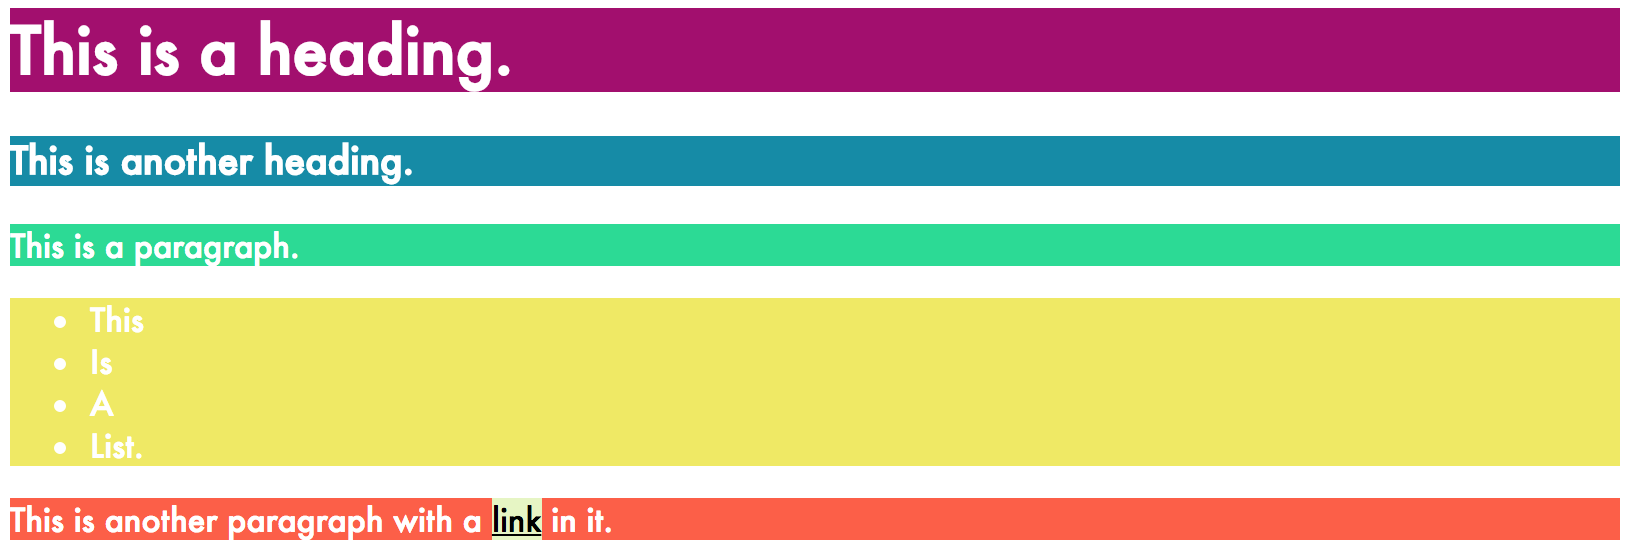
By default, that box will be just big enough to contain the element itself. In the image below, I've added a background color to different HTML elements so you can see the boxes that contain each element.
Notice that some boxes (like the purple box for the first heading) span the entire width of the page, whereas the light green box containing the link is only as big as the link itself! Boxes behave differently depending on the element type.
Let's look again at the first image from above and the code behind it:
HTML
<h1>This is a heading.</h1>
<h3>This is another heading.</h3>
<p id="one">This is a paragraph.</p>
<ul>
    <li>This</li>
    <li>Is</li>
    <li>A</li>
    <li>List.</li>
</ul>
<p id="two">This is another paragraph with a <a href="#">link</a> in it.</p>
CSS
body {
    color: #fff;
    font-family: Futura;
    padding: 20px;
}

h1 {
    background-color: #A4036F;
}

h3 {
    background-color: #048BA8;
}

#one {
    background-color: #16DB93;
}

ul {
    background-color: #EFEA5A;
}

#two {
    background-color: #FE5E41;
}

a {
    background-color: #E6F6C2;
    color: #000;
}
Why do the boxes behave differently depending on the element type? Some of the elements are block-level elements and some are inline elements. Block-level elements span the entire width of their containing element, whereas inline elements are only wide enough for their contents.
Equally important for layouts is the notion of a containing element. We'll talk a lot about "containing elements" or "containers" in this course. A containing element is one element that contains others.
Thanks, Captain Obvious, but how exactly does that work?
Let's take a closer look at this in action. In the following example, the <div> is the container for the <p> elements, which means the <p> elements will take up the width of the <div> (whatever it may be).
<div>
    <p>Hello!</p>
    <p>Goodbye!</p>
</div>
In the first part of this course, we'll look at key CSS properties that allow us to customize the appearances of the boxes themselves. These properties can already dramatically improve the appearance of your content, as seen above.
In the second, third, and fourth parts of the course, we'll see how to arrange boxes differently on a page.
First, let's make sure you get the hang of container elements because they'll be very important as we work through this course. Do an interactive exercise to create content inside content!
Your Turn
Follow me to your first exercise in this CodePen! In the index.html file, add a div with a class of "container" that contains the paragraph (with an id of "one") and the unordered list.
You'll know you've succeeded when you see a thick black border appear around the paragraph and list!
Recap
Every HTML element has its own box.
"Boxes" for block elements take up the whole page, while "boxes" for inline elements will only be as big as the element itself.
Containing elements or "containers" (ex. a div) have other elements inside them.
