Push back to the server
When you have finished debugging your code, created and passed all the unit tests, you are ready to check-in your changes to the online Git Repository.
To start, go to Team Explorer and select Changes to see a list of the modified files:
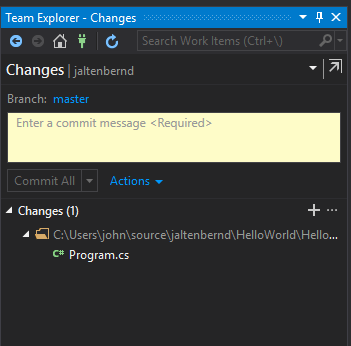
As you can see, before you are able to submit changes, you need to enter a comment about what was changed and why. Adding them is very helpful when you need to look back in the history of changes to see what had been done.
Once you enter a comment, the Commit Action drop down list becomes activated:
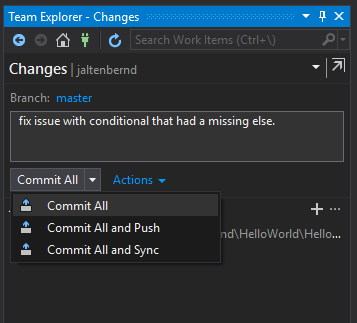
This allows you to select one of three actions:
Commit All. This will only submit changes to your local repository.
Commit All and Push. This will do the same as above, but will also submit the changes to the online (remote) repository.
Commit All and Sync. This performs three actions:
It will commit changes to the local repository.
It will perform a pull from the remote repository to get any updates.
It will push changes to the remote repository.
In which situations would I use one commit over another?
Use Commit All when doing a number of changes you don't want to lose. When you commit to your local repository, you are creating a history of changes. Thus, if you make a mistake or need to retrieve an earlier change, you can view the history of your changes to get what you need.
The Commit All and Push is primarily used when you are the only person working on the application and need to store changes in the remote online directory. If anything happens to your computer or if you use someone else's computer, you can retrieve your work from the remote repository.
Using the Commit All and Sync should be used when you are working in a team environment where others are also working on the application and committing their changes to the remote repository. Make sure that you pull down their changes from the remote repository and sync with your changes. Once that's finished, you can push to the remote repository.
In the video below, we'll go through the three types of commits:
Let's recap!
View all modified files from the Changes window inside Team Explorer.
A comment is required to explain what changes were done and why.
There are 3 types of Commits:
Commit All: saves changes to your local repository.
Commit All and Push: same as Commit All, but pushes changes to the remote repository.
Commit All and Sync: saves changes to local repository, pulls changes from the remote to sync with local changes, and then pushes changes to the remote repository.
Congratulations!
As soon as you check your understanding with the last quiz, you'll have reached the end of this course. It's been a pleasure to walk you through and show you the ropes!
Now that you're familiar with Visual Studio, I'm sure you'll agree that it will be an indispensable tool for your .NET projects. You're all set to take your applications through a full development lifecycle with the help of our more advanced web development courses!
You truly are committed to becoming a .NET developer!
