Run Your First .NET MVC Project
Create a New Azure Account
If you already have an Azure account that you plan to use with this course, you can skip this section and scroll down to the section "Build a New Project." Otherwise, follow the steps outlined in this section to create your individual free Azure account.
Open a browser window and navigate to azure.microsoft.com. You’ll see the following page:

Anyone can sign up for a free Azure account. Click Free account in the upper-right corner.
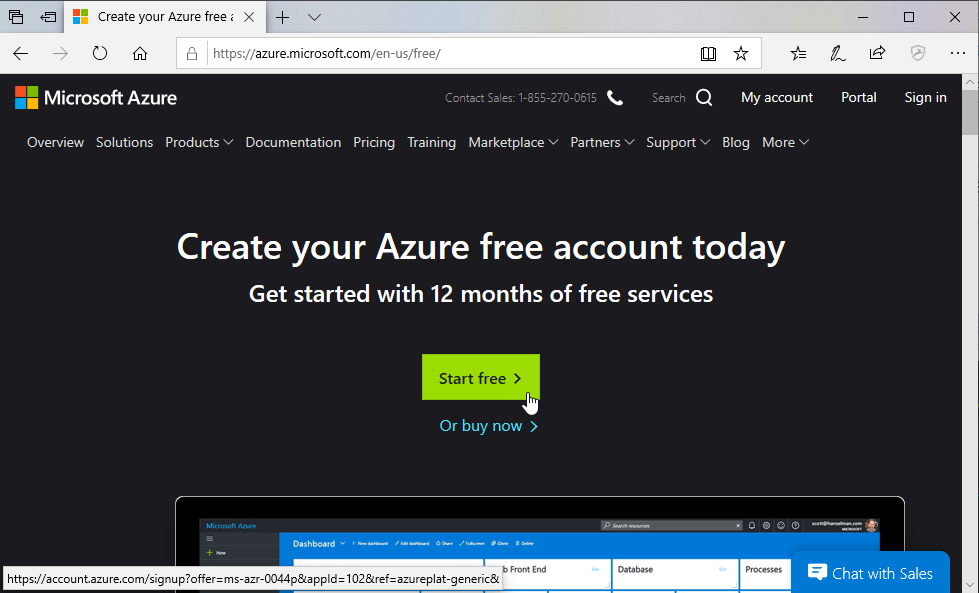
Now click the Start free button in the middle of the screen to begin the signup process.
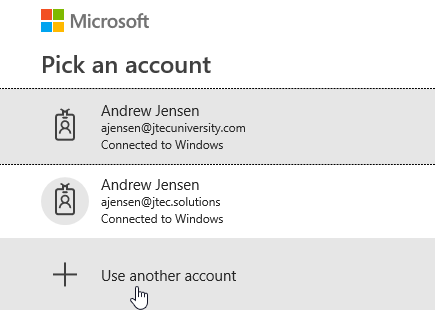
You’re now asked to select a Microsoft account to use for your Azure account. If you have a Microsoft account and wish to use that here, select it from the list and follow the prompts. Setup is very direct.
If you do not have one, or you wish to use a different account than any account listed, choose Use another account, and you’ll be taken to the Microsoft account sign-in page.
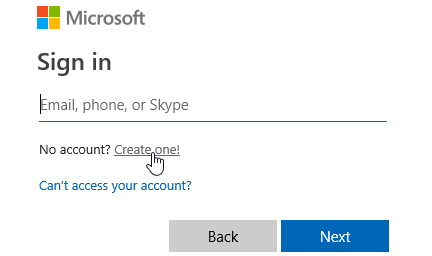
If your Microsoft account was not listed on the previous page, you can sign into it here. If you do not have a Microsoft account, or wish to create a new one, click Create account.
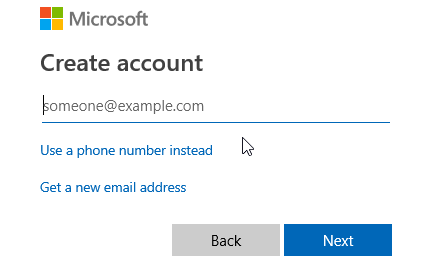
Here you may create a new Microsoft account using your current email or your phone number. You also have the option of getting a new email address to use for your Microsoft account. Each option follows similar steps, so jump to the one that requires the most, just to cover your bases. Choose: Get a new email address.
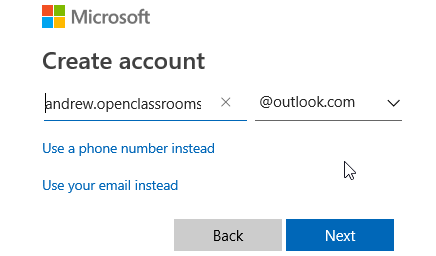
As you can see here, I’ve chosen a new outlook.com email address to use for this account. Clicking Next will allow me to create a password for my account.
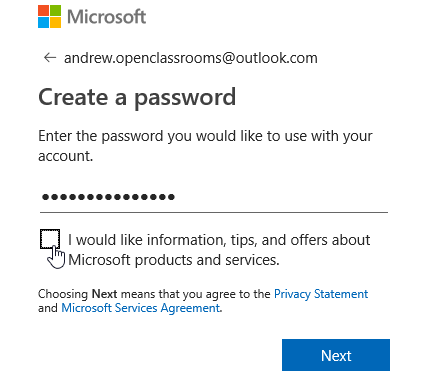
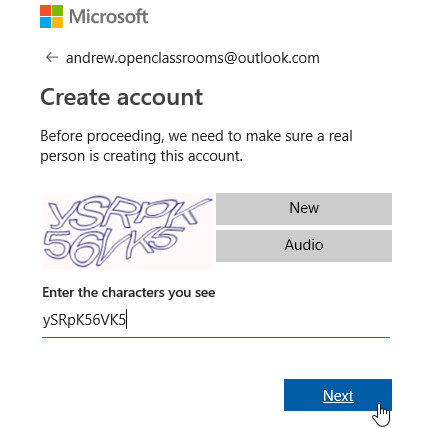
After creating a password for a new email and account, clicking Next brings up some anti-bot verification.
Clicking Next now takes you to the final step in this process. At this point, the Azure account is created and almost ready to be used. It just needs a bit of profile information, followed by identity verification to prove that you are who claim to be. Fill out the form, then click Next and follow the additional prompts.
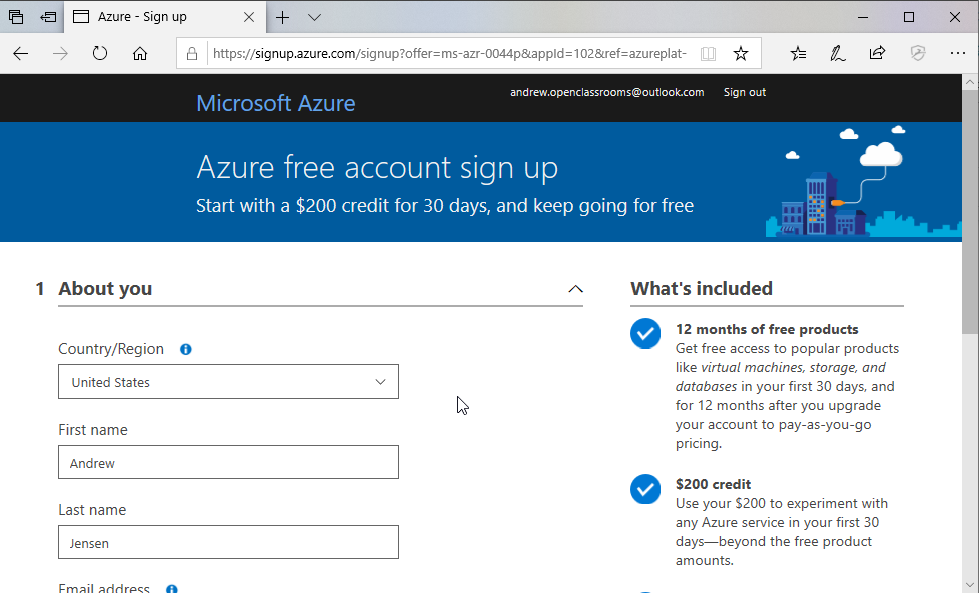
When you’ve completed the form and the identity verification, click the check box next to the subscription agreement, then click Sign up.
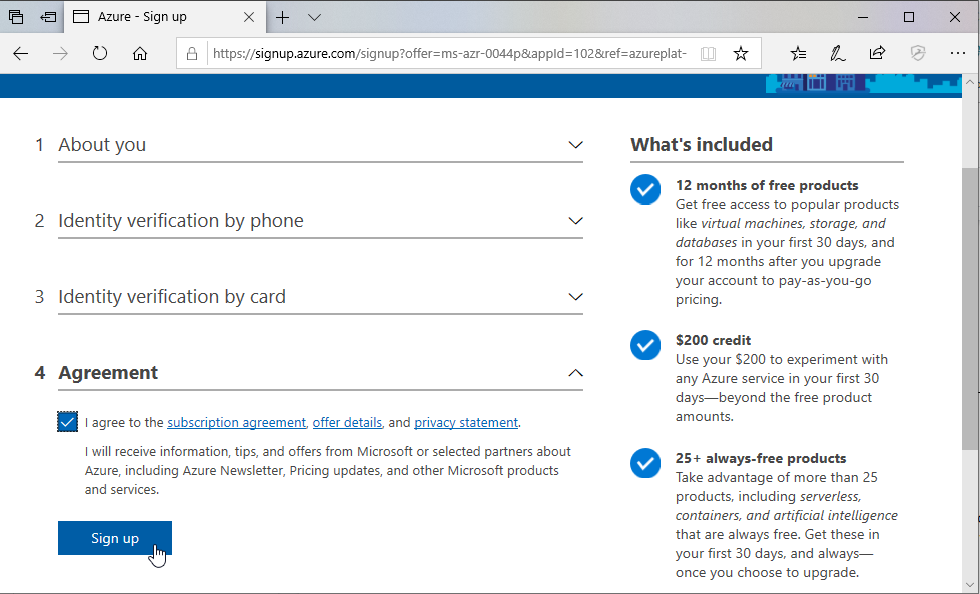
It may take a few moments to set everything up, but as soon as the process is completed, it will redirect you to a confirmation page where you can enter your Azure portal.
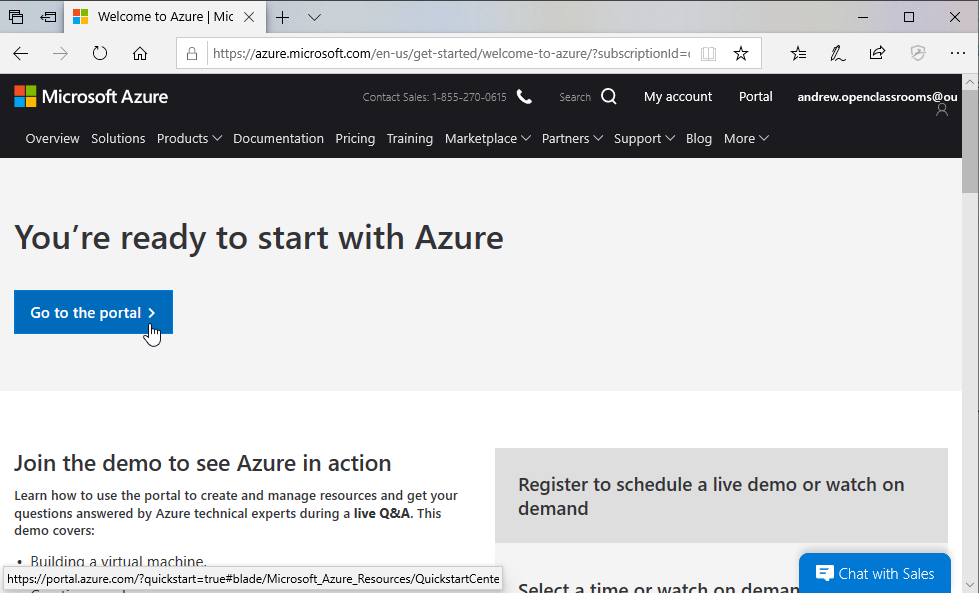
There’s no need to go to the portal at this time because there is nothing there. But you now have an Azure account and portal where you can host any of the web applications you develop, including the Watchlist app you are about to build.
Build a New Project
You’ve installed Visual Studio and created your Azure account, so now it’s time to create your project. If you’re already comfortable working with Visual Studio and want to move at a faster pace, you may want to follow along with the screencast video as you create your project. If you’re not that comfortable yet, then you can use the video to get an overview of the process and then walk through the steps outlined in the rest of this section.
Launch Visual Studio (either from the programs menu, desktop icon, or quick launch icon). You’ll see the following window, which offers you several choices as to what you might want to do.

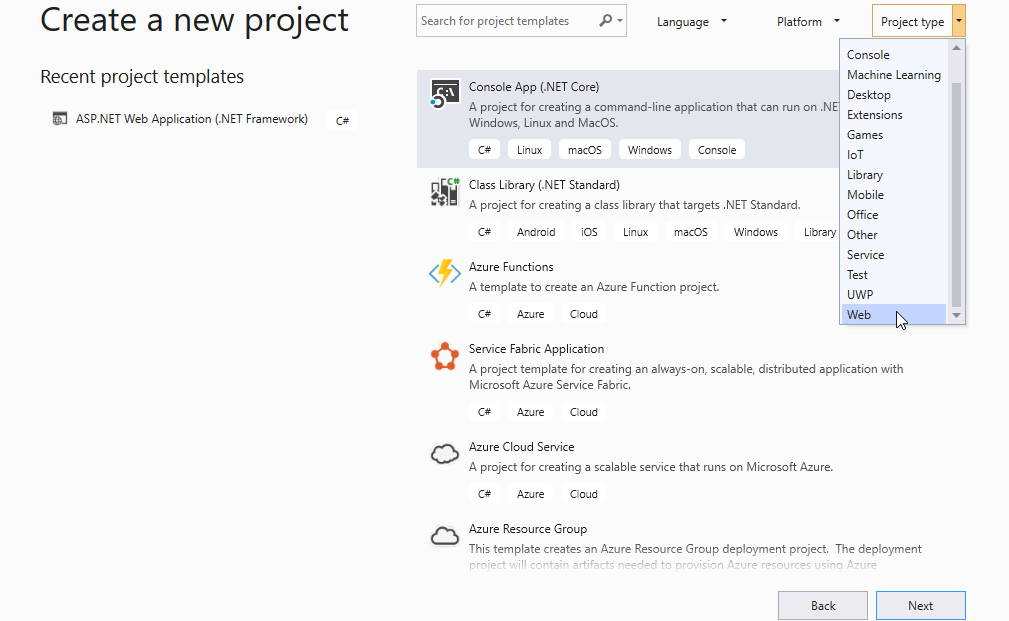
Since you’re going to build this project immediately, select Create a new project.
The next window that comes up lets you specify which type of project you want to build. There are so many possibilities with .NET Core, that sometimes it can be helpful to narrow the choices using the Language, Platform, and Project Type dropdowns. Go ahead and choose Web from the bottom of the Project Type dropdown, as shown in the screenshot below.
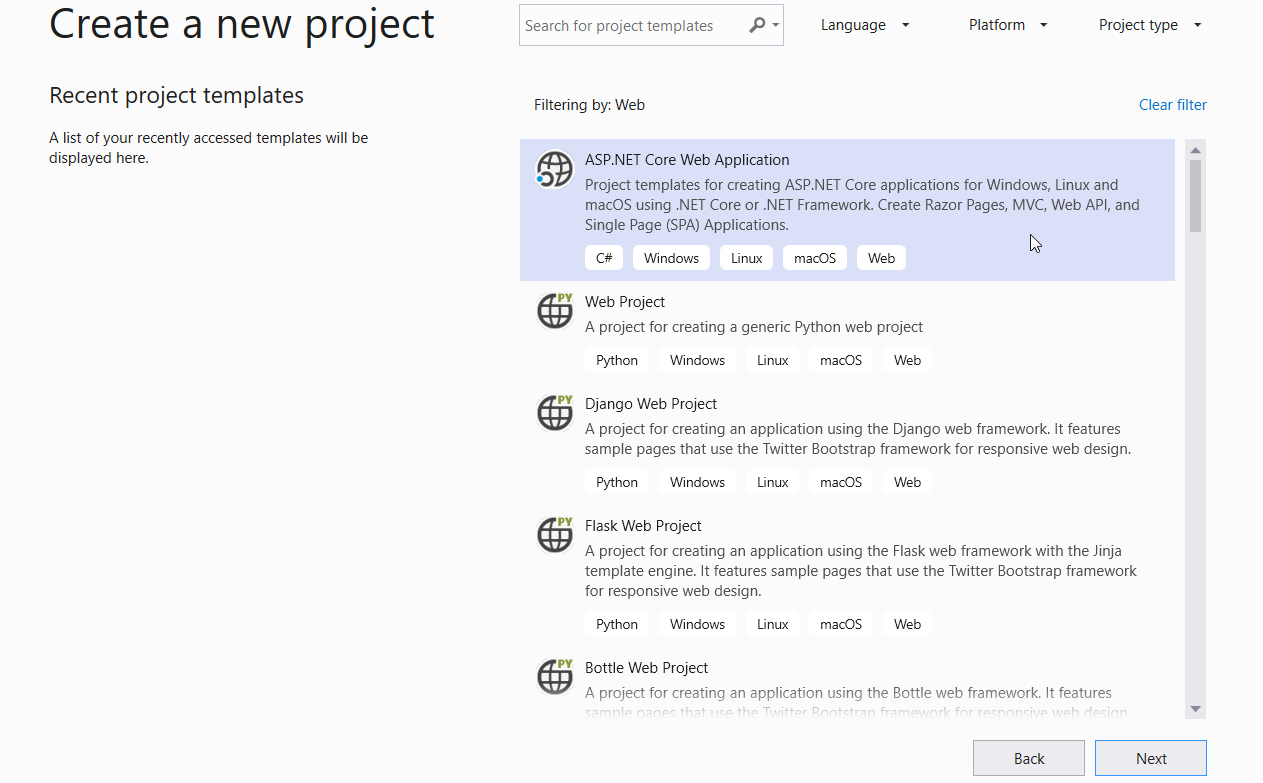
This will restrict the list of project types to just web-based projects. Locate and select .NET Core Web Application, as shown below, then click Next.
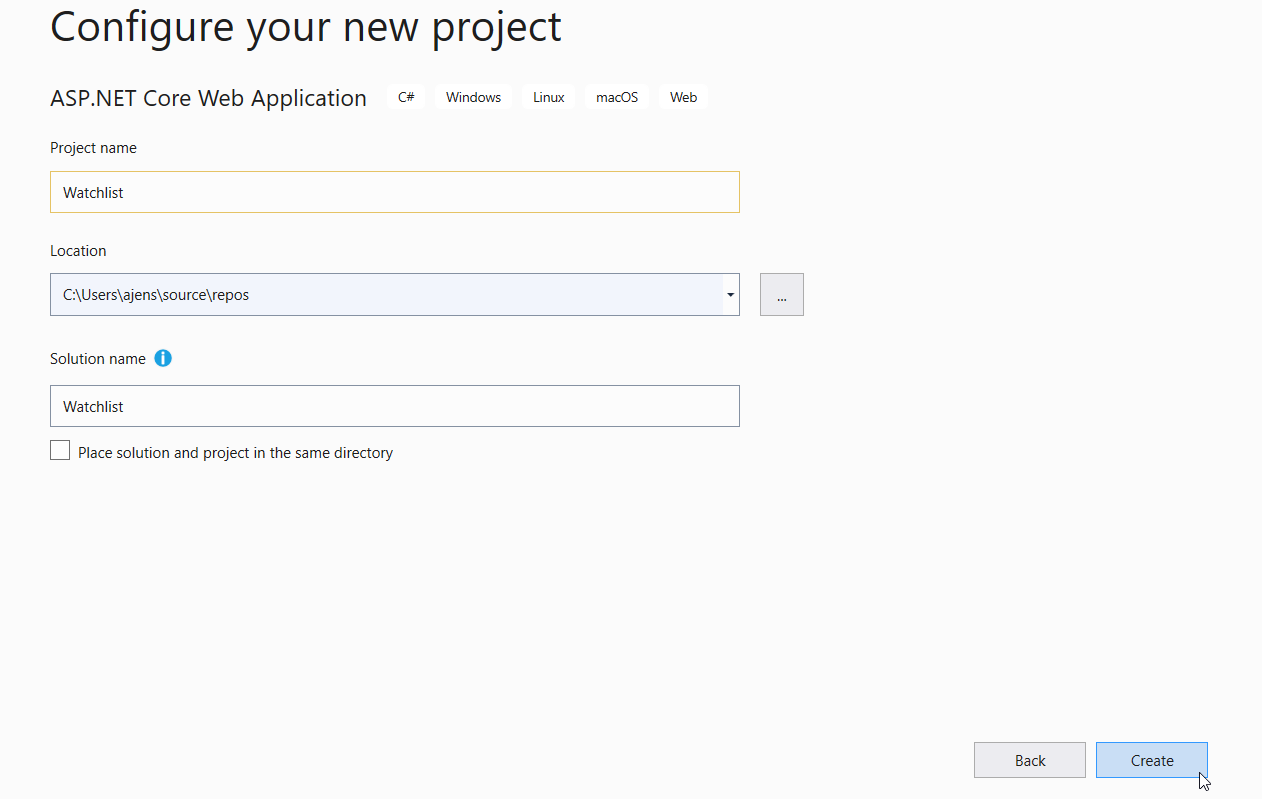
The next window allows you to configure your project, which means giving it a name and build location. Name your project Watchlist, select the location in which you want it built, then click Create.
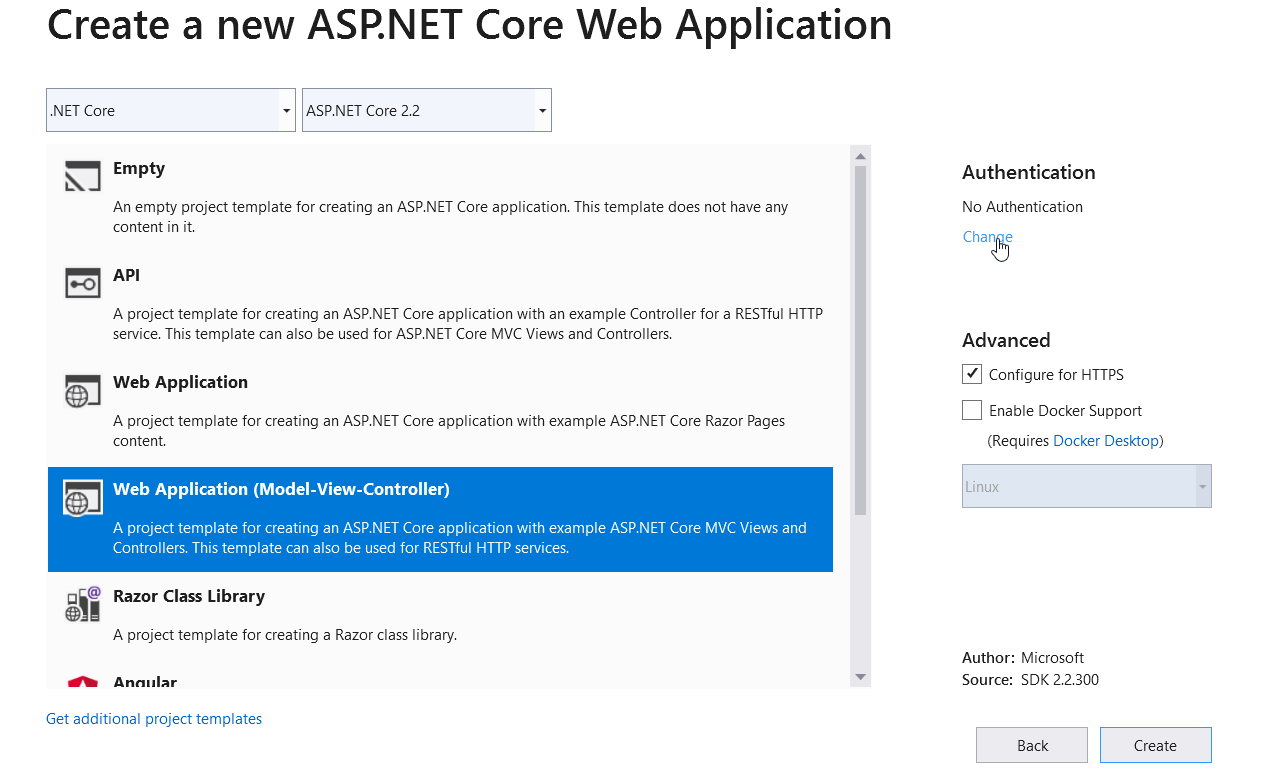
Next you need to specify a few more details about the project. We’re building a .NET MVC application, so select Web Application (model-view-controller) from the list of application types. Then, under Authentication at the right, click Change.
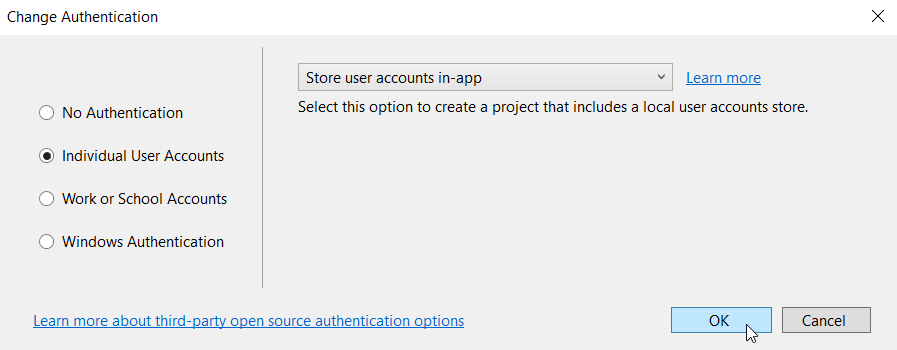
Change the authentication type from No Authentication to one that uses a secure login for each user. In the following window, select Individual User Accounts, ensure that the dropdown lists Store user accounts in-app as the selected option, then click OK. This will create your project with Entity Framework installed and with secure user accounts built into the project. This will be useful for you later, when you may wish to provide access to your app by secure login. Now click the Create button in the Create a new ASP.NET Core Web Application window.
Visual Studio is now generating your base application, complete with a secure system for managing user accounts, including registration and login. These accounts are built and managed using ASP.NET Core Identity, which is included in the application as a Razor class library.
You could do more to customize user accounts, but let's save that discussion for the .NET Core Security course later in the .NET Path.
Initialize the Database
There is one task to complete before testing the application to make sure everything works out of the box. When you created the project, the code to build and interface with your database was generated, but the database itself has not been updated. To do this, you are going to use a process called code-first migration.
To run a code-first migration, open the Package Manager Console. You can find this window by selecting View > Other Windows > Package Manager Console. The window will open in the lower section of your IDE and look like this:
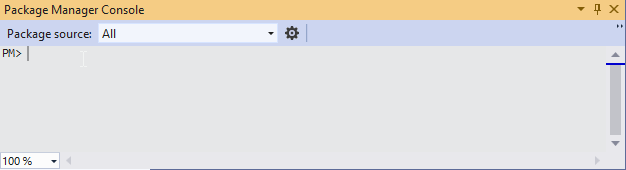
At the prompt, type the following command, and press Enter:
update-database
This will update the database using the current migration state that was generated when you created the project.
User Registration and Login
Now let’s run the project. Press F5 to start debugging. You can alternatively choose Debug > Start Debugging from the menu, or click the IIS Express button on the toolbar.
When your code executes, you should see this page:
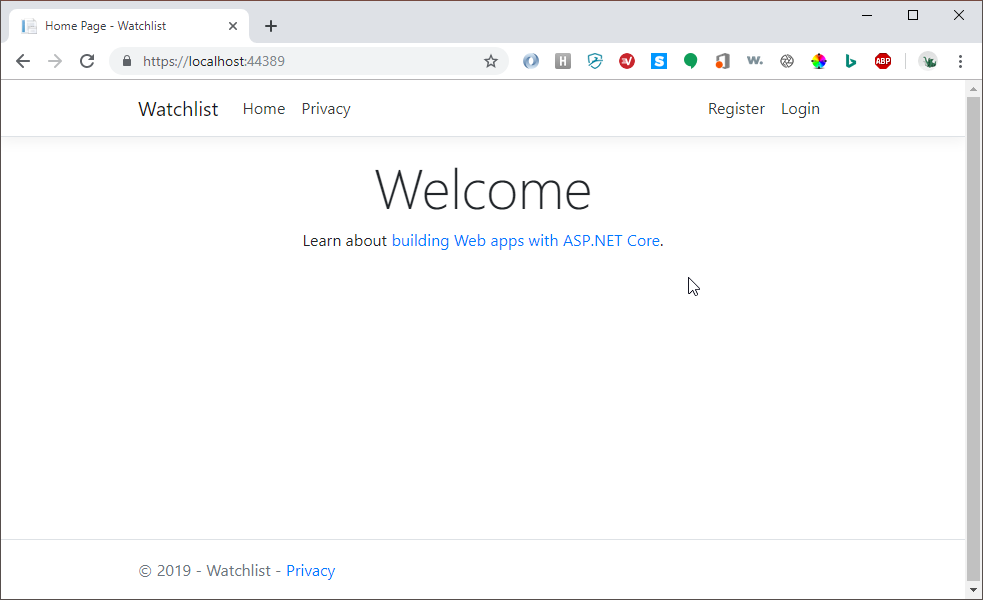
Notice the Register and Login links at the top right. These are your access points to user accounts. Register yourself as a user by clicking the Register link. You’ll be asked to enter your email and a password.
The default settings for ASP.NET Core Identity require the following characteristics for passwords:
Minimum six (6) characters in length.
At least one (1) number.
At least one (1) uppercase character.
At least one (1) lowercase character.
At least one (1) non-alphanumeric character.
When you have entered the required data, click the Register button. You’ll then see the same page as before, but the Register and Login links will be replaced with a greeting and a Logout link. You are now securely logged into the system!
If you want to test the login functionality separate from registration, click Logout. When the page refreshes, click the Login link and enter your email and password, then click the Login button. You should see a successful login.
Anatomy of a .NET MVC Project
Now that you’ve built your base application and verified that the user accounts are in working order, let’s talk about what this project looks like. In the Solution Explorer at the right of your IDE, you see all of the folders and files that comprise your Watchlist project. In particular, look at Models, Views, and Controllers.
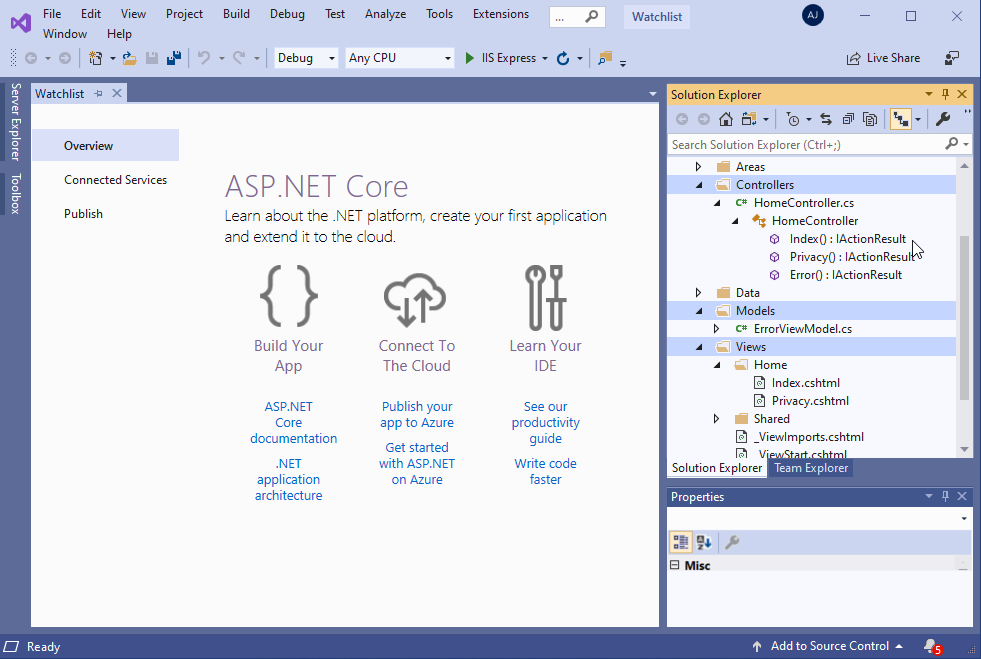
These folders represent the MVC design pattern components that you will use to build this app. The Models folder contains all of the view models (C# classes) that will be used to render the data from your database to the browser. The Views folder contains all of the HTML pages that will render the data represented by the models. The Controllers folder contains the controller classes that process the data, constructs the models, and invokes the views on the server, returning them in response to each request.
Notice that the names of each controller are also the names of the subfolders within the Views folder. Every controller has a corresponding view folder. This is how the MVC routing mechanism knows which view to render and where to find it. URL requests are constructed in a [domain] / [controller] / [action] / {id} format. The controller name is the first part of the URL after the domain name. It is followed by the controller action invoked. The action name is also the name of the HTML page within the View folder that matches the controller. The {id} parameter is optional, and is supplied when retrieving a specific item from the database.
So, if your URL request is https://yourdomain.com/movies/create, then you are asking your application to navigate to the MoviesController and find the create action method within it. The code for that method then returns a dynamic HTML page rendered using the view named Create.cshtml, which would be found within the /Views/Movies folder. This is how all routing works in .NET MVC.
I want to draw your attention to another subfolder under the Views folder: Shared. All of the pages placed in this folder may be called from any controller. If the controller is unable to locate the requested page in its corresponding View folder, it will then look in the Shared folder for a match.
The Shared folder also contains two other important types of view: layouts and partial. Layouts contain code that is common across multiple pages, such as menu navigation and other header elements as well as footers. Individual view pages then contain only the code elements that are specific to those pages. For example, if a change needs to be made to the menus or footers, it need only be made one time (in the layout page) to affect the change to all other pages using that layout.
Partial views are typically small HTML snippets that are used repetitively across multiple pages, such as a contact form, for example. The partial view contains the form and is rendered into the requested page by a simple line of code instead of repeating the form code throughout multiple pages.
We’ll talk more about layouts and partial views later. Now I want to talk to you about Identity Models and how you use them to work with a relational database.
Object-Relational Mapping and the Database Context
Look at the Data folder in your project. You'll find two things inside: 1) a Migrations folder, and 2) a *.cs file called ApplicationDbContext. The Migrations folder contains all of the code Entity Framework generated to construct a relational database for your application. That database contains all of the tables required to enable, create, and manage secure user logins.
The ApplicatonDbContext class is a C# class that derives its base functionality from a class in Entity Framework called IdentityDbContext. It’s this class that contains the base functionality for dealing with user accounts and your database. The ApplicationDbContext class is the code representation of your database. You use it to interact with the database through object-relational mapping (ORM). ORM is a means of mapping database entities to C# code, where a class may represent a record in a table, and the class attributes represent the columns. We won’t go into much detail about ORM in this course, but you'll find it in another one in the .NET Path. However, I will show you how to use ORM to work with and update the database for this application.
Let's Recap!
We covered quite a bit in this chapter!
Your Azure account is now set up.
You have successfully built and run your application.
You’ve registered a new user and tested the login functionality.
Your application is now ready for the customization that will make it your Watchlist. But before we dive into that, take a few moments to complete the quiz for this part of the course.
