Publish Your Application
Migrate a Database to Azure
There are several ways to migrate a local database to Azure. The method you choose may depend on whether you need to migrate data with the database schema. For example, if all you need is a new, empty database with a schema that matches your MVC data model, code-first migrations are a terrific way to go. However, if you have data in your database that you need to preserve as you move it to Azure, then you might need to consider another option.
You can find several methods online, most of which are convoluted and complicated. The easiest way I know of to do this is through SQL Server Management Studio (SSMS). You’ll become familiar with this tool in a later course, Create and Query an Object Model for a Relational Database, but we’ll use it here to teach you how to migrate your locally held database to Azure. If you haven’t installed SSMS yet, you can download it here. Once it is installed, you’ll be ready to move your database. The rest of this chapter will walk you through that process.
Connect to Your Local Server
When you launch SSMS, you are greeted with the SQL Server connection window:
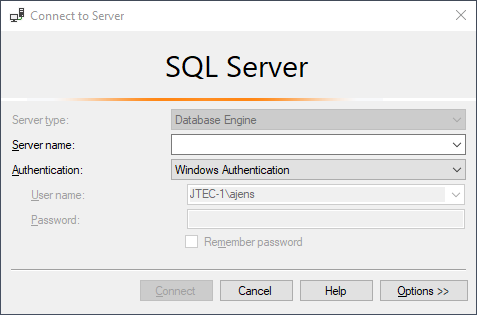
To select a server for the connection, click the Server name dropdown. You’ll see all of the SQL Server instances of which your SSMS installation is aware. You can select one of these if that is what you desire. However, if nothing appears, or you need to connect to a different server, you may click <Browse for more…>. Alternatively, you can type in (or paste) the name of the server to which you wish to connect, such as the one in the connection string for your application:
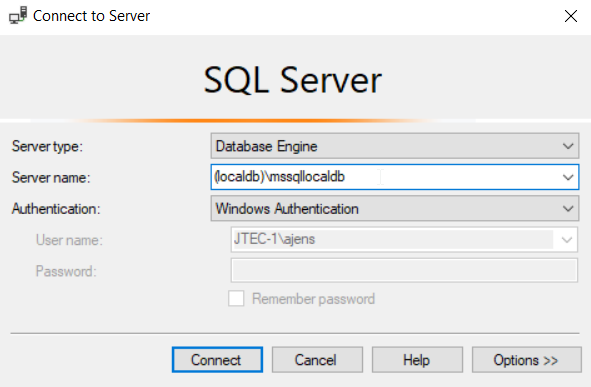
At this point, you may change the authentication type if necessary. For local installs, your authentication type will most likely be Windows Authentication, which will default to your Windows login username. So you can click Connect, and your server connection will be established. If you’re connecting to an online or network server, you’ll want to select SQL Server Authentication from the dropdown. You’ll do this later when you set up your Azure server. For now, let’s stick to your local server installation and Windows authentication.
Locate and Export Your Local Database
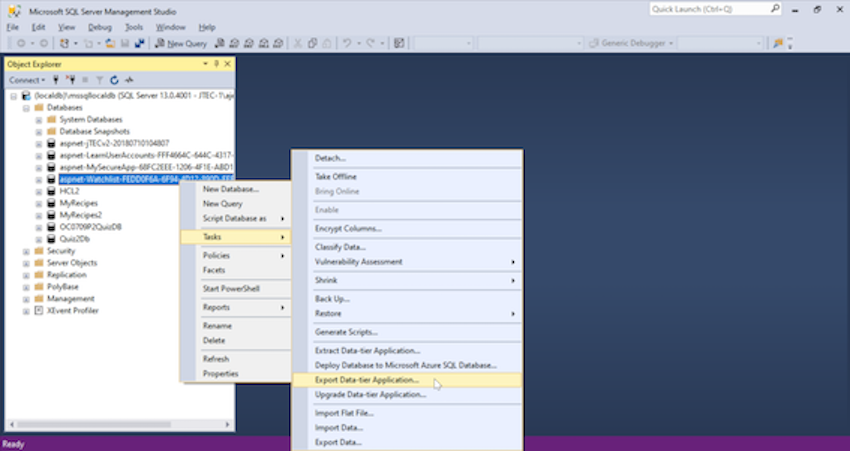
After you’ve connect to your local server in SSMS, you’ll see the contents of the server listed in the SSMS Object Explorer pane. Expand the Databases folder to see a list of databases on the server. You’ll see one that begins with aspnet-Watchlist.
Right-click on the Watchlist database, then choose Tasks > Export Data-tier Application.
In the Introduction window that comes up, click Next. In the next window, select Save to local disk and click Browse. Choose a location to which you would like to save the file, then give the file a name, and click Save.
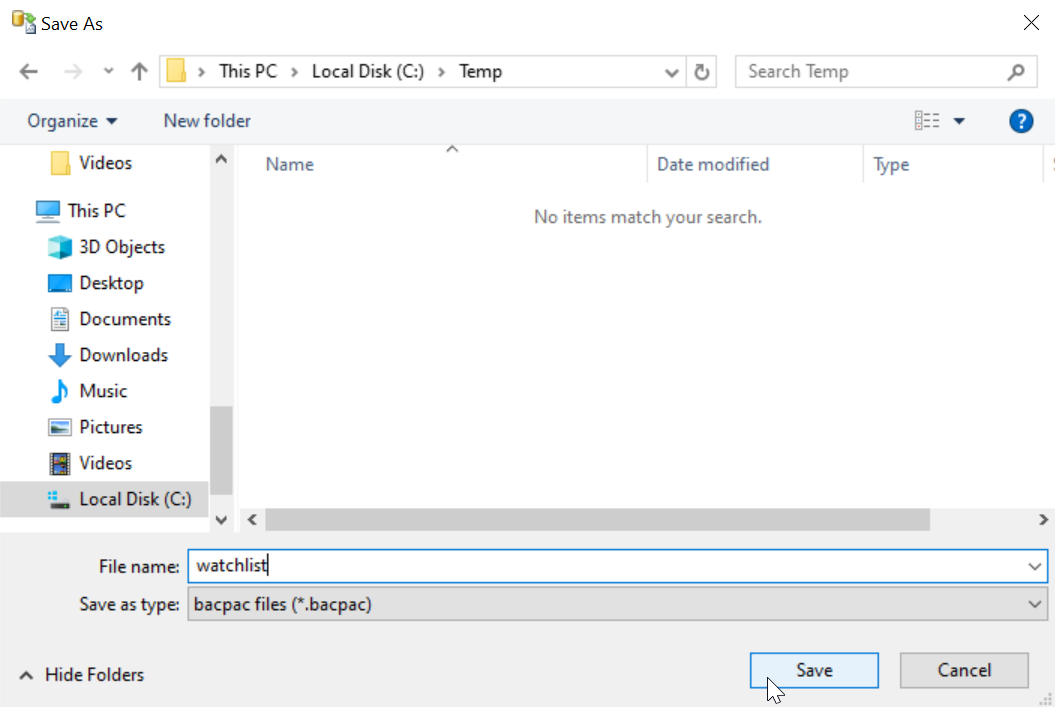
Click Next, then Finish. Your database is now being exported to the .backpac file you named in the Browse window. When it completes, click Close.
Create a New SQL Server Instance on Your Azure Account
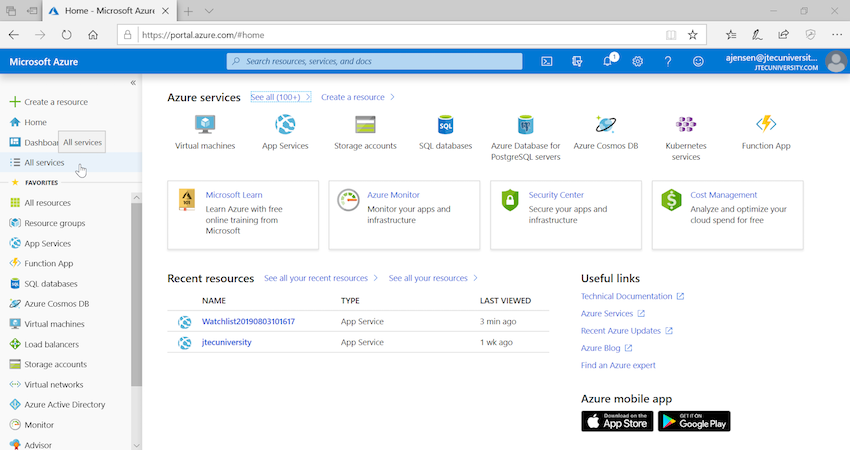
It’s time to set up a place to host your database on Azure. Log into your Azure account and click All services from the list of options on the left of your dashboard.
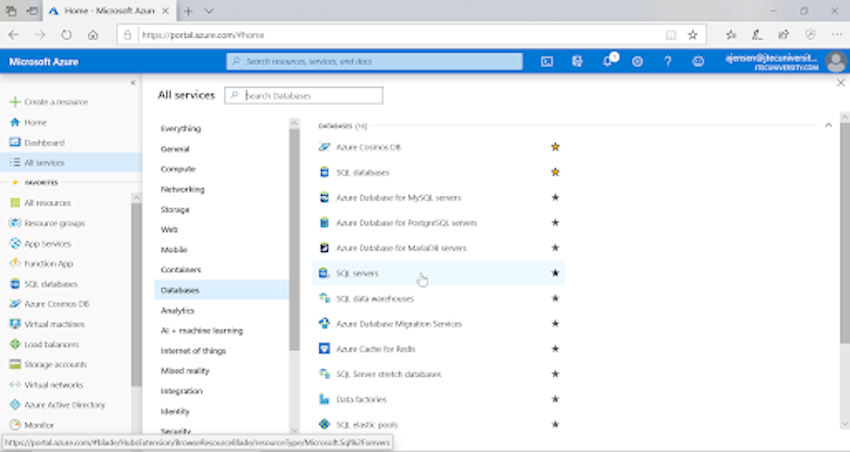
Select Databases, then select SQL servers.
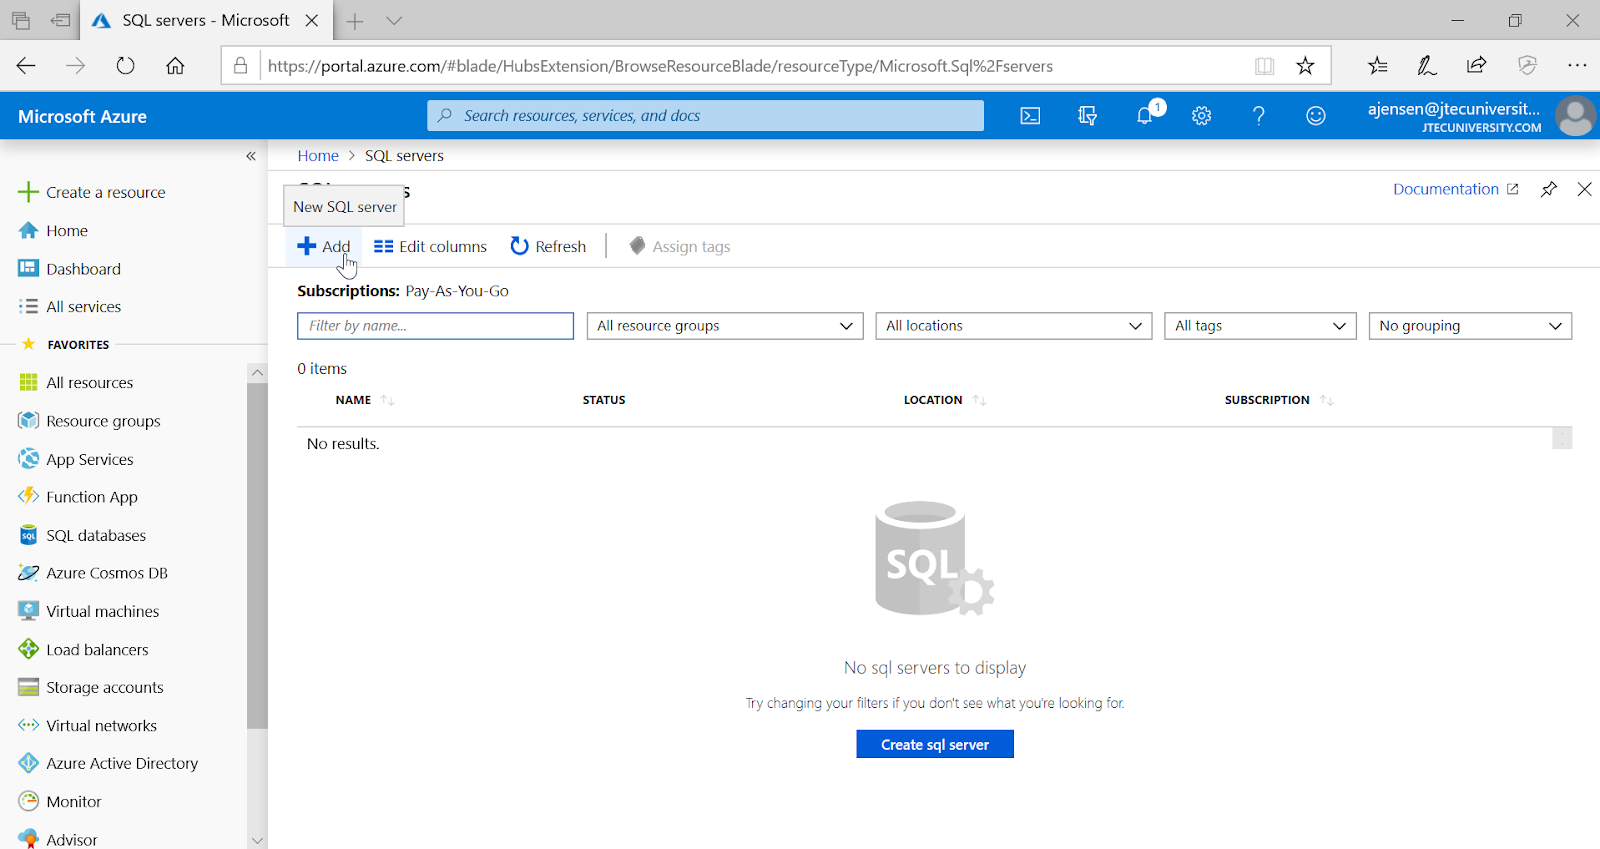
If you have already set up a server, it will be listed here, and you can use that to host your database. If not, click the Add button at the top.
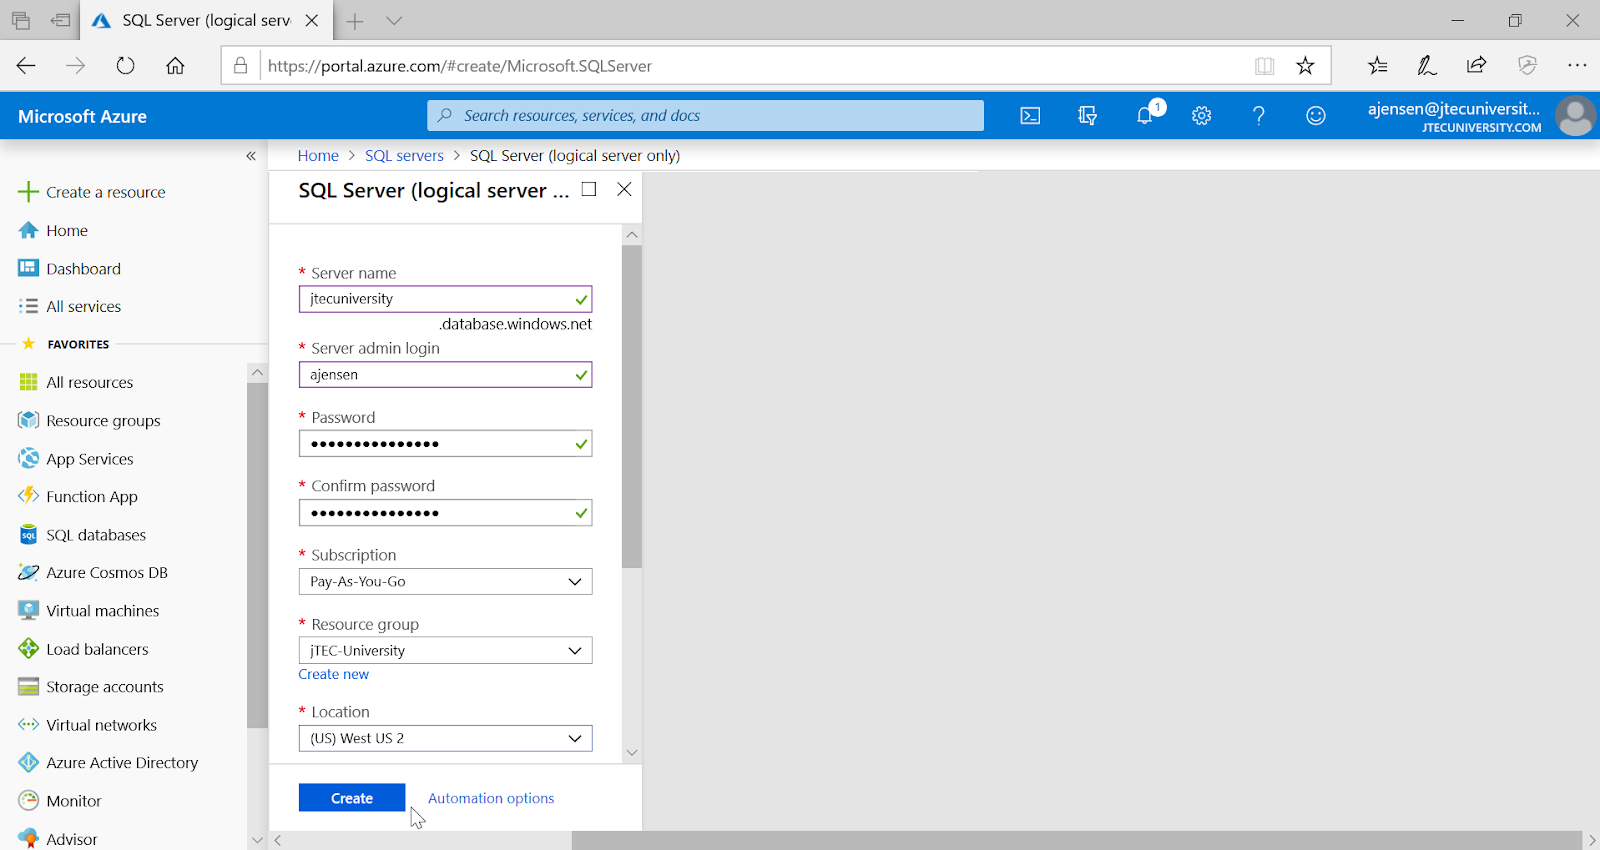
Complete the form, creating a new Resource group if necessary, then click Create.
When the server has successfully deployed, a success message will appear in the upper-right corner of the screen. You can then click the Refresh button to see your new server listed.
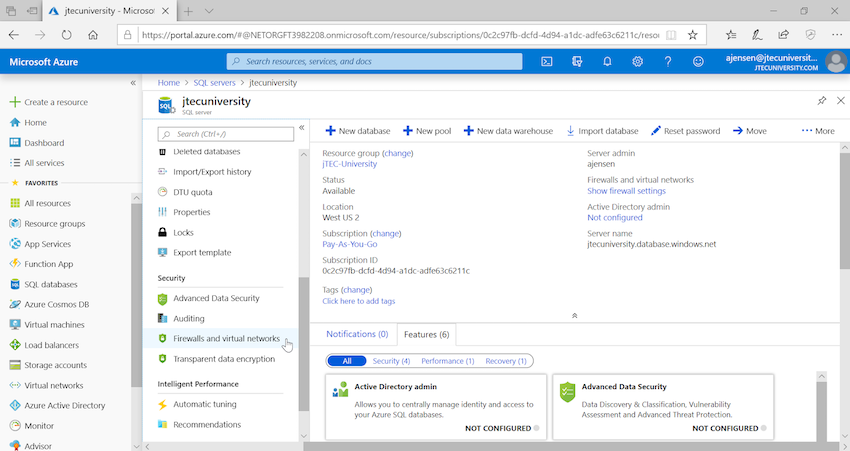
Click the new server name, then locate and click Firewalls and virtual networks.
In the new pane, click Add client IP, then click Save.
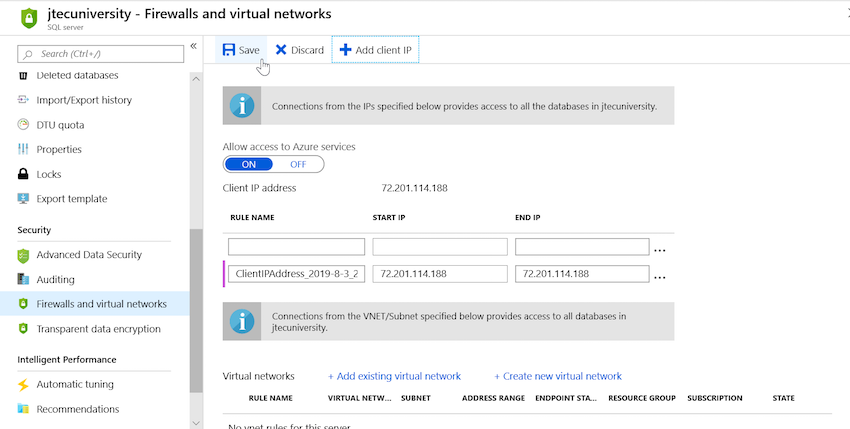
This will add the IP address of your computer to the list authorizing access to the server and allowing you to connect using SSMS.
Now, in the list of server options, locate and click Properties.
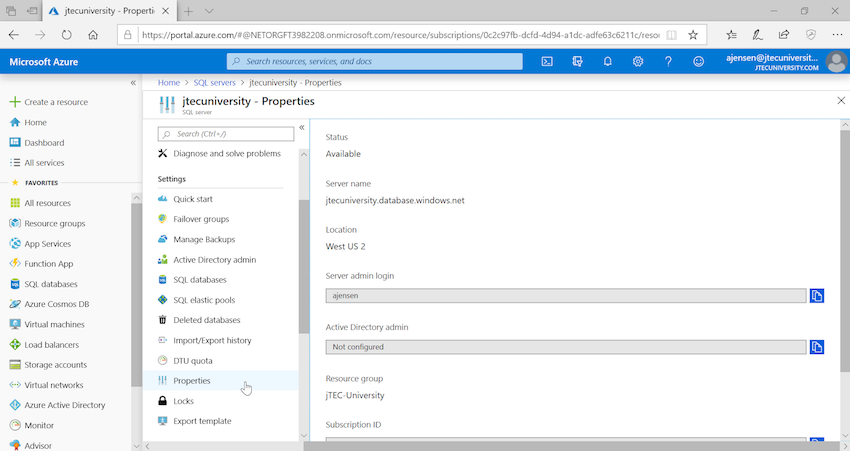
Copy the server name listed in the Properties pane, then open up SSMS.
Connect to Your Azure SQL Server Instance
In SSMS Object Explorer, click Connect > Database engine.

In the Connect to Server window:
Paste the server name you copied from Azure into the Server name field.
Change the Authentication dropdown to SQL Server Authentication.
Enter the login name and password you created in Azure when you set up the server.
Click Connect.
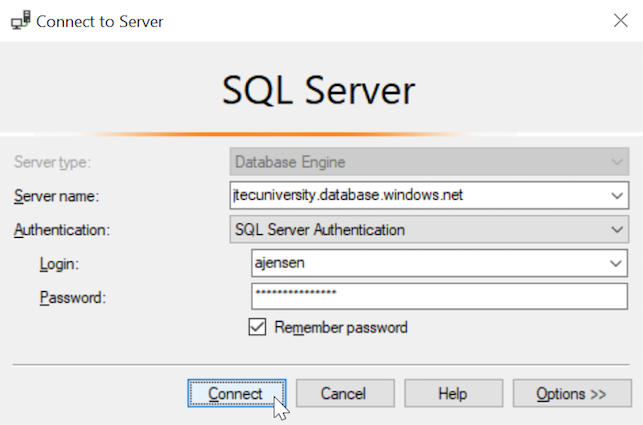
Connect to Server window.
You should now see your Azure server listed in the Object Explorer.
Create a New Database From the Exported .bacpac File
Expand your new Azure server in Object Explorer, then right-click on the Databases folder and select Import Data-tier Application.
On the Introduction window, click Next.
On the Import Settings window, click the Browse button next to the Import from local disk box, and locate the .bacpac file you created earlier in the chapter. Select the file and click Open, then click Next.
On the Database Settings screen, you need to set up the performance resources you want for your database. It defaults to a Standard Azure SQL Database, with a 250 GB size and an S2 Service Objective. This is an expensive option, especially for a tutorial project, so we’re going to make some changes. The Basic option is the cheapest, so select it from the Edition of Microsoft Azure SQL Database dropdown. This will change the database size to 2 GB, and the Service Object to Basic.
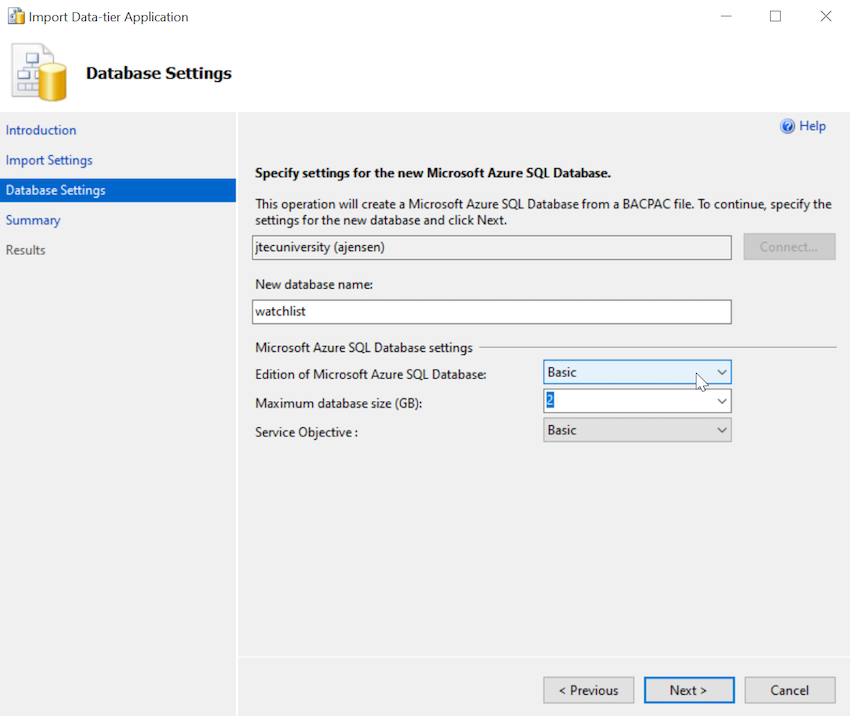
Click Next, and then click Finish. When the import process is complete, click Close. Your Watchlist database is now beneath the Databases folder in Object Explorer.
Add the New Connection String to Your Project
Now you need to tell your app to use the new database on Azure instead of your local database. To do this, you need to add a new connection string, so go back to your project in Visual Studio and open the appsettings.json file.
You can add multiple connection strings in this file, separated by commas. Add a comma at the end of the line for the “DefaultConnection”, then add a new connection string for your Azure database with the following information:
"AzureConnection": "Server=[new server name];Database=[new database name];
    User ID=[username];Password=[password];MultipleActiveResultSets=true"
Note the omission of the Trusted_Connection=True; parameter in the new connection string. This parameter permits local connections (for development purposes) to bypass the username/password security for a local SQL Server installation. It will not work on Azure.
Now open Startup.cs. Locate the code that gets the connection string (about line 40), and change “DefaultConnection” to “AzureConnection”.
Rebuild your solution. Now it’s time to publish your app to Azure.
Publish Your Application
After you have successfully migrated your local Watchlist database to your Azure SQL server, it’s time to publish your app. This can be done entirely within Visual Studio. To begin, right-click on the project name in the Solution Explorer, then select Publish. You’ll see the following screen:
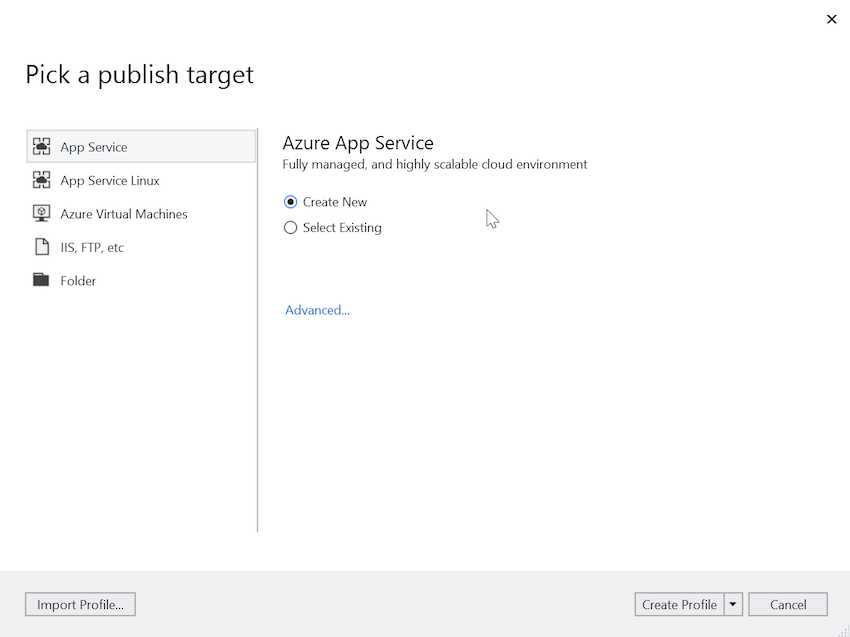
An Azure App Service is a published, live version of your application. Since you haven’t created one yet, make sure the Create New radio button is selected, and choose Create Profile from the button dropdown at the bottom of the window. When you click Create Profile, you’ll see a window like this:
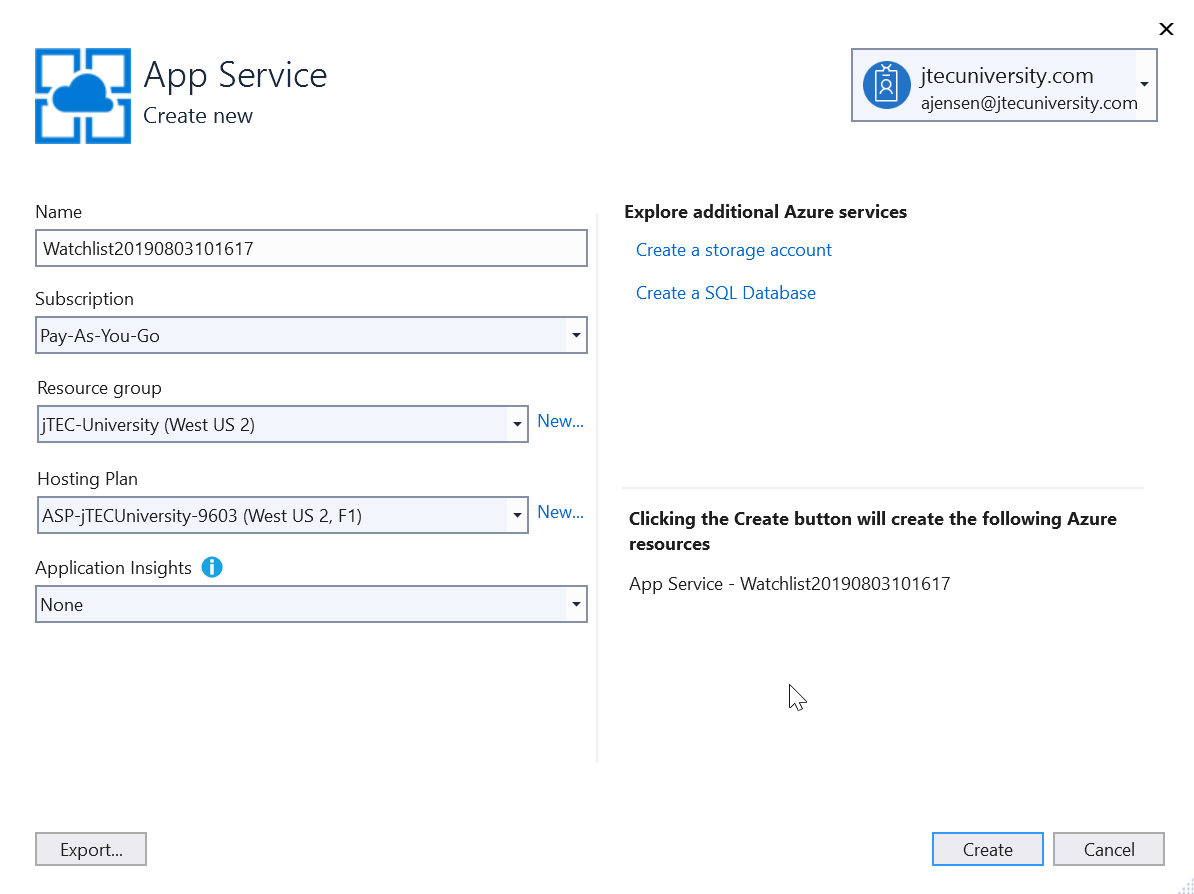
Next, select the subscription type. You’ll likely use the Pay-As-You-Go option. The resource group and hosting plan are next. If you haven’t created these yet, you can do so by clicking the New link next to each item. Finally, install Application Insights if you wish to have application diagnostic tools installed for your app online. I’m not including them for my app.
When you have filled out all the required options, click Create.
Your app will then be deployed to Azure as an App Service, but one final step remains. You’ll see the following window in Visual Studio when the app is ready for publication:
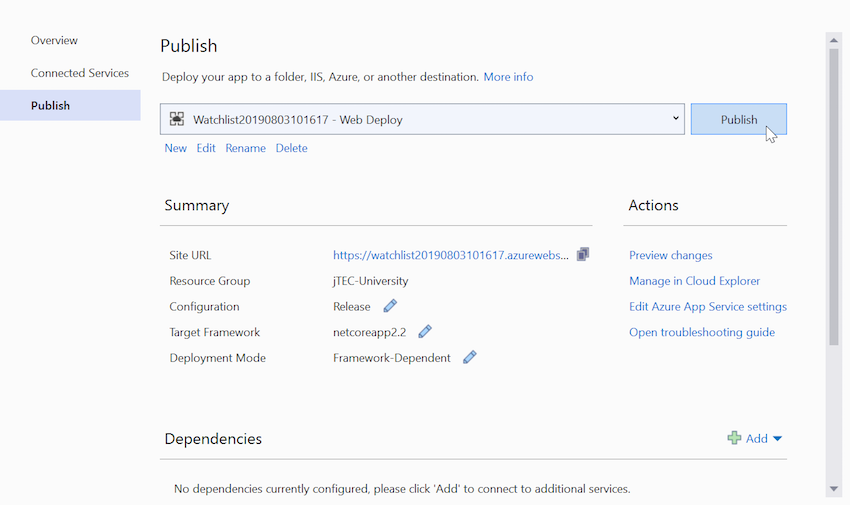
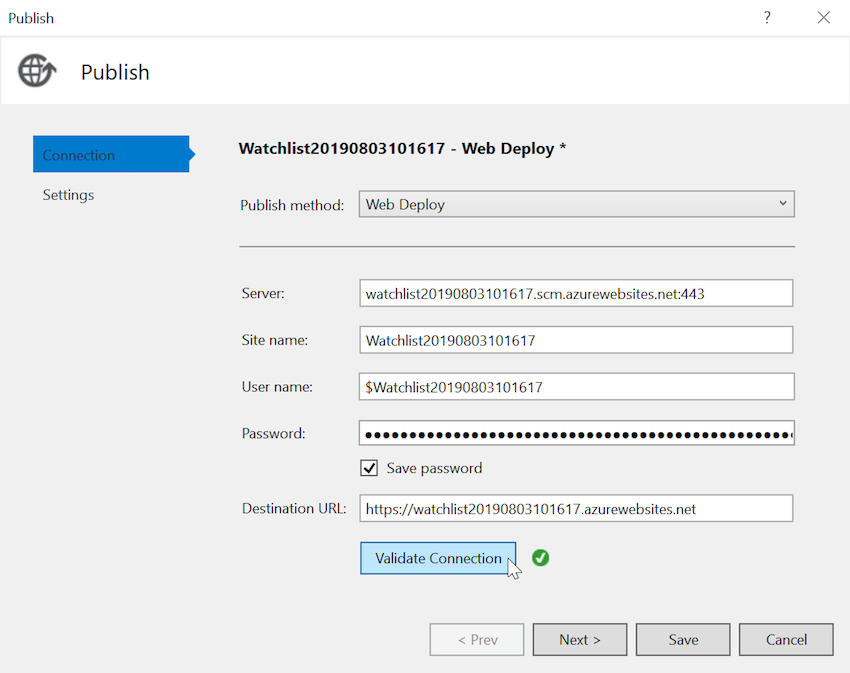
You now have a publish configuration for your app, but there are still a few things you need to do. Under the publish dropdown, there are four links. Click Edit.
In the window that comes up, click Validate Connection to ensure the app service and your configuration are appropriately linked. When the connection is validated, click Next.
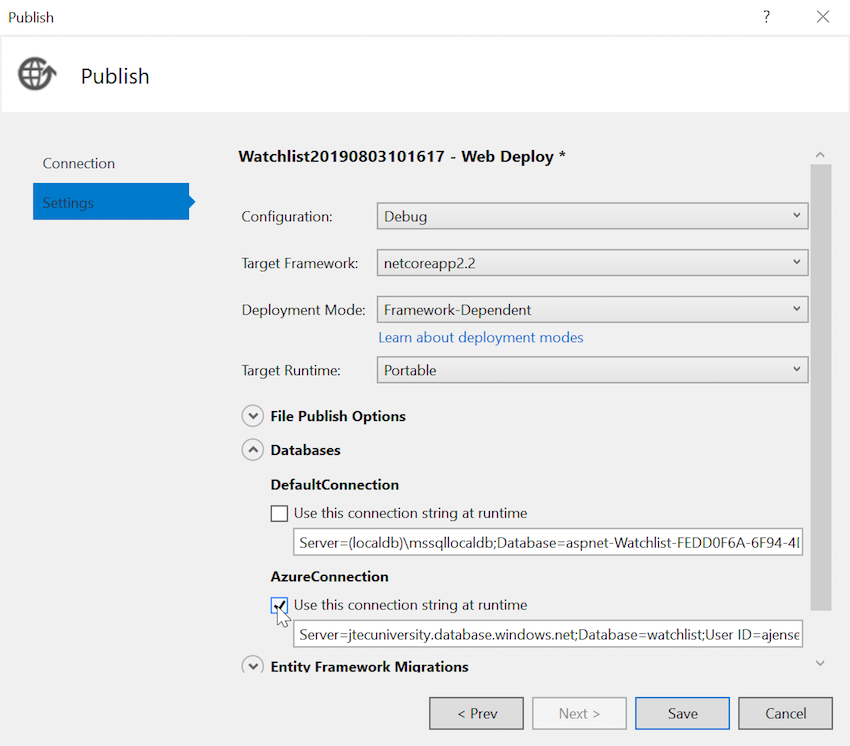
In the Settings window, change the Configuration dropdown to Debug, then click the down arrow next to Databases to expand the database options. Select the checkbox under AzureConnection to tell the app to use that connection string. Make sure there is no check under DefaultConnection. Click Save.
Now click Publish. When the process is complete, your new app will open in your default browser.
Set Up a Custom Domain
Assigning a custom domain to your app is nice, and you can do it for any Azure App Service. It's costly, so it's not required for this course; however, you know how to do it should you want to. Here are the things you’ll need to consider and do before you get a custom domain:
Upgrade the pricing tier for your app service on Azure. The lowest pricing tier that allows custom domains is S1, which will cost an estimated $74.40 per month.
Purchase the desired domain from your preferred domain provider. The cost can vary from a few dollars to several thousands, depending on the domain.
Purchase a Secure Sockets Layer (SSL) certificate from your domain provider or other vendor. The cheapest option for this will usually cost around $5 - $6 monthly, or about $65 - $70 annually.
Upload your SSL certificate to your Azure account and bind it to your app service. Specific instructions are located in the Microsoft Azure documentation here.
Assign and configure the desired domain(s) in your app service properties.
In the interest of keeping student expenses down, that’s as far as we’ll go for this course. This at least provides you with a checklist of what you’ll need to do once you’re ready to assign a custom domain to one of your applications.
Let's Recap!
Your Watchlist app is online!
In this chapter, you learned how to use SQL Server Management Studio (SSMS) to migrate a local database to Azure for online use.
You learned how to publish a web application to Azure.
You learned what is required to assign a custom domain to an Azure app service.
Next, we’re going to test your application in its new online environment to make sure everything still works as intended, and, if necessary, make any last minute corrections.
