Navigate the Interface of SQL Server Management Studio (SSMS)
You’ve seen SQL Server Management Studio before, but you probably haven’t had an opportunity to learn how it can help you build, maintain, and manage your relational databases. We’ll do exactly that in this chapter.
Connect to a Server
You may have completed this during the SSMS install, but in case you skipped over it, we’ll go through adding a server to your SQL Server installation via SSMS now.
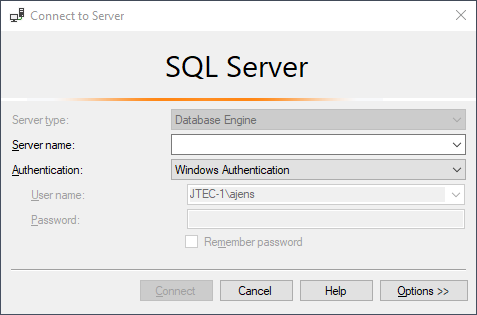
When you launch SSMS, you will see the SQL Server connection window:
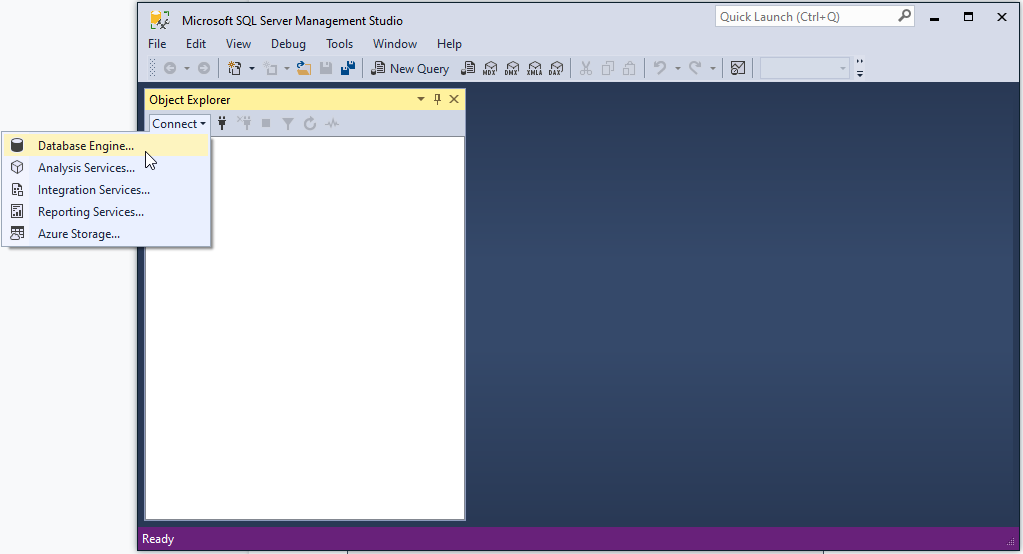
This window can also be brought up by clicking the Connect dropdown in the Object Explorer window and selecting Database Engine:
To select a server for the connection, click the Server name dropdown, as shown below. You’ll see all of the SQL Server instances of which your SSMS installation is aware. You can select one of these if that is what you desire. However, if nothing appears here, or you need to connect to a different server, you may click <Browse for more…>. Alternatively, you can type in (or paste) the name of the server to which you wish to connect, such as the one in the connection string for your application:
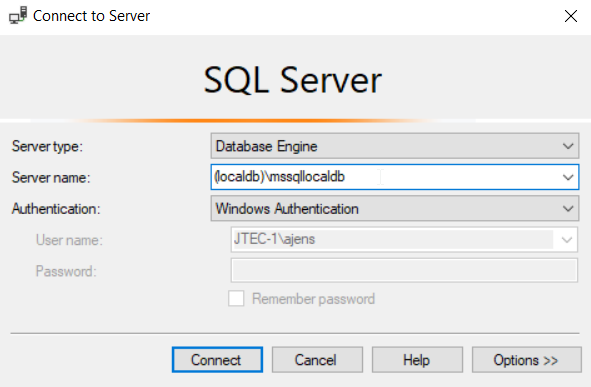
At this point, you may change the authentication type if necessary. For local installs, it will most likely be Windows Authentication, which will default to your Windows login username. Then click Connect, and your server connection will be established. However, if you’re connecting to an online or network server, you’ll most likely want to select SQL Server Authentication from the dropdown. We’ll do this later when we set up your Azure server. For now, let’s stick to your local server installation and Windows authentication.
Explore Database Objects
Once your server is connected, the Object Explorer will display all relevant information to that connection. The Object Explorer works like a file explorer, breaking your server into simple, folder-based components. Databases appear with a database container icon next to them. These, like folders, are also expandable, and expanding a database brings up a list of organizational folders within the database containing the various components with which you may need to interact.
Finding Your Databases
We're interested in the Databases folder because it contains all of the databases you’ve created on this server.
Within this folder are two additional ones: System Databases and Database Snapshots. We aren’t using them for the course, so let's skip them for now.
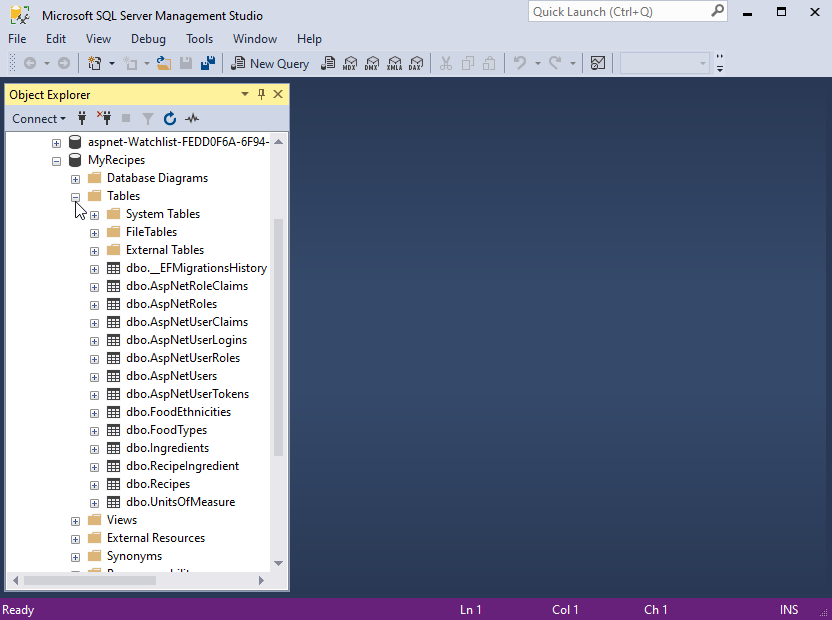
Beneath those folders are the databases you created on this server; specifically, the ones using code-first migrations from the first half of this course. Expand this database to see the list of folders within it.
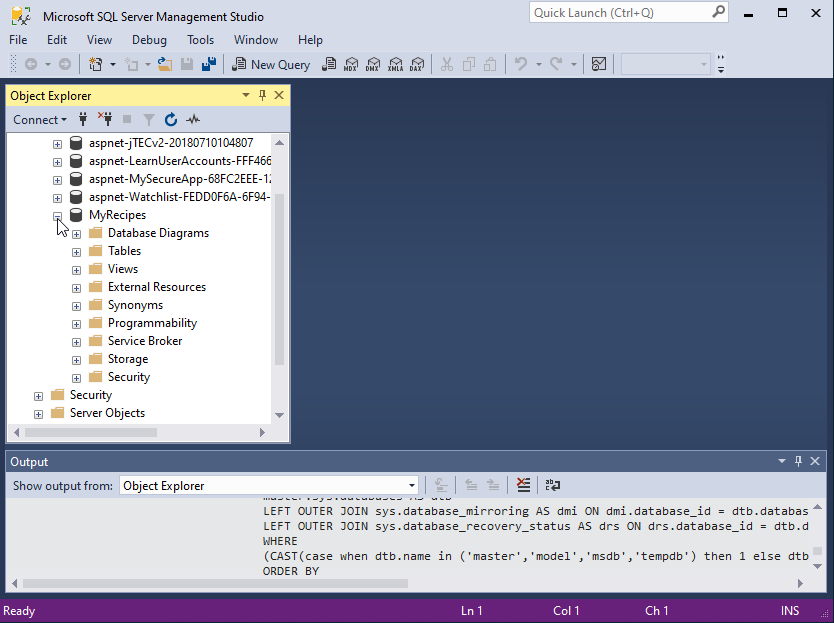
We will work with three folders here: DatabaseDiagrams, Tables, and Programmability. The rest aren’t relevant to this course. Let’s begin with Tables. Expanding the Tables folder brings up a list of all the tables in this database. You should see the tables that match the data model you created in the first half of the course, as well as a Migrations table, which tracks the migrations you perform each time you type update-database in the Package Manager Console in Visual Studio. You should also see seven AspNet tables that were created by Entity Framework to handle your secure logins and user accounts.
Explore Tables
By now, you should be getting a handle on how the Object Explorer in SSMS works to help you quickly and easily navigate the contents of your SQL Server installation. Now let’s dive a little deeper into some of the other features of the SSMS interface.
First, expand the Recipes table. You’ll see several folders beneath this table. We’re especially interested in the Columns, Keys, and Indexes folders, so expand those as well.
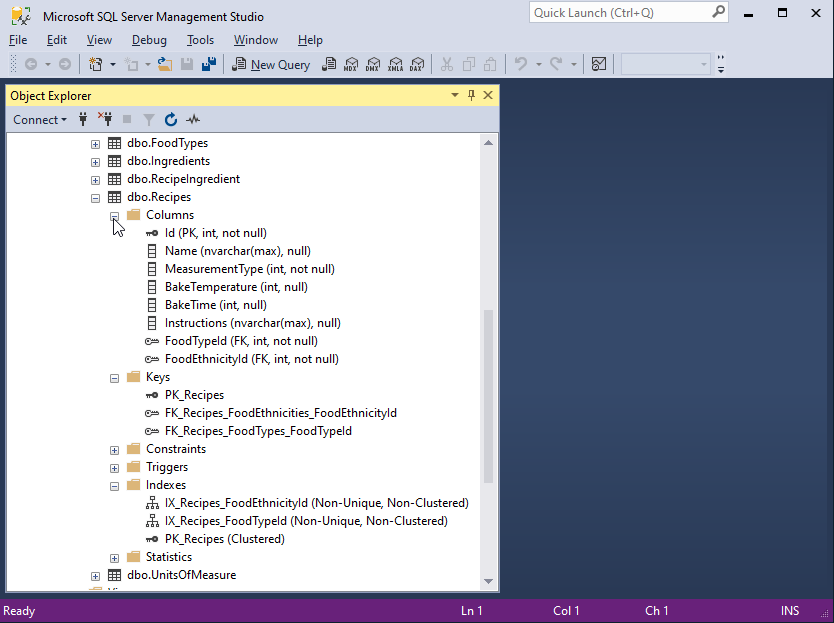
If you built your model correctly in Part 1, you should see something similar to this. In the Columns folder, you’ll find all of the columns that were created for this table, representing the object attributes you created in your C# code. Here you can see the data types associated data with each column, whether it represents an optional value (null vs. not null), and which represent primary or foreign key values. Primary keys are identified with left-pointing solid black key icons, while foreign keys are noted with right-pointing open (white) key icons.
Under the Keys folder, you can see each key that corresponds to the key columns identified in the Columns folder. The foreign key names include the current table as well as the table targeted by the foreign key.
The Indexes folder shows all of the indexes created for this table and identifies the columns where they are applied. In this case, a clustered index (for unique values) is applied to the primary key, which is found in the Id column of this table. You can also see that two non-unique, non-clustered indexes are applied to each of the foreign key columns in this table. We did not have to create these indexes. Any column containing a primary or foreign key will generate an index for it as part of the code-first migrations process.
Take Advantage of Quick Functions
You’re familiar with pop-up menus - right-click on something and a new menu displays, right? SSMS entities benefit from pop-up menus too. Right-click on the Recipes table in object explorer and see what happens!
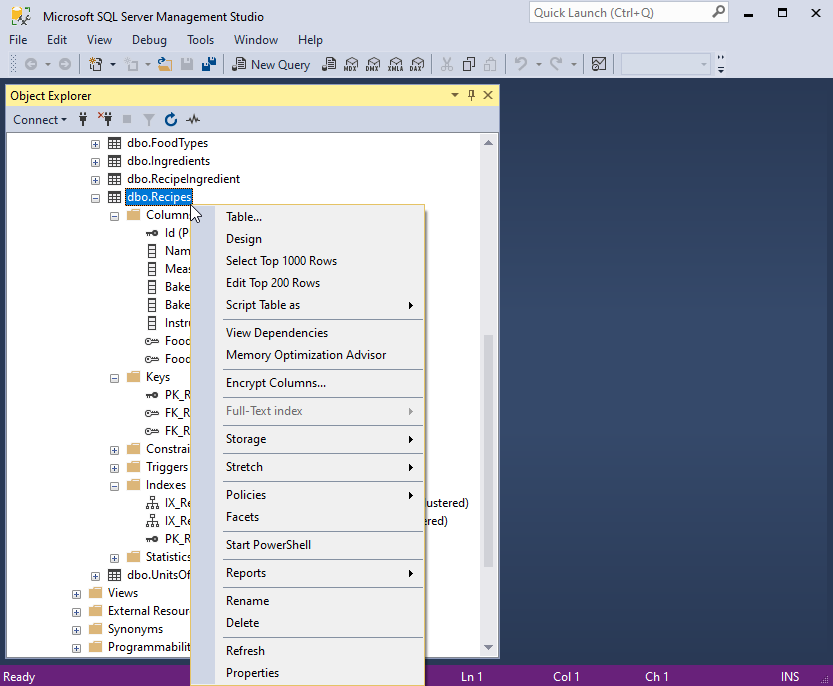
This pop-up menu, specific to table-related functions, offers a lot of beneficial functionality, but we’re only going to focus on four of them today:
Table...
Design
Select Top 1000 Rows
Edit Top 200 Rows
Let’s go in order.
Table...
The ellipses (...) following this item suggests it may be different from the others. This is a quick link that brings up a window through which you can create a new table with all of its columns. We’ll do this a little later, so keep it in mind.
Design
This option brings up a window displaying the full design of the selected table. Each column is represented, along with its data type and whether it permits null values. When a column is selected, the lower pane displays all of the properties for that column. Editable properties may be changed in the Column Properties pane.
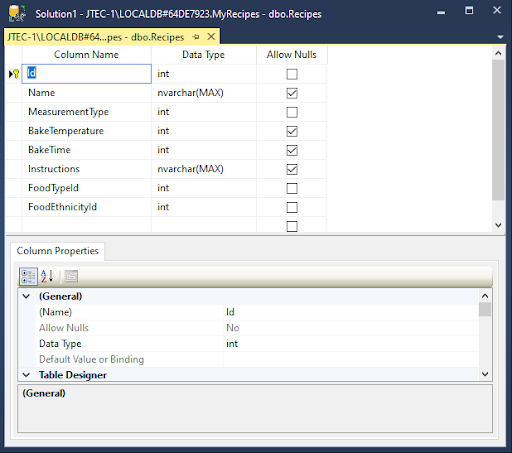
If you make changes to any of the data in this view, an asterisk will appear at the right of the table name in the top tab, indicating your changes have not been saved. Save them by clicking the save icon in the menu bar or by clicking Yes when prompted upon closing the window.
Select Top 1000 Rows
As you might have guessed, this is simply a quick link for a SQL command to retrieve the first 1000 records in the table. What’s great about this command is that it not only retrieves the results, but it also displays the SQL query.
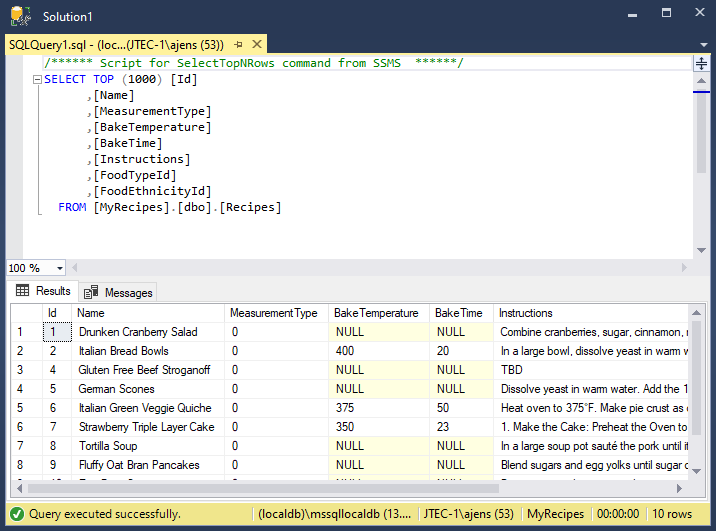
This is essentially an SQL execution window, so you can make any changes you want, then click the Execute button in the menu bar at the top (you can also right-click in the pane and choose Execute, or press the F5 key) to execute the new query.
Edit Top 200 Rows
Like the previous link, this one brings up a SQL query whose result is an editing pane for the first 200 records in the table.
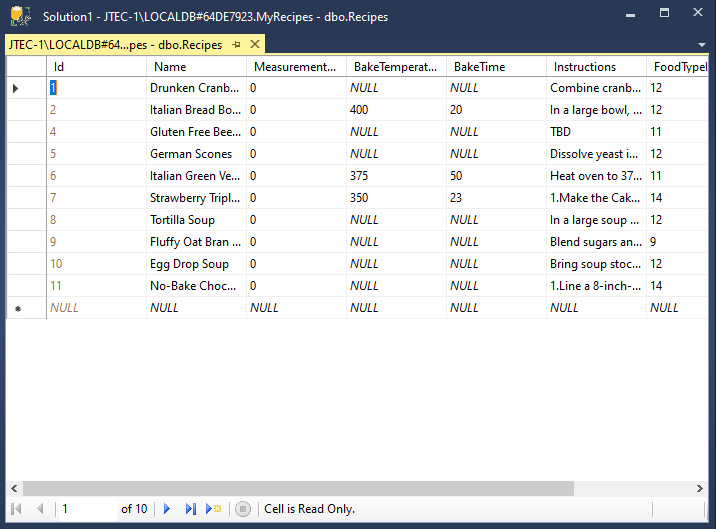
This is one of the ways you can manually add new data to your table, or make changes to existing records.
More Ways to Execute Queries
You might be wondering if there is a simple way to write and execute SQL queries directly on your database without having to use predefined links and altering predefined query text. Of course, there is! In the ribbon bar at the top of the screen, you’ll see a button labeled New Query. Click it any time you want to write and execute SQL on your database.
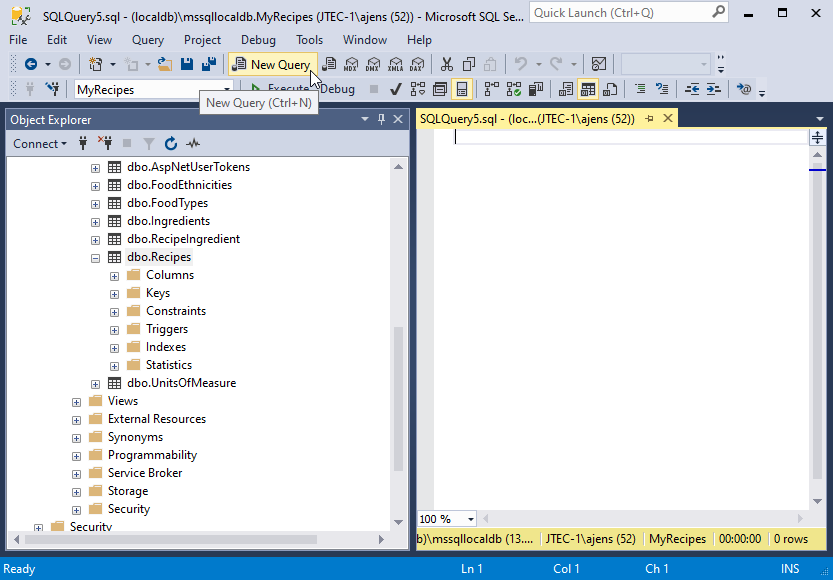
The result is an editing pane in which you’ll write your SQL queries. Then click Execute (or press F5) to execute your query. The editor works like the code editor in Visual Studio, so your SQL strings will be color-coded, and you will be warned of any errors you make in writing the query. Note the errors indicated by the red lines in the example below:

A correct query that is ready to be executed will show no such errors:

Use Interactive Database Diagrams
As I’ve mentioned, the Database Diagrams feature of SSMS is one of the most powerful tools available. So let’s jump in and see how to use it!
The first time you try to create a new diagram, you’ll be told that diagram support is not installed, and you’ll be asked if you wish to install it. Click Yes.
Once the feature support is installed, you can create a new diagram by right-clicking the Database Diagrams folder and selecting New Database Diagram.
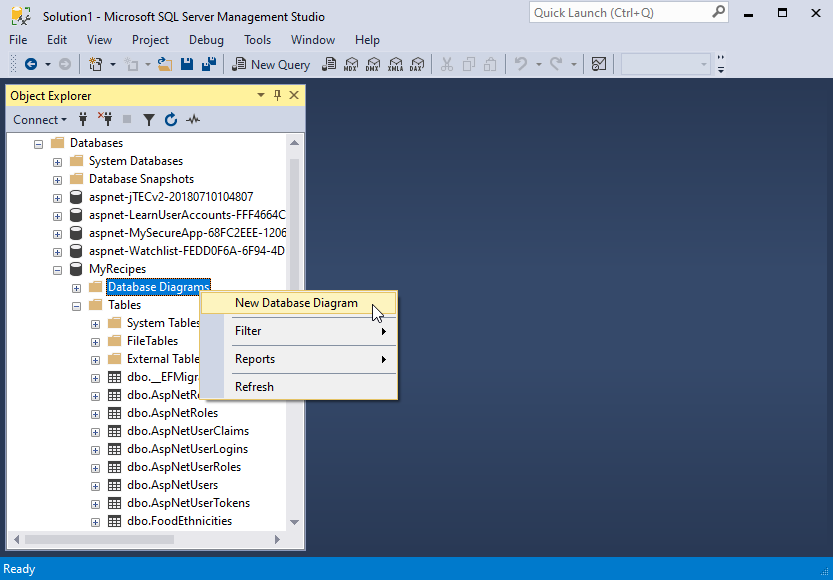
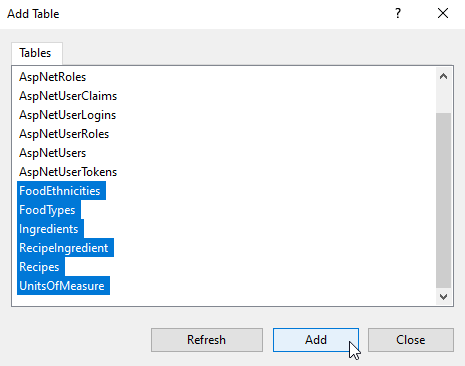
This will bring up the Add Table window.
I mentioned before you could build a diagram representing your entire database, or just portions of it. So let’s build one that represents just the model entities you created when you designed your data model in Part 1. To select multiple tables, press and hold the CTRL key as you click the tables you want to include. When you’ve selected your tables, click Add.
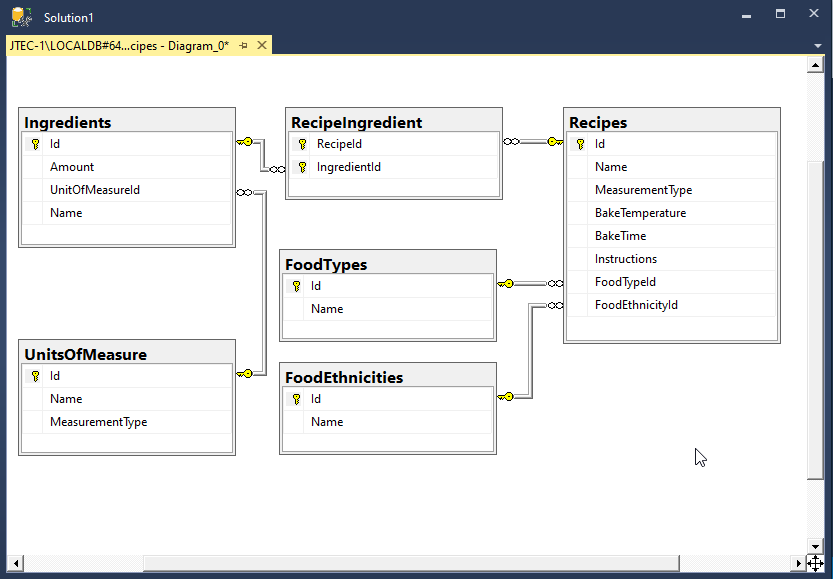
When the tables are added, click Close to close the Add Table window. The result is an automatically generated entity-relationship diagram representing the tables you selected.
Right-clicking on a table and choosing Properties from the pop-up menu will bring up a Properties pane for the table. This pane not only shows the table’s properties but provides a means of changing them as well, as many are editable from within the diagram.
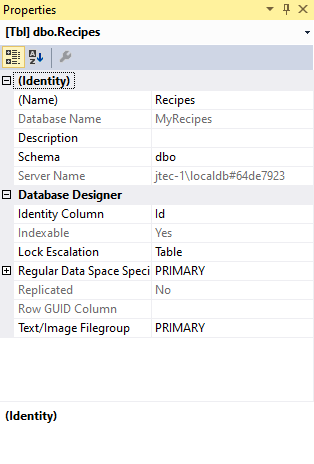
Table names can be changed directly in the Properties pane. To change a column name within the diagram, click and re-write it. Columns and tables can be added to or deleted from the database via pop-up menus.
The best way to familiarize yourself with the additional functions of the interactive diagram is to play with it a bit. Most of the functionality is available through the pop-up menus. A different menu appears when you click the white background than when you click on one of the tables, or one of the columns within a table. So take a few minutes and explore and familiarize yourself with these functions. This database is a safe place to play because we’re not going to use it for anything else right now.
In the next chapter, you’re going to build a brand new database within SSMS. It will essentially be a duplicate of the one you have now, so you can go ahead and mess this one up all you want as you explore the diagram features, and any others you wish to get more familiar with, in SSMS. 😉
Let's Recap!
This chapter has been all about discovering and familiarizing yourself with SSMS. You learned:
How to connect to a database server and browse the databases held there.
To take advantage of available quick functions through the various context menus.
How to execute predefined queries through quick functions and custom queries using the SQL query window.
And finally, how to create a database diagram in SSMS and use that diagram to view and alter table designs, relationships, and properties.
In the next chapter, we’re going to build on what you’ve learned here and create a new database from the ground up within the SSMS IDE.
