Create your first Spring Boot web project
There’s no better way to learn than by doing, so let’s start developing our Watchlist app! 💪 In this chapter, you will see for yourself how easy and fast it is to start a new Spring project using Spring Boot. We'll start by creating the project skeleton using a Spring-provided online tool, and then we’ll add the homepage. Let's dive in!
Install the Spring Tool Suite
All you need to start developing and running Spring Boot applications is an IDE. Throughout this course, we will use Spring Tools 4 for Eclipse (a.k.a. Spring Tool Suite or STS), which is an Eclipse-based development environment customized for developing Spring applications. If you already are an Eclipse user, then you are going to feel right at home with STS.
Get a Maven overview
As you will see shortly, Spring Boot heavily relies on build tools to deliver a lot of its value to developers. In this course, we will use Maven to build and configure our application. Maven is a very popular Java build and dependency management tool that does the following tasks:
Compiling source code
Running tests
Packaging the result into
.jar(or.war) filesDeploying the results to a server
For the first task, meaning compiling the source code, applications usually need many .jar files from 3rd party libraries to be present on the classpath.
Downloading the correct version of each library from the internet can be a very tiresome and error-prone task. That’s where Maven as a dependency manager comes in! All you have to do is declare what libraries your application needs as a dependency in an XML file. This file is called POM (Project Object Model). When you try to build the project, Maven will first look at your local repository, which is usually a directory in your user folder. If it’s present there, it will use it. If not, it will download it from a remote repository (mvnrepository.com by default) into your local repository and then use it.
Another important Maven concept is plugins. Maven core does not know how to do tasks like compiling code, running tests, or packaging the compiled code. The actual tasks are done by plugins that extend the functionality of Maven core.
When it comes to running Maven, you have two options; either install it on your machine and then run it or use Maven Wrapper, which is basically the main Maven executor in your source code directory. The good news is that Spring Boot apps prefer using Maven Wrapper, so you don’t need to install anything, because it will be included in the source code folder when you initialize your app using Spring Initializr.
Initialize the Watchlist app using Spring Initializr
Now, to get started on our client’s request, we’ve got to start a new project. Spring Boot simplifies the (normally painful) process of starting a new Spring project with Initializr. It’s basically a web application that generates a Spring project structure based on selected features. The Initializr web app can be accessed in the following ways:
Directly from the website at https://start.spring.io.
Using the new Spring Starter Project wizard in STS.
Using the Spring Boot CLI.
Let’s go through the process using the website directly. The other two methods use the same service behind the scene and will produce the exact same result.
Go to the Spring Initializr website and enter com.openclassrooms as the group, watchlist as the artifact. Enter "web" to select the web dependency. Leave everything else with their default values and press the Generate Project button. Download the ZIP file to your computer then unzip it in your directory of choice.
Import the Spring Boot application into your IDE
Spring Initializr created a minimal Spring Boot app for us. In this section, we are going to import it into our IDEs and actually run it. We'll be using STS as the IDE for this project, but the process is quite similar for other Spring tools as well.
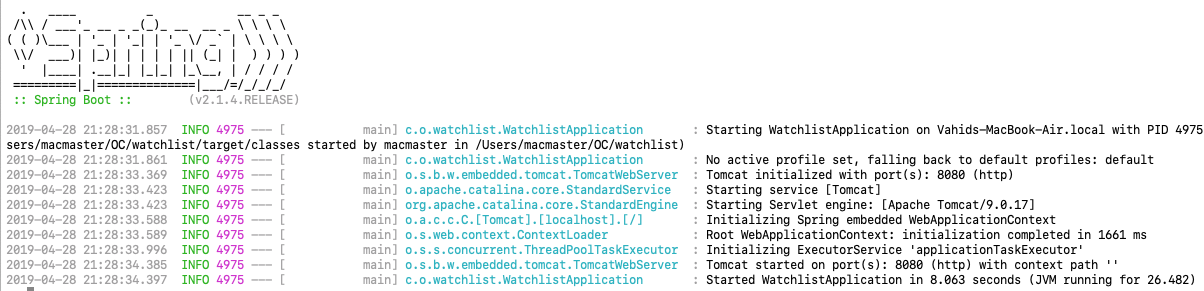
Import the project that you generated and unzipped. Follow the import wizard of STS/Eclipse (or your IDE of choice) and import it as a Maven project. Finally, when you are done, find the WatchlistApplication class and run it as Spring Boot application. You should see something similar to this on your IDE's console:
Import the GitHub repository of HTML files
Now that the project structure ready, we are going to add the application homepage which we don't have to create from the scratch! There are some pre-created static HTML pages in a GitHub Repository, ready to go!
In this section, we are going to import that repository into our IDE as a project, and in the next section, we will use one of the files to create the application's homepage.
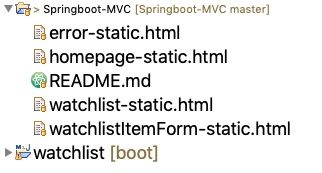
There are many ways to import the files of a GitHub repository into an IDE. If you have a preferred way, feel free to follow that! Otherwise, follow the Eclipse/STS import wizard and import the static HTML repository from Git as a general project. In this way, these files will be available when we want to add them to our project.
Add the homepage of Watchlist application
The basis of our project and the HTML pages of our application are ready! It's time to bring our application to life by creating its homepage. Let's get started!
Copy homepage-static.html file from Springboot-MVC git repository into the src/main/resources/templates directory and rename it to index.html. Add this element to the dependencies section of your pom.xml file. This will enable the application to serve web pages.
		<dependency>
			<groupId>org.springframework.boot</groupId>
			<artifactId>spring-boot-starter-thymeleaf</artifactId>
		</dependency>
Now start the server and go to http://localhost:8080 and you should see the application's homepage.

We have a working, albeit minimal, Spring Boot application that can easily run from our IDE. But what if we want to deploy and run it on a server machine? That’s in the next chapter!
Let’s recap!
We've gone through the main set up steps. Ask yourself if you remember the steps for:
Using Spring Initializr to bootstrap a new application.
Importing a Spring Boot project into STS.
Importing a GitHub repository into STS.
Adding a static HTML page to a Spring Boot application.
Ready to get our app ready to deploy? I'll meet you in the next chapter!
