Create your first Java Project on Eclipse
Now that you've got everything downloaded, what do you do with it? Let's dive in.
Create your first Java project
Configure and set up your project
Set the perspective.
Eclipse supports Java EE and Java SE. Java EE stands for "Enterprise Edition." It's built on top of Java SE, which stands for "Standard Edition." For our purposes, we'll use Java SE.
To change the perspective when you open a Java project, go to Window -> Perspective -> Open Perspective -> Java.
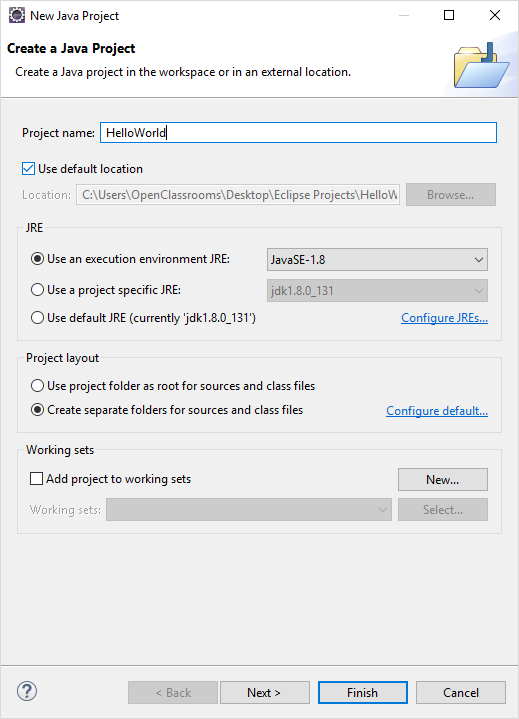
Start a new project
You can start a new project by going to File -> New -> Java Project. A new wizard will pop up that will automate the setup of your very first Java project!
You can now create a name for your project and ensure that there is an execution environment and development kit selected.
Use packages
On the left pane, you will see the Package Explorer that will contain all the files to your project. This enables you to use multiple files, classes, and more!
First, create a Java package because it is best practice, especially for web development. Web development projects typically contain multiple files and folders. A package will allow you to link all your files and is especially important for web development projects because Eclipse will put it all together for you with no extra hassle!
You can create one by right-clicking the name of the project. Right-click HelloWorld -> New -> Package -> Java -> Java Project.
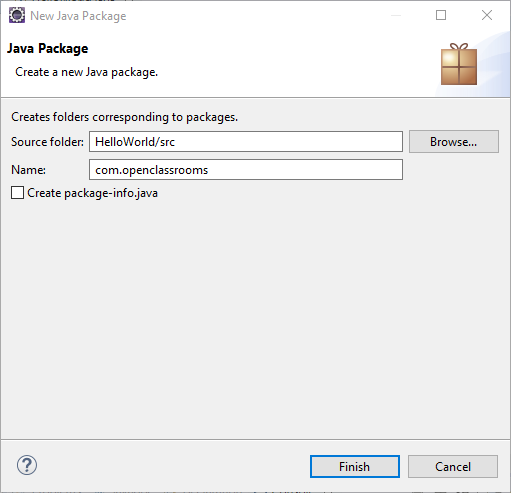
You can give the package a name like ‘com.openclassrooms’. This way you can connect many files together in this project under the umbrella of one web development project.
Create your first Java class on Eclipse
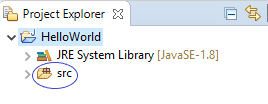
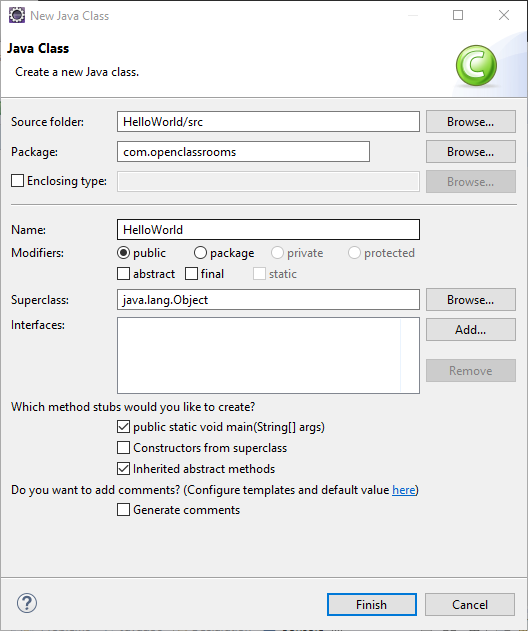
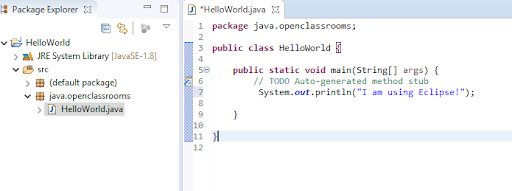
In the Project Explorer on the left pane, below the project name, you will see a folder called src. This is where you will save all of your class files. It is in this folder, where we will create our first class, HelloWorld. This class will print out the sentence “I am using Eclipse.” Try it out! Right click on src -> New -> Class
You can create the name of the class according to Java naming conventions. You will see that it will be a part of the package created and will contain a method stub ‘public static void main(String[] args) that we have been using. Make sure that is checked and click Finish.
Most of your code has been written for you, and all you have to add is the line to print out your statement. Put the following in line 7 in your main method for the output statement.
System.out.println("I am using Eclipse!");Your code should look like this now
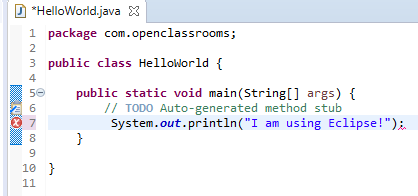
Your code is being compiled as you are typing it! Go ahead and make an error and see how it looks! You will see below, that I changed the semicolon to a colon and there is a red ‘X’ on the left side to indicate a compilation error! Neat, huh?
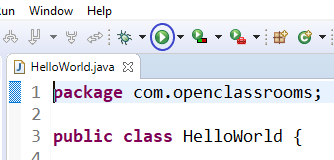
So lastly, let’s run the code. And guess what? That’s easy too! Just click on the Run button under the toolbar. It looks like a green play button shown below:
It will prompt you to save and launch. You can check the box that says to “Always save resources before launching.”
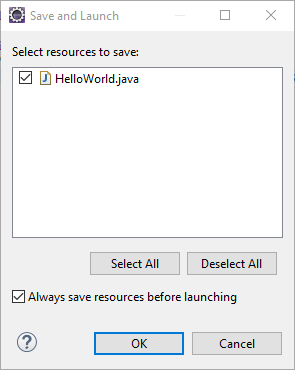
Click OK and your output will show in the console below!

That wasn't so bad, was it? Eclipse is designed to make Java development easier and automates so much in one package. You can see how there is so much more functionality than the text editors that we used like Notepad and VS Code. After using an IDE like Eclipse, it's really hard to go back to just plain text editors with so many extensions and plug-ins that have to be installed and updated.
Now that you have learned how to make a simple program using Eclipse, let’s look at all the other fun things that you can do with it!
Summary
You should now feel comfortable:
Setting up a first Java project
Creating a package
Creating a class
Running and saving a program
