Use Eclipse to Send Fixes to a Repository
Open the project and fix syntax errors
Now that we've cloned the repository, let's start working with it!
Let's review what we've seen and clarify:
To open the project, click in the Package folder and open up HelloBugs.java.
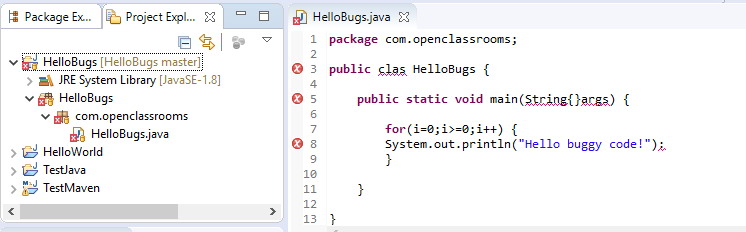
Take a look at the code, let’s fix the first issue. There are some syntax errors. Do you see where they might be?
Uh oh!! Remember how I said that when you write, or in other words, build your program, you are compiling it? Well, Eclipse caught the syntax errors! They should show up on the left side as red Xs next to the line number. Let’s go over them one by one! When there is an error, you will see a red X on the left so let’s go through them and see what they are.
There is an X next to lines 3, 5, and 8 so let’s check them out. This is the syntax issue that was in Github:
Line 3: The X next to the first line says that class is spelled wrong. That fixed that problem!
Line 5: Hmm...the second one isn’t so clear but perhaps we're supposed to have square brackets instead of curly ones.
Line 8: That one indicates that a semicolon is needed. Oh! Looks like there is another error in line 7!
Line 7: It looks like we didn’t declare i. Remember that all variables have to be declared so add a variable declaration above the for loop and that should do it!
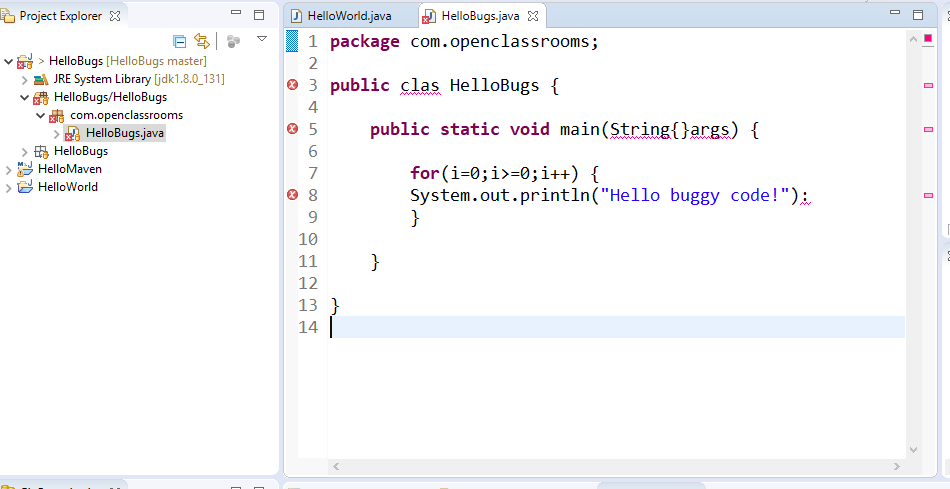
So here is the corrected code!
Let’s run it and see what happens!
Oh no….It looks like the output isn’t ending. This is called an infinite loop. This is where we come to the second issue reported in the Github repository.
Fix an infinite loop issue
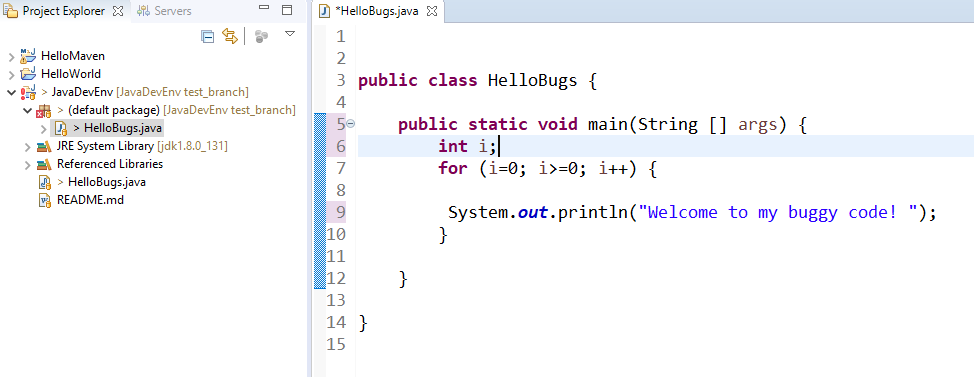
An infinite loop is a logic error. That means that the will compile because the syntax is correct, but when we run the program, there is another problem. This is a great time to use a debugger. Let's use Eclipse’s awesome debugger to figure out where this infinite loop starts.
Let's recap how we've fixed our infinite loop problem:
Let's put a breakpoint at the for loop in line 7. Click on the The Step Into and Step Over. As you go through the code, you can see what i is equal to. If you see i >= 0 at what point does the for loop end? Great question because with the way it’s written, this loop will never end! So you need to make it end.
How about we have it spit out the line of code three times. Do that by changing it to for (i=0; i<3; i++) .
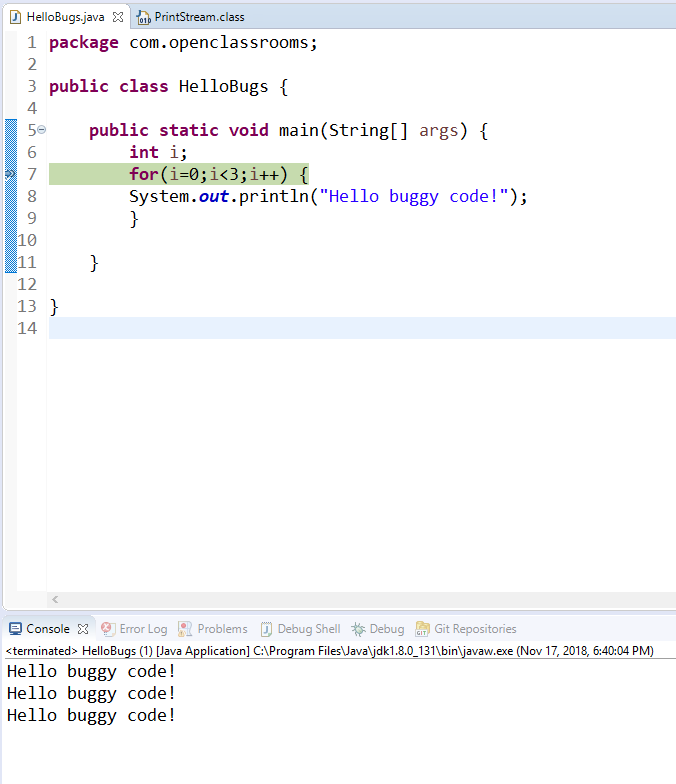
Great! That fixed the infinite loop issue! Pat yourself on the back.
Commit and push fixes to Github
Now that we've fixed our issues, let's put the corrected code back on Github!
Let's go through the major steps:
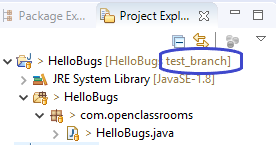
Start by creating a new branch and push the fixes up! Right-click on the project that you have in Eclipse: Team -> Switch To -> New Branch. This is what we've named Test Branch. When you click through the pop-ups, you will see that you have checked out of the master branch. This means you're not on the master branch, but on your own new branch. As you can see, it now has the name of my new branch on the project.
Now, you need to commit, or in other words, save the changes that you’ve made in HelloJava.java and push it back to Github in the new branch. Right-click on the Project -> Team -> Commit.
You will see that the file that has changed shows up in the Git Staging tab. If it does not, click on the green plus sign.
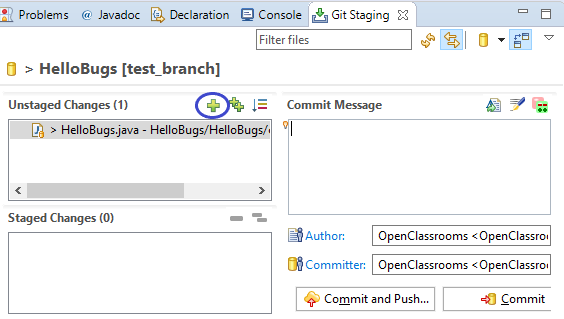
Here, Eclipse allows you to commit and push it back to Github. Choose that option.
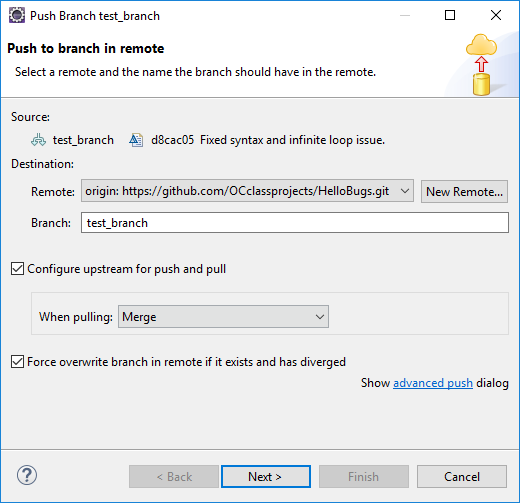
Click OK on all the pop-ups. Now go to Github.com and hit Refresh. You should now see that the new branch has sent the changes to Github!
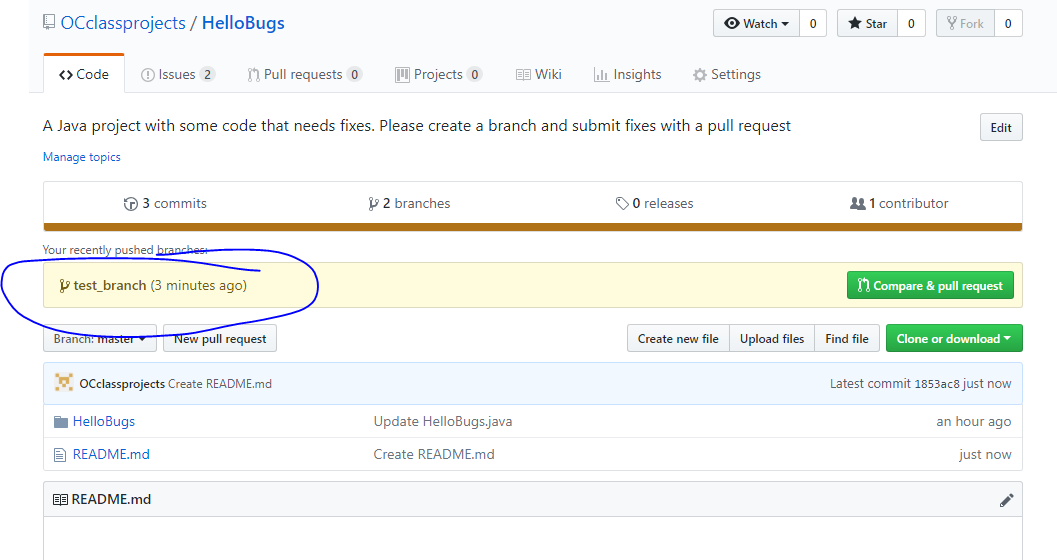
Now click on Compare & pull request. A pull request informs the project owner that you've made changes. This way, the project owner will be notified, and they can check out what you've done. This is why it's important to put in a message about the information that was changed.
Below is a pull request with a description of the changes that were made to HelloBugs.java. We've requested that the owner of the repository merge the fixes to the master branch. Merging, as you may guess, means integrating the changes into the master branch (if the owner so chooses).
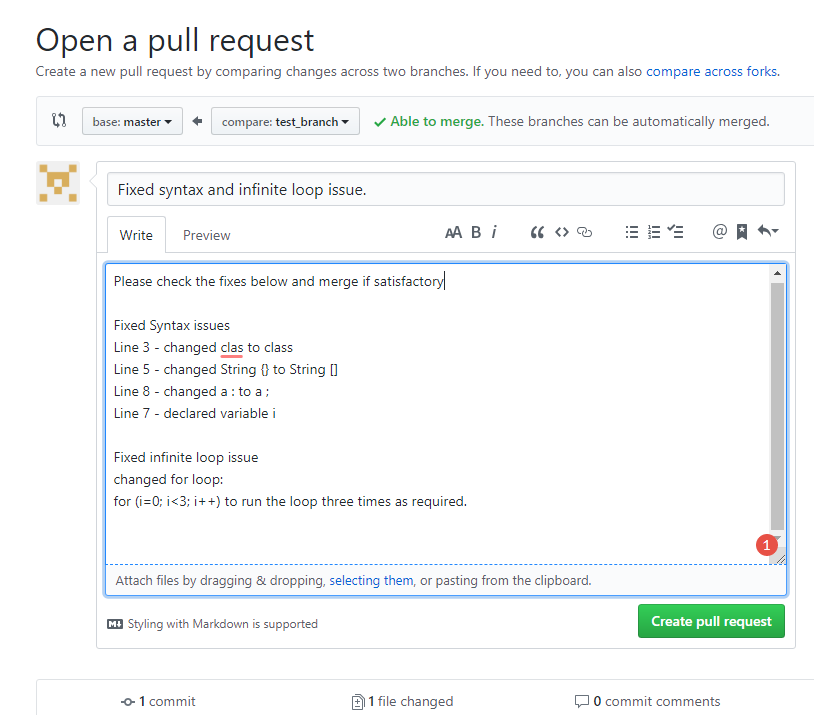
Once this pull request is made, the repository owner can take the changes and integrate them to the master branch.
Congratulations! You have officially contributed to an open source project! You can also use this process when you are working with a team of developers on a Java project.
Summary
You now know how to:
Find and fix basic errors in existing code.
Commit your changes and push your branch back onto Github.
Do a pull request to notify a project owner of changes.
