Load a Dataset into Tableau
Let’s load our first dataset together!
Connect to Your Files (AKA Data Sources)
We are going to use .xlsx files (this one and this one) to help us familiarize you with loading data into Tableau. Later on in Part 3, we will load the dataset that was provided in the first chapter: Read Your Mission!
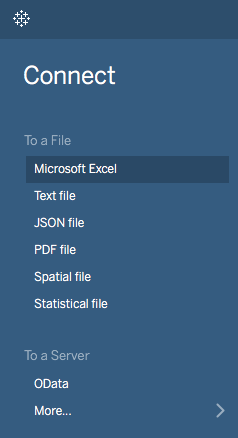
Once you have downloaded the .xlsx files onto your local drive, select the Microsoft Excel option in Section 1 of the Connect/Open Page, as shown below.
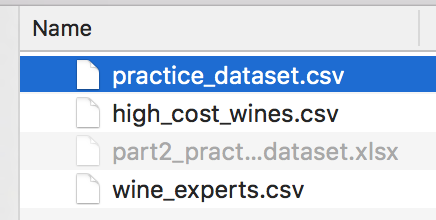
In the navigation window that pops up, navigate to where you have stored the .xlsx files and select the file named part2_practice_dataset.xlsx, as shown below.
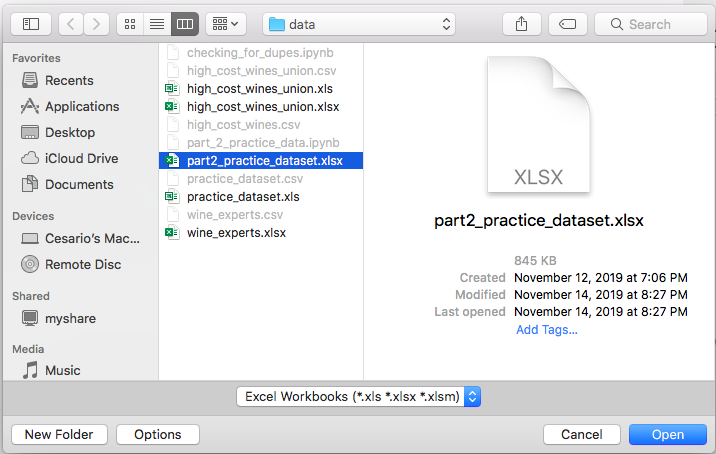
Once you select the file and click Open, you’ll be taken to the Data Source page.
Get Familiar With The Data Source Page
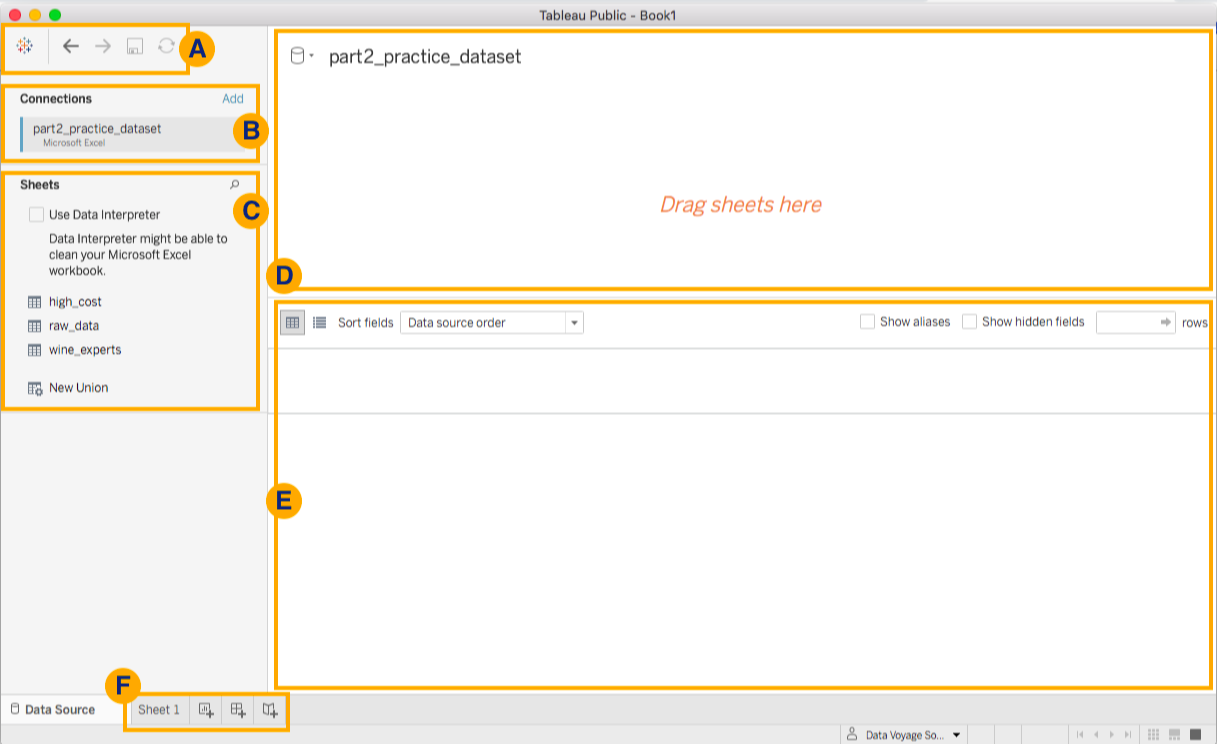
Section A
Up in the top-left corner of the screen, you should see the menu of icons shown below.

The first icon will take you to the previous Connect/Open page. The left and right arrows are the Undo and Redo buttons, respectively.
The floppy disk icon is the Save button. You won’t be able to save just yet, because we have not made any actual changes. When we do save later on, you can use this button.
Section B
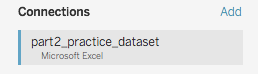
Section B is the Connections area in the Data Source page. This area shows you what data sources are connected to the workbook.
Do you see the blue Add link? This link allows you to add additional data sources. The workbooks we create in this course will only need one data source connection. So, we will not be using this section other than to make sure we are connected to the correct data file.
Section C
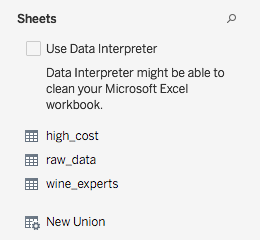
Let’s move on to Section C! In this area, you will see a checkbox to enable Data Interpreter, the Excel Sheets or Files that you can connect to, and a button icon for New Union.
Use the Data Interpreter Feature
Tableau has a feature called Data Interpreter. If you enable this feature (by clicking the checkbox), you allow Tableau to automatically complete some data cleaning tasks for you. You even get a summary file of all the completed tasks.
You will be learning how to complete certain data cleaning tasks yourselves. Therefore, we will not be using the Data Interpreter feature in this course. But you should definitely explore it on your own! Here is a resource if you are interested in learning more!
Identify the List of Available Dataset Tables
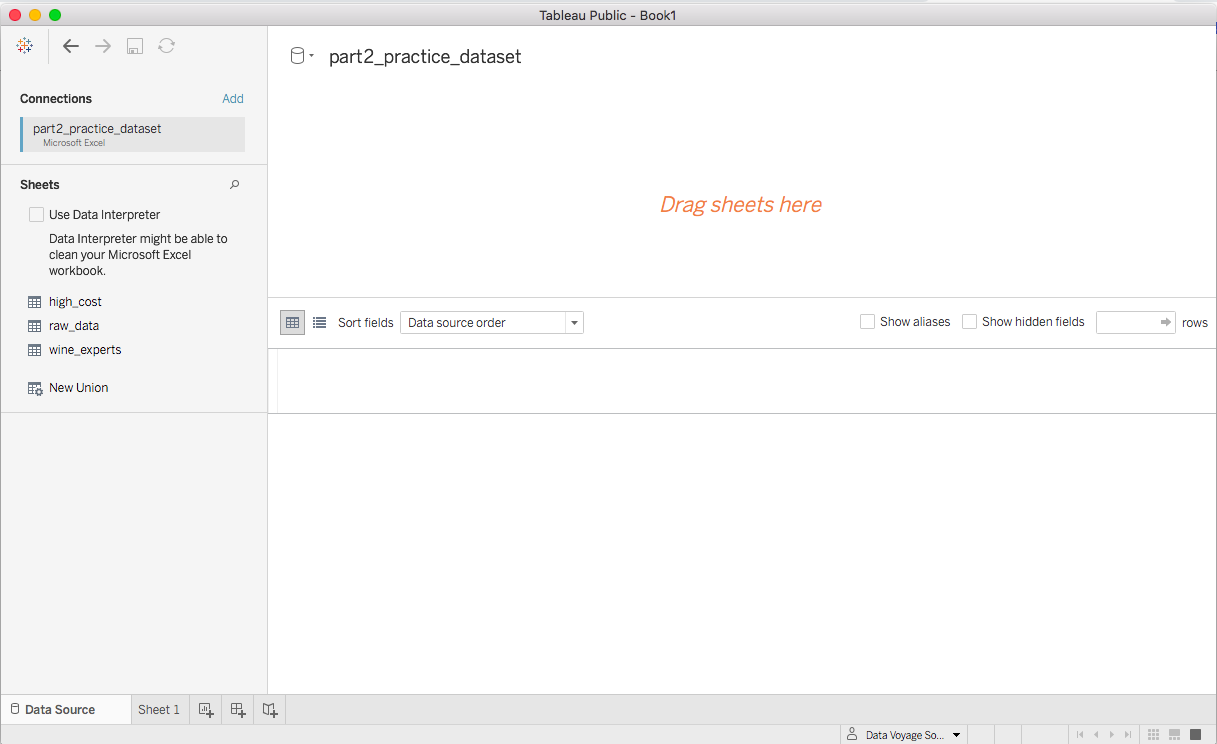
Because you connected to an Excel file, you will see a list of the sheets that exist in that .xlsx file. If the Excel workbook only has one sheet, you will only see one sheet name in this area. Here, you can see that the part2_practice_dataset.xlsx file contains three sheets: high_cost, raw_data, and wine_experts.
Use the New Union Button
The last area of interest in Section C is the option to create a New Union.
Having this option in this area streamlines the process of combining datasets. There are two main ways to combine data.
You can:
Join data based on a common field or identifier column.
Use a union to stack your data tables.
Connecting to CSV Files
I want to show you what Section C looks like when you connect to flat files such as .csv files (comma separated values files).
Going back to the Connect/Open page, I am going to select the Text file option in the Connect pane.

Once you connect to a flat file, you will notice that Tableau is pretty smart and can register other files with the same extension type.
Even though I only selected one file to connect to, Tableau will list others found in the folder that are available as data source connections.
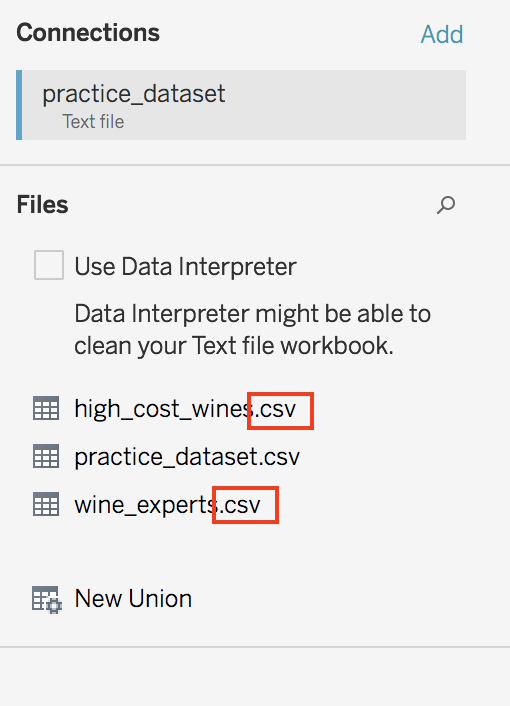
I think that’s really neat! :D
Summary
It is very important to get familiar with the Data Source page.
Section A allows you to connect to the homepage, undo/redo your work, and save.
Section B shows you the data sources that are connected to the workbook.
Section C allows you to enable Data Interpreter, see a list of the the Excel Sheets or Files that you can connect to and combine data.
The focus of the next chapter is on how to union and join data tables in Tableau. We will review the remaining sections (D, E, and F) of the Data Source page.
