Display Posts in the Feed

Use Custom Filters in Templates
Now that we have Photo and Blog instances in a sorted list, we can display them in the feed. Let's walk through how we can do that.
First, let’s update the home.html template to iterate through the new list of Photo and Blog instances.
# blog/templates/blog/home.html
{% extends 'base.html' %}
{% block content %}
    <h2>Your Feed</h2>
    {% for instance in photos_and_blogs %}
        ...
    {% endfor %}
{% endblock content %}
We want to display Blog and Photo posts differently, so we need a way of distinguishing between the different instance types in the template.
In pure Python, you could check the type() of the object, like so:
if type(instance) is models.Blog:
    # handle blog
However, when using the Django template language, you can’t access built-in Python functions such as type() . So, to retrieve the model type, you need to write a custom filter.
When creating custom tags and templates, specify them in a directory templatetags in a Django app. This means Django will automatically pick them up. You also have to include an empty __init__.py file so that the directory templatetags is considered a Python package.
Let's place a custom filter in a file called blog_extras.py .
(ENV) ~/fotoblog (master)
→ mkdir blog/templatetags
(ENV) ~/fotoblog (master)
→ touch blog/templatetags/__init__.py
(ENV) ~/fotoblog (master)
→ touch blog/templatetags/blog_extras.py
A custom filter can take one or two arguments. Whatever is returned by the function is displayed in the template as the result of the applied filter.
In our case, we will use the filter to return a string representation of the model type that the instance belongs to, which will only require providing one argument, the instance.
# blog/templatetags/blog_extras.py

def model_type(instance):
    return type(instance).__name__
To ensure these filters are accessible in the templates, create a Library instance called register and register the filters to it using the @register.filter decorator.
# blog/templatetags/blog_extras.py
from django import template

register = template.Library()


@register.filter
def model_type(value):
    return type(value).__name__
Now that you have the filter, you can use it to distinguish between the model instances in the template.
Use the following syntax to use the filter:
{{ instance|model_type }} This will output either 'Blog' or 'Photo' .
We want to use this output in an if statement, to dictate whether to display a photo or a blog. When using the Django template language, you can create conditional statements using the {% if <condition> %} tag. You can also use our filters in this tag.
To use our custom tag in a template, we need to load it into the template context using the {% load %} tag. In this case, we add {% load blog_extras %} .
To use the template in the homepage template, add:
{% extends 'base.html' %}
{% load blog_extras %}
{% block content %}
    <h2>Your Feed</h2>
    <div class="grid-container">
        {% for instance in blogs_and_photos %}
            {% if instance|model_type == 'Blog' %}
                // Blog shown here
            {% elif instance|model_type == 'Photo' %}
                // Photo shown here
            {% endif %}
        {% endfor %}
    </div>
{% endblock content %}
Add in the necessary HTML to display the blog and photo posts.
{% extends 'base.html' %}
{% load blog_extras %}
{% block content %}
    <h2>Your Feed</h2>
    <div class="grid-container">
        {% for instance in blogs_and_photos %}
            {% if instance|model_type == 'Blog' %}
                <div class="post">
                    <a href="{% url 'view_blog' instance.id %}">
                        <h4>Blog Post: {{ instance.title }}</h4>
                        <img src="{{ instance.photo.image.url }}">
                        <p><strong>Written by {{ instance.contributors.all|join:", " }}</strong></p>
                        <p>{{ instance.date_created }}</p>
                    </a>
                </div>
            {% elif instance|model_type == 'Photo' %}
                <div class="post">
                    <img src="{{ instance.image.url }}">
                    <p>{{ instance.caption }}</p>
                    <p><strong>Taken by {{ instance.uploader }}</strong></p>
                    <p>{{ instance.date_created }}</p>
                </div>
            {% endif %}
        {% endfor %}
    </div>
{% endblock content %}
Let’s see how it looks in the browser!
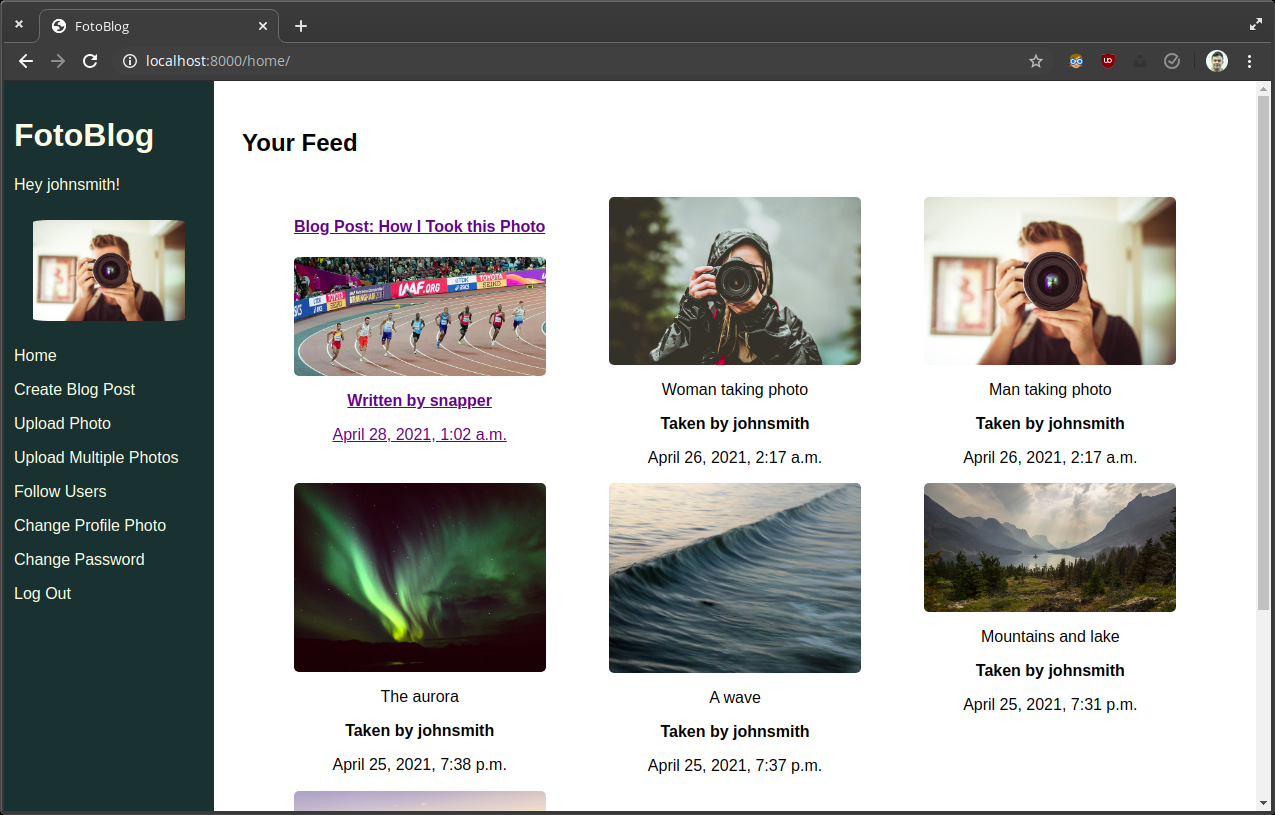
It looks good, although there are a few things that can make it cleaner. Let’s address those next.
Use Custom Tags in Templates
At the moment, the uploader’s username is next to each photo. It’s OK, but we want a more dynamic display! Let's walk through how to do this!
Instead of seeing "Taken by <your-username>," it would be nice to see "Taken by you."
To do this, use a custom tag.
Custom tags are similar to custom filters but use the {% %} syntax instead.
The next step is to access the template context in our custom tag and use it to display either "you" or the poster’s username, depending on who is logged in.
To register a function as a custom tag, use the @register.simple_tag decorator. To include the template context in the tag, add the argument takes_context=True . When adding this flag, the first argument of the tag function must be named context.
Let’s write a custom tag. Whatever the tag returns will be displayed in the template when we use it.
from django import template

register = template.Library()


@register.simple_tag(takes_context=True)
def get_poster_display(context, user):
    if user == context['user']:
        return 'you'
    return user.username
Now incorporate it into the view.
{% extends 'base.html' %}
{% load blog_extras %}
{% block content %}
   <h2>Your Feed</h2>
   <div class="grid-container">
       {% for instance in blogs_and_photos %}
           // Blog shown here
           {% elif instance|model_type == 'Photo' %}
               <div class="post">
                   <img src="{{ instance.image.url }}">
                   <p>{{ instance.caption }}</p>
                   <p><strong>Taken by {% get_poster_display instance.uploader %}</strong></p>
                   <p>{{ instance.date_created }}</p>
               </div>
           {% endif %}
       {% endfor %}
   </div>
{% endblock content %}
And you can see how it looks.
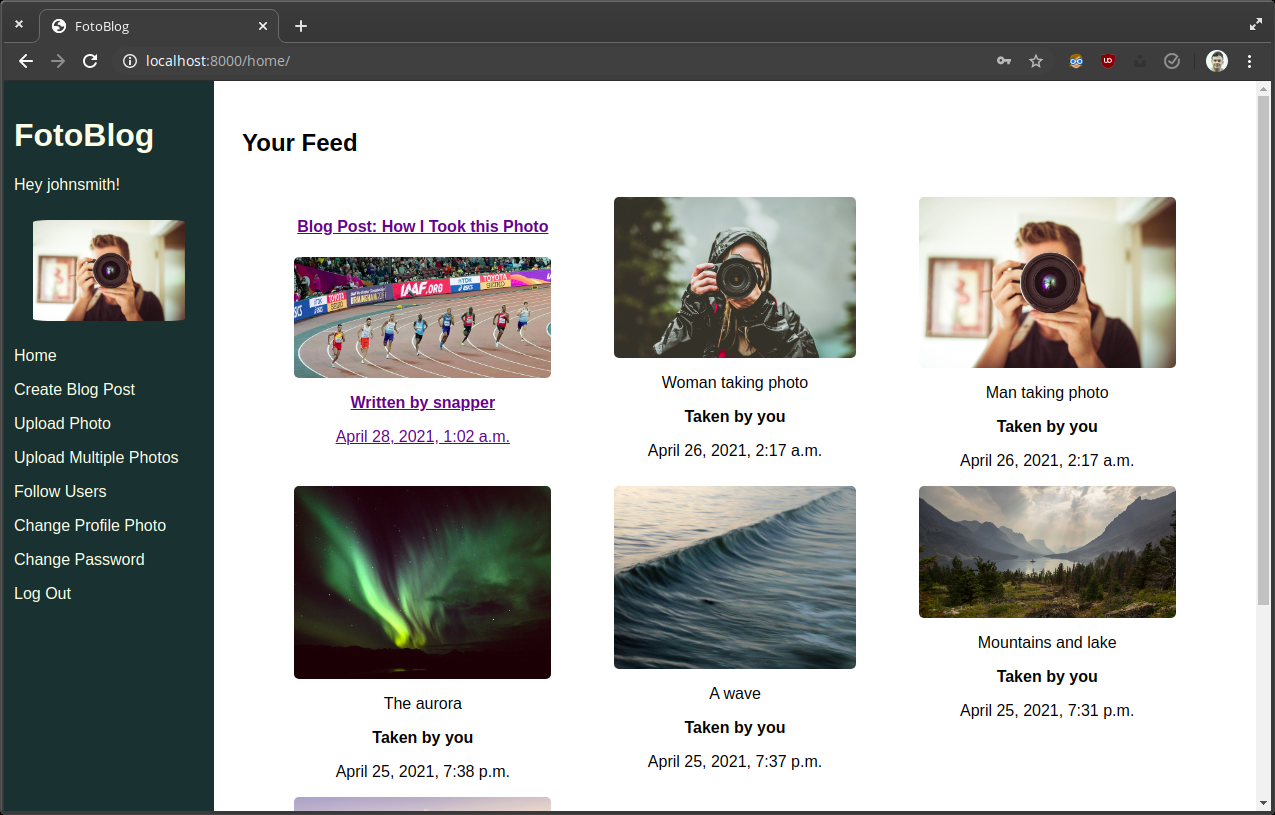
That looks better, but those dates are still a bit ugly. Next, you are going to create your own filter to display them properly.
Exercise: Create Your Own Custom Filter
Dynamically display a string based on how recently a post was added.
You will need to:
Create a filter called
get_posted_at_displaythat takes an argument,time.Compare the value with that of
django.utils.timezone.now(). This returns a time zone aware datetime for the server and should be used overdatetime.datetime.now().Return a string based on the following conditions:
0 < x < 60 minutes -
'Posted x minutes ago.'1 < x < 24 hours -
'Posted x hours ago'x > 24 hours -
'Posted at HH:MM dd mmm yyeg17:53 04 Apr 21. Usestrftimeto create this.
Use your new filter to display the time the post was posted in the feed.
When you have added your custom filter, check it against the solution in GitHub.
Now that we have built the feed, let’s clean up the template and create reusable template elements with the {% include %} tag.
Utilize Reusable Partial Templates Using the {% include %} Tag
We have already used the {% extends %} tag to allow each template on the site to be built off a reusable base template.
You can also use the {% include %} tag to create reusable elements that can be repeated in multiple templates.
When we build our feed, we want to display every blog post and photo in the same manner every time. We may also want to display our blog and photo posts in different areas of the site. To do this, create a partial template. Let's walk through it together.
We are going to store our partial templates in blog/templates/blog/partials/ .
First, let's create a partial template to display a Blog instance, called blog_snippet.html .
Create the snippet just like a normal template. You can copy over the template segment from your feed template, but since you’re working with a Blog instance, rename instance to blog .
{% load blog_extras %}
<div class="post">
    <a href="{% url 'view_blog' blog.id %}">
        <h4>Blog Post: {{ blog.title }}</h4>
        <img src="{{ blog.photo.image.url }}">
        <p><strong>Written by {{ blog.contributors.all|join:", " }}</strong></p>
        <p>{{ blog.date_created|get_posted_at_display }}</p>
    </a>
</div>
Now include the blog snippet in the feed template using the with keyword to rename the instance variable as blog in the partial template.
Replacing the blog section of the feed template with the snippet looks like this:
{% extends 'base.html' %}
{% load blog_extras %}
{% block content %}
    <h2>Your Feed</h2>
    <div class="grid-container">
        {% for instance in blogs_and_photos %}
            {% if instance|model_type == 'Blog' %}
                {% include 'blog/partials/blog_snippet.html' with blog=instance %}
            {% elif instance|model_type == 'Photo' %}
                ...
            {% endif %}
        {% endfor %}
    </div>
{% endblock content %}
Let’s see how the feed looks using a snippet instead.
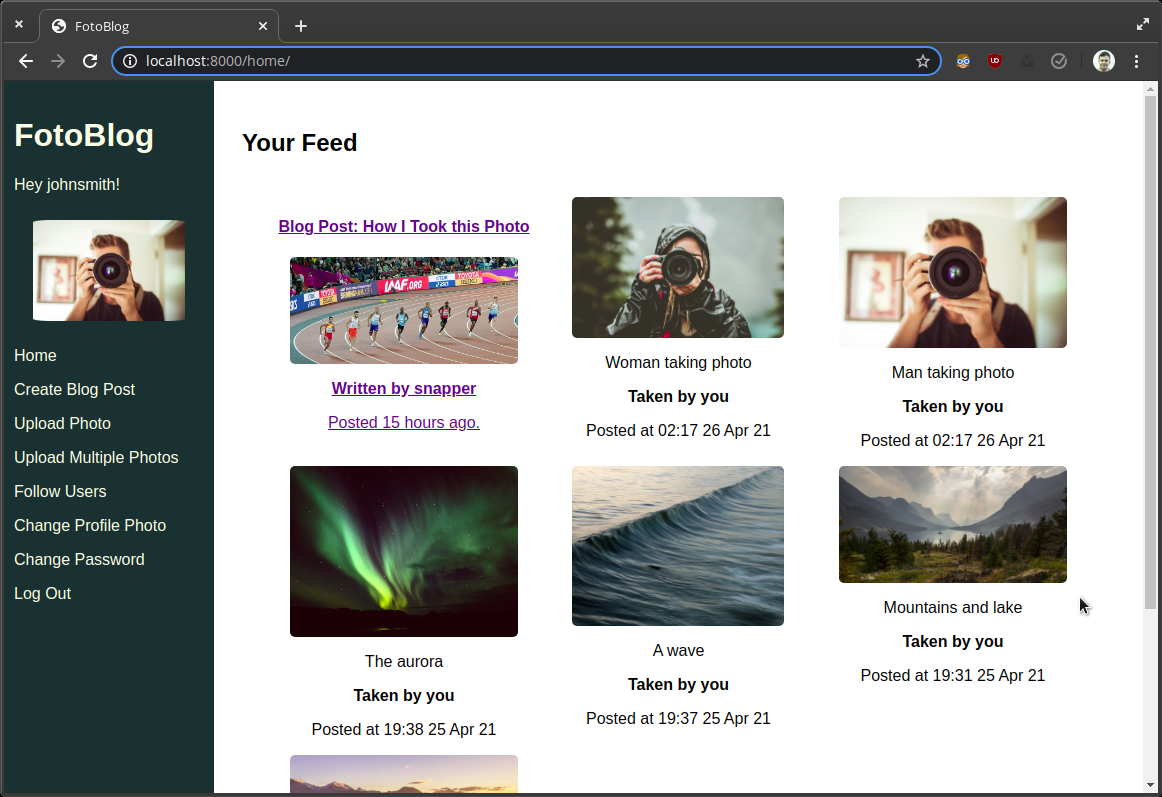
It looks exactly the same! Just as intended.
The benefit of using a partial template like this is that you can reuse this snippet in any template across your site. It also makes the original template cleaner and more readable.
Next, you are going to do the same with the photo section. Then, you will use this snippet to create the photo feed.
Exercise: Create a Partial Template to Display a Photo Post
Now that you have learned how to use a partial template to display a Blog instance, it is your turn to do the same for a Photo .
You can use this snippet in both the standard and the photo feed.
You will need to:
Create a new partial template at
blog/templates/blog/partials/photo_snippet.html.Copy the current photo section from
feed.htmlintophoto_snippet.html.Use the
{% include %}tag to includephoto_snippet.htmlinfeed.html.Create the photo feed by building out
photo_feed.html. Reusephoto_snippet.htmlin this template using the{% include %}tag.Include the photo feed in the URL patterns and link to it from the sidebar.
Once you finish, you can check your code against the solution.
Let's Recap!
Create and register custom filters and tags to make utility functions you can use within templates, rendering objects and attributes in a repeatable fashion.
Use the
{% include %}tag to create reusable elements in your templates.
Now that you have displayed all of the posts in the feed, let’s see how to improve page performance and usability with pagination.
