Create a Virtual Machine With a Disk Image

Create a Virtual Machine
There are two ways to create a VM:
Create one on its own (without an operating system) and install the OS using an ISO file.
Directly download a VM along with its operating system.
The drawback of the first method is that it takes time. You’ll have to download an ISO file (i.e., from the Ubuntu website), set up the file as a CD/DVD image on your virtual CD/DVD drive, and go through the entire standard installation procedure.
The other solution involves downloading a VM from specific websites. What’s downloaded is not actually a VM, but the virtual hard drive of a VM, which already contains an operating system. That is very useful!
Recognize the Different File Formats
Most of the virtual hard drives are in VDI, VMDK, or VHD format. These files only contain the VM hard drive, but not its configuration.
VHD is the original Microsoft format for Virtual PC.
VMDK is the original VMware format.
VDI is the format used by VirtualBox.
You will also encounter OVA and OVF files, which are generally the exported and imported VM formats:
OVF is only the description of the VM’s configuration. It must be linked to a disk file (VDI, VMDK, VHD, etc.).
OVA is a package containing the description of the VM’s configuration and its disk file (VDI, VMDK, VHD, etc.). In short, OVA = OVF + VDI/VMDK/VHD.
Where can I download these types of files?
There are several websites where you can directly download VM files. Here are the best-known:
First, we’ll look at how to create a VM with a disk image. Then in the next chapter, you’ll see how to create a VM with an ISO file.
Step 1: Download the Disk Image
Download the Ubuntu 12.10 disk image.
Unzip it (the 7z format can be unzipped with a tool such as 7zip).
Step 2: Launch the .vbox File on VirtualBox
Open the unzipped file, and you will see that it contains two files: .vbox and .vdi.
The simplest way to create the VM is to open the .vbox file, which will automatically launch VirtualBox and build the VM from the file.
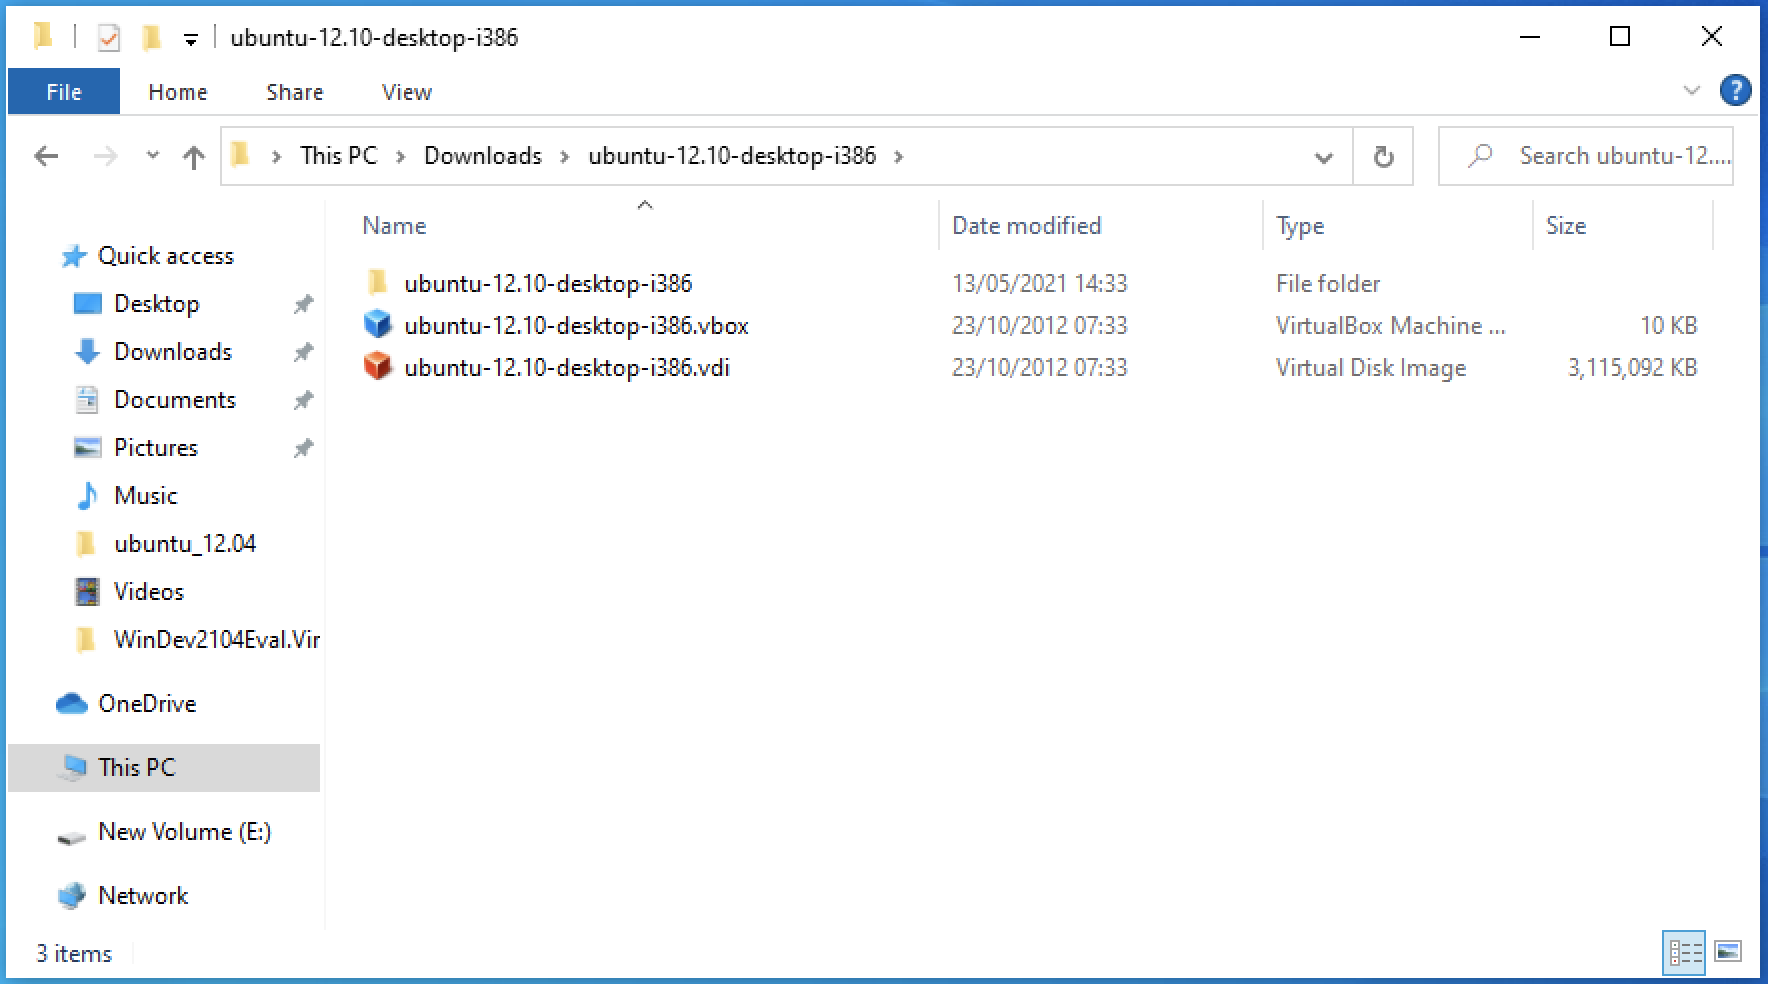
Depending on the website you chose to download your VM, there may not necessarily be a .vbox file.
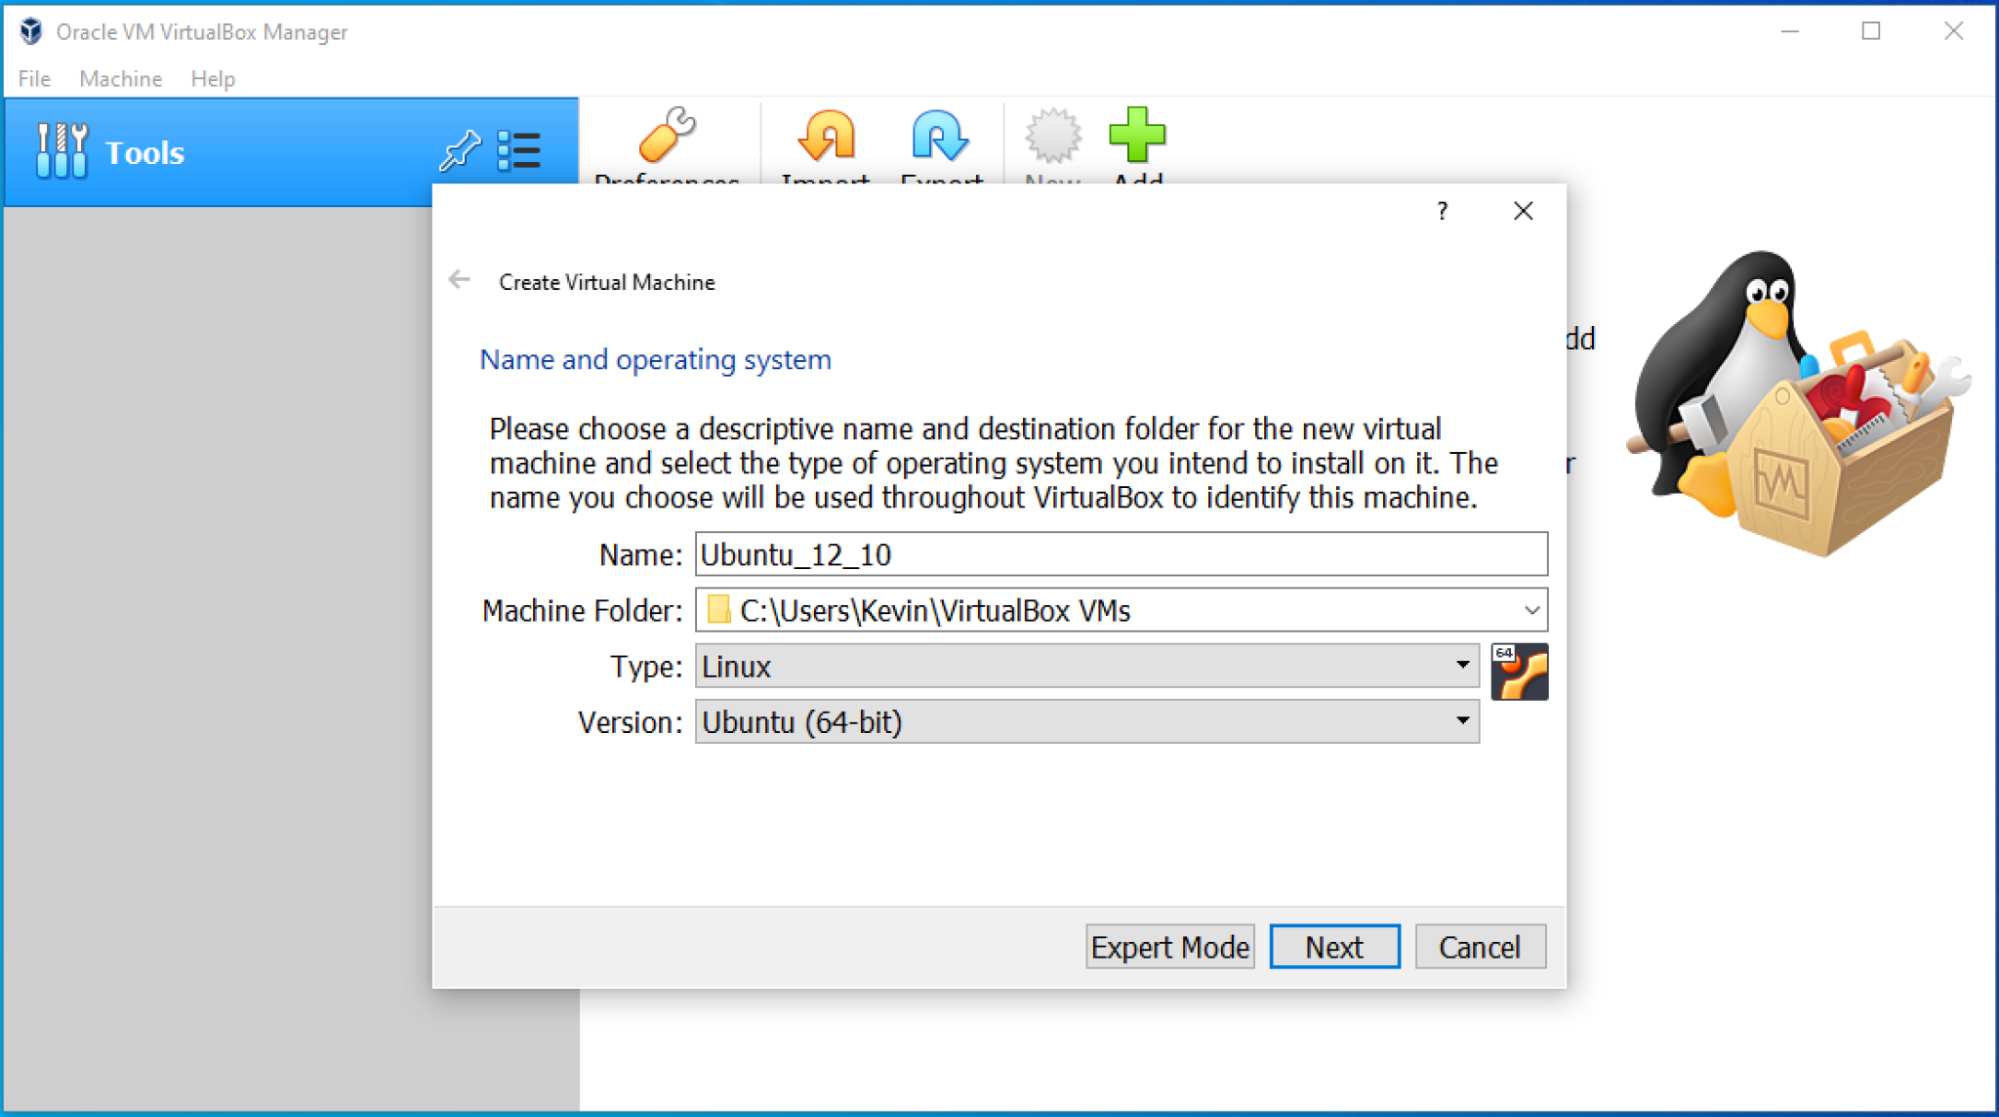
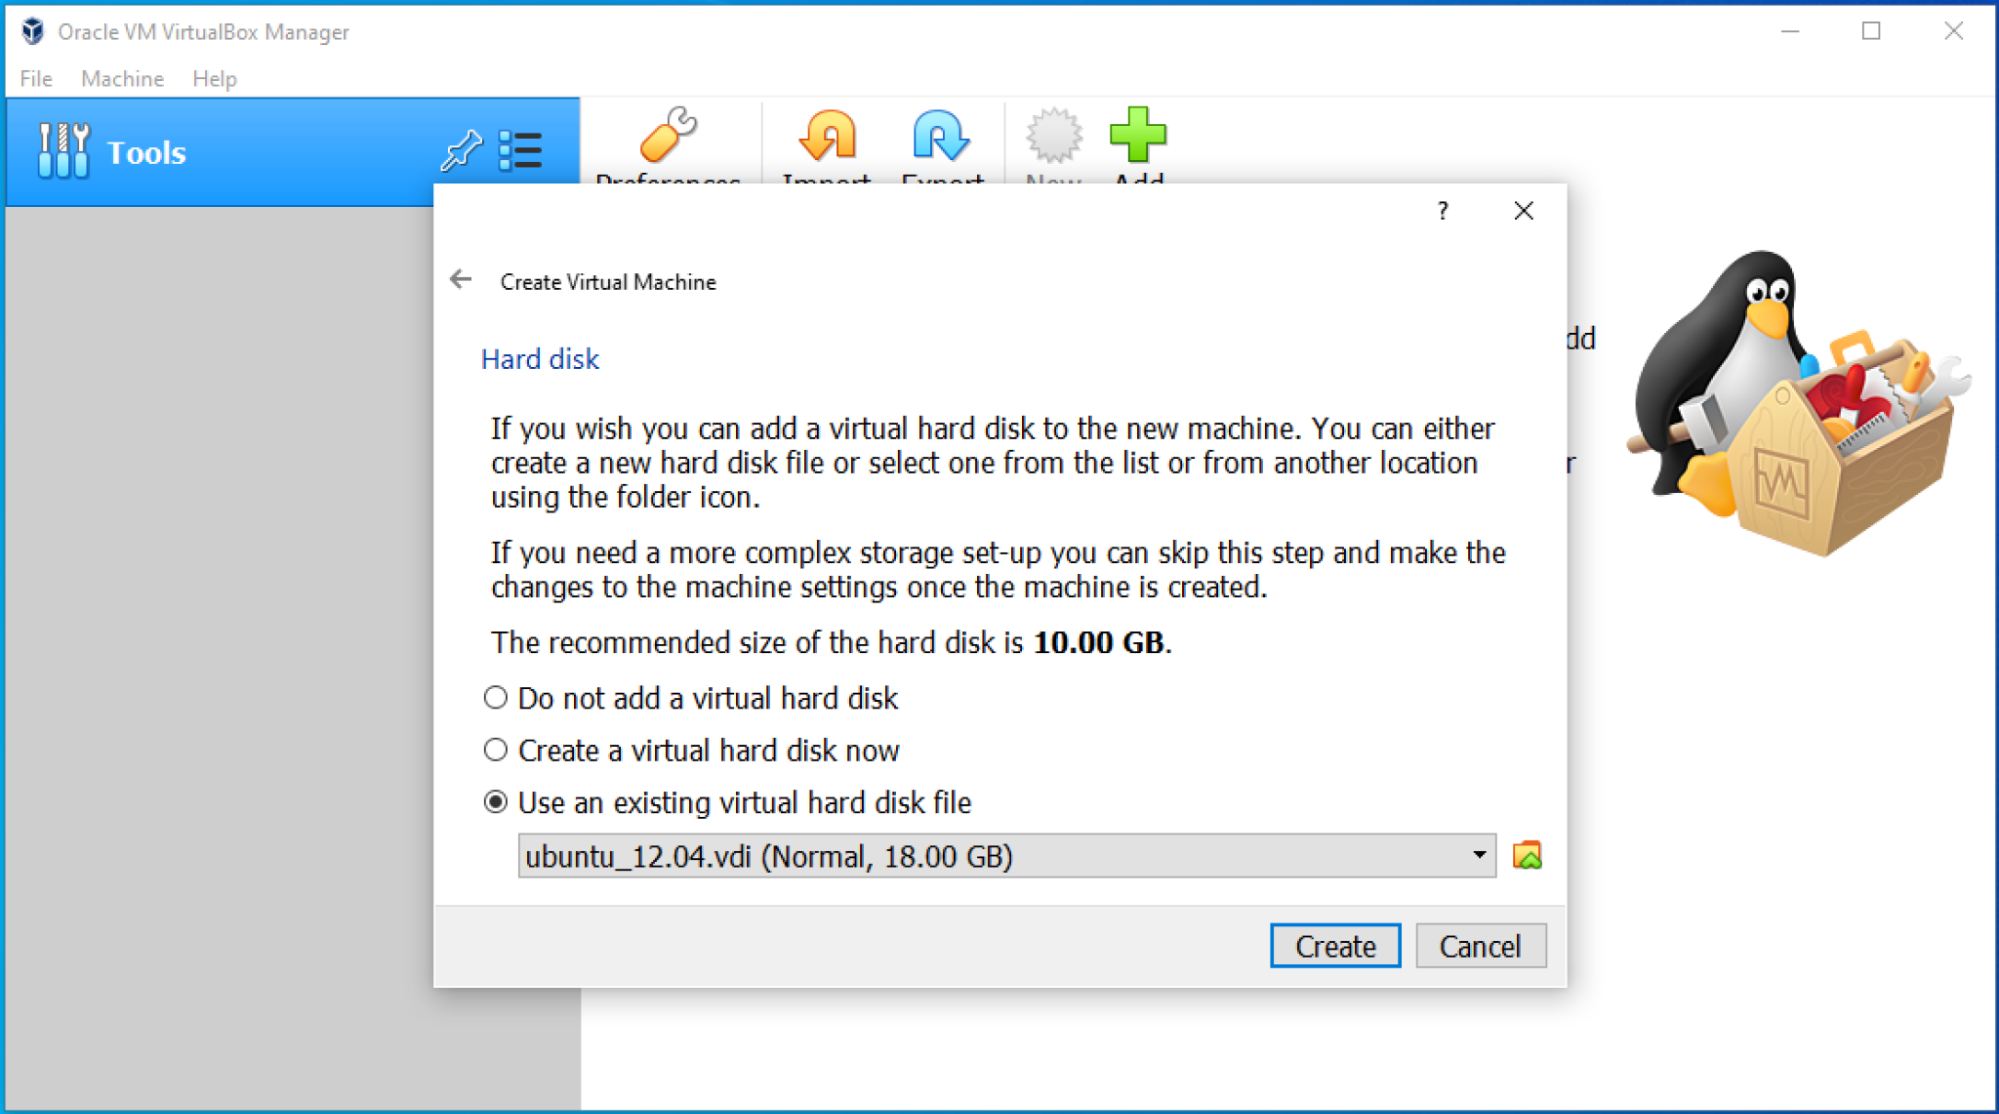
The other solution in VirtualBox is to click on New in the menu to create a new VM and follow these steps:
Give your VM a recognizable name.
Choose the location where you will save the VM’s configuration files and disk images.
Select the system you want to install on your VM. This option will not install the selected operating system but will select a hardware configuration (RAM, type and size of disk, network devices, audio, etc.) that is suitable for the system.
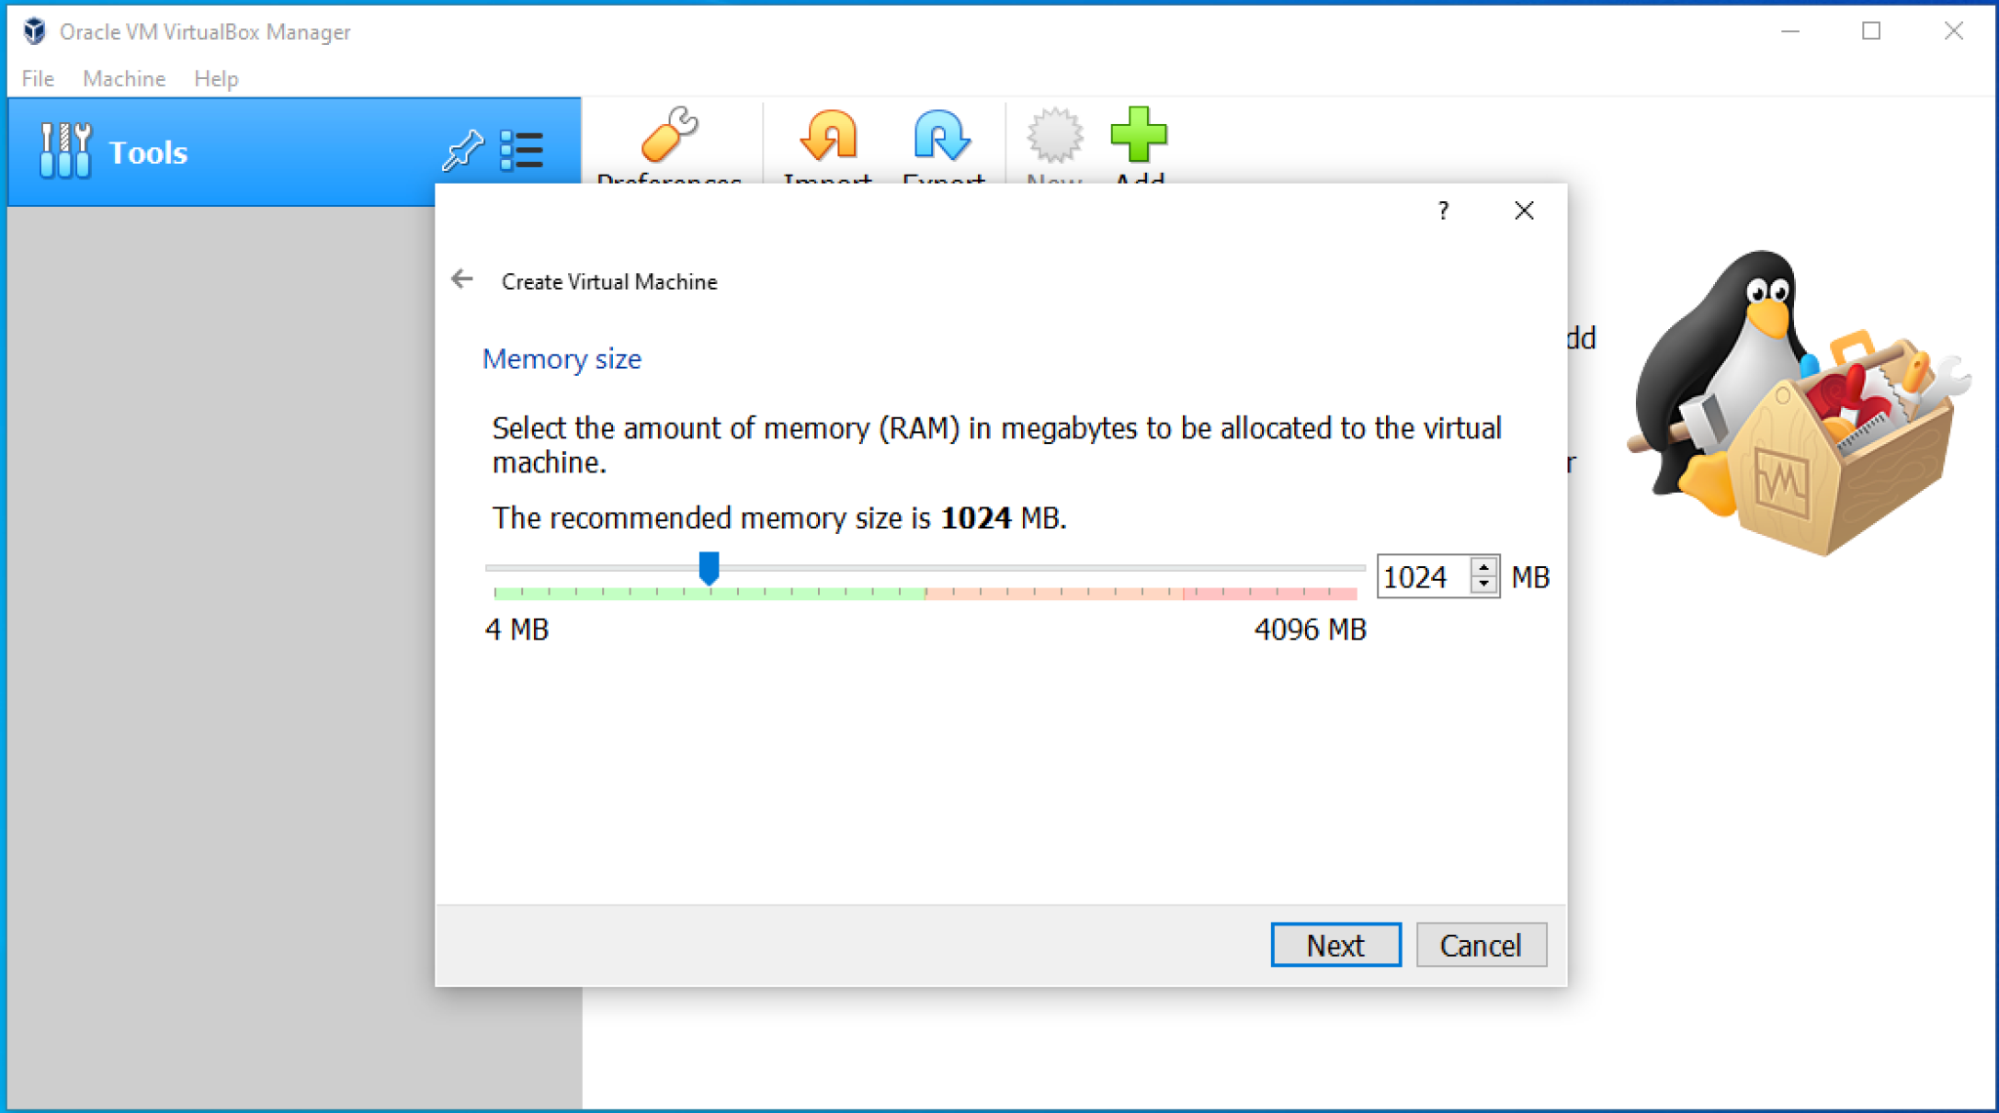
Adjust the amount of RAM.
You can create a new disk or link the VM to an existing hard drive. In this case, choose the third option and select the .vdi file you downloaded.
Congrats! Your VM has now been created.
Take a Closer Look at Steps 1 - 2
Watch the video below to see how I create a virtual machine from a disk image step by step:
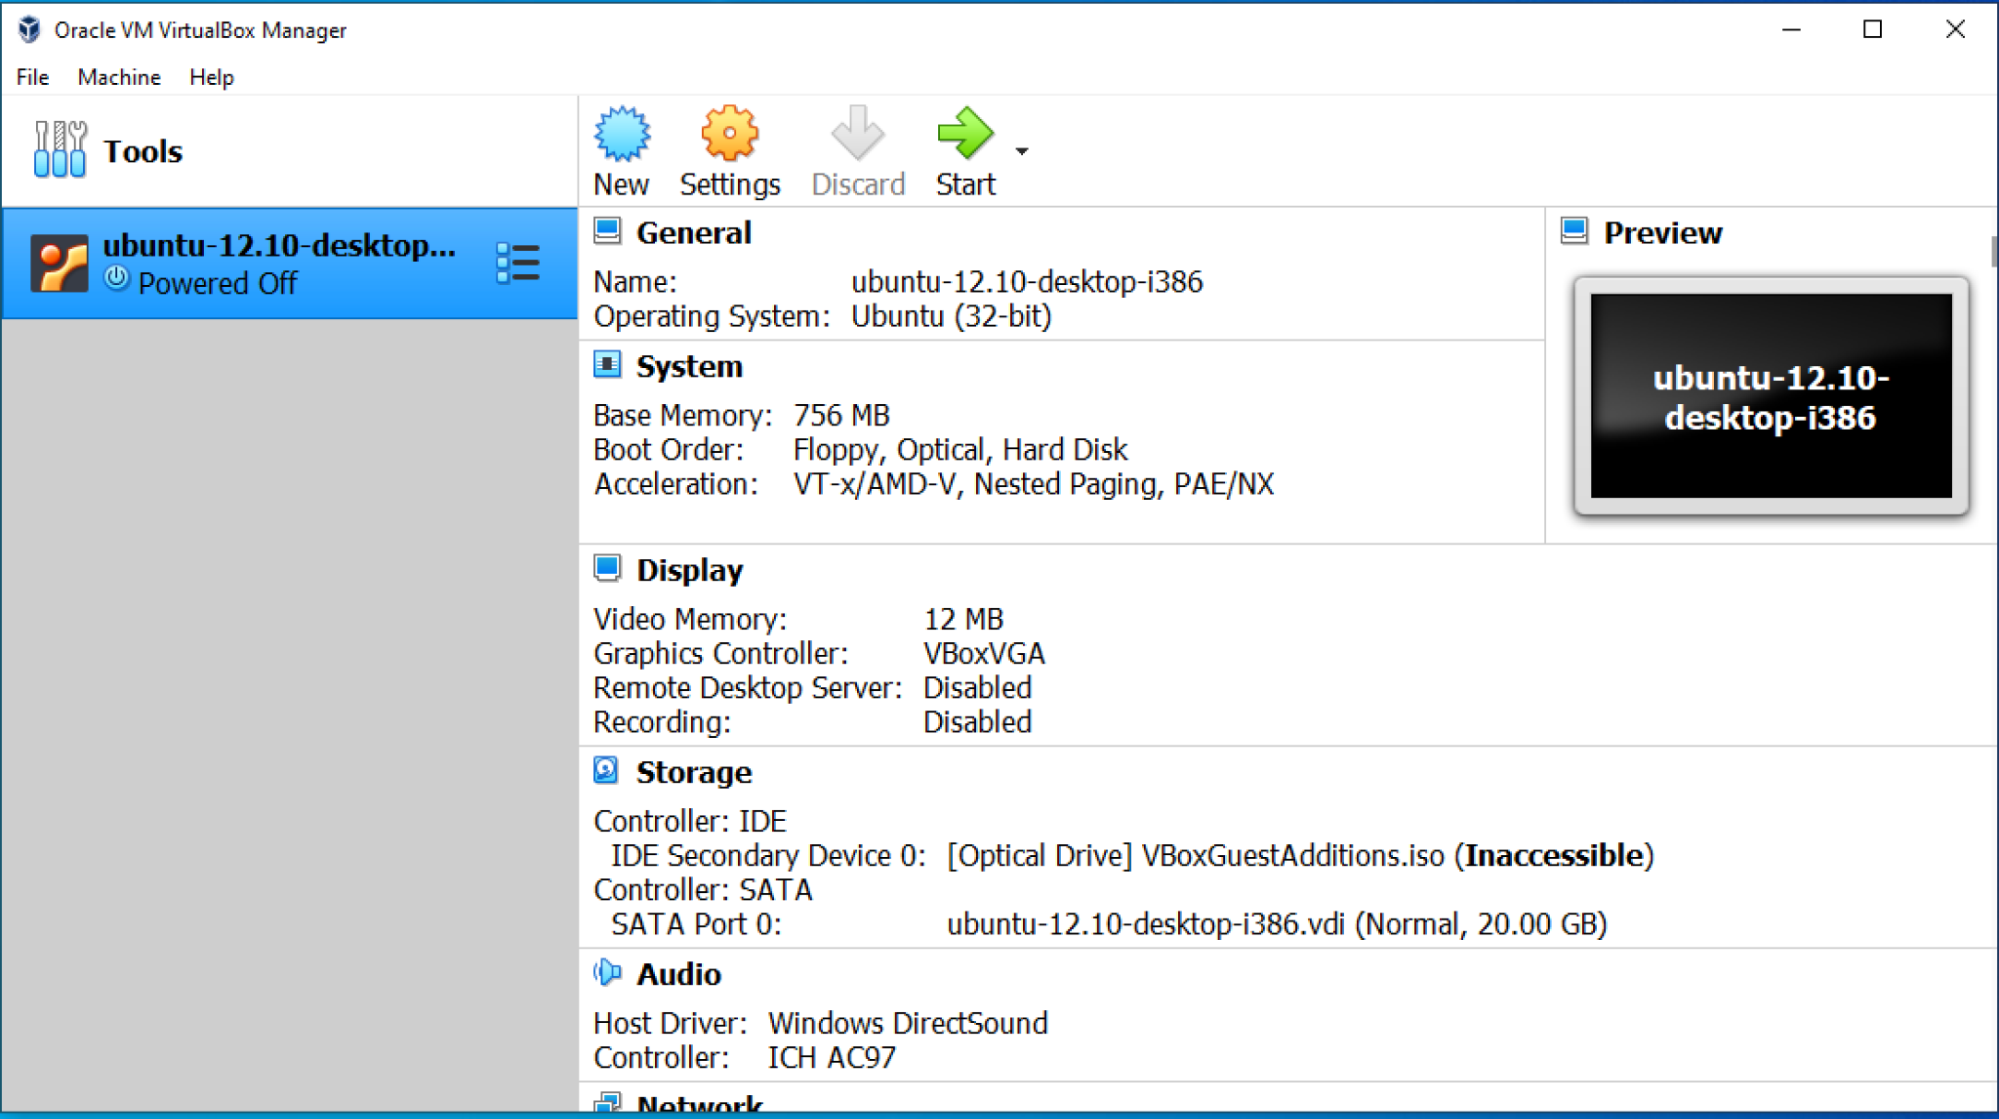
Step 3: Adjust the Virtual Machine Settings
Select your VM ubuntu_12.10 and click on Settings.
The most important settings to ensure your VM runs smoothly are in the System section: the resources allocated to it.
You can adjust:
RAM in the Motherboard tab (To maintain stability, VirtualBox does not allow you to allocate more than half of your host machine’s RAM).
The number of vCPUs in the processor tab.
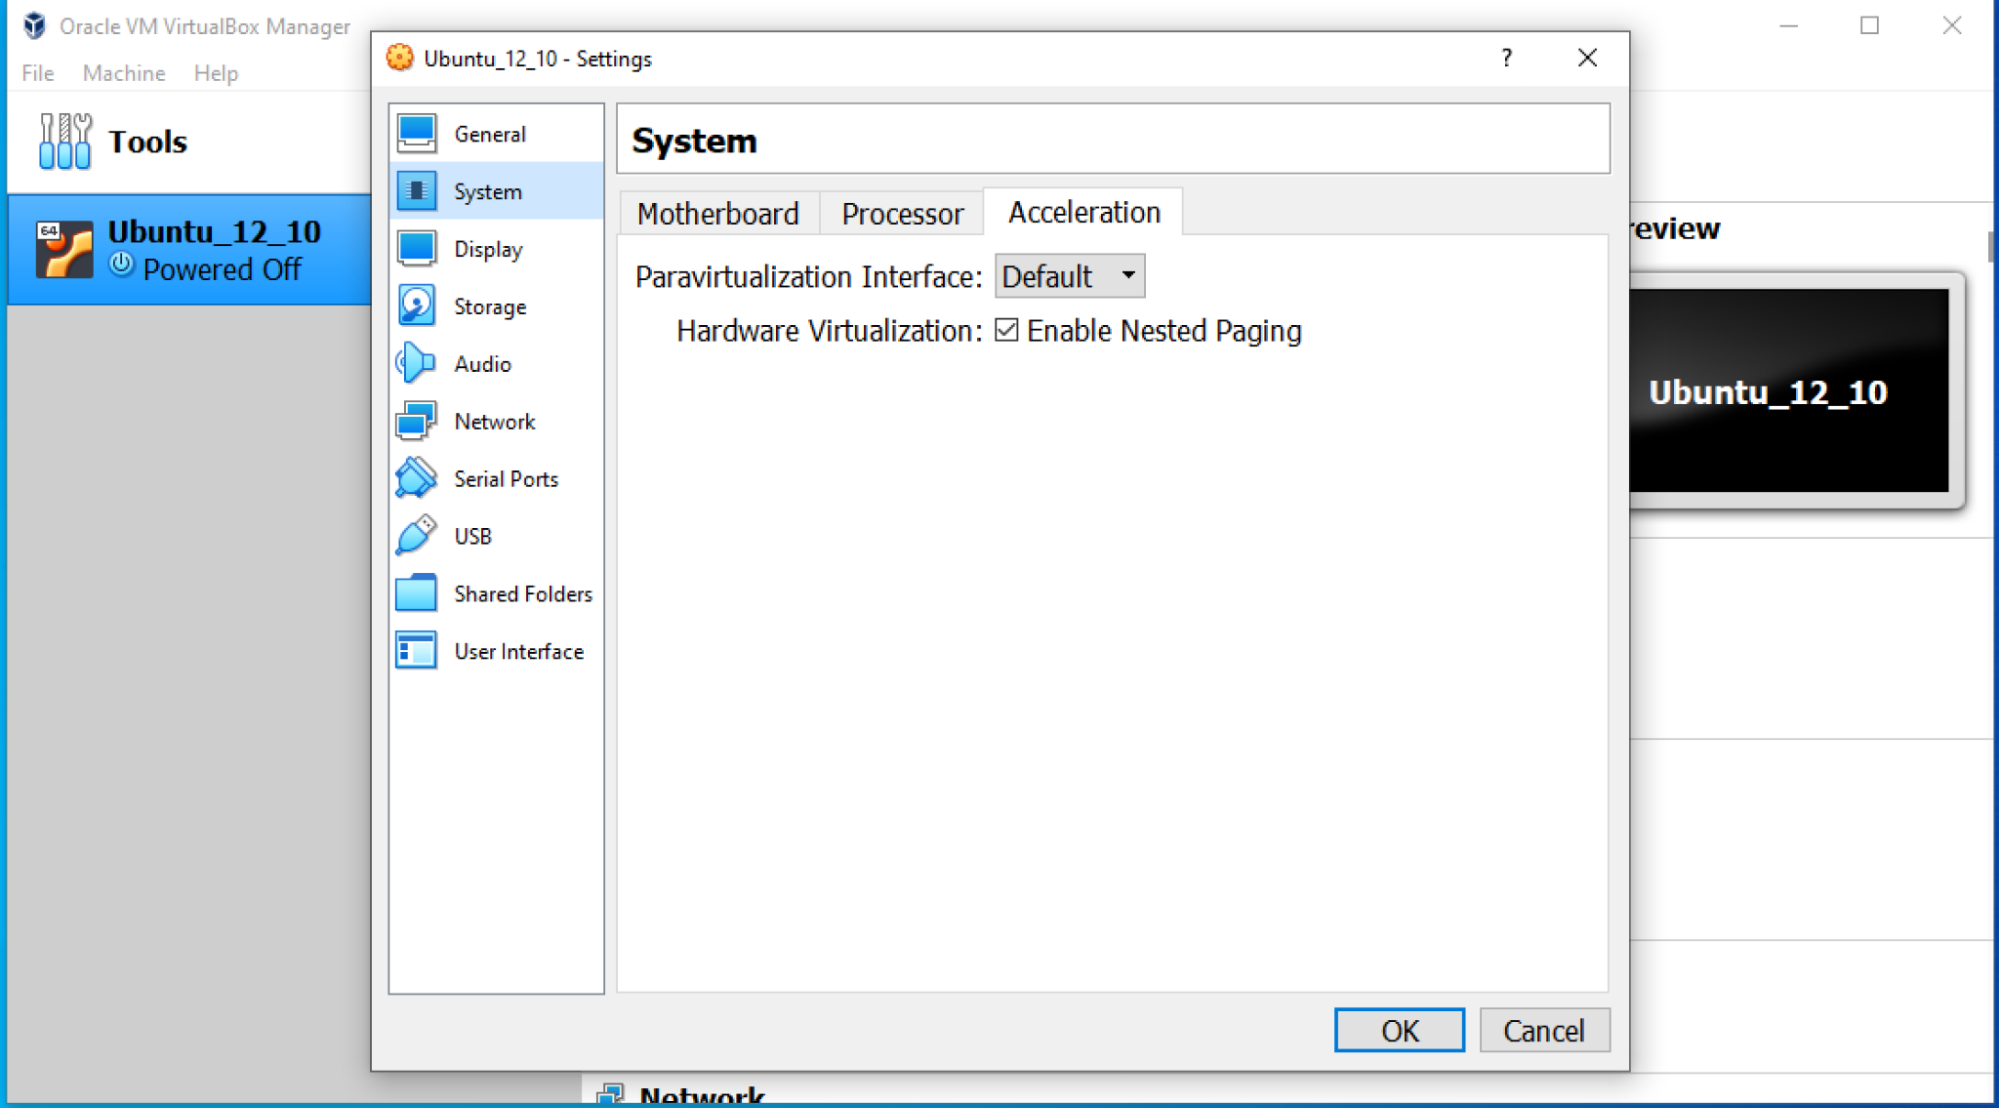
You can also activate the VT-x or AMD-V option if your host machine supports it. Otherwise, you’ll have to deselect this option in your VMs.
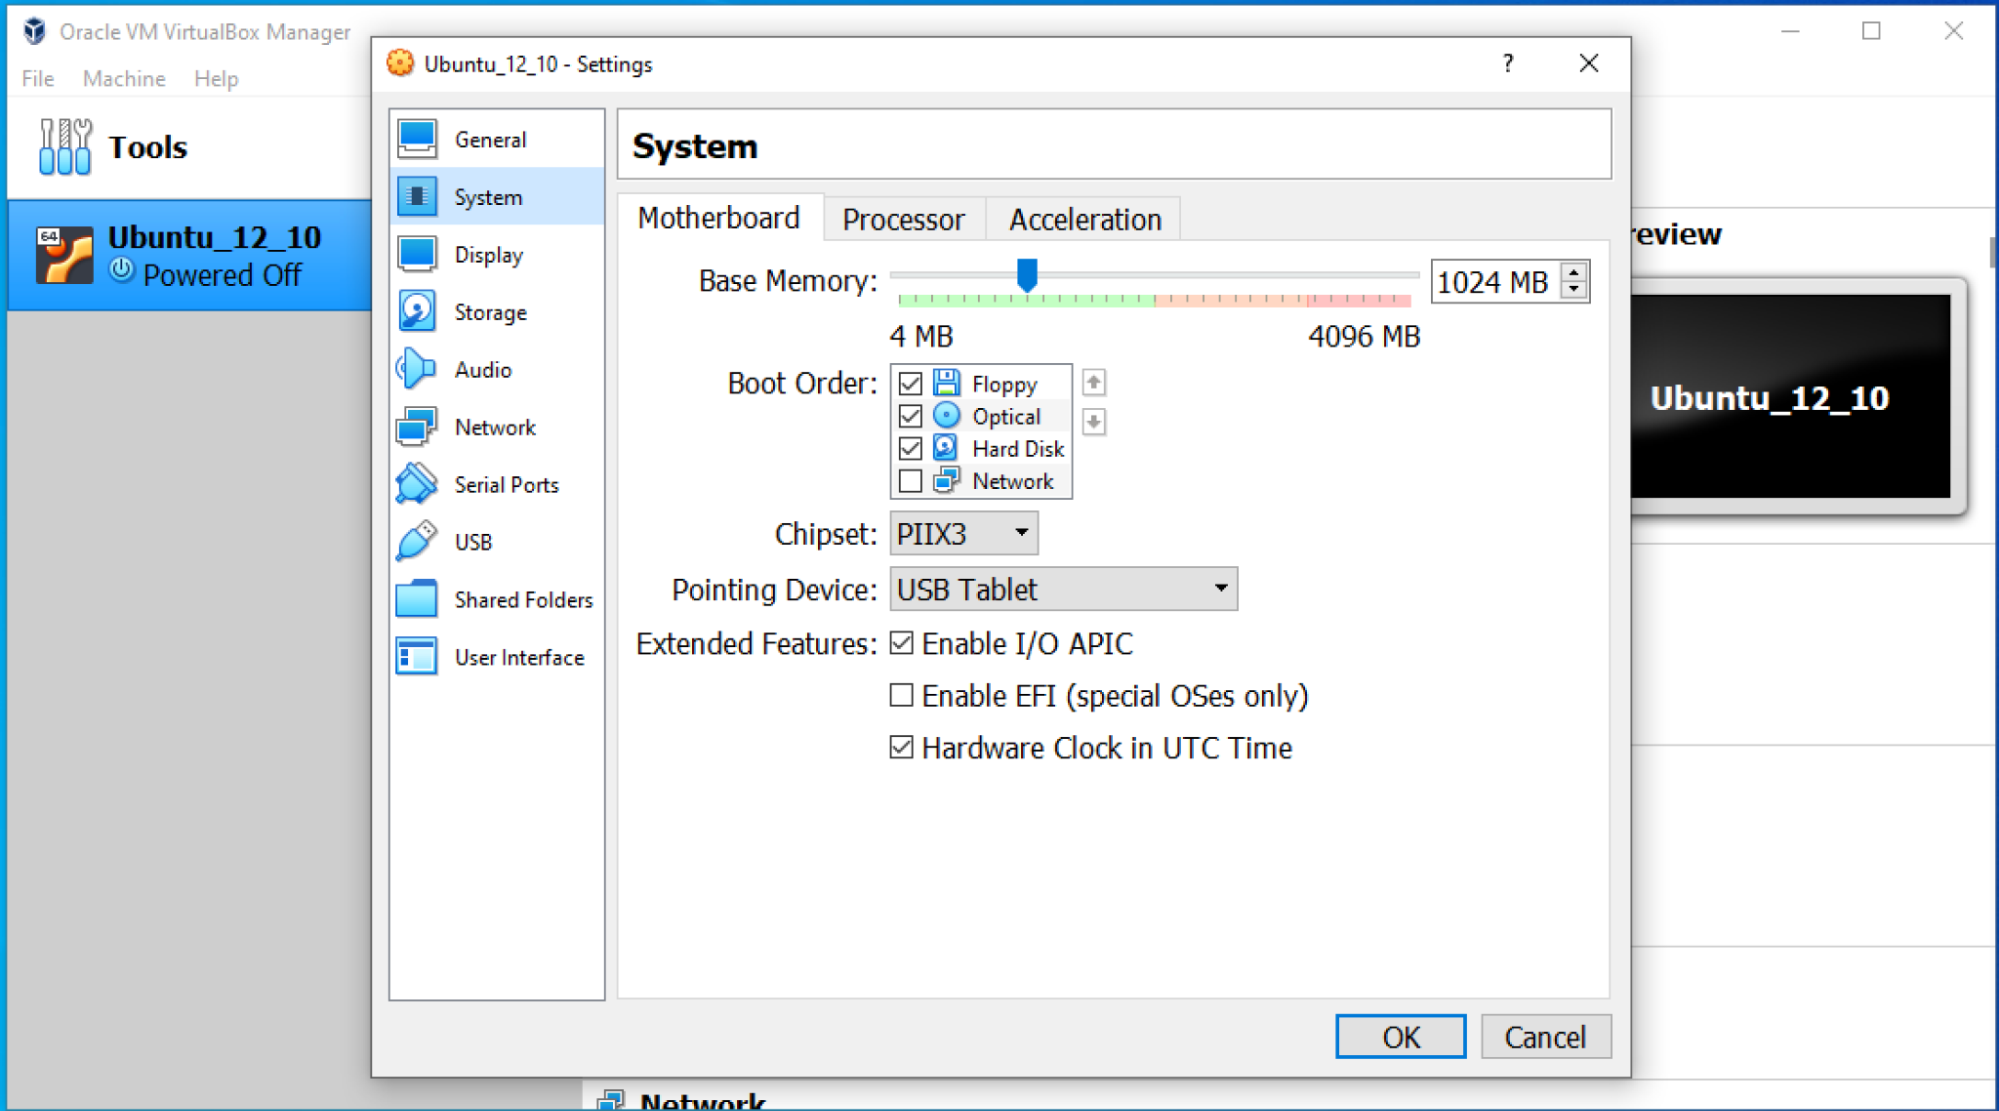
The Windows 10 host machine only has 4GB of RAM, so the VM cannot have more than 2GB of RAM allocated to it.
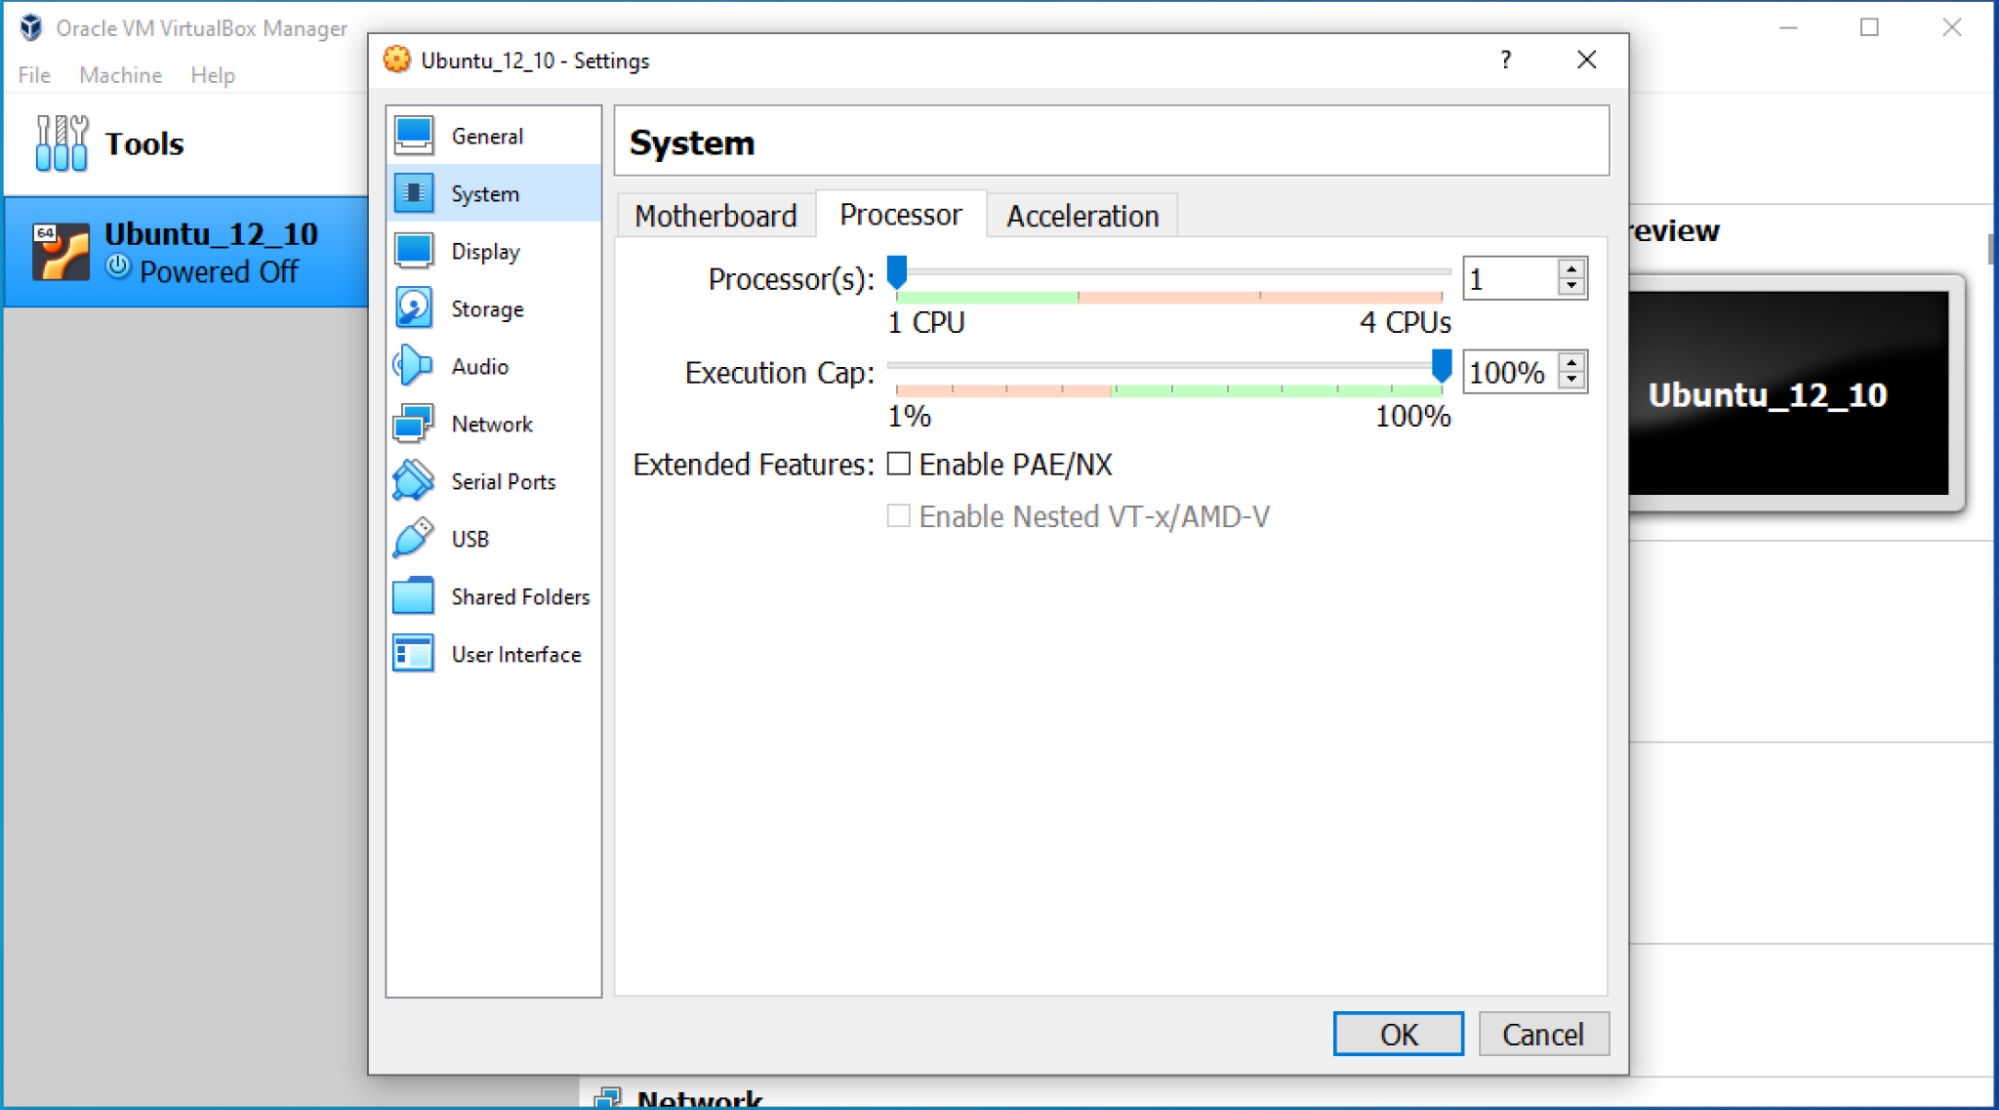
The number of configurable vCPUs on your VM also depends on the number of CPU cores your host machine has.
Step 4: Set Up a SATA Hard Drive
The hard drives linked to your VM are in the Storage section of the Settings menu. In this example, the downloaded VM has been configured to use a SATA hard drive, none other than the VDI file.
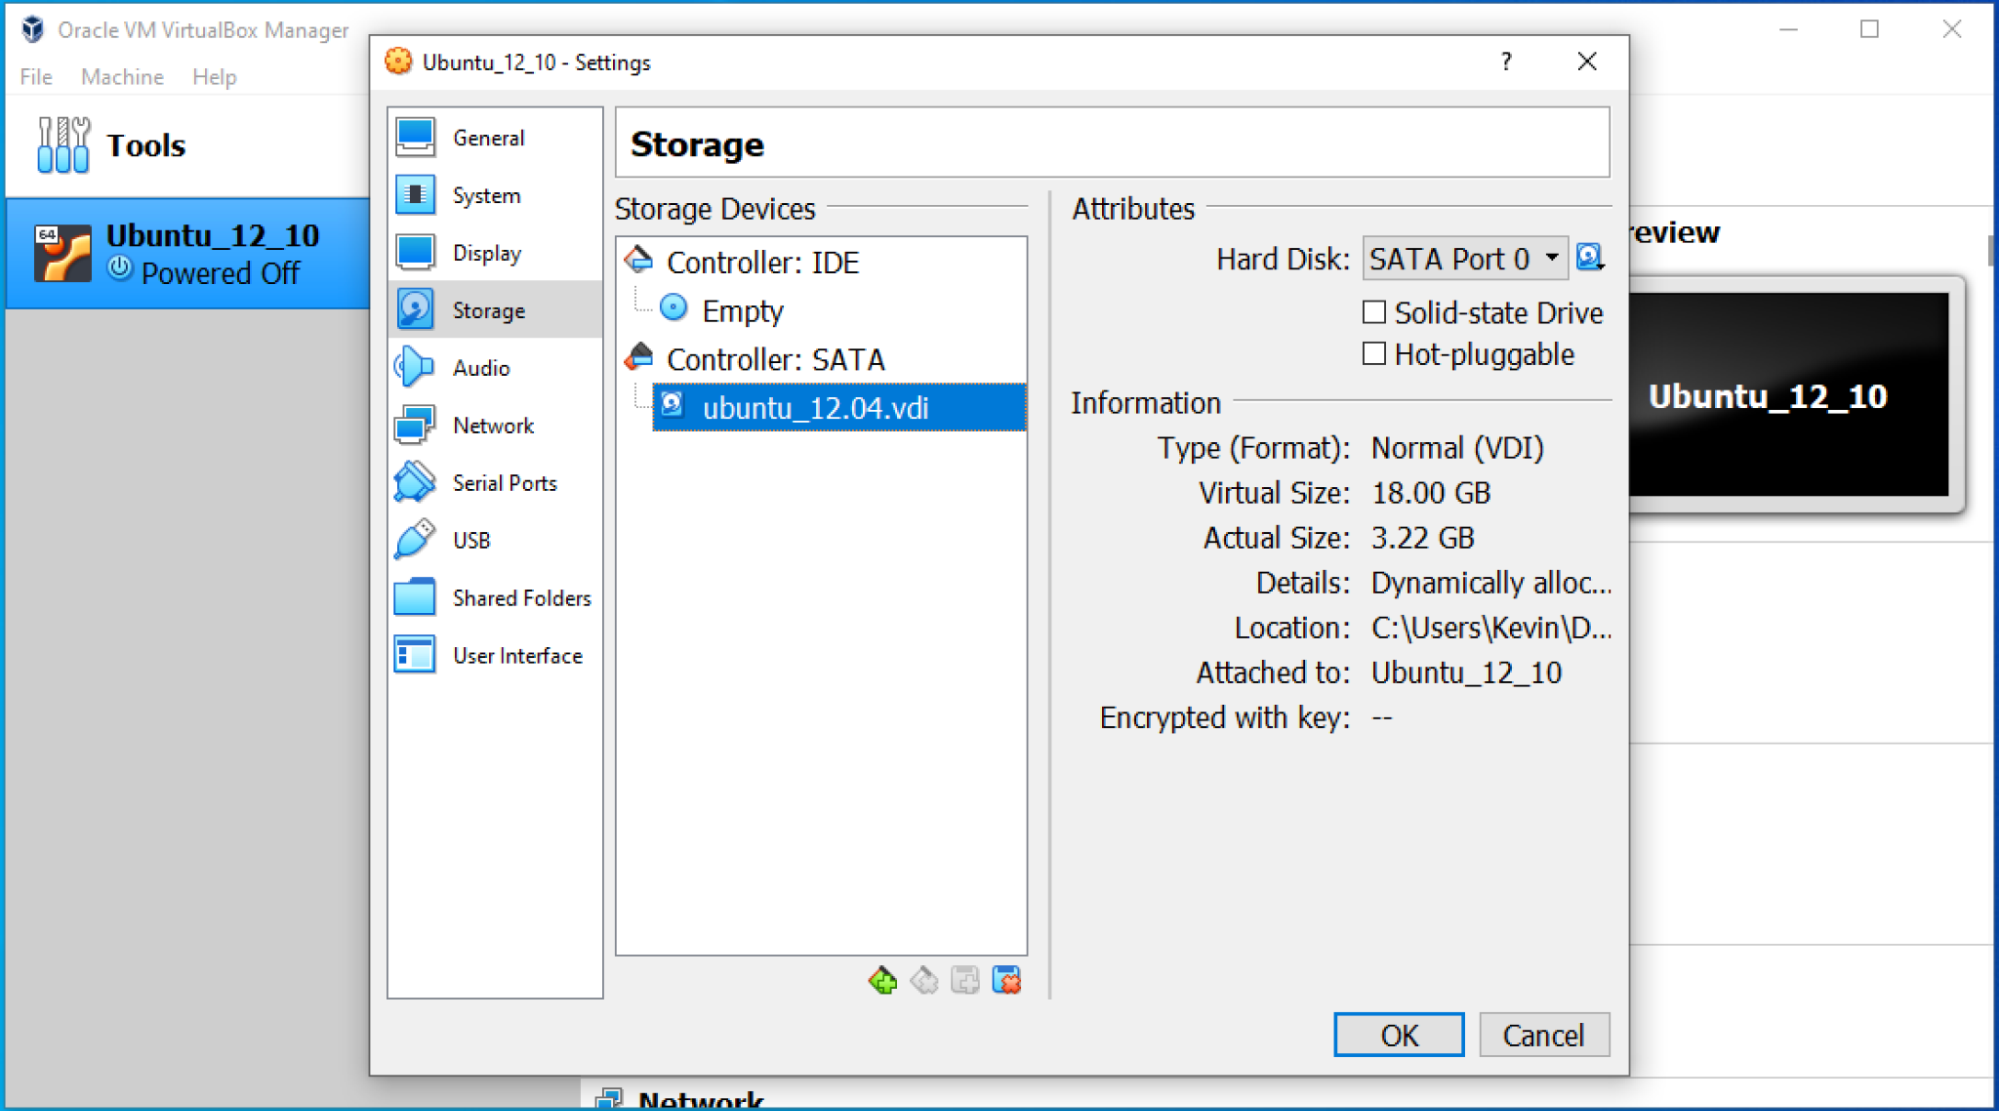
There’s nothing to stop you from adding other hard drives to your VM or choosing the size you want. However, the more disk space you allocate to your VM, the more it will take up on your host machine.
When you create a new disk, you can choose between two options:
Dynamic allocation – if your virtual disk has 20GB, but your VM is only really using 10GB, the disk file (VDI/VMDK/VHD) will only take up 10GB, not 20GB on the host machine. However, be careful, as the disk file size will not decrease if you reduce the disk space used by your VM.
Fixed size – Whether your VM uses all 20GB or not, the disk file will remain at 20GB.
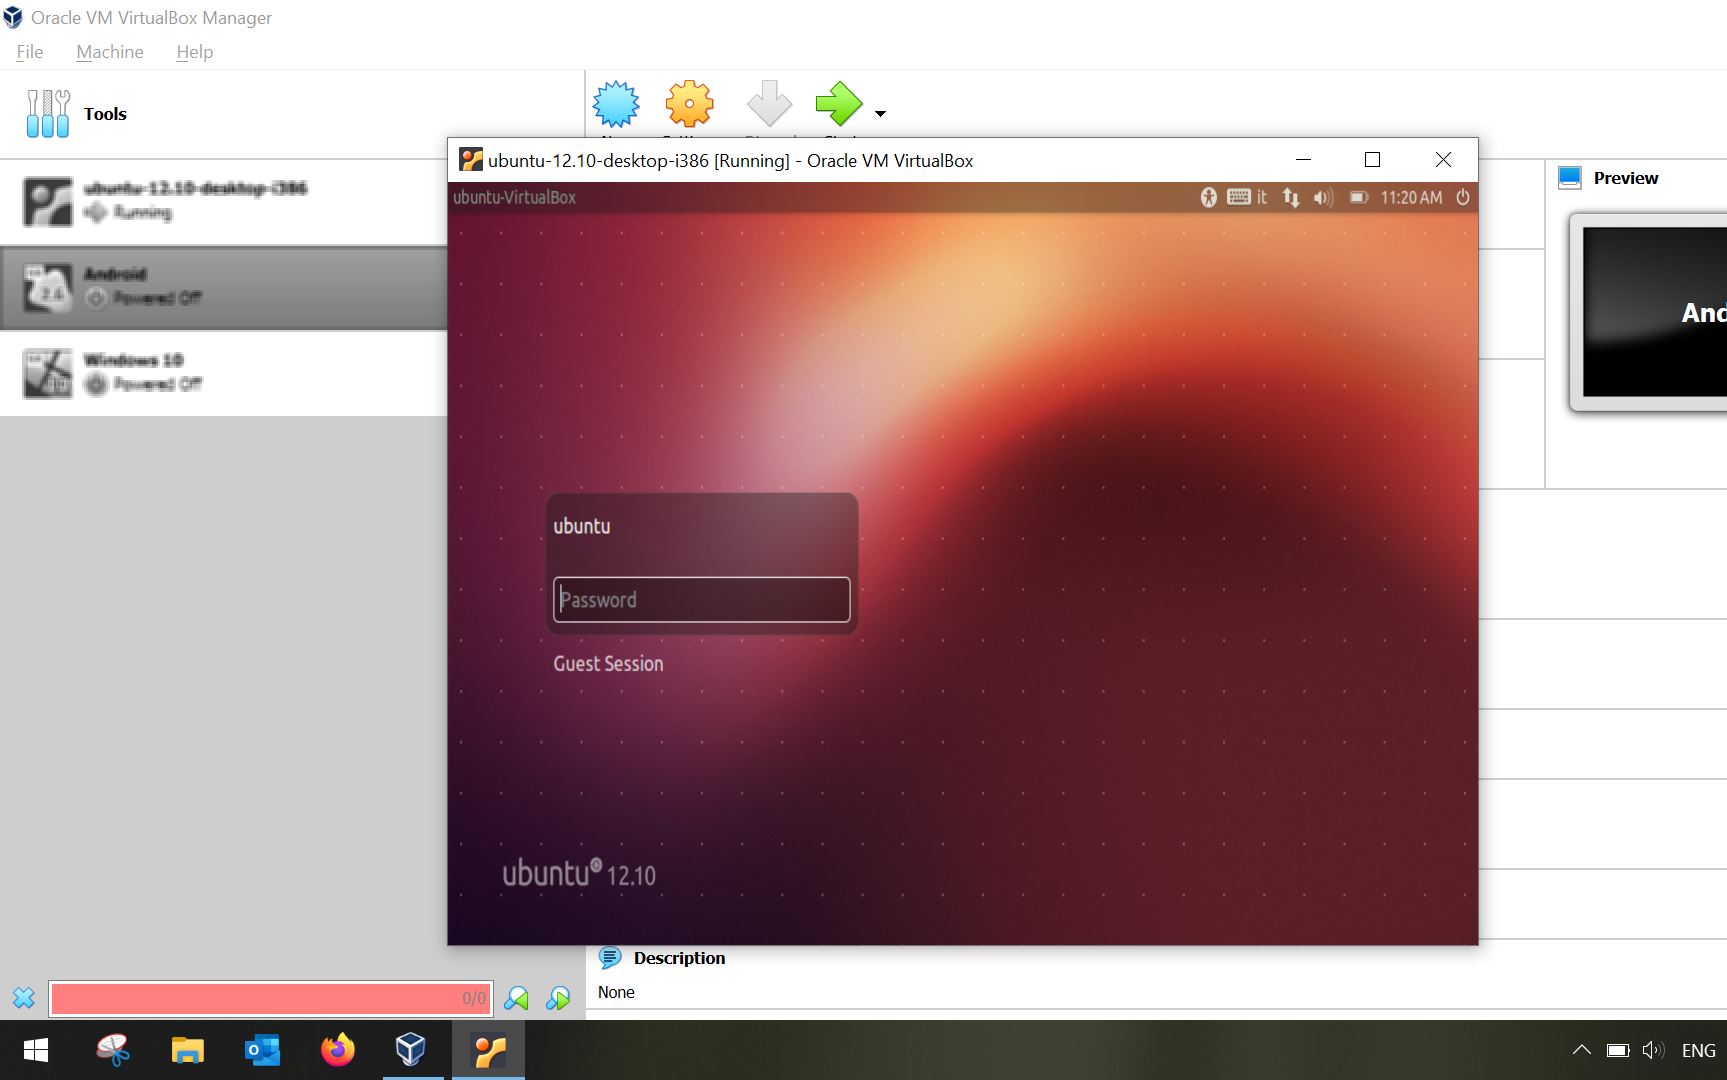
Step 5: Run the Virtual Machine
Launch the VM using the Start button, and your first VM will be up and running!
Take a Closer Look at Steps 3 - 5
You now have an operational Linux machine installed on VirtualBox. Watch the video below to get a visual understanding of the steps to changing your VM settings:
Let’s Recap!
There are two ways to create a virtual machine:
Create a VM on its own, using an ISO file to install the operating system.
Directly download a VM along with its operating system.
Virtual hard drives are in VDI, VMDK, or VHD format.
Exported and imported VM formats come as OVA or OVF files.
You can use the Settings option to change:
RAM allocation
Processor utilization
Storage
Great work! You have gone through the actions for installing a type 2 hypervisor on your computer. This is the first step in creating your first VM. Let’s move on to the next chapter, where you will take the next step and create your first virtual machine using an ISO installation file.
