Create Virtual Machines With ESXI

Access ESXi via the Web Client
In previous years, you had to install the vSphere Client application to connect to ESXi. But now, you can do it with your favorite web browser.
On your machine, open your browser and type https:// followed by the full IP address of your ESXi host (e.g., https://192.168.1.101) into the address bar.
An error message will appear, informing you that the page is not secure because your browser does not recognize the SSL certificate.
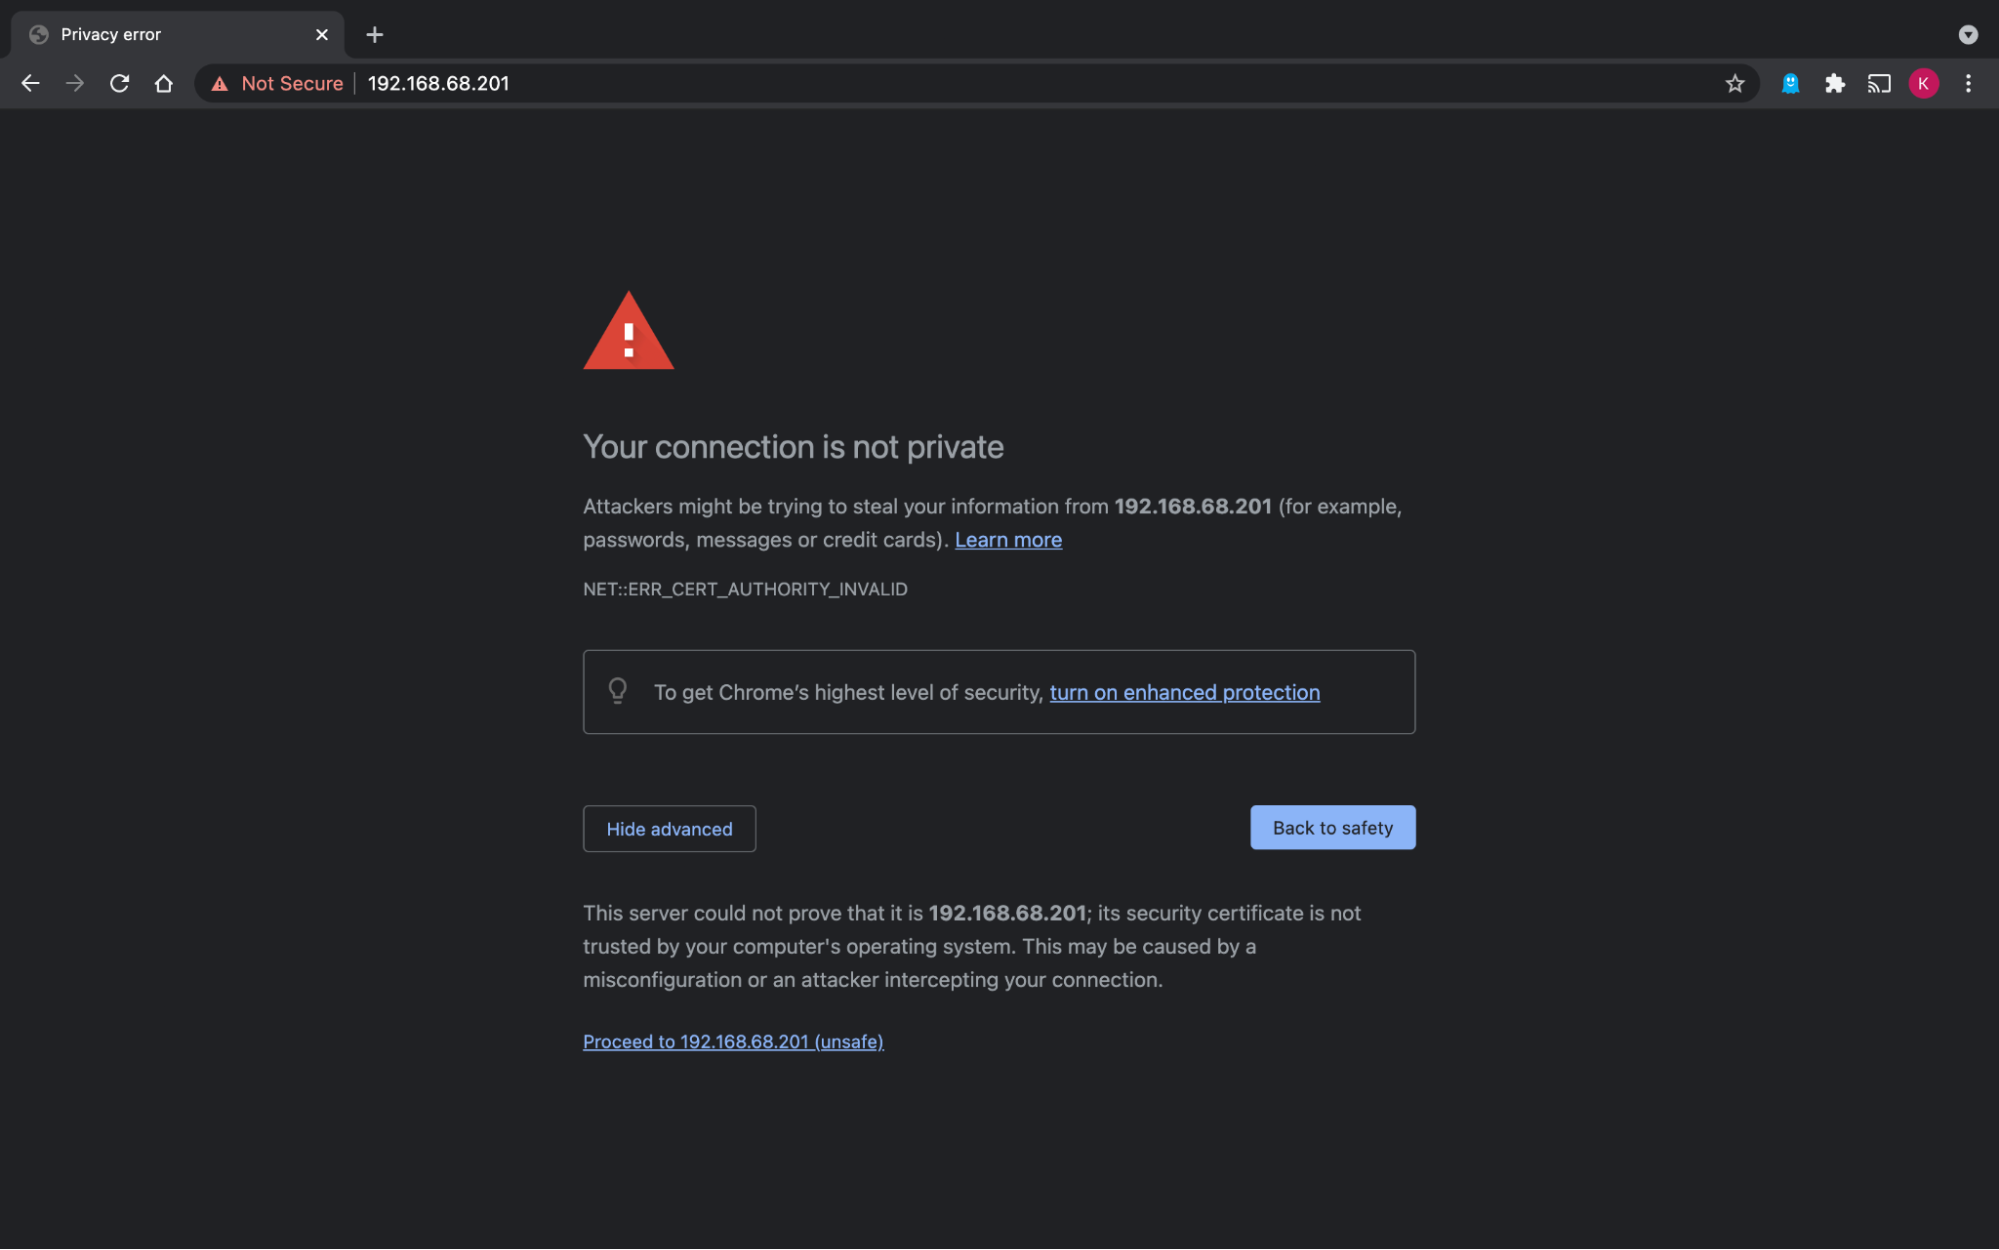
Therefore, you can add an exception (Advanced button) or click Continue to this website. The error page might look different depending on the browser you’re using.
Reload, and you’ll be on your ESXi’s authentication page.
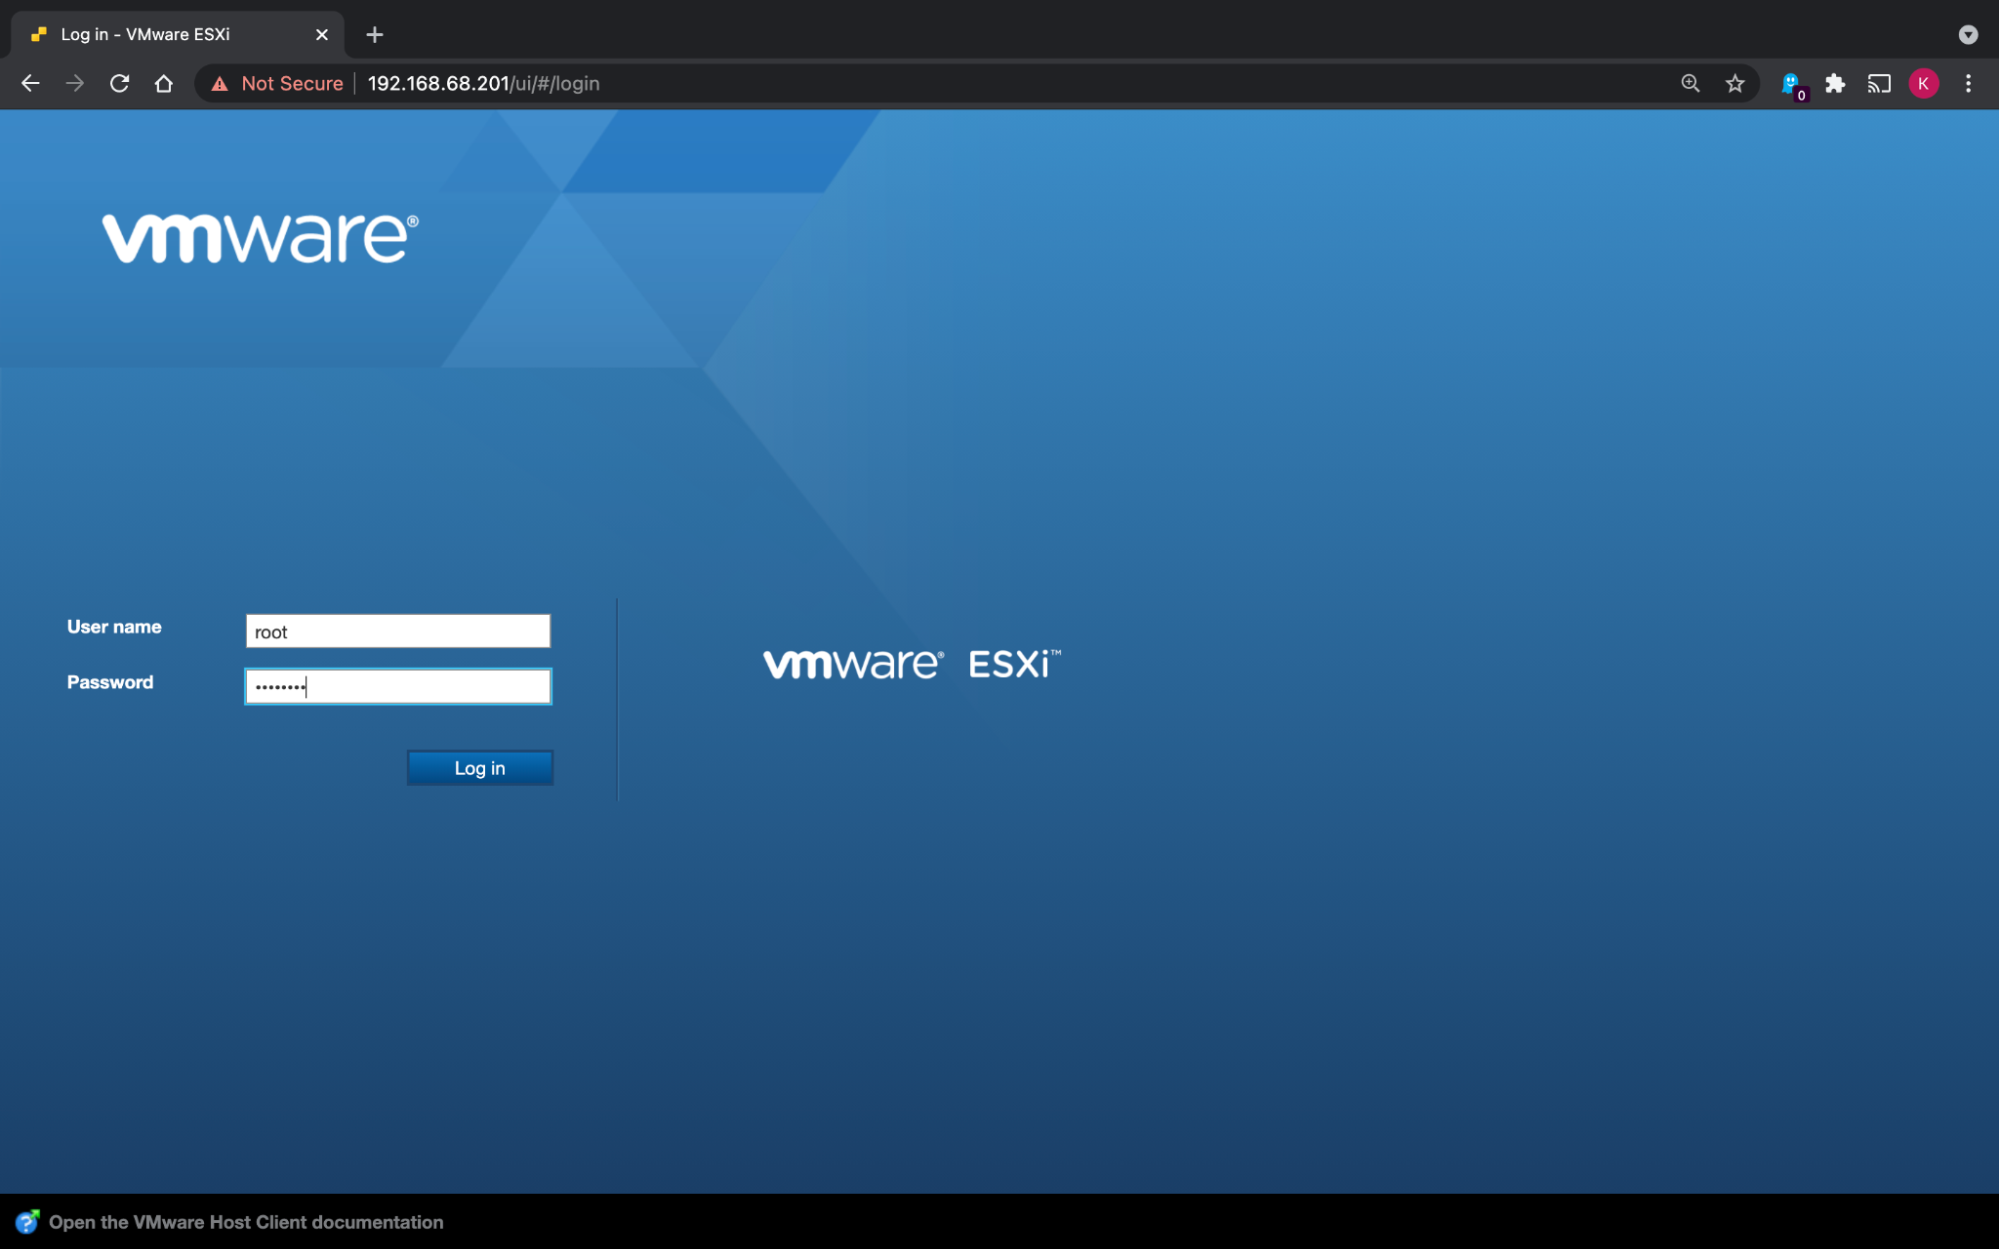
Sign in using the root account and you’ll be taken to the ESXi management interface. This is where it all happens!
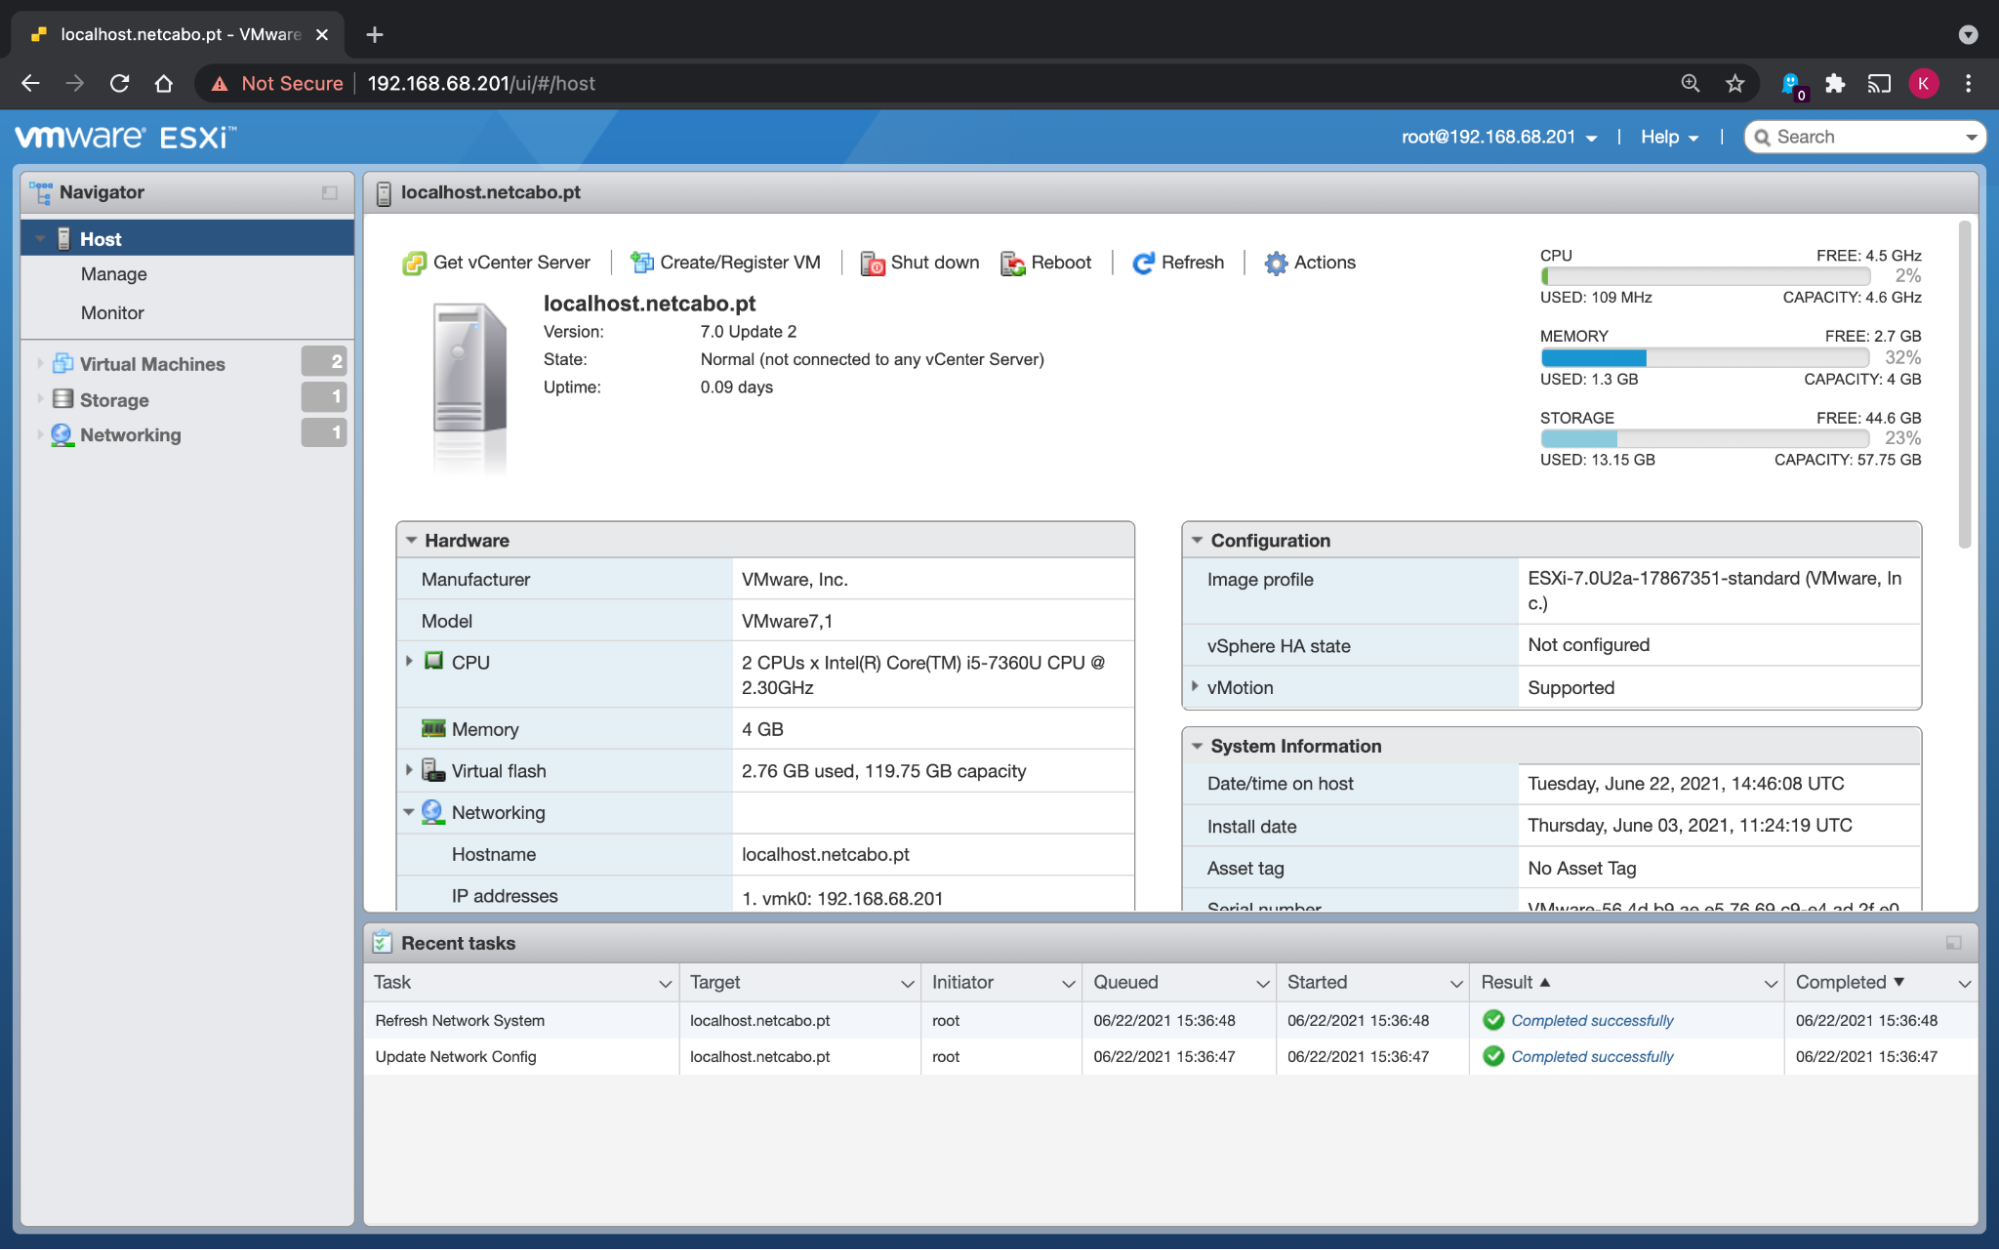
On the homepage, you’ll find the characteristics of your ESXi server, including:
CPU use
Memory use
Storage use
Your server’s network interface(s)
Here is the video recap of all the mentioned steps above!
We’ll look at this in more detail later in this course. For now, let’s start by creating your VMs.
Create VMs on ESXi
To simplify things, we’re going to use VMs with the Debian operating system, a lightweight OS, but adequate for our tests.
You can access the VM image here. Download it, and you’ll be able to create your VM.
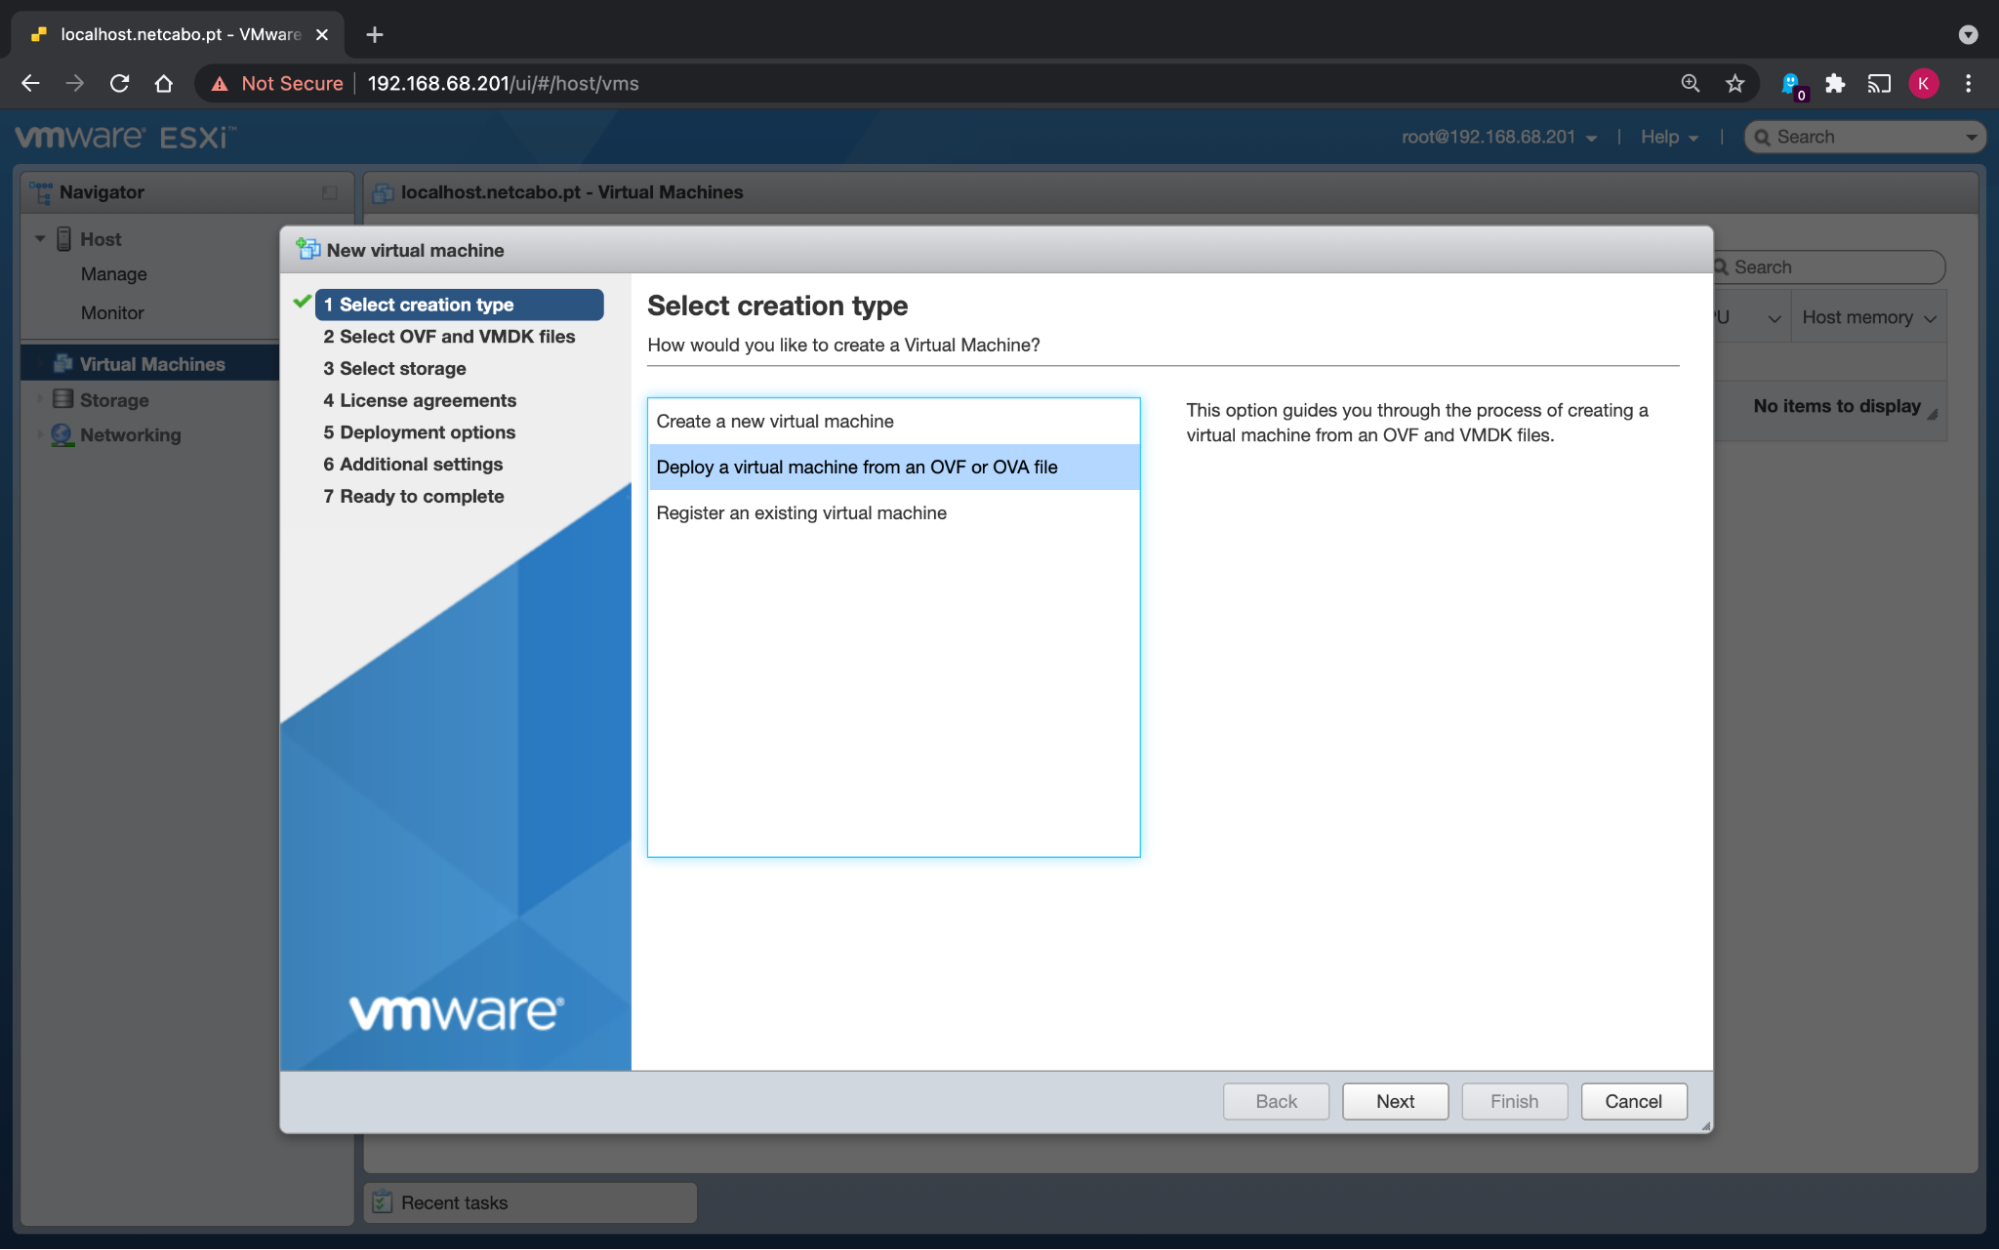
In the side panel, click on Virtual Machines. The number of VMs currently on your ESXi server will appear (it will be zero!)

Fix this by clicking on Create/Register VM. A creation wizard will then ask you how you want to create your VM. Select the second option to Deploy a virtual machine from an OVF or OVA file.
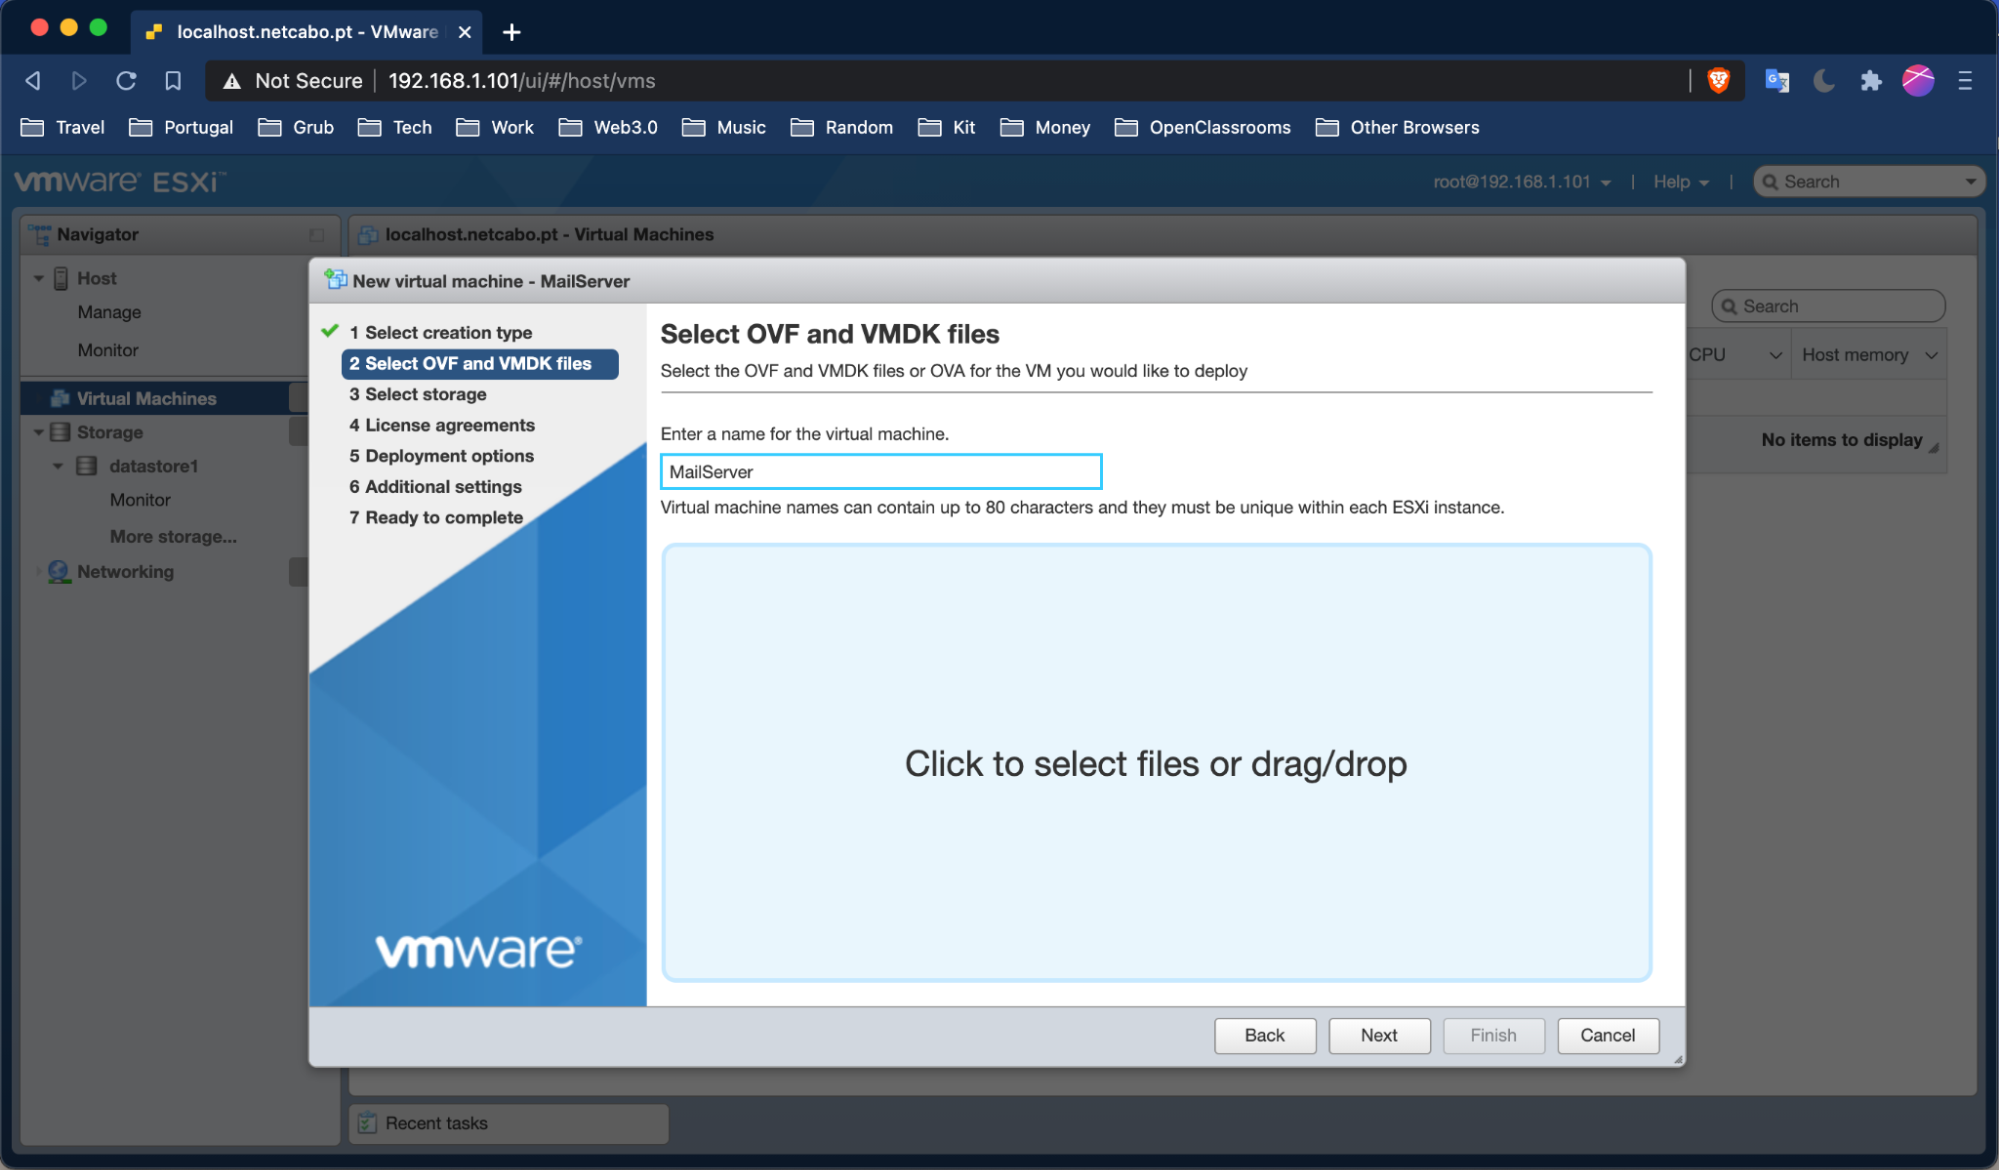
You can name your VM whatever you like, but make sure it’s something relevant (in this case, MailServer). Then, find the OVF and VMDK files you downloaded a few minutes ago.
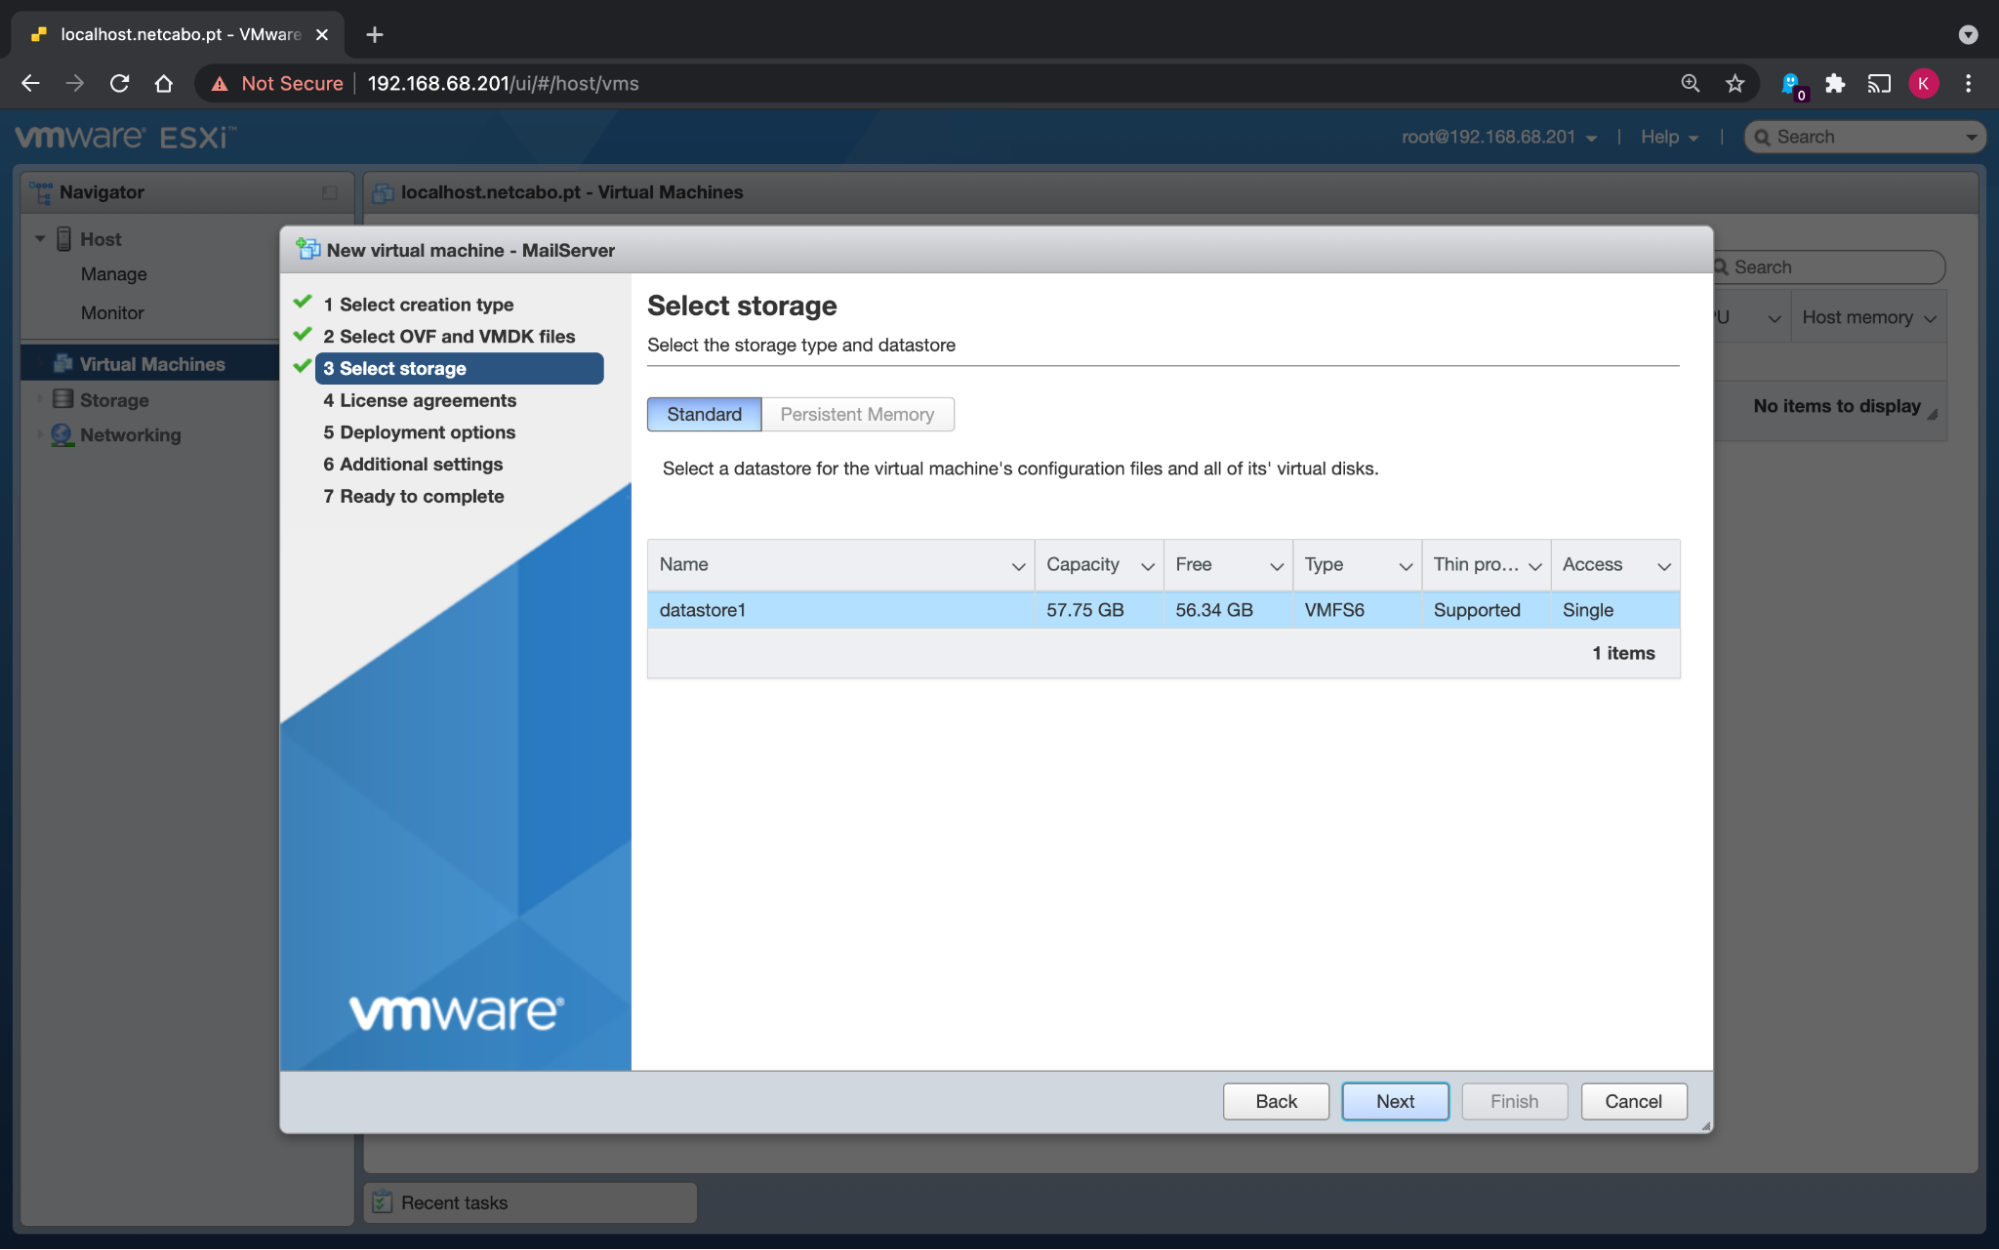
Select the datastore where you will create the VM’s disk. In VMware jargon, a datastore refers to a storage space connected to your ESXi server. Ours is the server’s internal hard drive.
However, it could be that your ESXi server is connected to a remote storage device such as a SAN, which is common for businesses. In that case, it will appear as a second datastore.
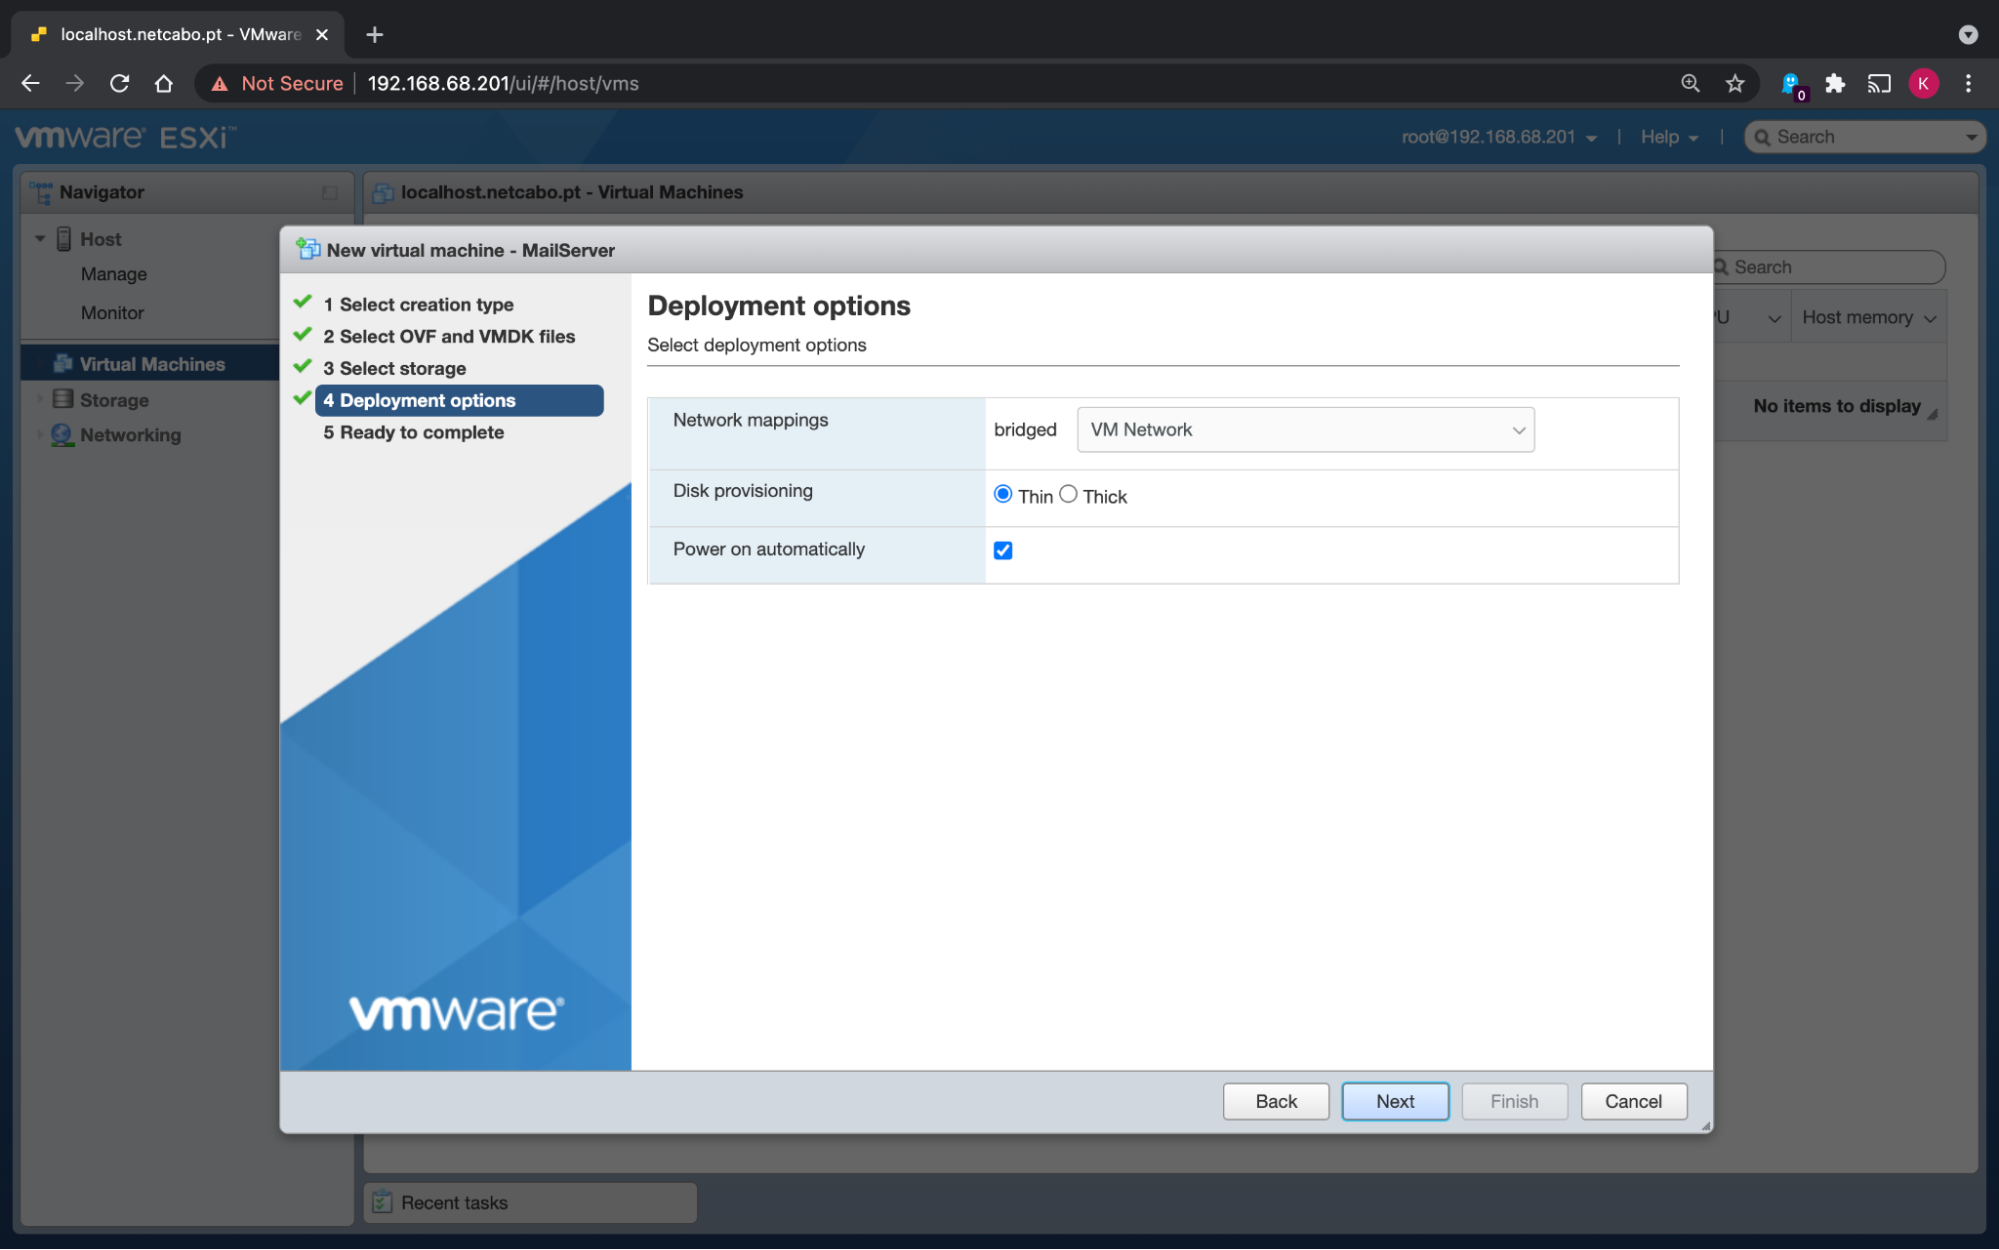
Then select the network you want to connect your VM to. For the moment, select the default VM Network as it’s the only one that exists.
There are two options for disk provisioning:
Thin provisioning: does not directly allocate all disk space specified in the VM’s characteristics, only the space occupied.
Static provisioning: all specified disk space is directly allocated, even if the virtual hard drive is empty.
Choose Thin.
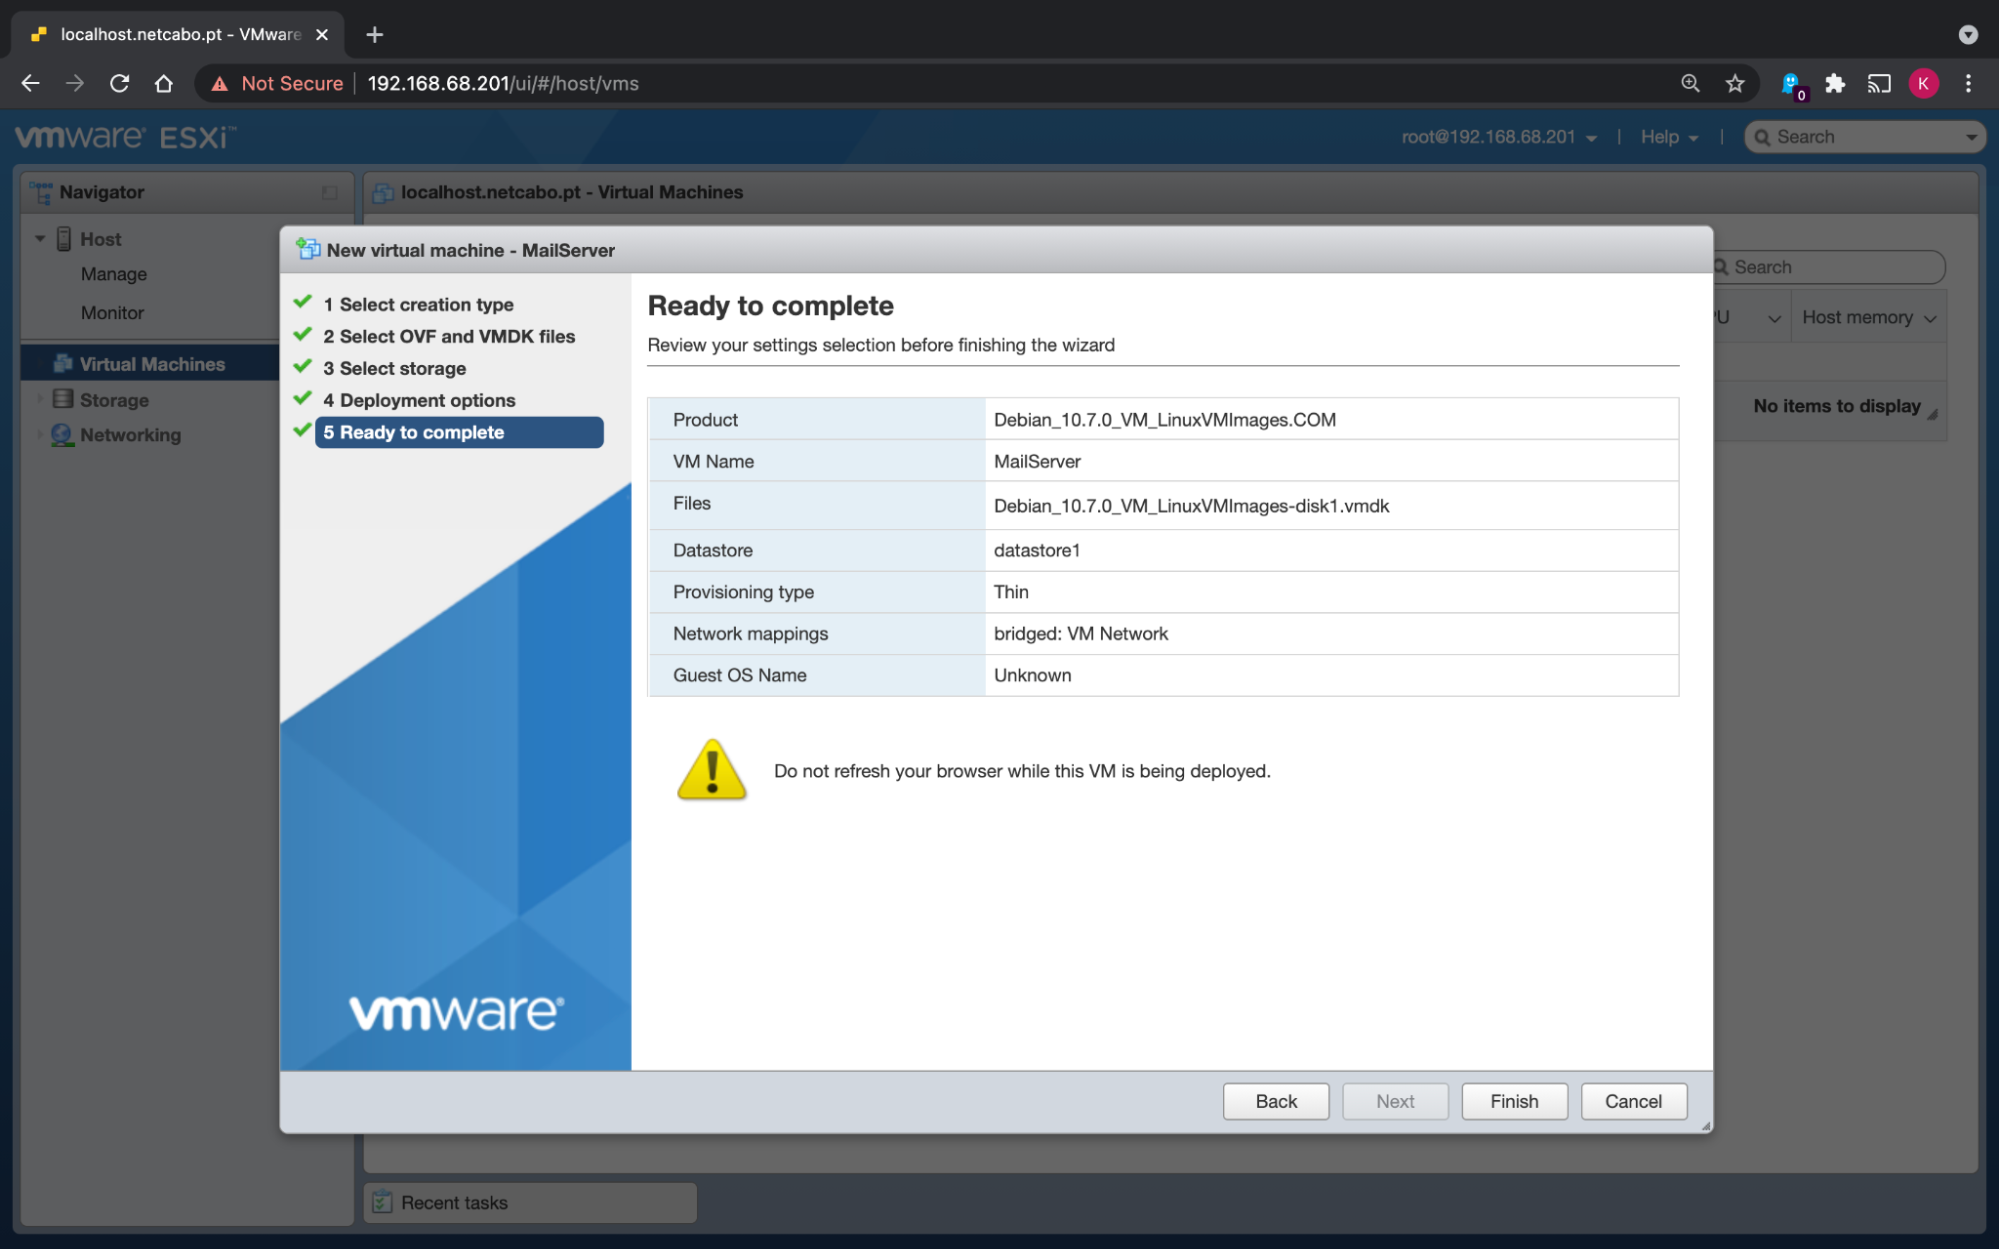
You'll see a recap of the settings you chose. If you’re happy with them, confirm.
Your VM is now displayed in the list of existing ones with a Normal status, which shows that the creation process was successful.
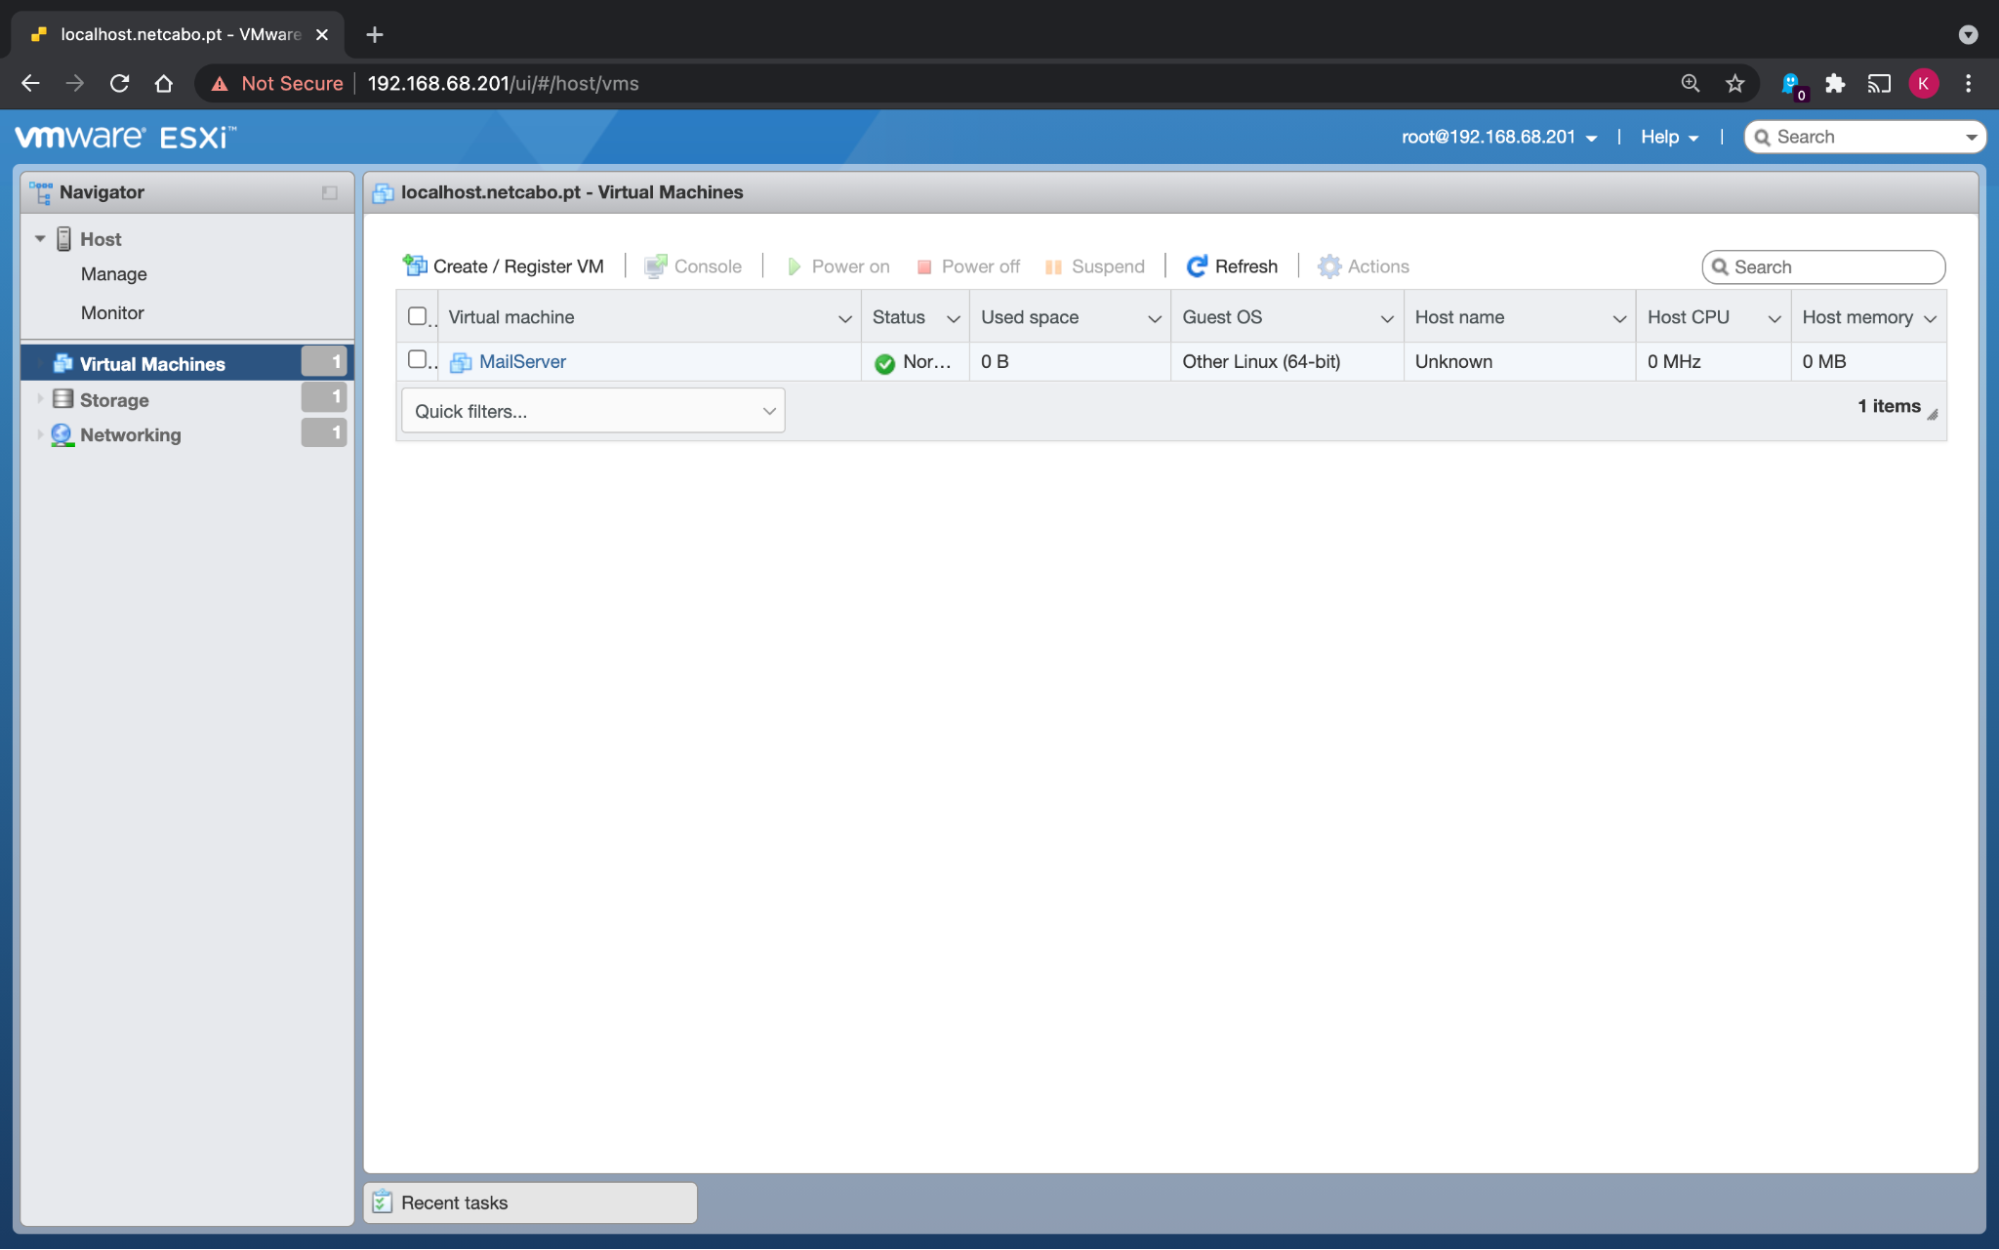
You can click on it to see its configuration settings.
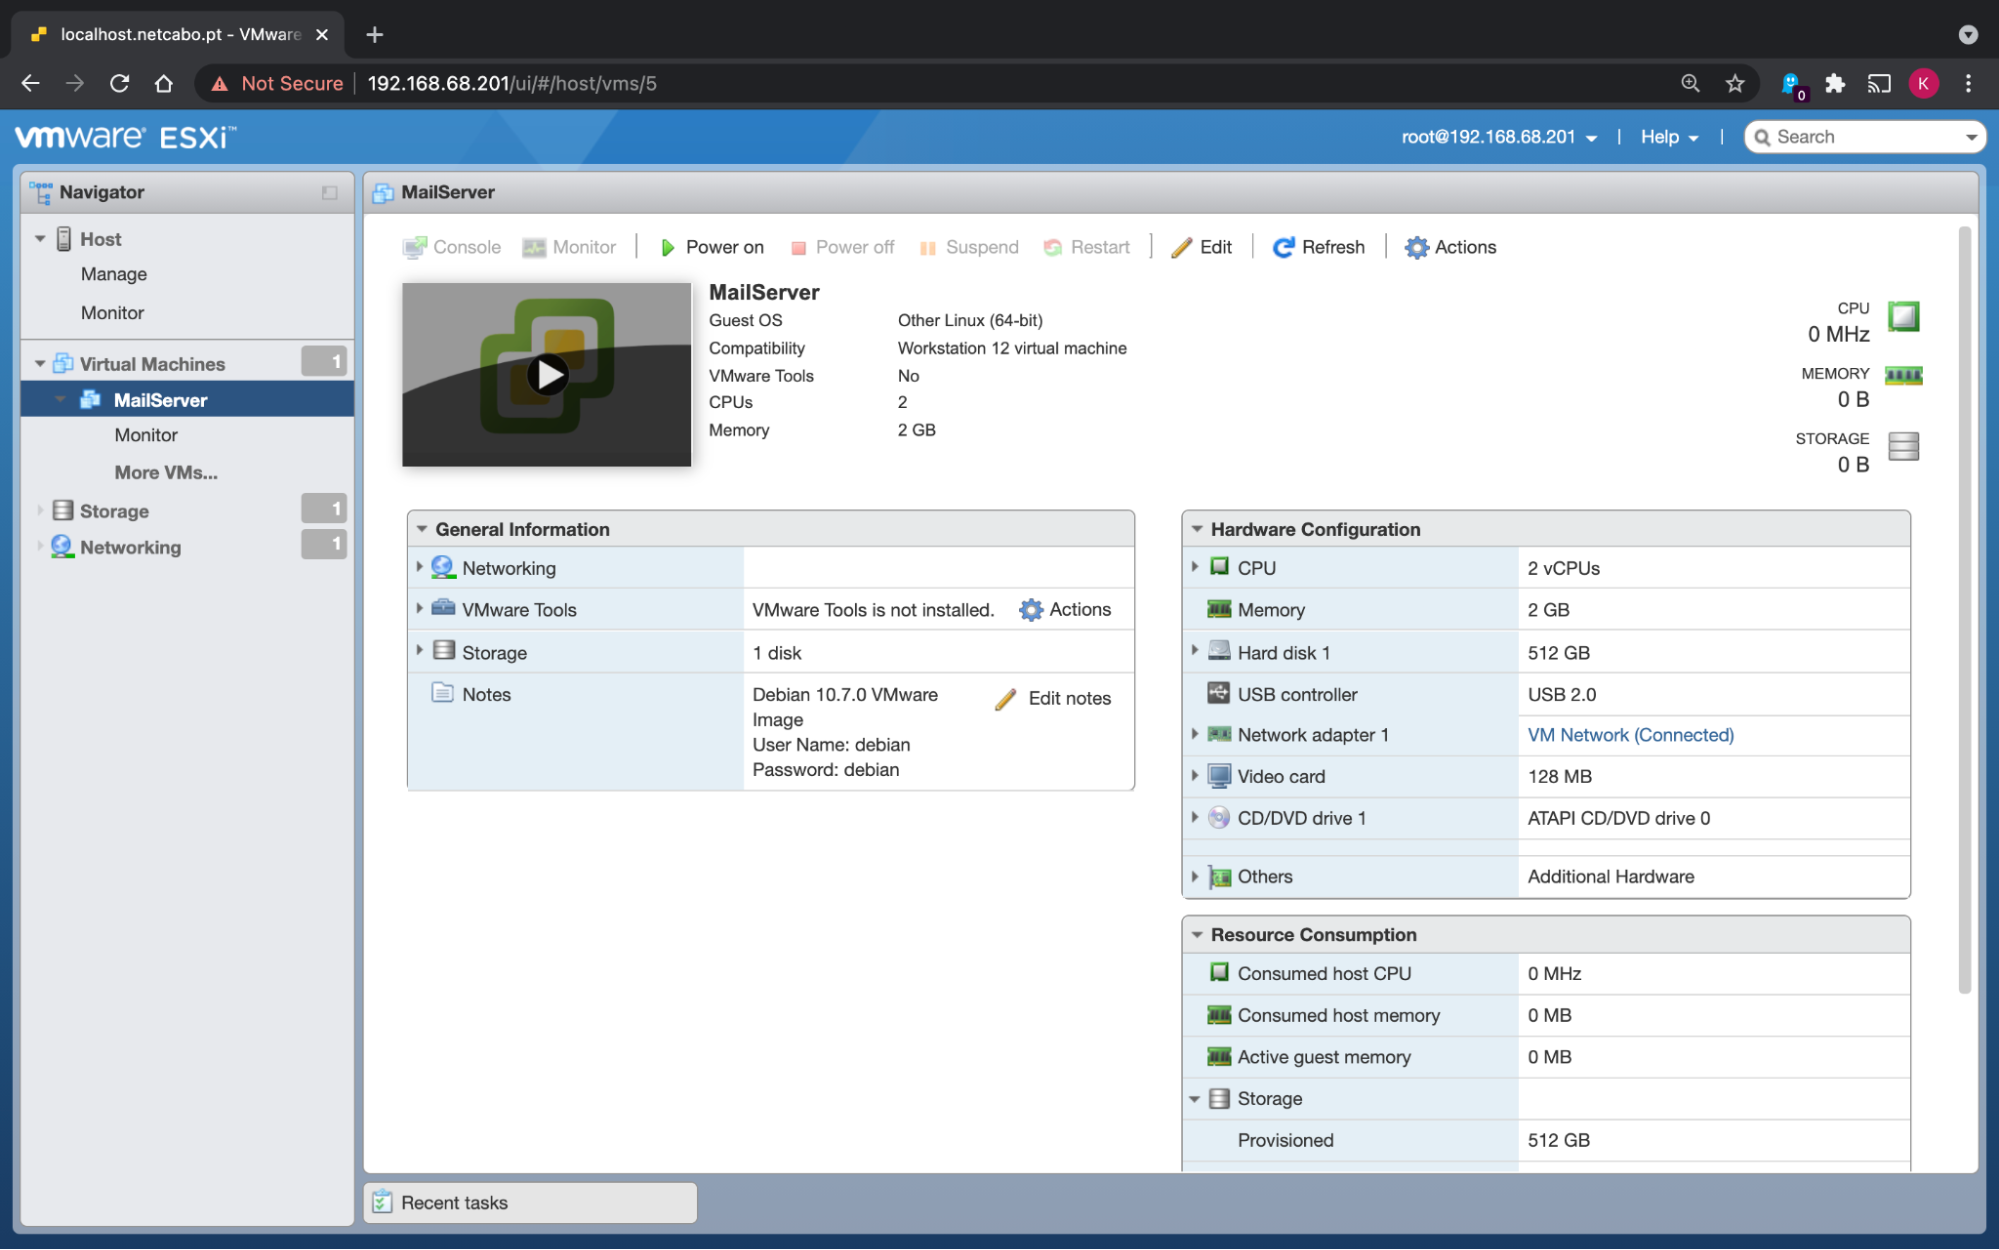
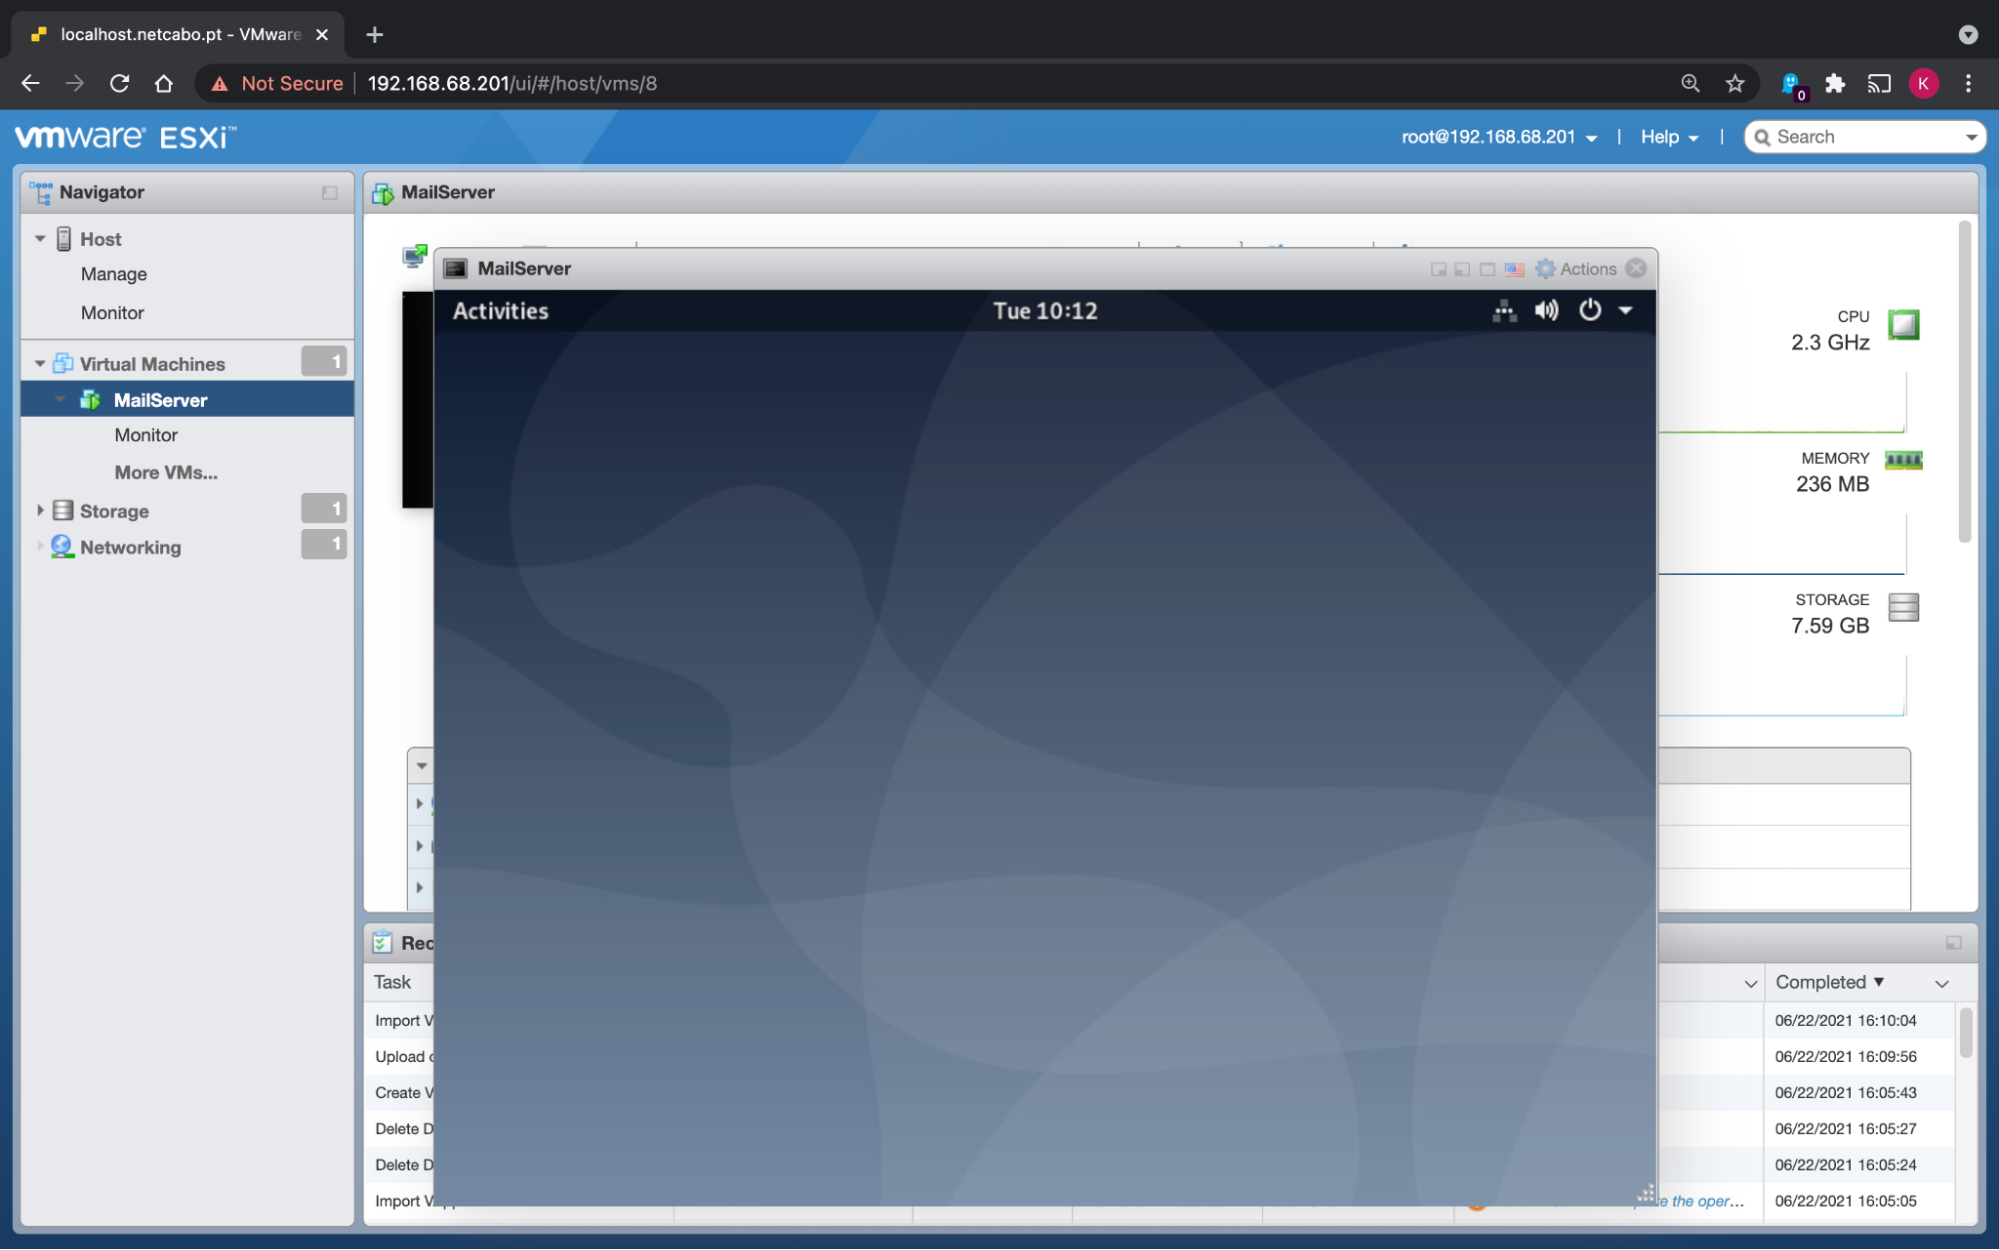
You can now launch the console to see if your VM is working. To do this, click on Console, and Open a browser console. There’s your VM!
Take a Closer Look at Setting Up a VM on ESXi
Use the video below as a guide before moving on. It shows how I created a VM from the disk image linked in the text above:
Create a Second VM on ESXi
Now create a second VM, following the same procedure. You can name this VM WebServer, for example.
After you create the second one, your two VMs should appear on ESXi. It should look like the image below.

When you want to use one of these VMs, you’ll do so remotely from your regular workstation. Remember: never access a VM using the hypervisor’s administration interface for everyday use.
Why’s that?
For security reasons. For example, the web server end-user may not be a Cloud network engineer or a network administrator. Instead, they may only be users who need to change something on the web server but have no knowledge of virtualization, let alone ESXi.
This practice is not specific to virtualization. For example, when a change needs to be made to a physical or virtual server in businesses, this is done via a remote connection (using SSH or RDP).
Let’s Recap!
Sign-in via the web UI using the root account created during ESXi installation.
You will find your ESXi server specifications on the homepage, including
A datastore refers to a storage space connected to your ESXi server.
There are two options for disk provisioning:
Thin provisioning - does not directly allocate all disk space, only the space occupied.
Static provisioning - all specified disk space is directly allocated, even if the virtual drive is empty.
Normal connection to the VMs is established remotely from a workstation or server and not using ESXi’s administration interface.
The ESXi interface is detailed and powerful. It's important to understand how to navigate it to manage, monitor, and create your virtual environment! In the next chapter, we’ll create an environment with multiple VMs and establish communication between the machines.
