Establish Communication Between VMs

Link Your VMs to the Same Network
When you created your VMs, the creation wizard asked you what network you wanted to link your VMs to, and you selected the only possible response: VM Network.
To get a clearer picture of what this means, click on Networking, then the Port groups tab in the side panel of your ESXi management interface.
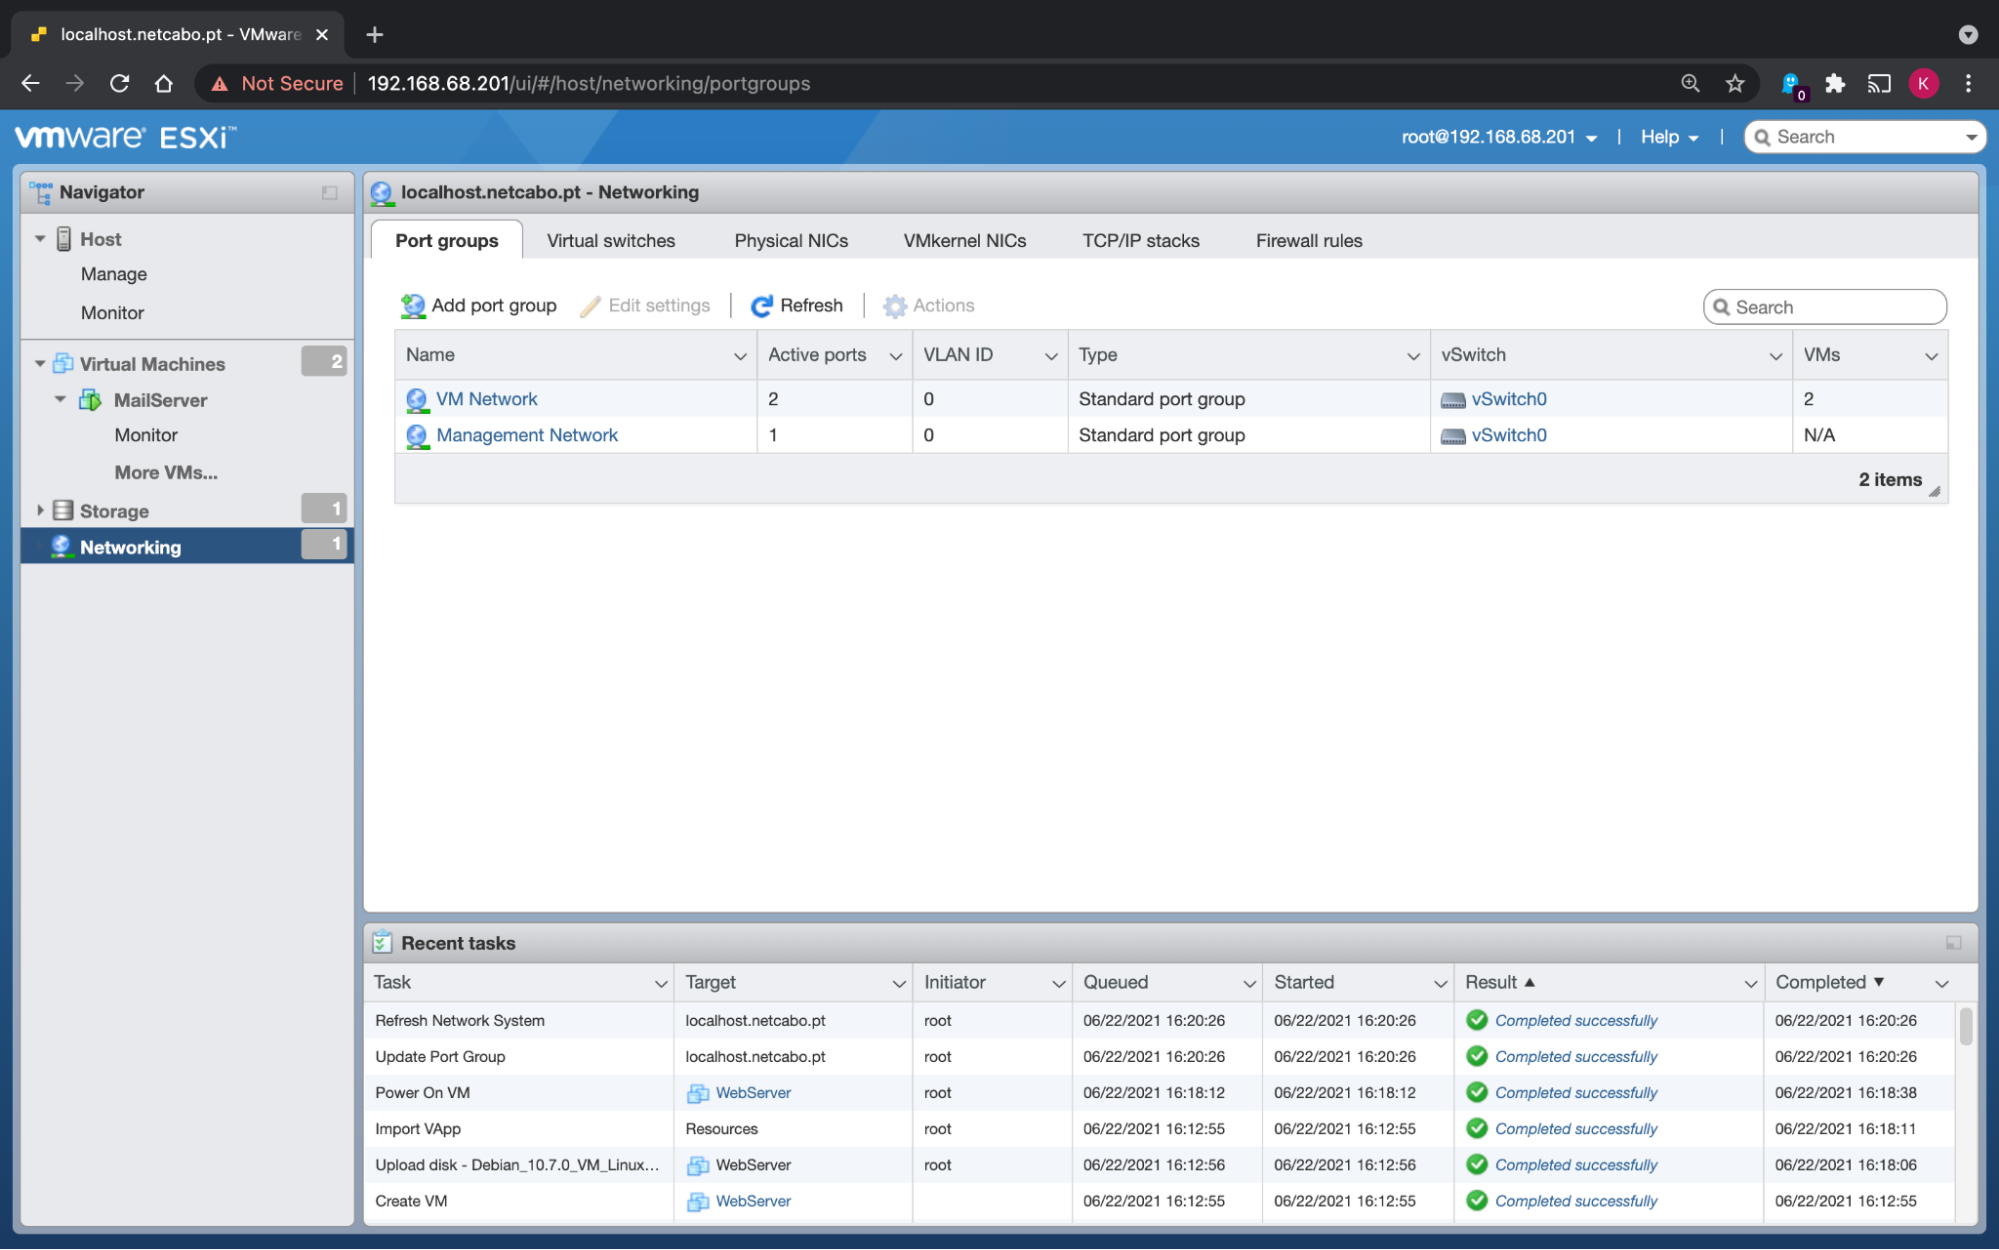
The virtual network called port groups is already configured on your ESXi.
For the moment, two networks are available:
VM Network, dedicated to VMs.
Management Network, for communication between ESXi and the company’s internal network, configured during ESXi installation.
You were not offered the option to link your VMs to the Management Network, as it is dedicated to managing ESXi.
Manage the vSwitchs
You’ll also notice that each network or port group links to a vSwitch; in this case, vSwitch0.
Now go to the Virtual switches tab to create other vSwitches and edit those already present.
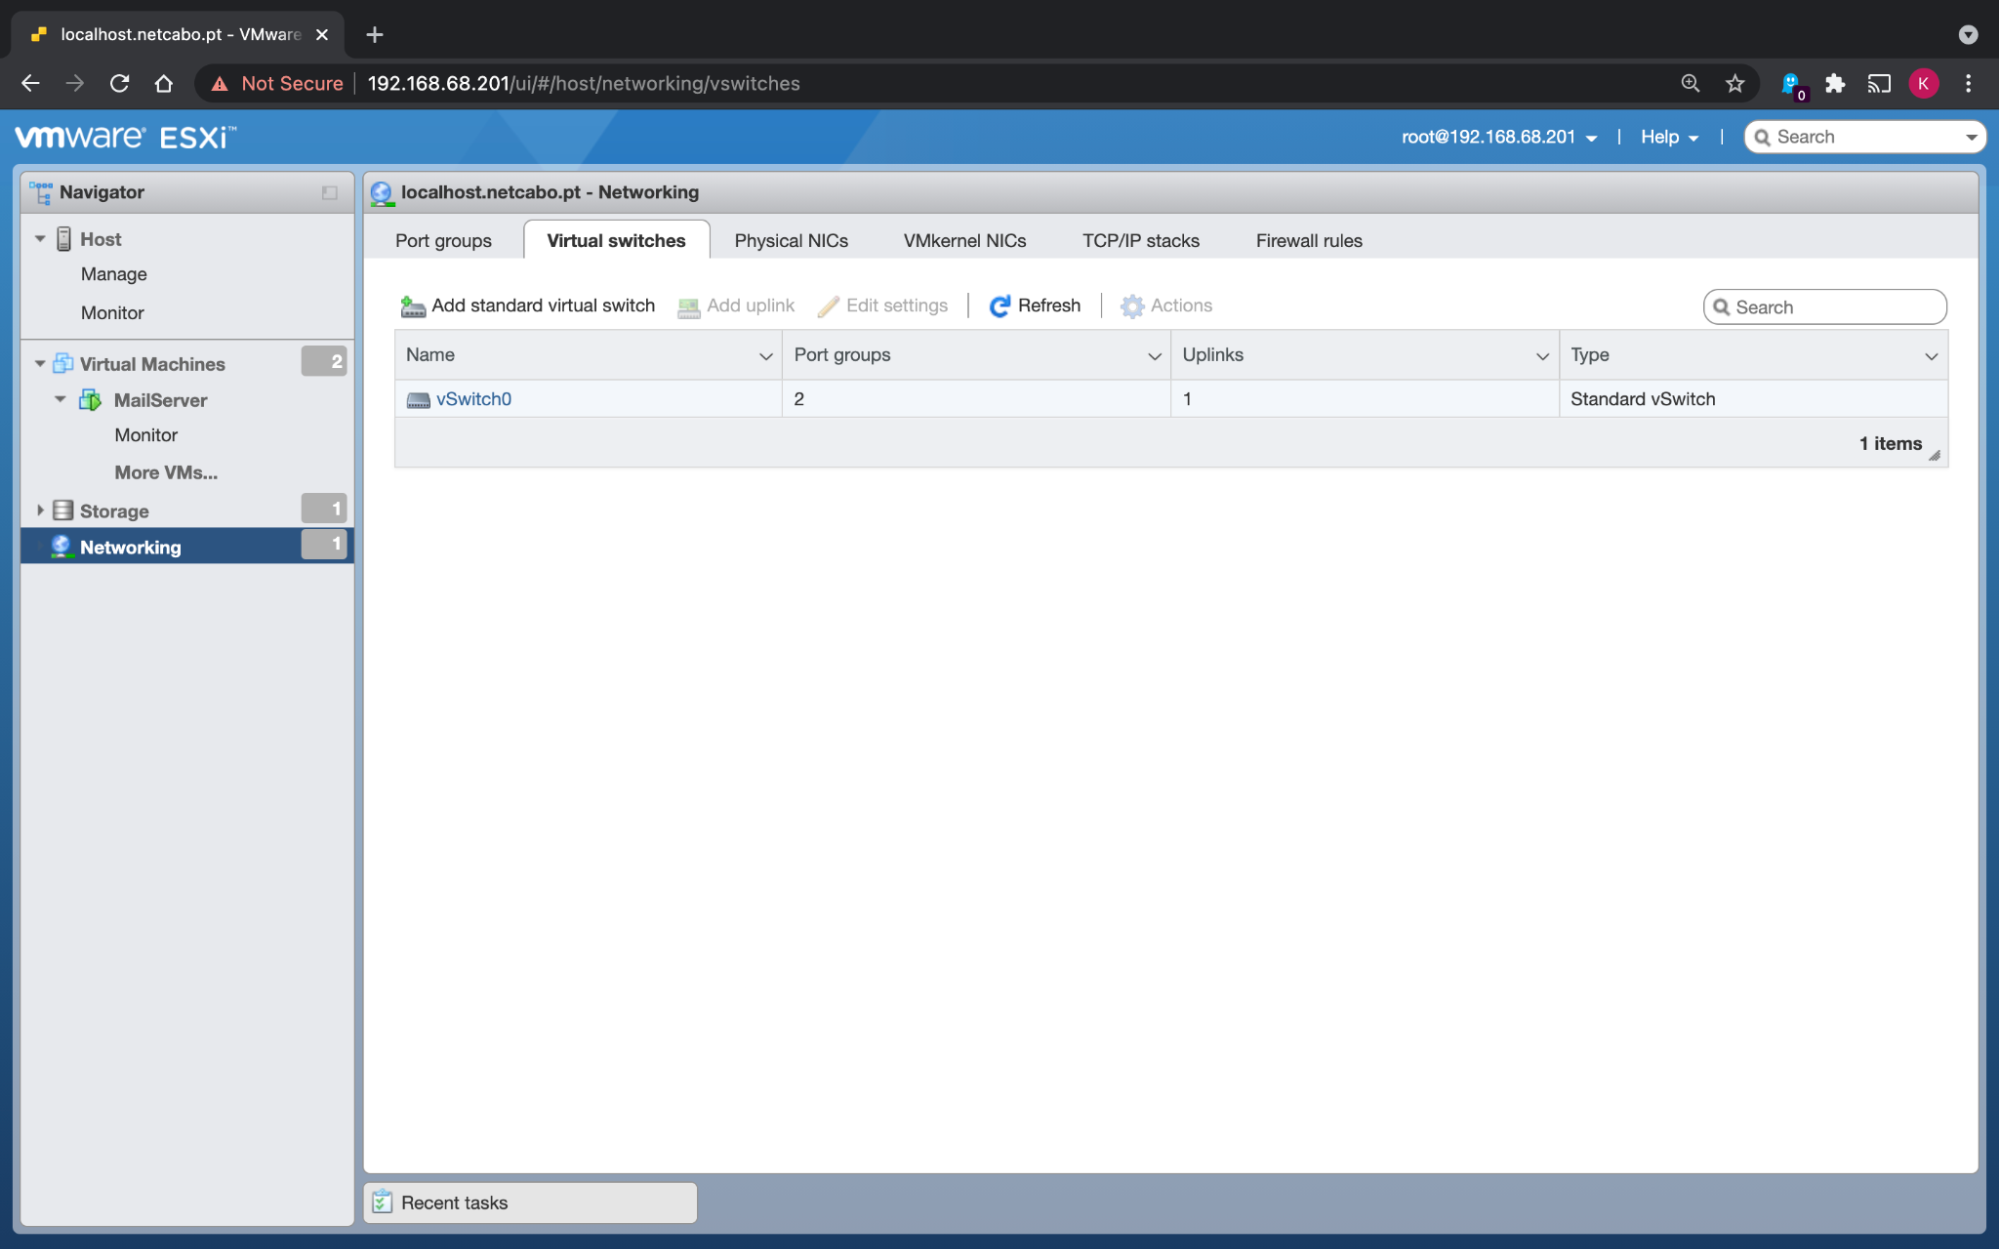
Finally, the Physical NICs tab lists the number of physical interfaces present on your ESXi server. In this case, there is only one.
View the vSwitch Topology
To understand the difference between a physical interface, a vSwitch, and a port group, go back to the Virtual switches tab and click on vSwitch0. This takes you to a page that describes how vSwitch0 works and what it’s connected to. This is called the vSwitch Topology.
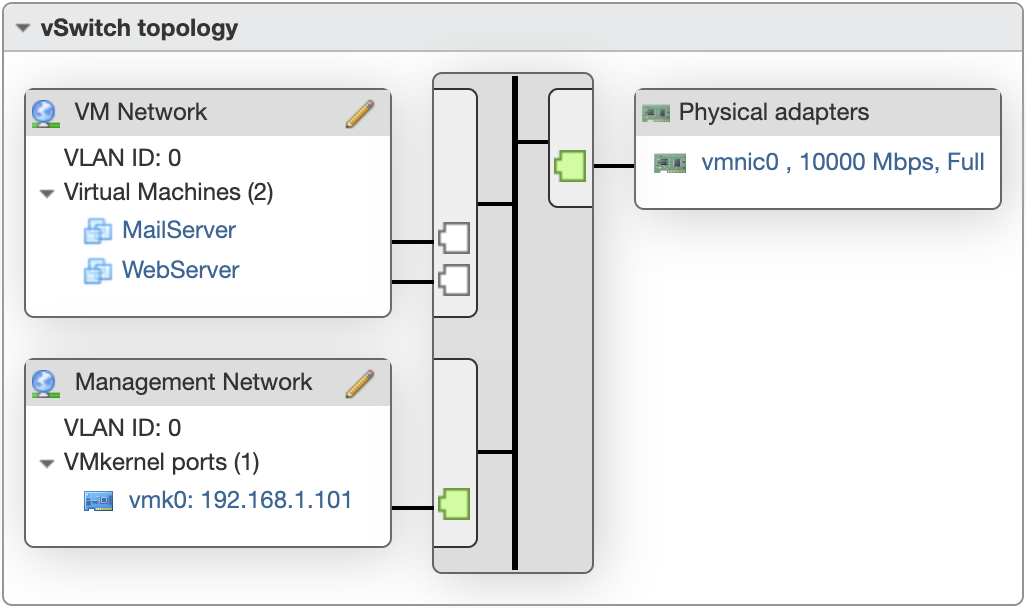
A network or port group is connected to a vSwitch, which is connected to a physical network interface.
It’s similar to VLANs, which allow you to separate your physical switch ports. Here the same applies; port groups separate some of the vSwitch ports. So, to prevent VMs from one port group from communicating with VMs from another, you need to assign a different VLAN ID to them.
Let’s try stopping our two VMs from communicating directly with ESXi.
Here is the current configuration:
Machine | Port group | VLAN | IP address |
MailServer | VM Network | 0 | 192.168.102.137 |
WebServer | VM Network | 0 | 192.168.102.138 |
ESXi | Management Network | 0 | 192.168.102.132 |
Although they are in two different port groups, all machines can communicate because they are on the same network and have the same VLAN ID.
To isolate communication, assign a different VLAN ID to each port group. For example, you can assign VLAN1 to the VMNetwork.
To do this, click on Edit in the VM Network settings and change the ID number.
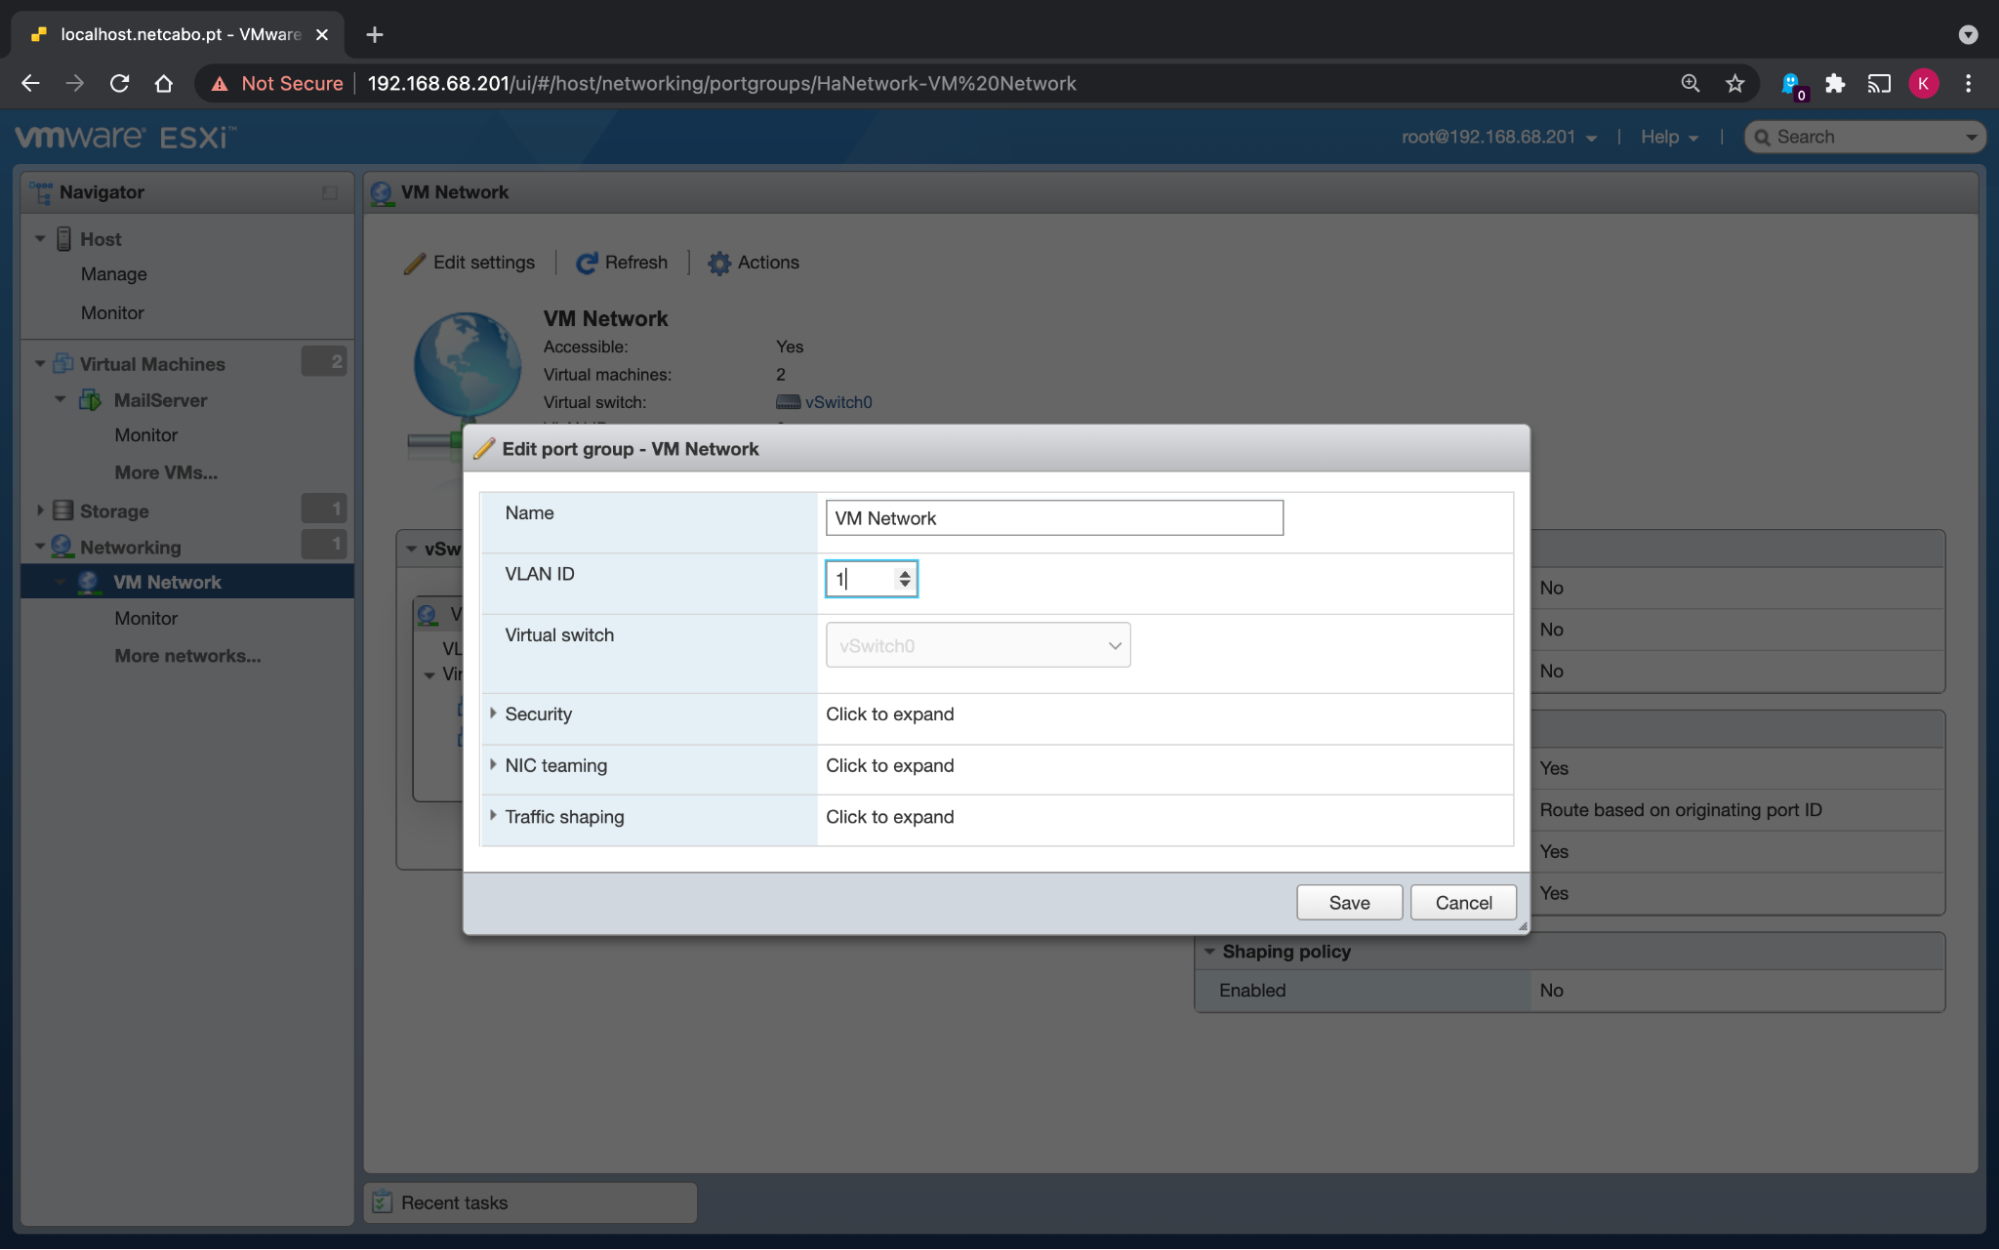
The new configuration will look like this:
Machine | Port group | VLAN | IP address |
MailServer | VM Network | 1 | 192.168.102.137 |
WebServer | VM Network | 1 | 192.168.102.138 |
ESXi | Management Network | 0 | 192.168.102.132 |
The VM WebServer can no longer communicate with ESXi, but it still can with the MailServer:
Take a Closer Look at Modifying ESXi Network Settings
Follow along with my video to see how to modify ESXi’s network settings to establish communication between two VMs - separate from the ESXi host:
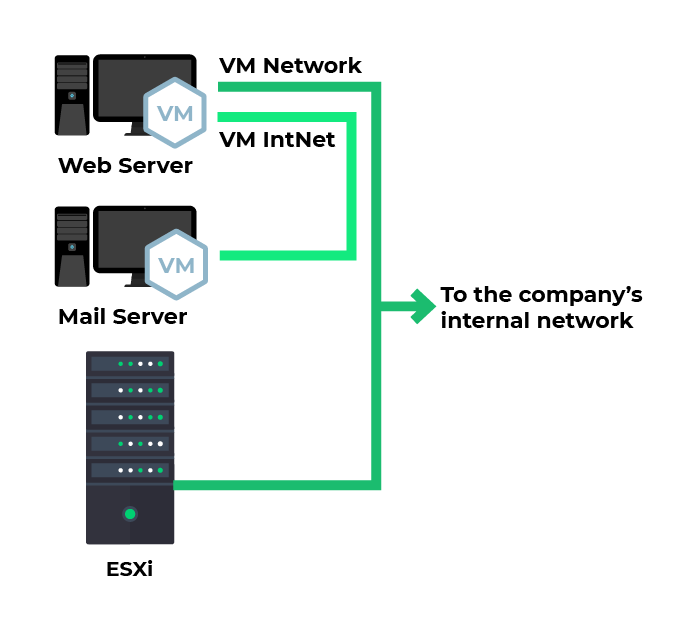
Create a Private Network Between VMs
Now our two VMs are connected to the port group of a vSwitch linked to a physical interface. The interface provides access to the company network and potentially to the internet.
But imagine you want to create a completely private dedicated network between the VMs.
For example, the web server needs to receive data from the mail server regularly. You could use the existing network, but it is better to create a different network for each use to optimize maintenance.
To do this, create a new vSwitch that won’t be linked to a physical network interface.
The aim is to create this type of network:
Let’s get started!
Step 1: Create a vSwitch
Click on New standard switch, and name it vSwitch1.
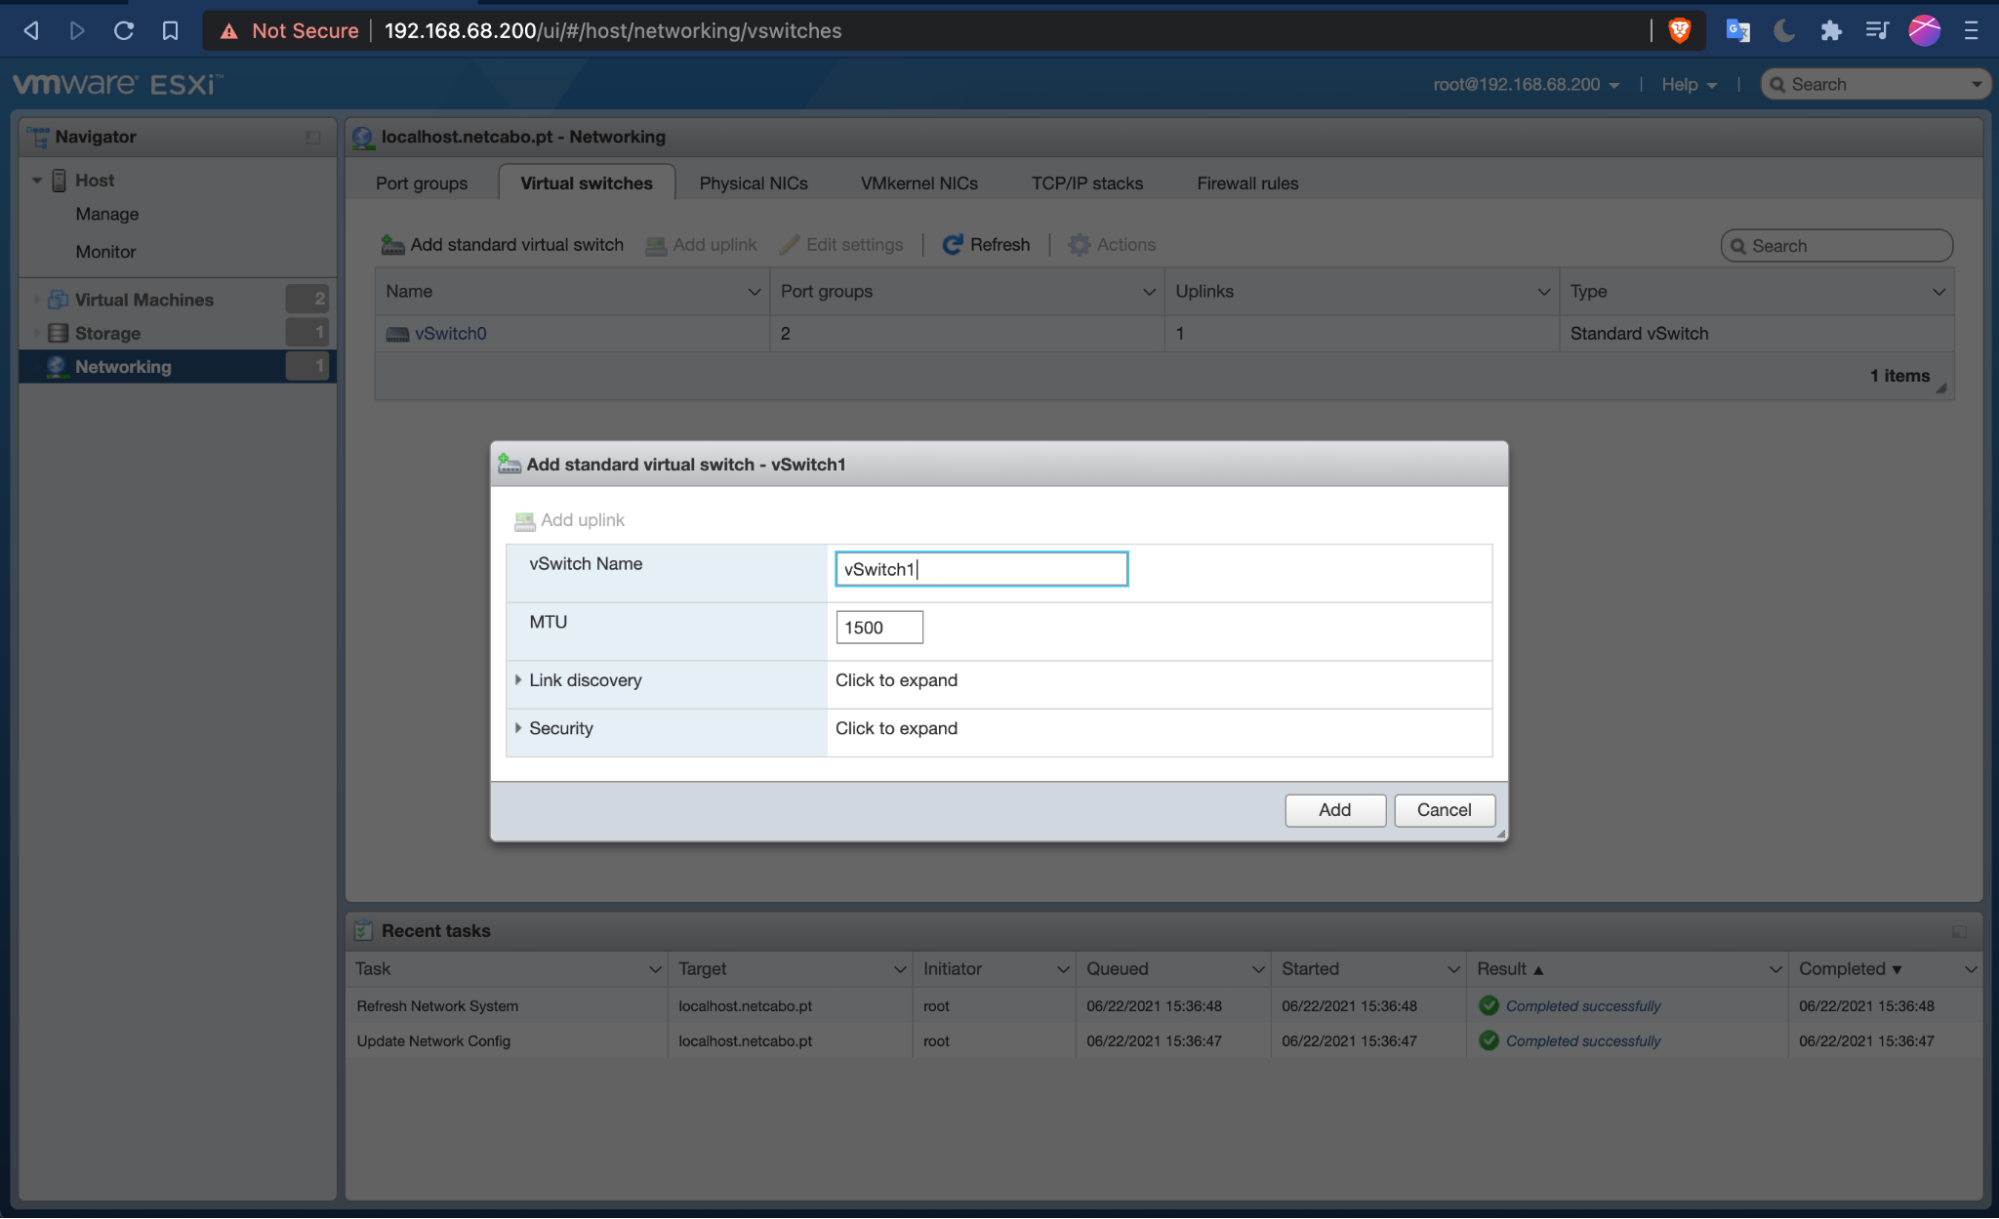
You’ll see no option to link it to a physical interface simply because none are free. The only physical interface is already linked to the first vSwitch.
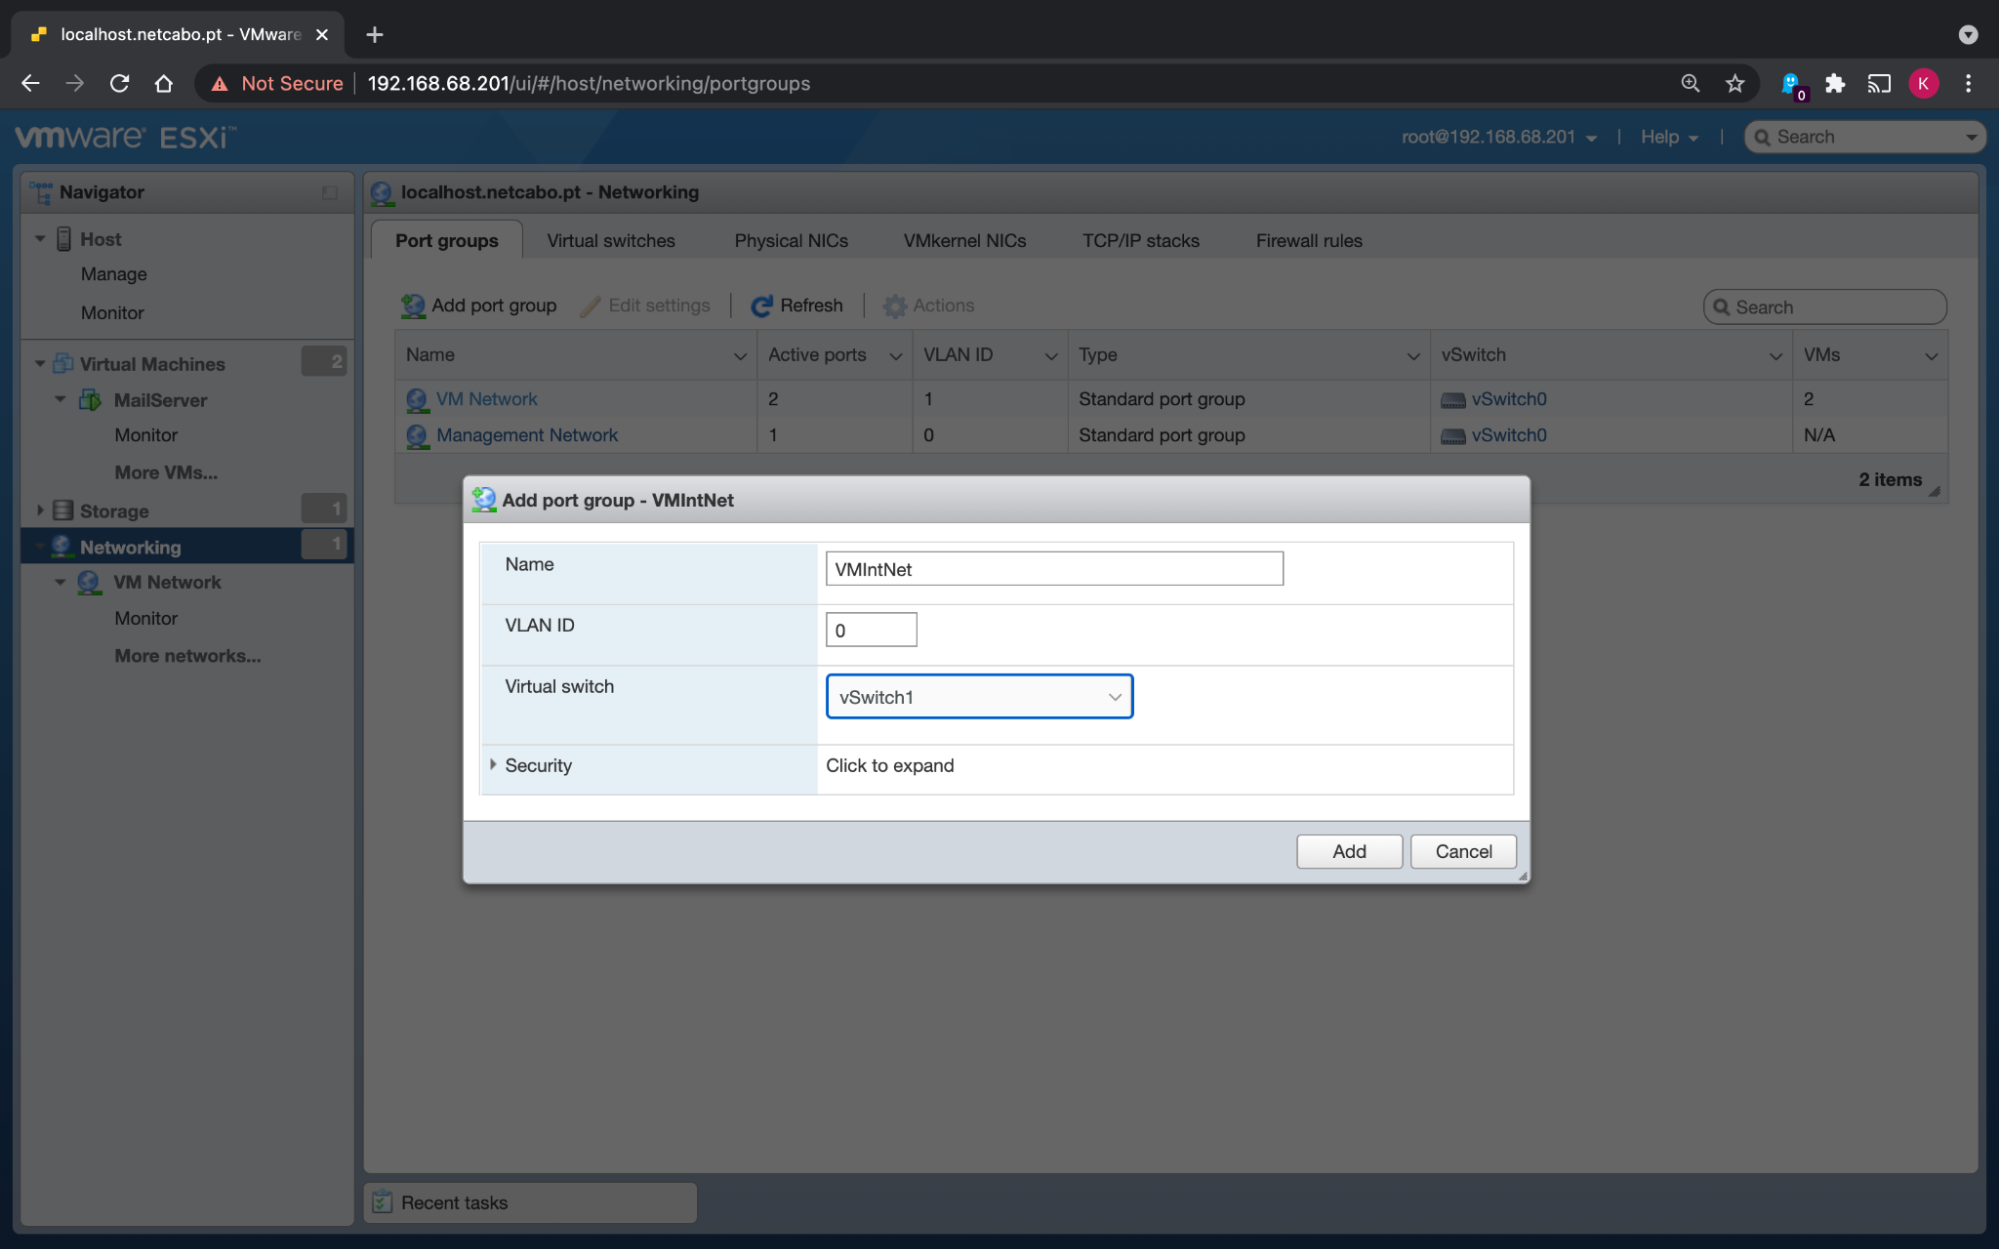
Step 2: Create a Port Group
Click on Add port group, and name it. I’ve named mine VMIntNet (for internal network). Make sure you associate the port group with vSwitch1.
Step 3: Add a Network Interface to the VMs
All you need to do now is open the configuration of your two VMs and add a network interface connected to the network VMIntNet.
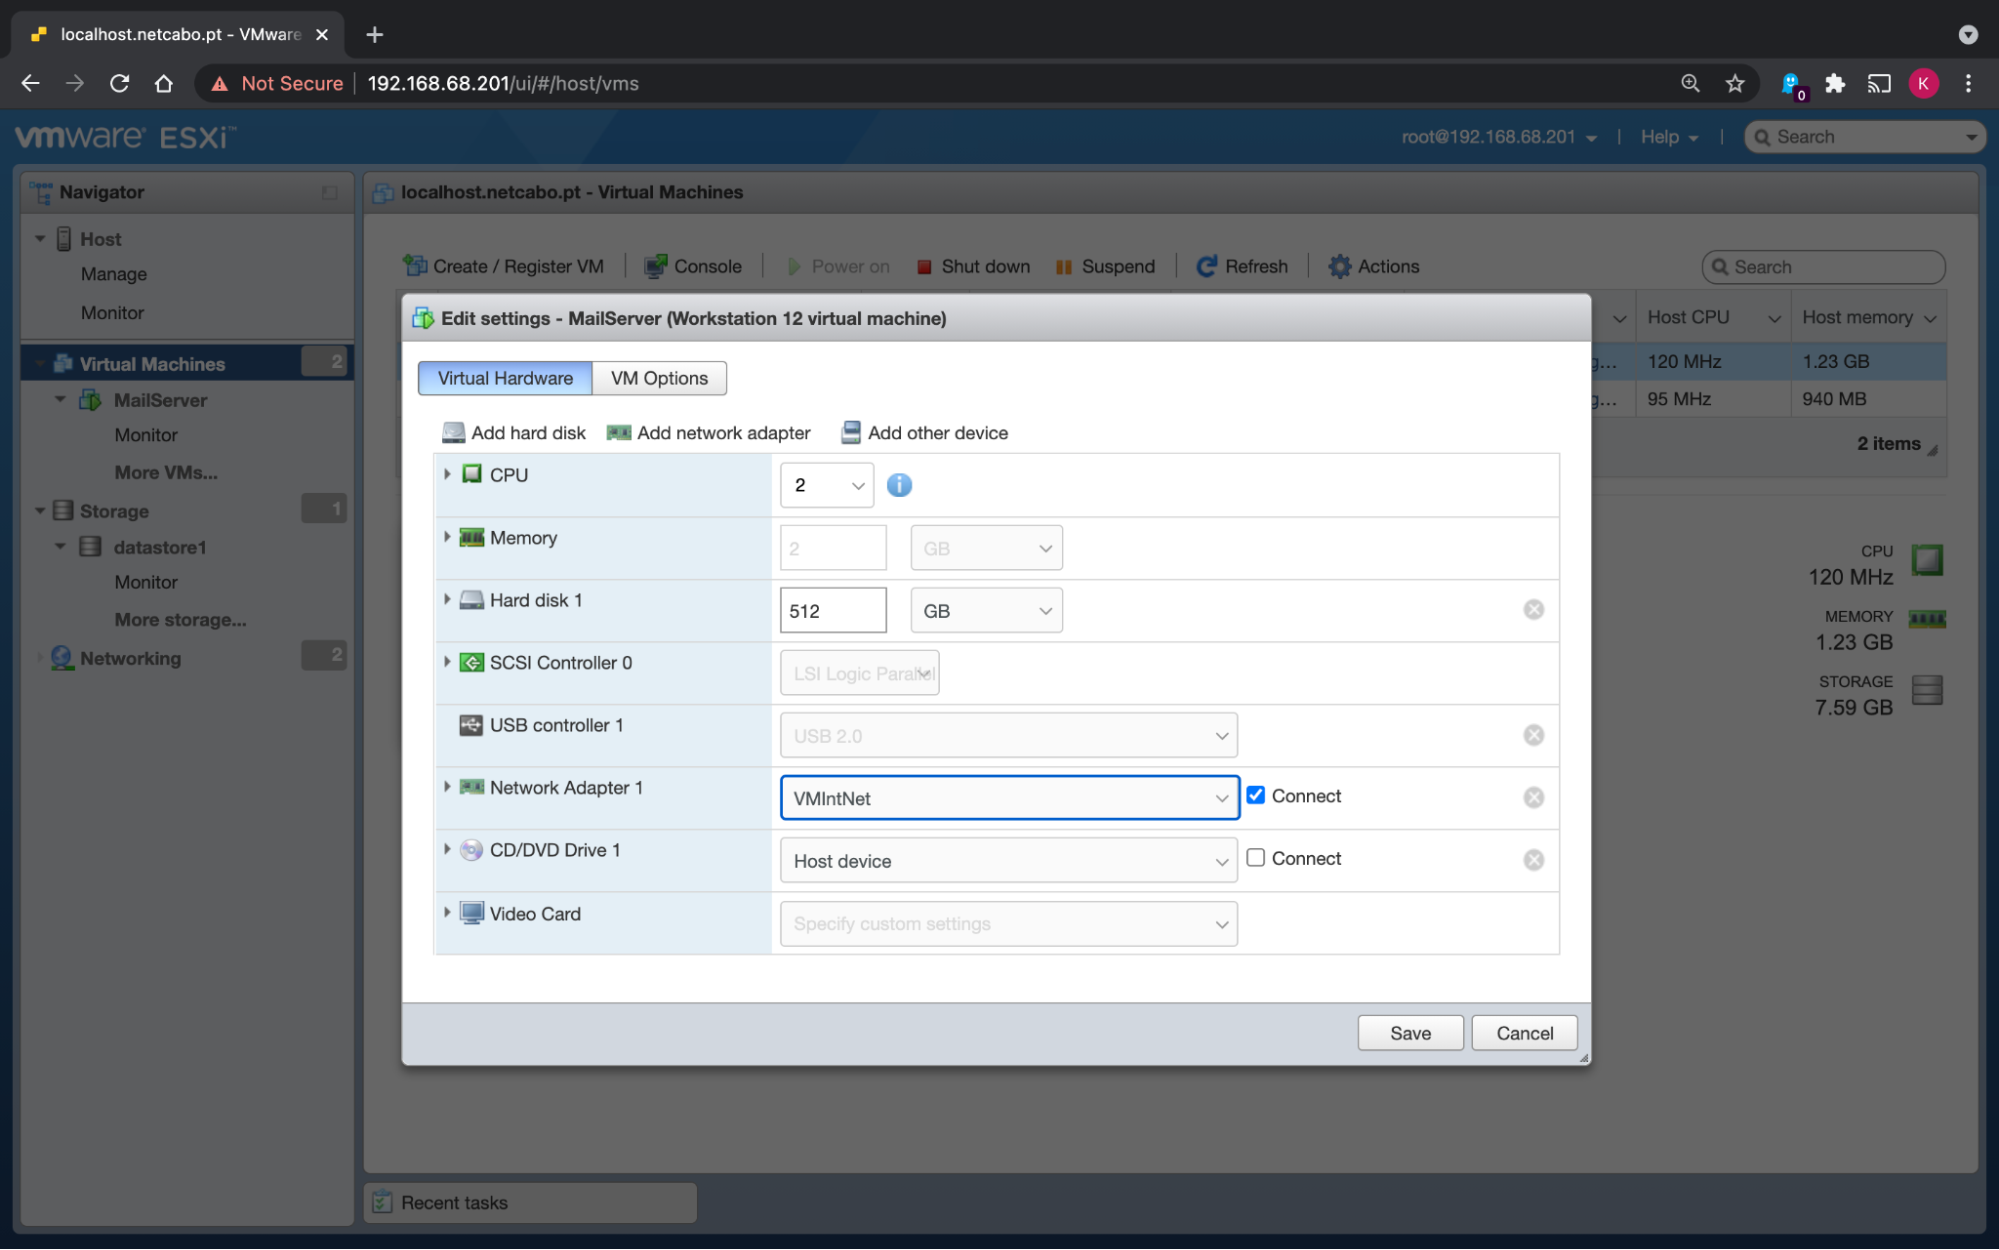
Then start your VMs.
This is what the vSwitch1 configuration should look like:

Take a Closer Look at Creating a Private VM Network
Watch my short video below to see the configuration changes before moving on to the next steps:
Step 4: Configure the New Interface
The command ifconfig shows that a new eth1 interface is present and that it has no IP address.
Assign the address 10.0.0.1 to the machine MailServer with the command:
sudo ifconfig ens33 10.0.0.1 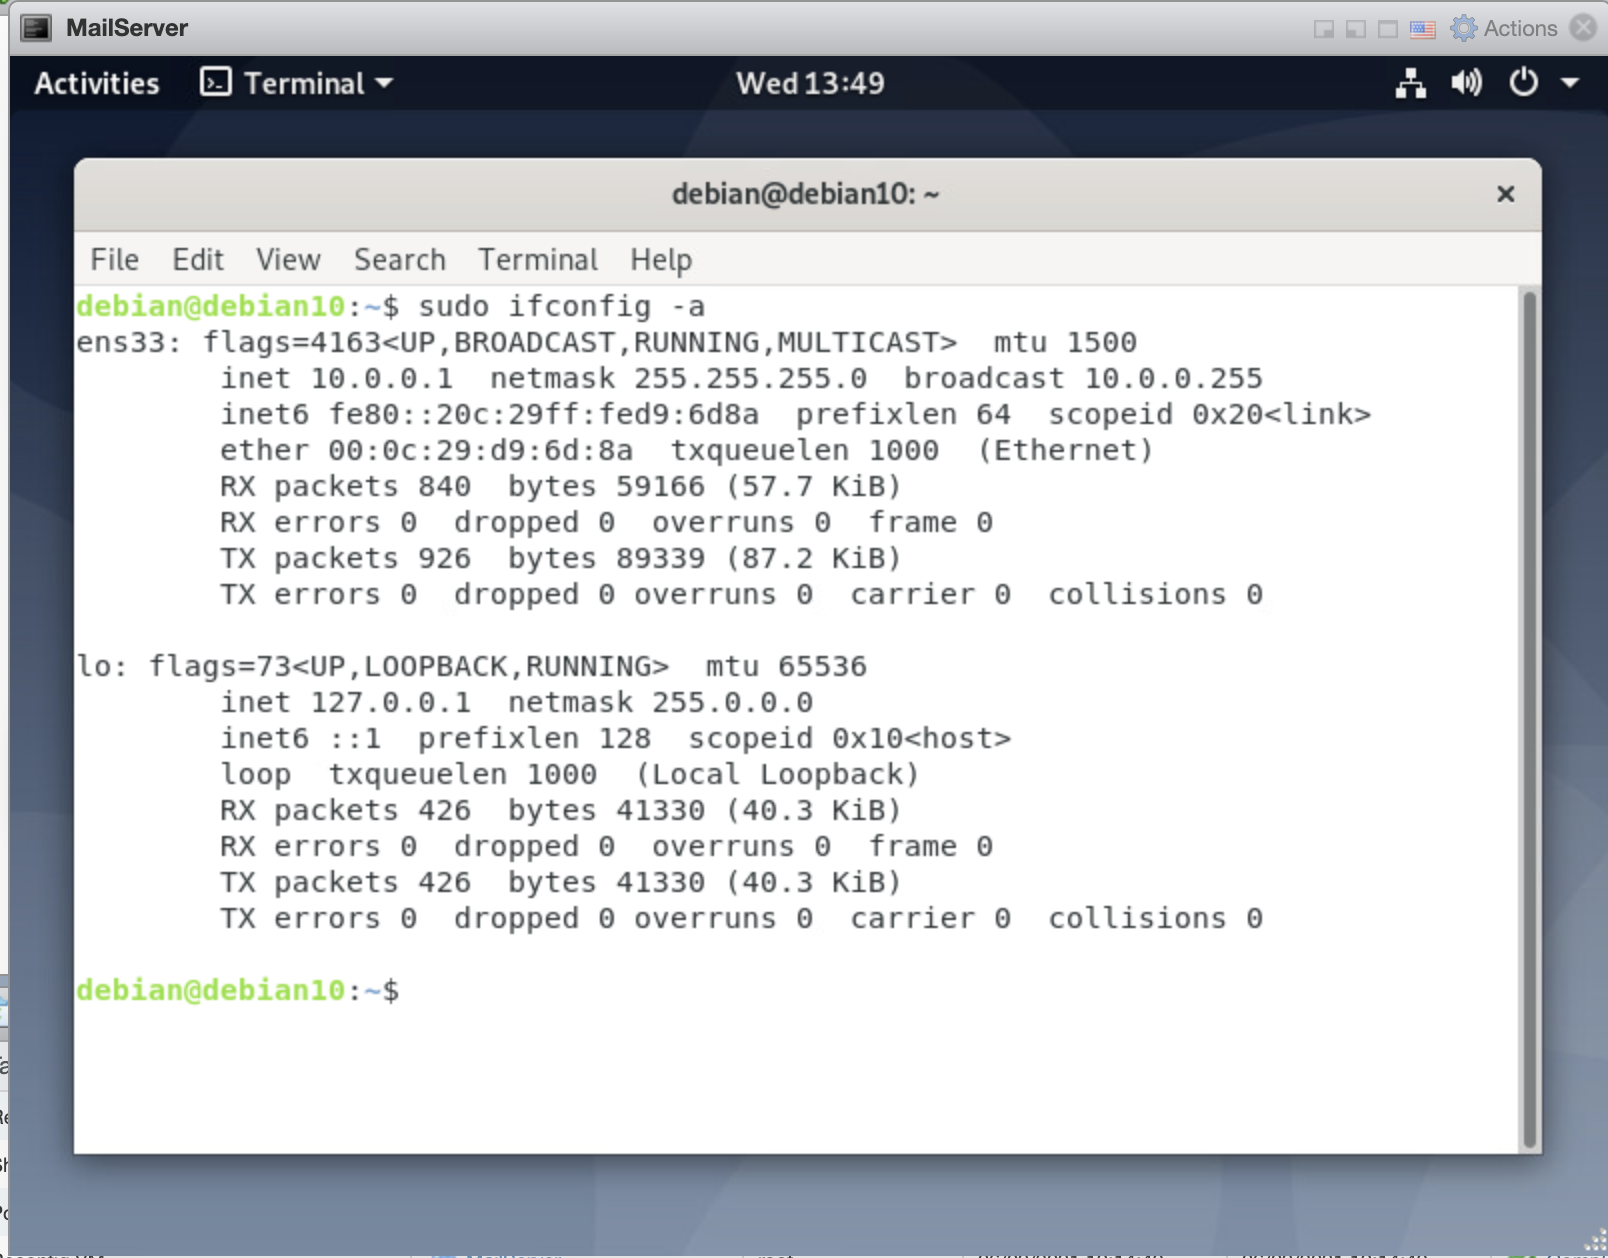
You will need to run a slightly different version of the machine WebServer command, so allocate the address 10.0.0.2, still on the ens33 interface.
sudo ifconfig ens33 10.0.0.2 Step 5: Test it!
The two VMs can now communicate via the new vSwitch1:

Take a Closer Look at Configuring the vSwitch
Configuring multiple virtual switches and port groups is not easy! Make sure you watch my video below to understand exactly how it is done before moving on:
Let’s Recap!
There are two default networks on your ESXi installation:
VM Network - a dedicated network for VMs.
Management Network - mainly for communication between ESXi and the company’s internal network.
A network or port group is connected to a vSwitch, which is connected to a physical network interface.
To isolate communication, assign a different VLAN ID to each port group.
To create a completely private network between the VMs, create a new vSwitch not linked to a physical network interface.
By using port groups and virtual switches, you should be able to isolate or connect your computers as needed depending on your environment. In the final chapter, we’ll go further with vSphere and see more possibilities with ESXi.
