Create Your First Tickets With Zendesk

Discover the Zendesk Interface
In this course, we are going to use Zendesk to explore some of the basic principles of managing and processing tickets. Zendesk is web-based and, like some other web-based tools, offers a time limited free trial for people who want to take a look around and learn about the products—which is what we’ll do.
We will explore the basics of using Zendesk as some of the more advanced features are complex to set up. We’ll leave them as optional homework if you wish to take things further.
With no further ado, head over to Zendesk and sign up for your instance (no credit or debit cards needed). For the examples in the course, we’ve set up an instance and called our business OurSuperCo. Learn more about the Zendesk interface by seeing how to set up an account in the video below:
Click the Free Trial button found on the Zendesk homepage to begin the process of setting up your own instance for the course.
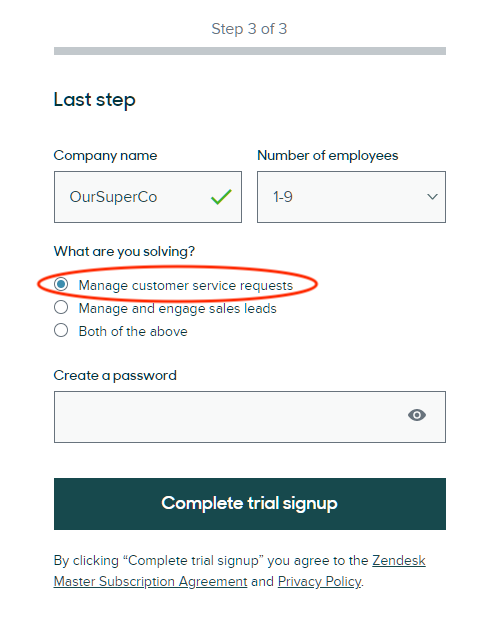
Follow the steps to enter your email address and contact details - followed by the company name that you will use for the course duration.
Remember:
Before setting a password for the account, make sure that Manage customer service requests is selected.
Once your account has been set up, spend some time getting familiar with the interface.
On the left-hand side of the page, you will see your navigation menu, which is where you can find details about tickets, Customers, Organizations, Reporting, and Admin tasks:

Click the Admin icon  and select Go to Admin Center.
As you can see, there are a lot of customizations that you can make on this page!

For now, we just want to make a small change and update our company’s Brand Color.
Click Account, select Appearance - Branding and update your Brand Color before clicking save.
That’s it for now! We are ready for the next step.
Create Your First Ticket
By now, you should have your free Zendesk instance set up. Go ahead and log in (if you haven’t done it already) and write up your first ticket!
When you first log in, you will see a quick introduction, which you can skip. When you get to the front page of your instance (“Customer Support Channels”), feel free to check out the “Ticketing System” presentation or click Dashboard:
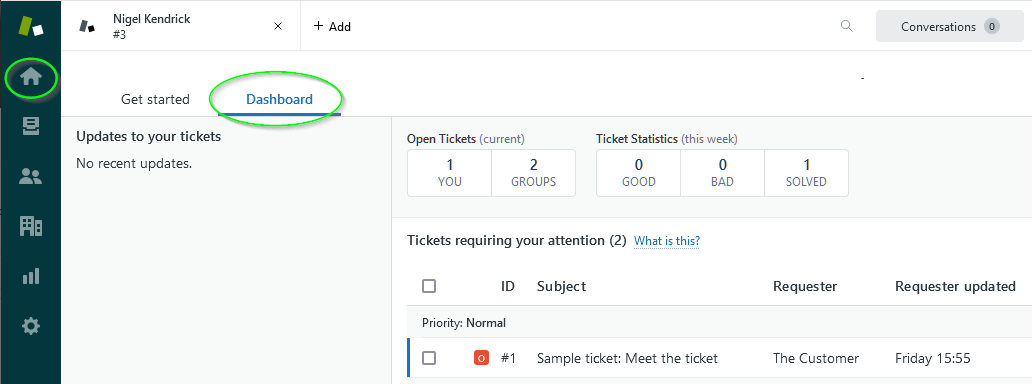
If you’ve found your way to the dashboard, notice that Zendesk creates a sample ticket. Feel free to check it over before returning to the dashboard view.
Hey, it looks like it’s time to process your first ticket; Riley from your sales department has just emailed you!
From: Riley Winter (RWinter@OurSuperCo.com) To: [You] Subject: Bugs in OurMonthlyPromo Website - customer sign-up |
Hi Support, We’ve just had a customer call to say they can’t sign up for our free offer of four cans of Mykitty pet food. Apparently, they have a hyphen in their surname, and the system won’t allow this character; I’ve tried it myself, and it doesn’t work. They also pointed out that the contact telephone and credit card number fields don’t allow spaces, which confused them for a while. Can we get these fixed as soon as possible? Thanks! |
Riley Winter Marketing |
On a live Zendesk system, this email would automatically create a ticket, but this time, Riley emailed you directly so you’ll have to do two things:
Manually create a ticket and copy the details of the issue from the mail.
Remind Riley to use the support team email address or our support portal.
Why shouldn’t Riley email support people directly?
Directly emailing a support person means issues go unnoticed if they are out of the office, unwell, have moved departments, or have left the business. Always encourage customers and employees to use the team/support desk address. The support team should represent itself as a single point of contact so customers and colleagues can engage with anyone rather than waiting for a specific person every time.
Let’s Create a Ticket!
Time to manually create Riley’s ticket; follow the steps in the next video:
On the Views page:
Select +Add in the top left of your screen.
Select Ticket from the dropdown menu.
Click on +Add user (that’s Riley) and add them as an end user (Staff members are people providing support services).
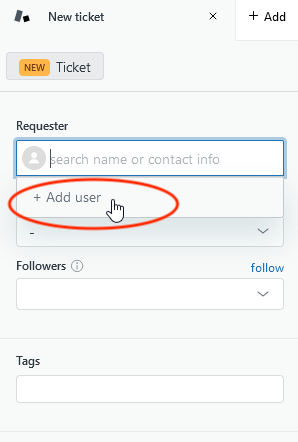
Remember to specify a unique email address; ideally, the ‘+’ trick to have the emails sent to you will work.
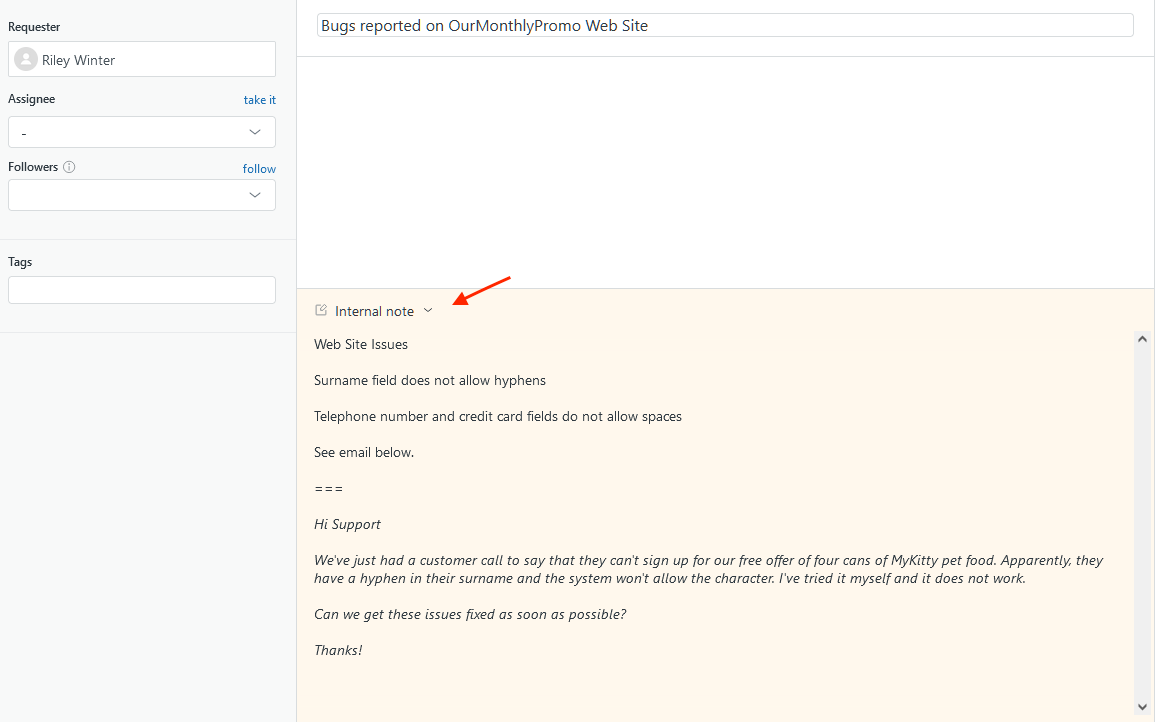
Enter a descriptive subject, such as: “Bugs reported on OurMonthlyPromo website.”
Select Internal note, and paste Riley’s inbound email into the note field.
Go to the top of the note field, add a few blank lines, and then type:
Web site issues:
Surname field does not allow hyphens.
Telephone number and credit card fields do not allow space.
See email below.
===
Select the Tags field on the left and type ourmonthlypromo [space] bug [Enter]
The tags will be created and later help us search for similar tickets and categorize them in our reports.
Click Submit as New.
Congratulations! You have created your first “new” ticket! If you check your inbound email or test account, there should be a message waiting! If not, check your setup and see if the email went into spam.
But what if there’s someone most able to help with Riley’s issues?
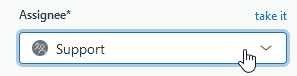
Any time during or after creation, a ticket can be assigned or reassigned to specific people or groups:
Sometimes, groups are used to define specializations, such as web bugs, printers, networking, etc. As well as having one or more specific people in the groups, a team leader or supervisor is added to catch times when all other group members (or the one member!) are not available. Adding these extra people reduces the problems associated with assigning tickets to specific individuals.
Many systems can also be trained to identify key words or phrases in the ticket notes and suggest the most appropriate person or team to handle the ticket.
We’ll see how to assign tickets in more detail later in the course!
Let’s Recap!
Zendesk has a handy navigation menu, which is where you can find details about tickets, customers, organizations, reporting, and admin tasks.
Ticket tags help identify the nature of tickets and establish trends and patterns when reporting.
The support team should present itself through its communication as a single entity, rather than individual people; this means the customer can engage with the team rather than asking for the same person all the time (who might not be available).
Well, that’s a cracking start to service desk operations: We’ve gone from theory through guidelines, had a quick look at the ITSM tools marketplace, and created a ticket! There’s no stopping you now, so let’s check that you soaked up all of this in the quiz before taking a peek at how to manage a ticket’s lifecycle.
