Prioritize Your Tickets
The order in which a service desk receives tickets is usually not the order in which they are processed. Just like you had to decide whether to fetch in the washing first or look for a pack of paper right at the start of the course.
Every ticket has a priority based on two key factors: the business impact and urgency of the incident.
Establish Incident (or Request) Impact and Urgency
The business impact of a ticket is determined by asking the following questions:
“What is the damage radius of the ticket’s issue. One person? Whole departments? The entire business!?”
“What is the financial impact of the issue?”
The term urgency measures an incident’s time to significantly impact a business. Therefore, the urgency of a ticket is determined by asking the question:
“How bad will the situation get if we don’t deal with the matter quickly?”
Here’s a scenario:
If the only computer responsible for processing the records for items leaving a warehouse breaks down, it will probably have a very high business impact on the company as a whole.
If the computer broke down on a busy Monday morning, it’s going to start affecting dispatch logistics very soon, making the incident urgent and of high priority. However, if the computer broke down at the end of the day on Friday, the warehouse will be closed for the weekend, and a weekend maintenance team will be on-site. They will have about two days to fix the problem before Monday. In the second scenario, a fix is not as urgent, as it will not impact business during the weekend; it will be treated with a lower priority level.
Establish Incidents (or Request) Priority
An incident impact and urgency matrix like the one below is a common tool to help you define your scoring criteria in ticketing solutions like Zendesk.

Once a set of priority levels has been mapped, the only remaining task is to define what P1, P2, etc. mean in terms of how quickly an issue or request should be acknowledged (response time or time to respond), and how quickly the support team should aim to resolve the ticket (resolution time, time to resolve, or time to fix).
These definitions might be predetermined (e.g., P1 = 10 minute response time, 2 hour time to resolve) or could vary by item, department, or customer contract; some customers may pay more for quicker service.
These timing values are part of the support team’s published service levels, or service-level agreement (SLA). They help measure performance and identify changes in performance. They can also sometimes determine whether the customer gets a financial rebate or service credits if the performance does not meet agreed upon targets!
What if it takes longer to resolve a ticket than the allocated time?
If it looks like it will take longer to resolve a ticket than its SLA allows, the ticket is escalated to a more senior or experienced person or team to bring in more resources.
Zendesk has a simplified priority system, which you can use for your tickets, but you have to turn it on first. You’ll see how to do that and enable some other fields in the video below:
To turn on the ticket priority field:
Click the Admin icon.

Select Ticket Forms from the Manage section (on the left).
Select the Default Ticket Form.
Click + against all the available ticket fields. You should end up with this configuration:
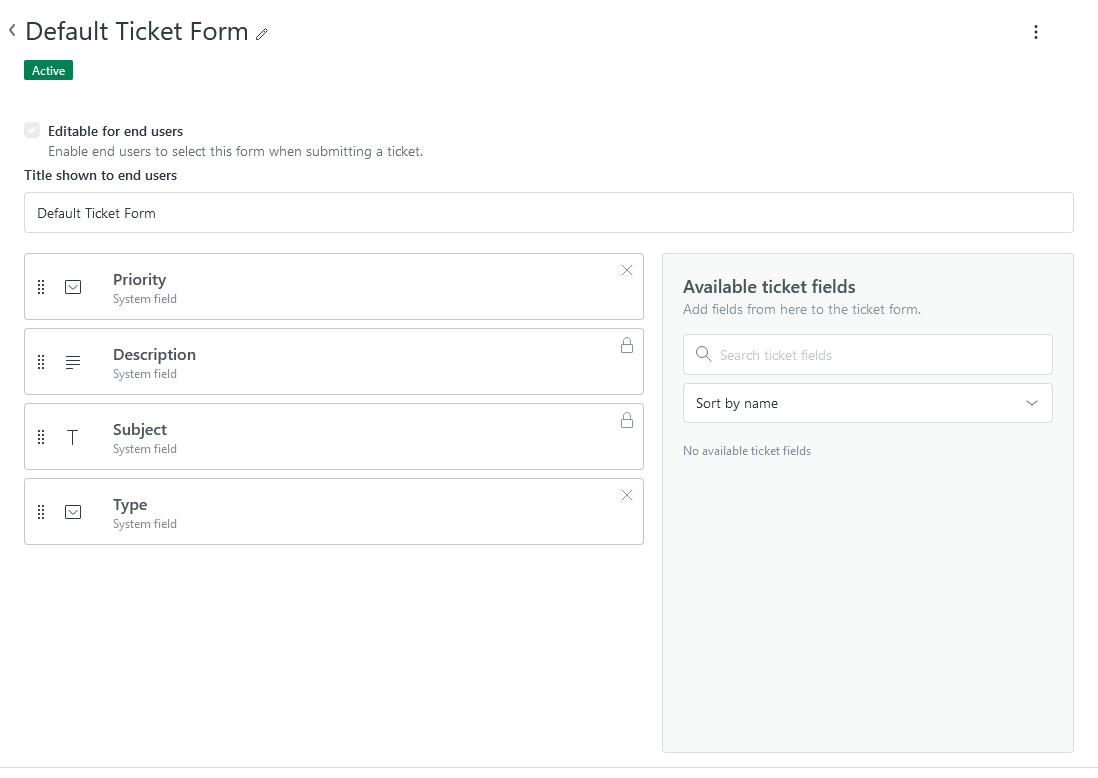
Click Save (bottom right).
Sign out and sign in again to activate the new form configuration.
Return to Riley’s ticket and check out the new fields!
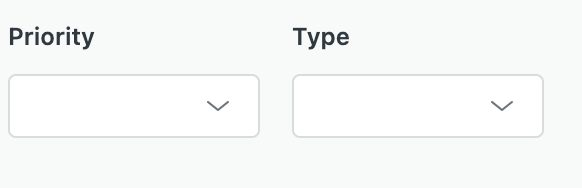
Now we can prioritize our ticket and categorize it as an incident, which means something unexpected has occurred.
Change the ticket priority; what do you think!? Is this a major issue? It looks like the issue is impacting everyone using the Web site, and it needs fixing rather quickly - perhaps it’s high or even urgent. Your call!
Set the ticket type to Incident.
Notice that you can now link this incident to another; that is how you can see whether you have some common incidents that might need reporting or investigation as a Problem. We’ll look at that later.
When you have made your changes, click Submit as Open, and our ticket is now live and ready for further processing!
As a final touch, and since you are now a views whizz, add the ID, Ticket Type, and Priority fields to our View (Unsolved tickets in your groups):
Go to the Views page.

Select Manage views at the bottom of the list.
Choose Unsolved tickets in your group from the list.
Scroll down to Columns and click on Add column.
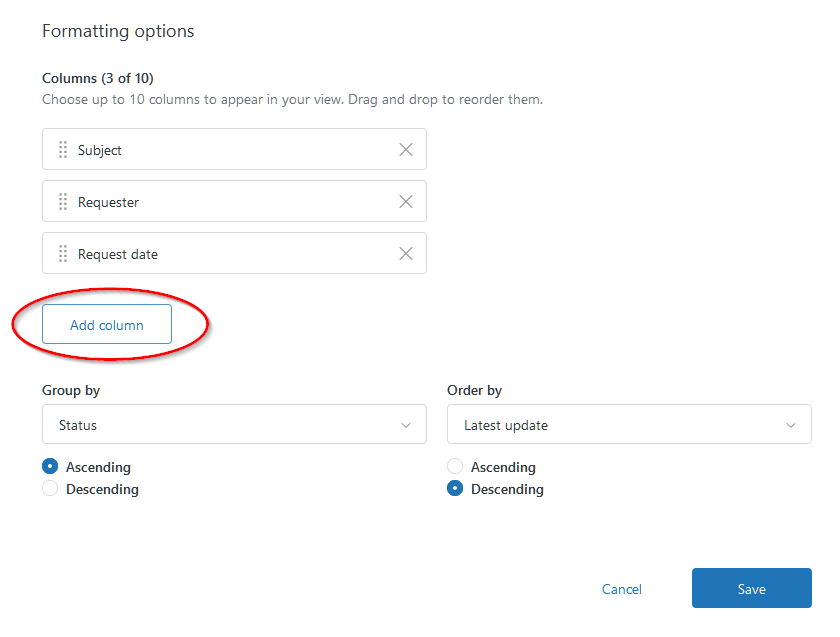
And choose ID, Ticket Type, and Priority from the drop-down menu.
Note that you can rearrange the columns with click and drag while editing the fields list. Now click Save.
Now we should see these changes immediately apply to our view as shown in the image below:

Fantastic! You’re grasping how to handle tickets in Zendesk!
Let’s Recap!
Based on business impact and issue urgency, prioritization establishes the order in which tickets are processed.
Service level agreements govern the response and resolution times associated with ticket priority levels. These times may vary by customer or department.
Zendesk has a simplified priority system, where you can choose the priority level from a dropdown menu.
The priority level and ticket types (question, incident, problem, task) can be added to the Views page, so we always know the latest status of our tickets.
Now that you know about prioritization and how to set it up in Zendesk, it’s time to see what to do next with your tickets. Who do you assign them to? What happens when you escalate a ticket? Let’s check it out in the next chapter!
