Foolproof and Schedule Your Scripts

Foolproof Your Script
To complete the backup script, we will wrap the Robocopy operation in a PowerShell failsafe routine (try) that allows the script to continue in the event of an error and send a message (catch) if something’s wrong.
Use notepad.exe or your favorite text editor to create a PowerShell script called dobackup.ps1 - for example (from the command line):
notepad dobackup.ps1
Notes:
Specify your destination folder in place of E:\backup if it’s different.
The robocopy command is all one line - it’s line wrapped below.
The script also identifies your user name so that it can write the log file into the right documents folder.
Enter the following text, including the “#” comments. These are to document your work for others who follow, or for you if you come back to the code some time later.
# My backup script
# Version 1.0
# Date 30-Dec-2021
#
try{
robocopy C:\windows\fonts E:\backup /E
 /LOG:c:\Users\$env:USERNAME\Documents\backup.log
}
catch{
Write-Output "Error when running daily backup"
}
Once you have saved the script, you can try to run it by typing .\dobackup in PowerShell and pressing Enter.
If you receive an error message stating that your script cannot be loaded because running scripts is disabled, you may need to permit the execution of local scripts by typing:
Set-ExecutionPolicy Remotesigned
in an admin PowerShell window and trying again.
If you get an error message with the Set-ExecutionPolicy command while using a company computer, refer to your IT department.
For more information on the Set-ExecutionPolicy command, see this Microsoft article.
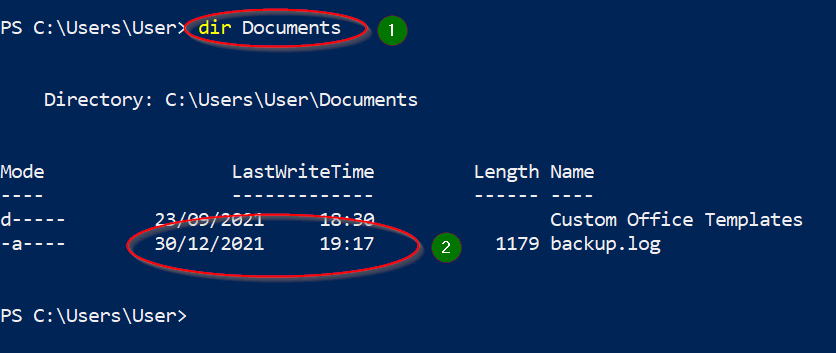
To verify that your backup has run, do a directory listing (1) and then check that the timestamp on your backup log is up to date (2):
If everything is working as expected, well done! You are now a PowerShell user! Many server automation and management tasks are done in PowerShell, so it’s a handy skill to have.
You can now close your PowerShell window, and we’ll go back to the Windows graphical user interface (GUI).
Automate Your Script
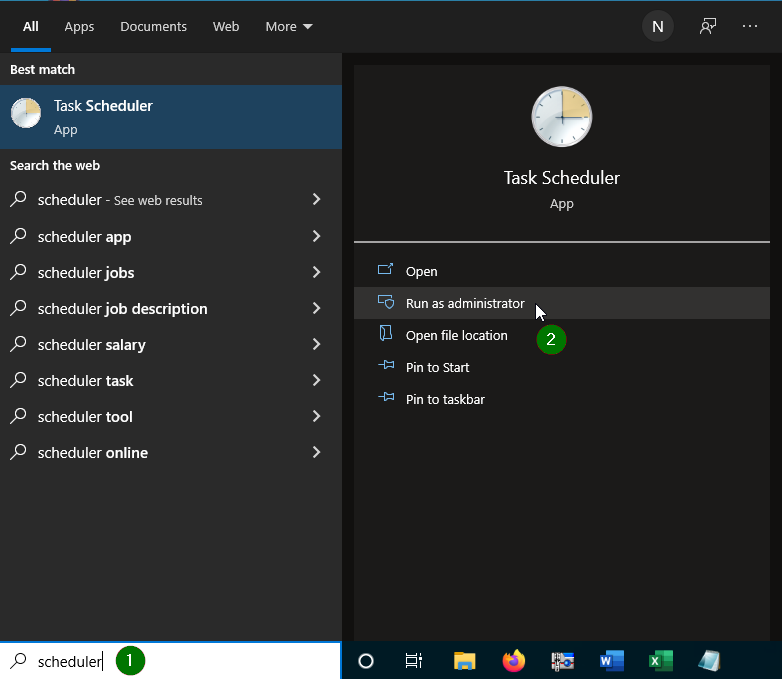
To run your script automatically, we need to ask the Windows Task Scheduler app to run it for us. Start by running the app in administrator mode; this step is very similar to how you start PowerShell:
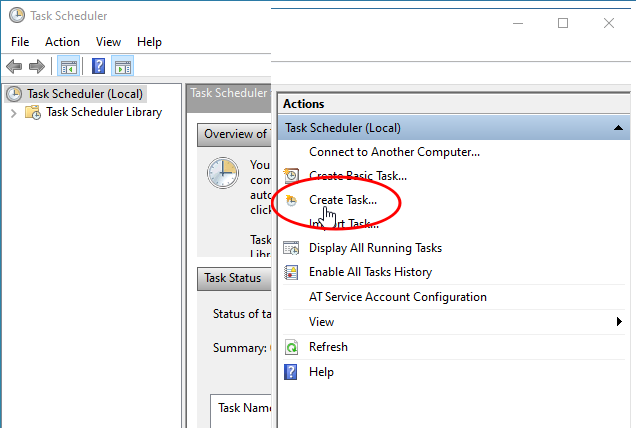
We need to create a new task:
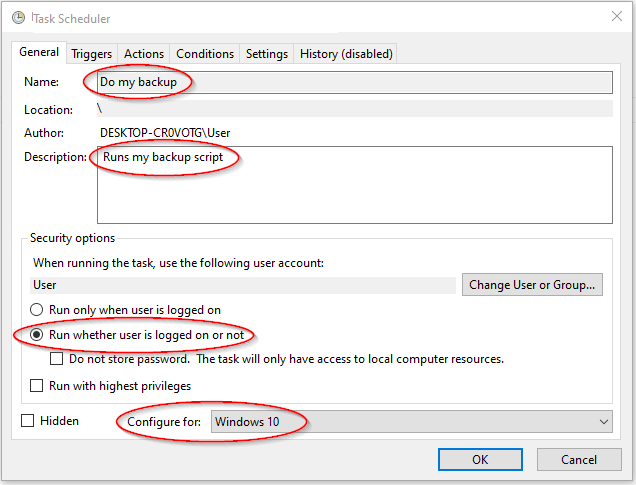
Fill in the required information on each tab and only click OK to save the created task when you’ve completed everything highlighted in the image below:
Adapt the Frequency of Your Backup

Now we need to define how often we want the script to run:
Click on the Triggers tab.
Click on New.
Set the start date and time.
Set the frequency of your backup script (every day).
Tick the Enabled box and click OK.
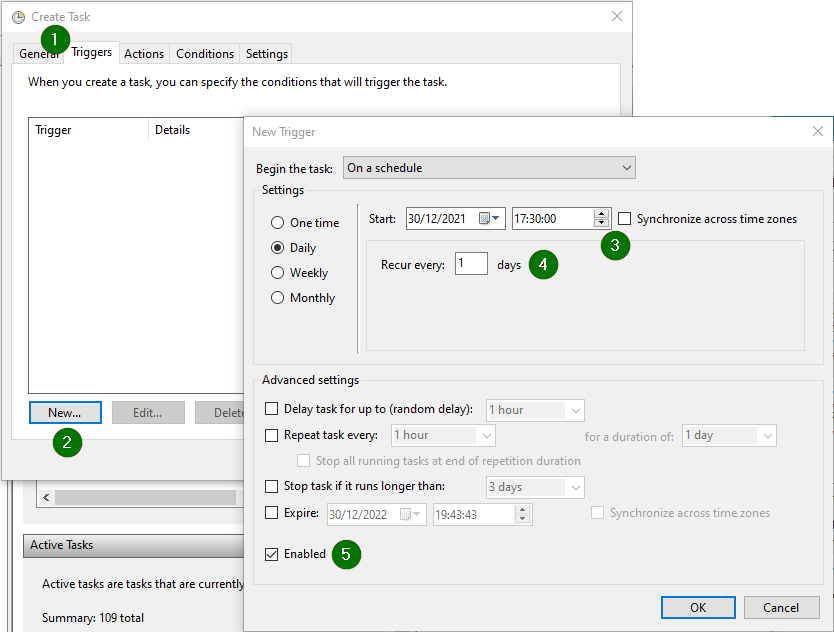
Here, create a new trigger for the script and set it to run daily at 17:30 (5:30 pm).
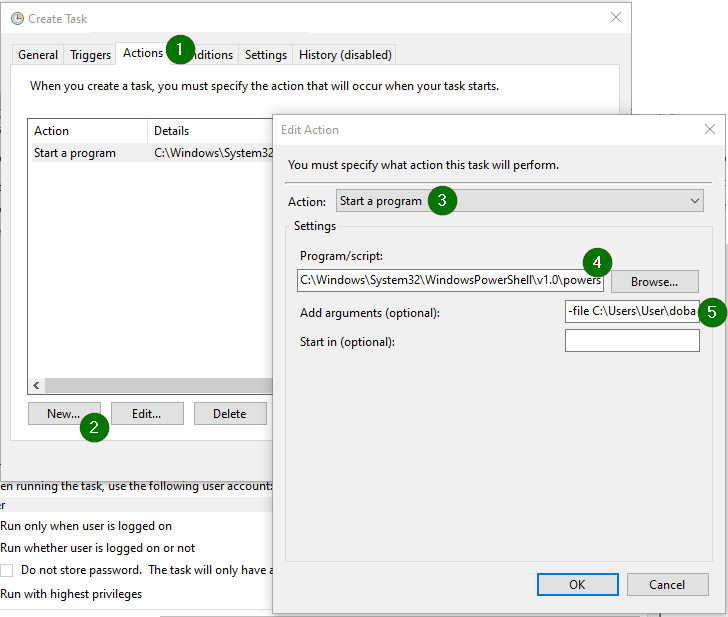
Finally, we need to define what happens when the task is triggered; we want PowerShell to start and run our script. Note how this information is entered:
Click on the Actions tab.
Click on New.
In the Action dropdown menu “Start a program” is set by default. Keep it.
Select the program/script field using Browse. Here you need to select C:\Windows\System32\WindowsPowerShell\v1.0\PowerShell.exe
In “Add arguments,” you will have to specify the script path. In our example: -file C:\Users\User\dobackup.ps1
All user account home folders are located under C:\Users on a standard Windows installation. Our example user is called User, hence that name is seen in the above command. If you are trying out this setup, use your login name here instead.
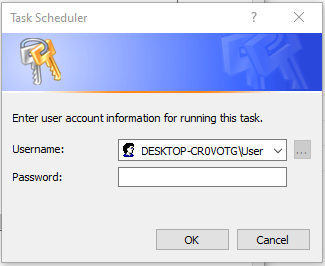
Finally, click OK to close the Edit Actions window and click OK again to close the Create Task operation.
You will now be prompted to re-enter your password to confirm the task has authority to run and that you have authority to create the task:
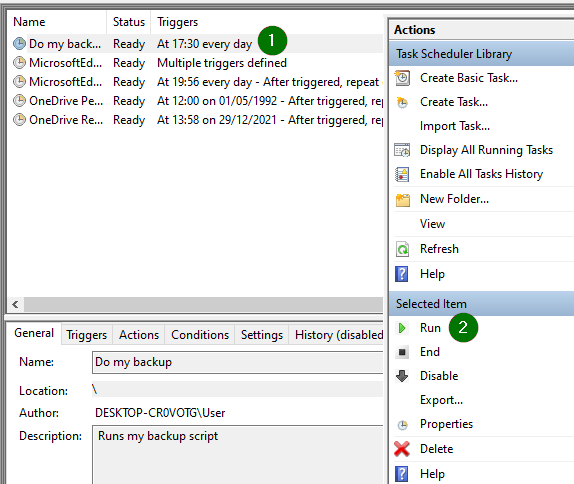
From the Task Scheduler Library you can run your script manually at any time by selecting it (1) and clicking the Run action (2). Try it now!
Now use Windows File Explorer to check the timestamp of the log file, which should be up to date if the script completed correctly. Double-click the filename, and you should see a report about your latest backup.
Try running the backup manually again to confirm the timestamp changes! Double-checking is always safer!
If the script seems to be running for a long time, click the Refresh button in the right panel to update the status.
Well done, you have created a scheduled copy/backup task!
Modifying the original PowerShell script would allow other folders to be backed up, such as My Documents, picture folders, etc. Similarly, you could change the destination from a USB flash stick to an external disk drive or shared network folder.
If you are interested in learning more about PowerShell and Robocopy, check out this article. Here you can find some good examples of scripts.
Let’s Review it in a Video
Review the different steps you saw in this chapter in the video below:
Let’s Recap!
To run your Robocopy command with some error handling, you can wrap it in a script file.
You can arrange for the Windows Scheduler to run your scripted backup according to your specified schedule.
Having the script write a log file helps check that it’s running as expected because you can check the log file’s timestamp and contents.
You now know how to create PowerShell Scripts and automate them! In the next chapter, you’ll see how to use the Windows graphical application EaseUS to set up and manage backups. Let’s go!
