Step 4: Develop a Solution for Continuous Improvement
Pick an Idea Using the Funnel Technique
Your brainstorming session hopefully generated a...storm of ideas!
How do you know which one is the best for your project?
Vote for Your Favorite Ideas
Whittle down the number of ideas by asking your team to vote for their favorite.
There will most likely be duplicates— it's a safe bet that a lot of people will vote for the same ideas. Good! This will make the next step quicker!
Describe the Ideas and Create A Visual Representation
For each of these ideas:
Create a visual representation of it (outline, schema, sketch, etc.), so it can be understood at a glance.
Explain the general idea in a few lines.
List the benefits, needs, and limitations involved in developing it.
This will provide you with the information you need to rule out ideas that are too unrealistic or adapt them to make them feasible. To re-evaluate ideas, use the following approach:
"This idea will only work if…"
You will end up with a list of feasible ideas, or at least, ideas that are achievable under certain conditions.
Analyze the Remaining Ideas Using Objective Criteria
You now have a shortlist of ideas originally selected based on subjective criteria (the personal preference of each voter). To pick the final idea you’re going to use, check these ideas against some objective criteria.
These are criteria you can use to "rate whatever ideas you have left. Alternatively, you can analyze them according to your own pre-defined criteria, such as cost or simplicity, by rating them individually on a scale of 1 to 5.
For example:
Is this idea easy to implement?
Is this idea desirable/ethical/sustainable?
Is this idea useful/convenient?
Design the First Prototype of the Chosen Solution
The answers to these questions will give you an idea of how feasible each idea is, so you can pick the most promising one.
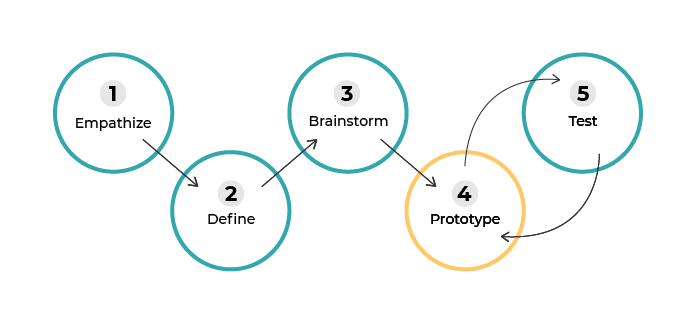
Now for step 4: Prototype.
Dwelling on every little detail can be time-consuming, and being a perfectionist at this stage can actually turn out to be a big disadvantage. If you get to the last phase (Test) and realize that your product isn’t up to snuff or that you made a mistake, you’ll have to start all over again! And nobody likes wasting precious time.
At this stage, nothing needs to be set in stone. Keep your first prototype simple and functional—you’ll have all the time in the world to improve it, refine it, and embellish it as the feedback from the test stage comes in.
There are different ways of designing a prototype, depending on what type of product you’re working on.
If your project is:
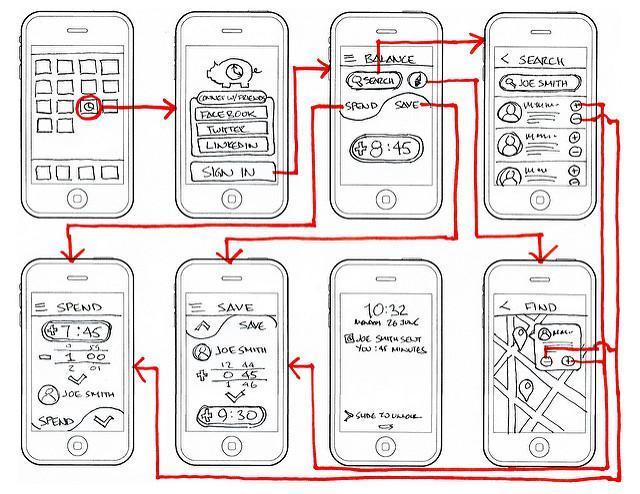
A website or mobile application, then your prototype will be a mockup (aka wireframe):
For a résumé or communication document, use a hand-drawn first version.
If you’re redesigning a space, your prototype will be a floor plan.
For a piece of furniture, a decorative object, a car, etc., you can use a drawing or create a miniature 3D model.
For a service or process, use a conceptual diagram.
Iterate Your Way to a High-Fidelity Prototype
You can repeat step 4 to improve your prototype after testing it in step 5.
As you develop your project, you’ll come up with a succession of prototypes.
The first one serves as a draft to provide an idea of what your product will look like so you can try it out with a test group of users in step 5.
The next iterations will progressively incorporate improvements made based on feedback (critical feedback provided by your users in Step 5) until the final version is ready.
For example:
Imagine you’re a digital project manager, and you’re designing an interface for a new section of a client's website where users will be able to share their portfolio online.
Your first prototype is a wireframe, which you test with a group of users in step 5 to hear their feedback.
You take the feedback into account and create a mock-up or model (using a tool such as Figma, Adobe XD, or Sketch). Again, you test it with a group of potential users, who provide comments and feedback.
You then improve the mock-up and make it interactive so that you can test the interaction experience. You can do this with the tools mentioned above, but these won’t make your prototype functional (only interactive).
You refine the prototype again and again, making sure everything’s working properly every step of the way before continuing. You can then start creating the final prototype (you can do this yourself using a no-code tool like Glide, or leave it in the capable hands of whoever is in charge of developing it—for example, a team of engineers).
If you're working on redesigning a process, such as the onboarding process for new employees at your company, your prototype will be different:
The first prototype will represent the different phases of the onboarding process using an arrow diagram. You can ask for feedback on it from employees who have recently been recruited, who are likely to have an opinion on the matter.
Finding out what worked for them during onboarding and what they like or dislike about your model will help you improve your onboarding process diagram, by clarifying certain phases and deleting others, for example.
Once you’re confident that the process is moving in the right direction, you can work on each individual phase: prepare the support tools, work out how long each phase will last, incorporate them into a schedule, etc.
When your process is up and running, try it out with new recruits. This will help you pinpoint anything that’s not working and use their feedback to improve it. The iterative process will help you gradually make the process more dynamic and enjoyable for subsequent waves of new employees.
Include Potential Errors in the Prototype
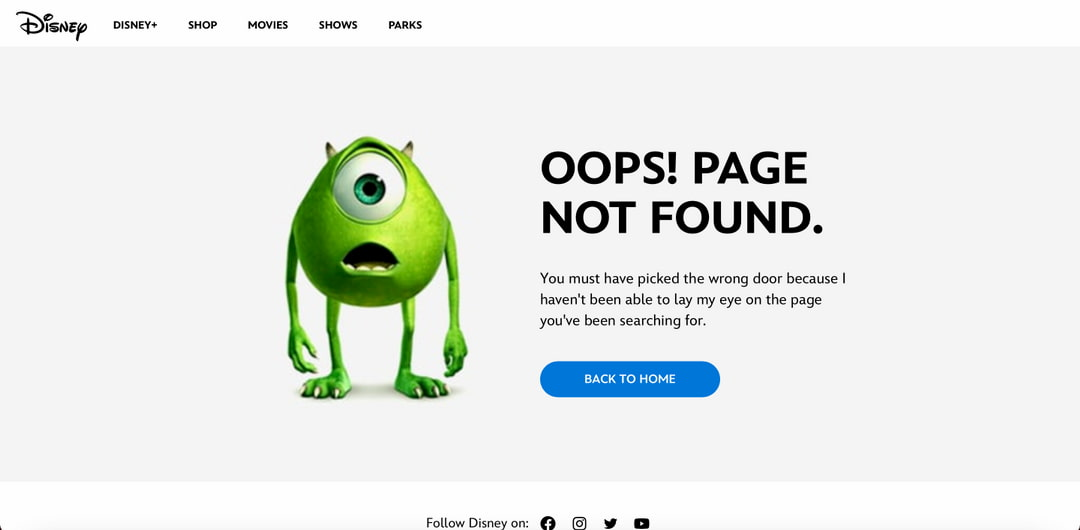
When creating a design, the most obvious consideration is to ensure that the product works well. But it’s also important to think about what happens if an error or problem occurs. For example:
What happens when your mobile app encounters a bug? When a user lands on a web page that doesn't exist, is there a message to let them know?
When a field is filled out incorrectly in a form, is any help provided for the user?
When a new employee is late in following up on their onboarding, is a message automatically sent to them?
What happens when a student fails a quiz in an online course?
All of this should be included in the design of your prototype!
Let’s Recap!
The idea of a prototype is not to come up with a perfect solution straight away but to improve it progressively with each new version.
Low-fidelity prototypes help prevent you from going down the wrong path with your project and can therefore save time.
Steps 4 and 5 of the design process work together—they follow each other in a loop. This iterative process helps the idea improve.
The form the prototype takes will vary depending on the project or concept, but it will often be a drawing or diagram in the early stages. This visual representation will gradually develop into a high-fidelity product which is interactive or even functional. It can then be handed over to the relevant experts for the final phases of development.
In the next chapter, we’ll see how to run a user testing session! You can use this method to test your prototype.
