Use Postman to Make Your Requests
Identify the Pros of Postman
You already know that a REST API involves sending requests from the client to the API, which passes the request on to the server. The API then retrieves the response and returns it to the client. In this chapter, we will look at how to make these requests using Postman.
Lots of developers use this graphical interface. It makes it easier to create requests, making it the ideal tool for testing APIs without having to use any code.
It’s also the tool that we’ll be using in this course!
Cool, but why Postman?
Because there are lots of pros to this particular interface:
You can use it no matter what language you’re programming in.
It has a sleek user interface; you can make requests easily.
You don’t need to know how to code
Download Postman
It’s time to take the plunge and download Postman.
Select your operating system. Postman is available for use with Linux, Windows, and OS X.
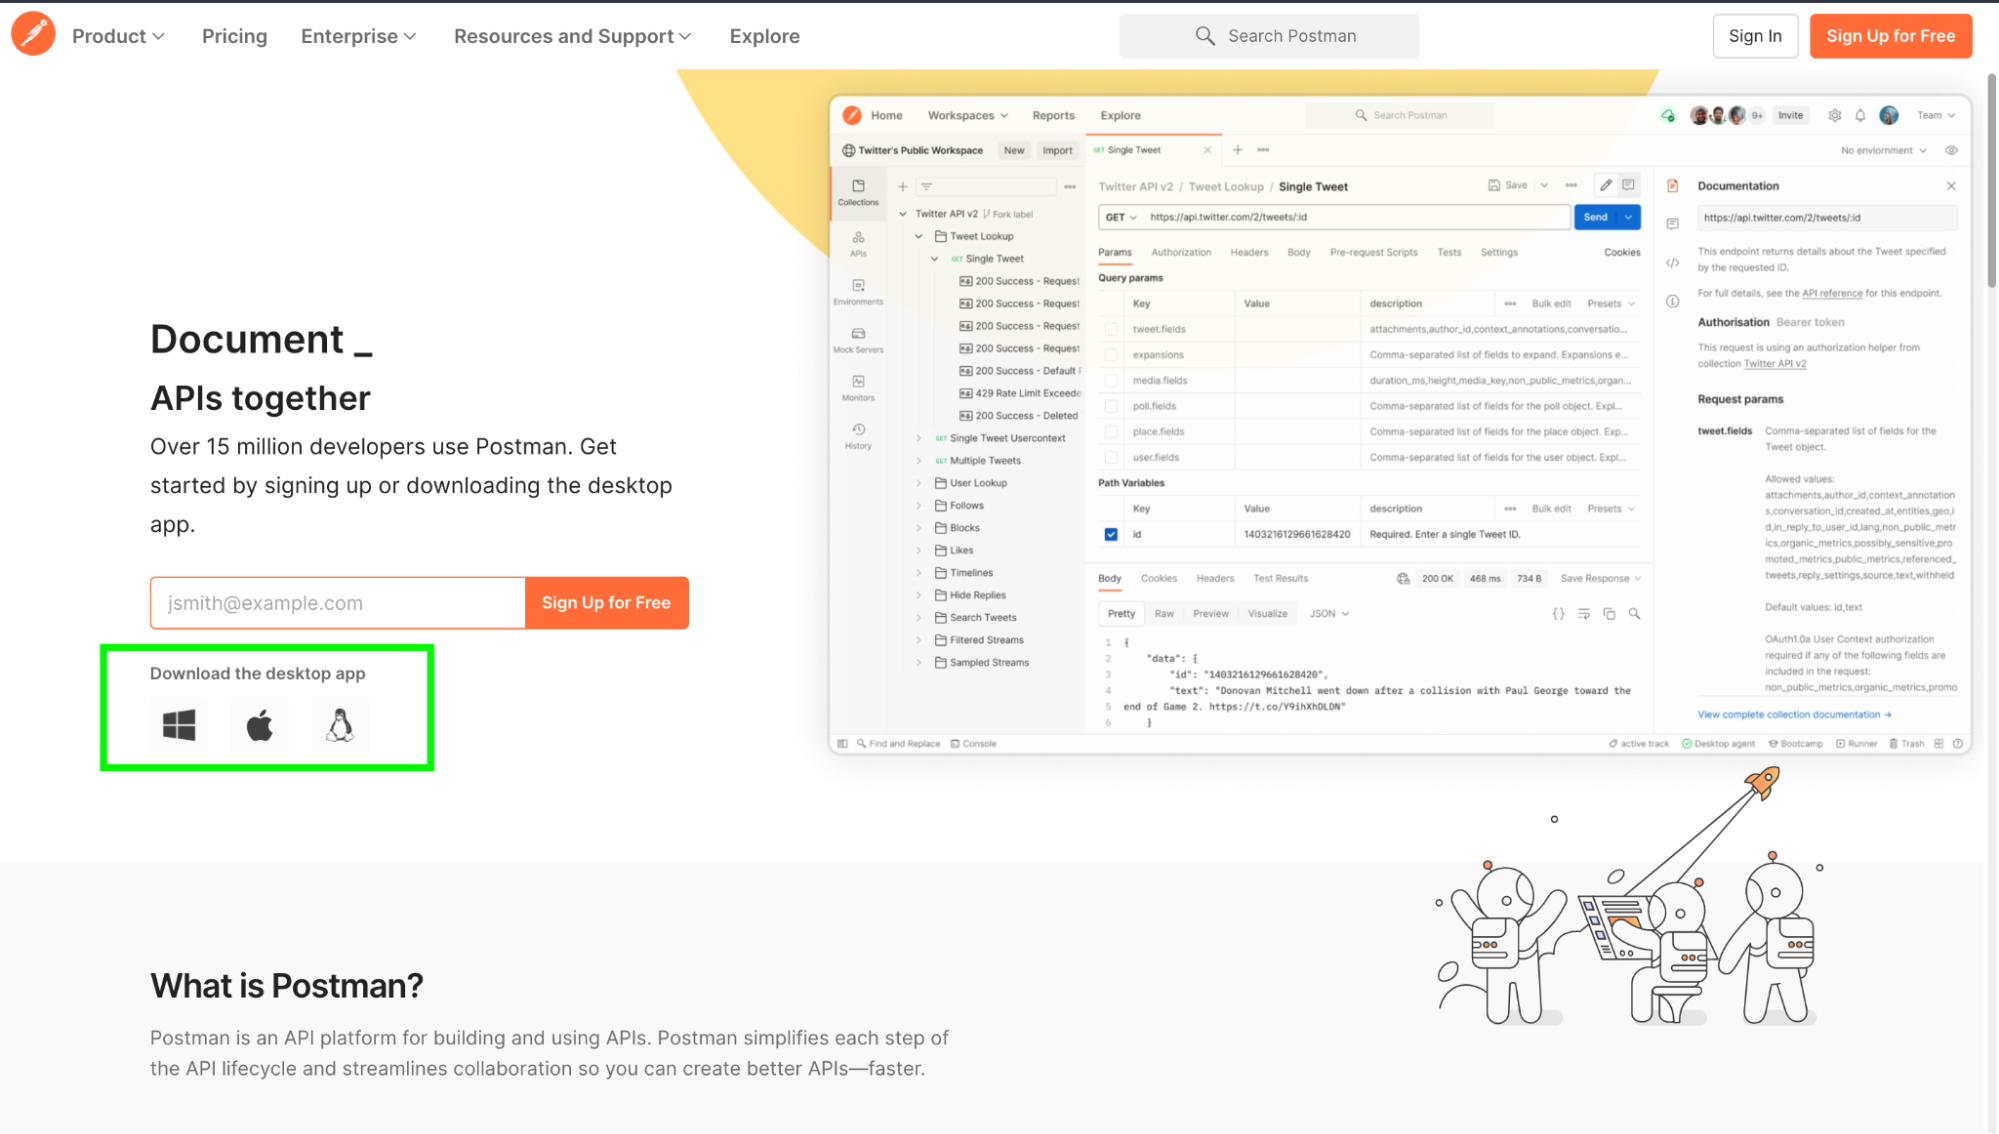
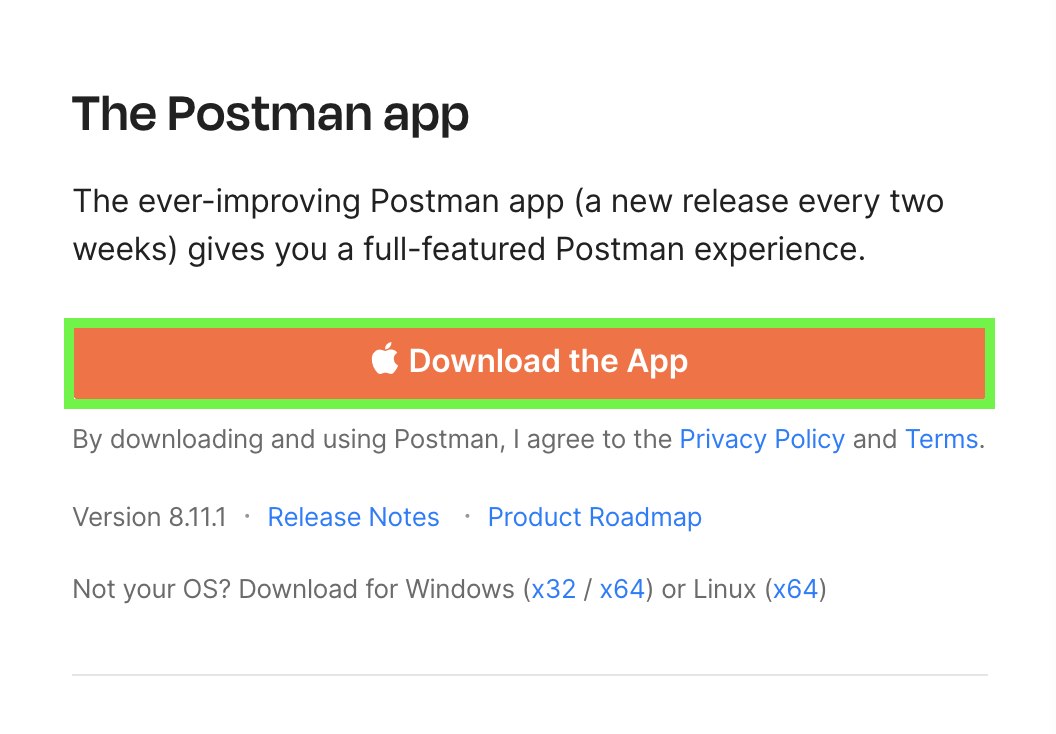
Once you’ve done that, you’ll be redirected to a page for downloading the software. Click on the button Download the App.
Perfect! And now we can move onto making requests. 😃
Make a Request on Postman
The Structure of Requests
Every request has a specific structure:
HTTP Verb + URI + HTTP Version + Headers + Optional Message Body
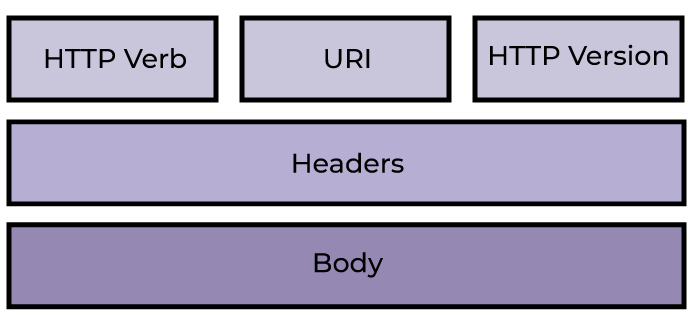
It can look different depending on the software or language you use.
A Request in Postman
Now that you’ve launched the program, let’s take a look at what a request looks like in Postman.
You should see this:
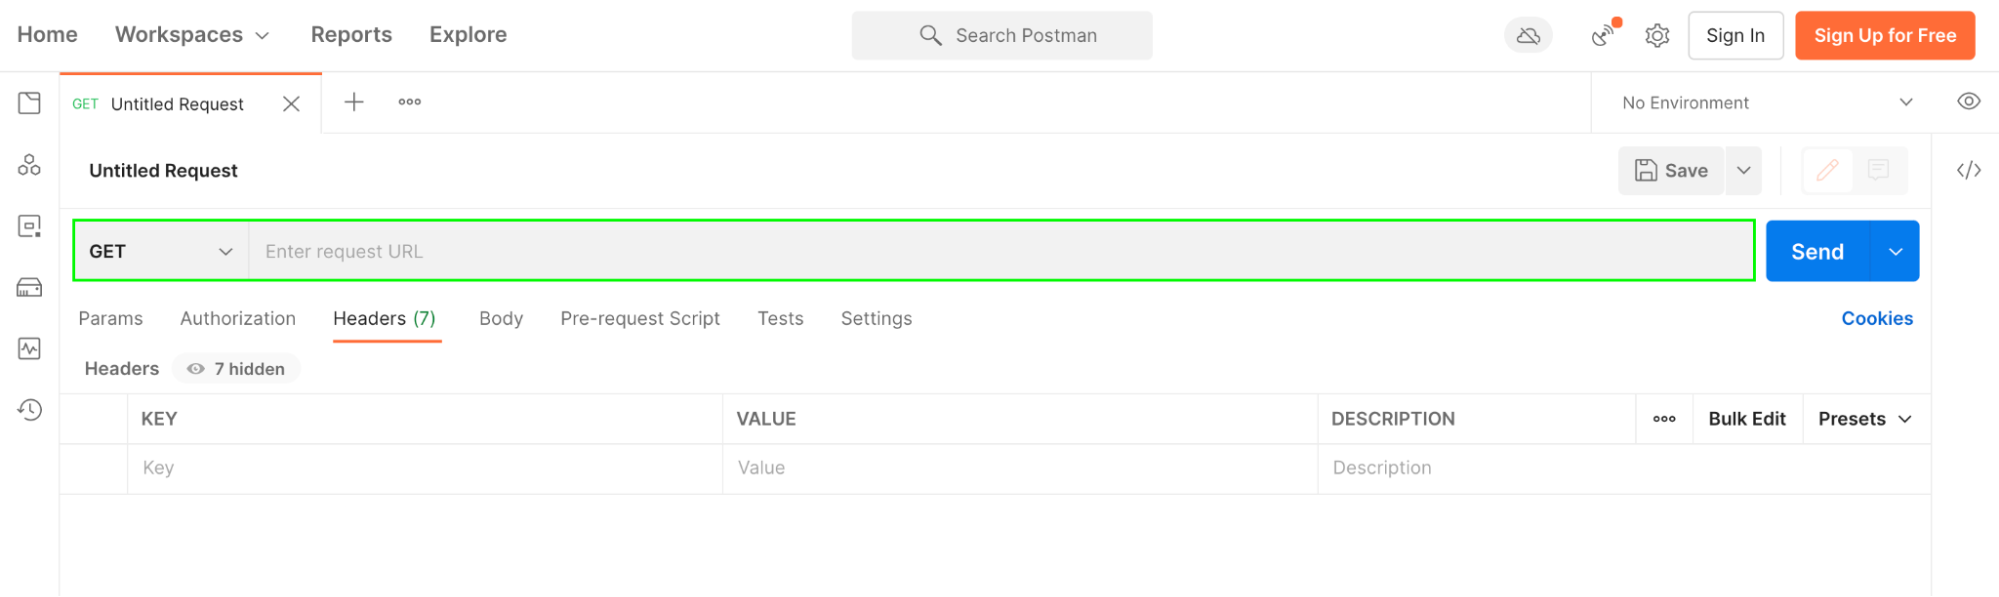
Oh dear, that looks a bit complicated!
Don’t panic! We’ll break down each zone one by one, following the structure of a request:

Verbs
Let’s start with verbs. HTTP verbs are different types of actions you can take with your request – the most common ones you’ll see are GET, PUT, POST, and DELETE. We'll cover these all in more depth later.

URI
Moving on now to the URI. A URI is how you identify resources. For example, if you want to see all the users on your website, the path would be:
/users
Now let’s say you wanted to get information for a specific user. You’ll need to specify their ID, so it would be something like:
users/:user_id
Why have we suddenly switched from using a number to :user_id ? 🤔
You use :user_id to represent the user ID – it’s a placeholder. In practice, with a real ID, the path would look more like this: users/145.

A header enables you to pass along additional information about the message. For example:
What language is it?
What date are you sending it on?
What software is the person using?
What is your authentication key?
Headers are in a key-value pair, and there are many different types of options for them. For example:
Date: Tue, 19 Jan 2019 18:15:41 GMT
User-Agent: Mozilla/5.0 (Macintosh; Intel Mac OS X 10_10_5)
You can check out this full list of header options.
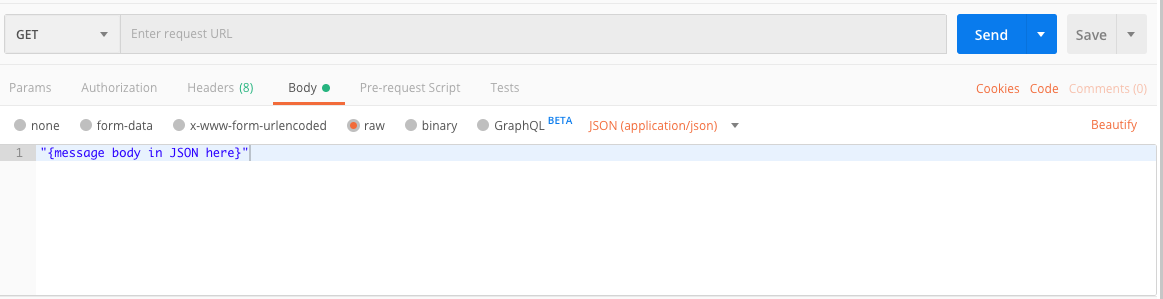
Message Body
And finally, the message body. When making a request, this is only used with PUT or POST HTTP verbs. It contains the actual data of the resource you are trying to create or update. The data is sent using JSON.
Quick reminder: JSON is widely used, but certain APIs might only accept XML. You’ll find this information in the documentation of the API you’re using.
Let’s look at an example. You want to add or update a user’s information, so you add the user details (name, last name, address, etc.) in the body (in JSON).
See how the message body is optional in both cases? This means that it is totally possible to send an empty message body depending on the API actions you want.
You’ll learn more about this in the coming chapters. 🕵🏻♀️
Get a Response With Postman
Request structure done ✅ ! Let’s move on to responses.
A response message has a similar format to the request:
HTTP Version + HTTP Response Code + Headers + Message Body
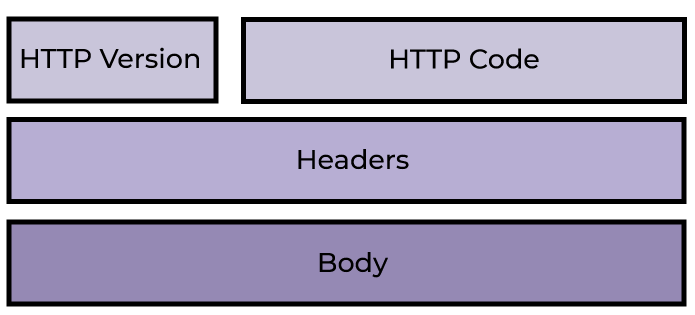
In Postman, you can see a response message that looks like this:
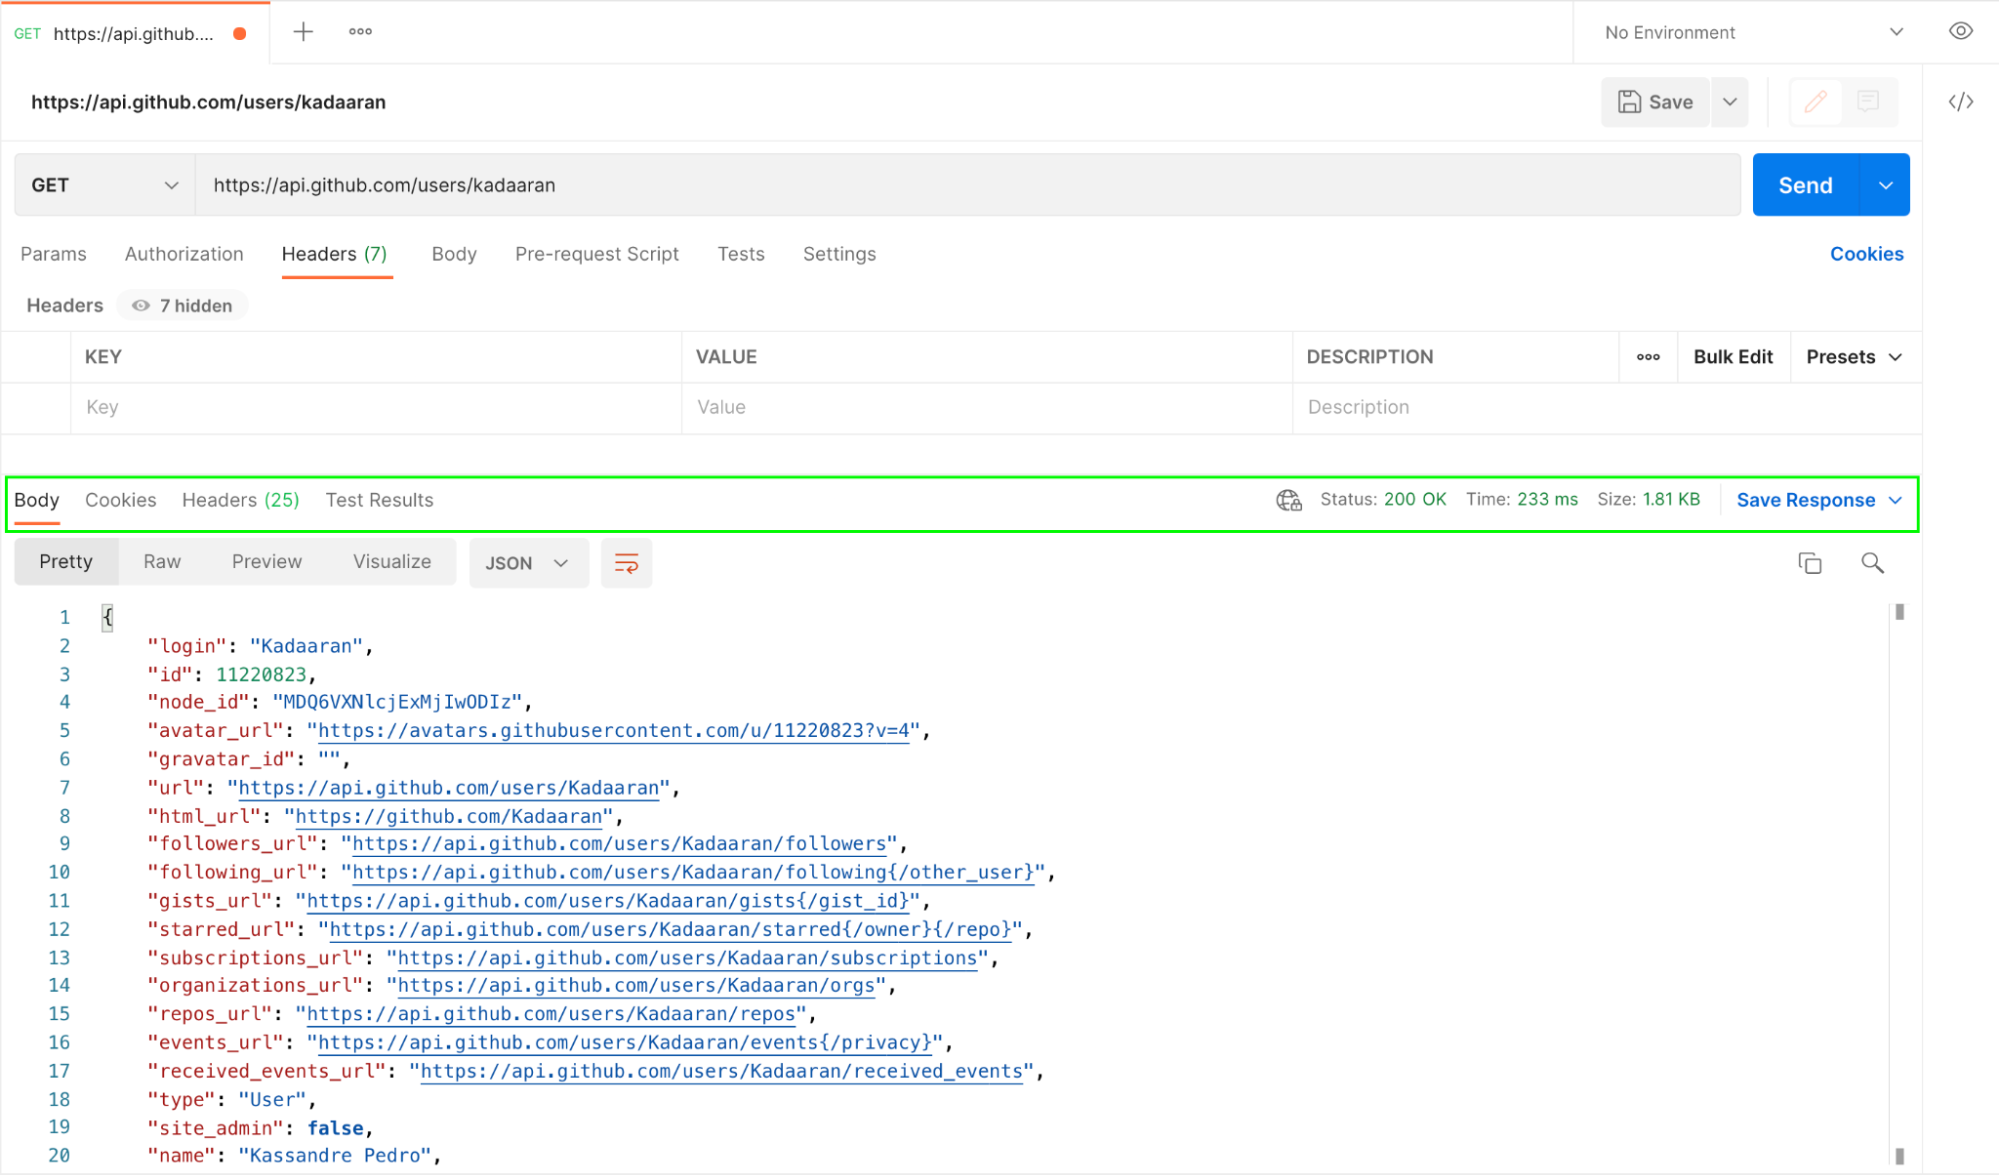
Wait a second. The message body? But isn’t that only used to make a request with POST and PUT? 🤔
To make a request, yes! But for responses, the message body has the information you asked for and the API has returned. This is signaled within the message body in JSON or XML. The image above shows a successful response for a request to the GitHub API.
And if it is unsuccessful? What happens then? Do we get different information? 🤔
Exactly! If the request was unsuccessful, the message body could have an error message:

However, the message isn’t enough, and sometimes APIs don't send any messages at all, whether the request is successful or not. This is rare, though! In such cases, your best friend is the HTTP response code.
Analyze the HTTP Response Code
The HTTP response code helps the developer or client understand the status of the response. Here are the requests in Postman:


When a client sends a request like, “Hey, can you send me all the tweets for this user?” You can think of the response code as something like a traffic light 🚥 telling you:
GREEN ✅ : “This request was successfully processed.”
Or
RED 🔴 : “We could not find anything about this request!”
There are a lot of different response codes - one you are probably familiar with is 404 Not Found. You may have seen this on a few websites. For example, when you try to go to a page that doesn't exist, you'll see something like:

Another important response code to know is 200 OK - which means your request was successful, and your response is good to go! In general, the rule of thumb for HTTP response codes is:
100+ ➡ Informational
200+ ➡ Success
300+ ➡ Redirection
400+ ➡ Client error
500+ ➡ Server error
HTTP codes are very standard, and each number corresponds to a specific response. So, all APIs will return a 404 if the resource is not found, and this means developers will understand what type of response they’re getting. It’s a sort of generalized naming system that everyone sticks to.
If you have any doubts about an HTTP code, take a look at this documentation, which contains more detailed information.
Let’s Recap!
Postman is a free software for making API requests without any code.
Requests take the form:
HTTP Verb + URI + HTTP Version + Headers + Optional Message Body.HTTP verbs are possible types of actions to take when making a request.
Responses take the form:
HTTP Response Code + HTTP Version + Headers + Message Body.HTTP response codes are a kind of traffic light 🚦 with specific codes to let clients know whether a given request was processed successfully or not.
HTTP codes are standardized according to the type of response; you’ll find a list here.
Next chapter, we’ll be rolling up our sleeves and starting to work with real APIs! So that your learning can be as effective as possible, it’s important to know the general format of requests and responses and what successful and unsuccessful responses look like!
