Perform the Initial Configuration of Your Network Routers
(Re)Discover Routers
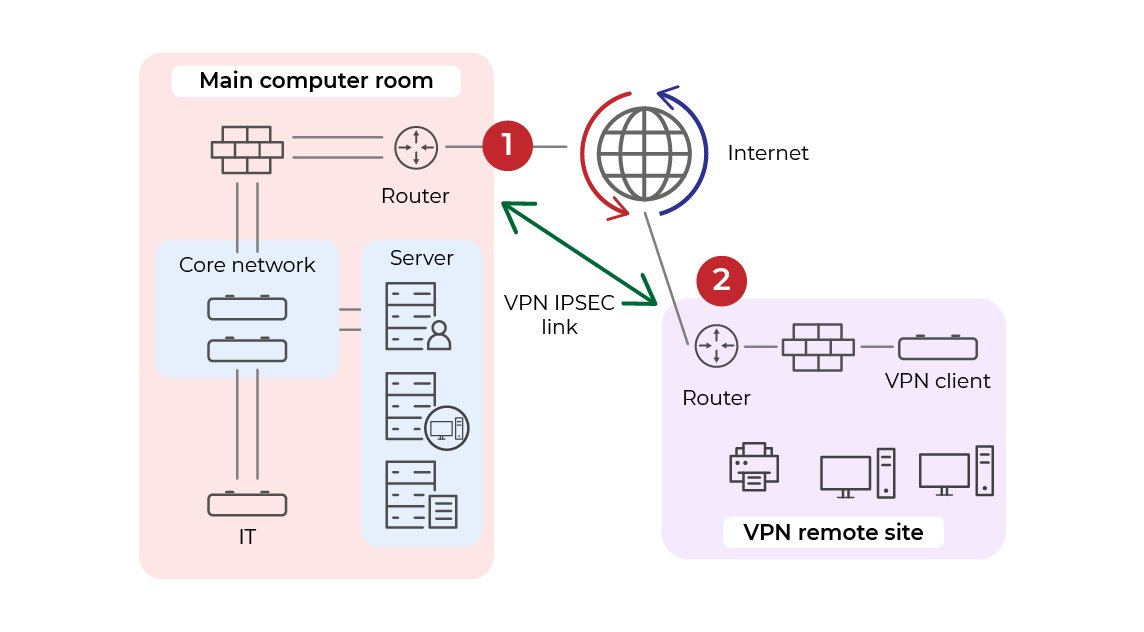
In the Set up TCP/IP networks course, you learned that a router is a connectivity device that links different networks together. This is the device that we’re going to look at in this chapter. How many routers will there be in the final diagram?
If you look back at the network diagram, you’ll see two routers:
The organization’s router is already in our network within Cisco Packet Tracer. You're now going to add the VPN client router in Cisco Packet Tracer. To do this, you're going to add the VPN subnet (router and end devices). Here’s a video to help you to do this:
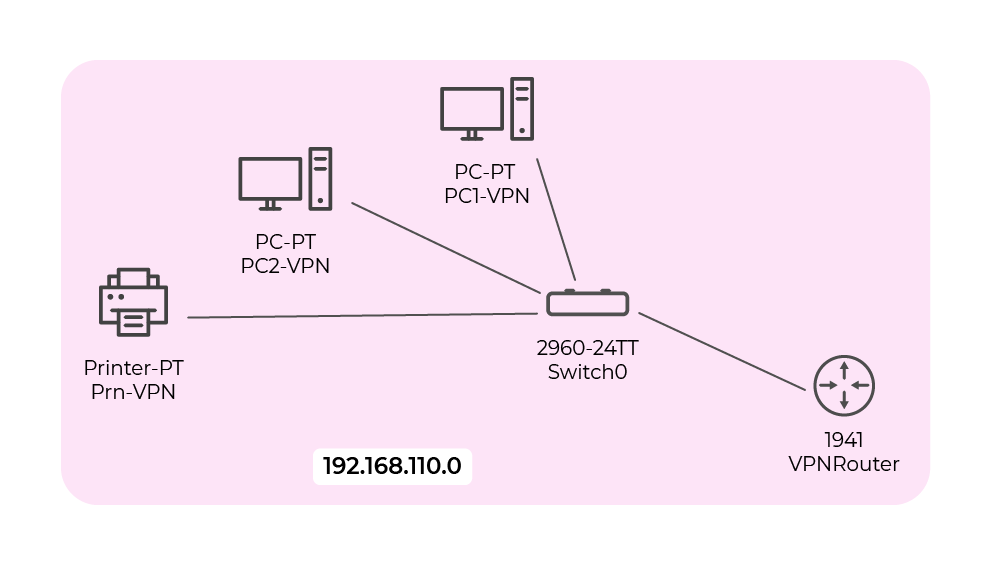
Here’s a colorful representation of our VPN subnet in Cisco Packet Tracer:
Let’s just have a look at this serial connection for a moment:
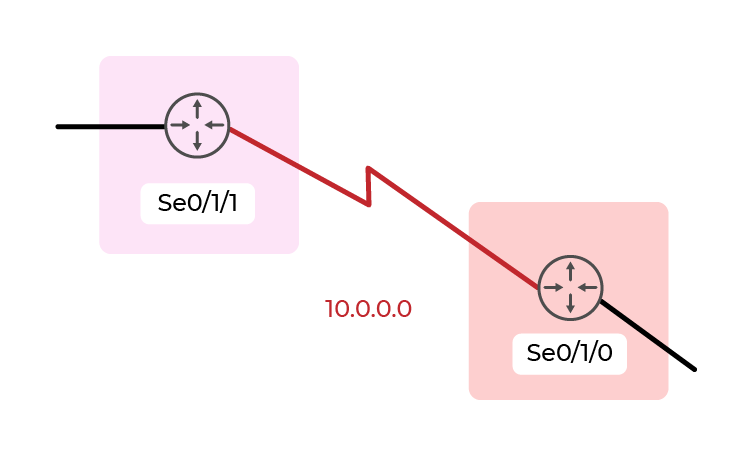
Firstly, you’ll notice that the link between these two routers is a lightning symbol. We use this symbol to represent a long-distance WAN connection. You’ll often see this type of connection in network diagrams. In general, this is used for point-to-point VPN connections between remote sites.
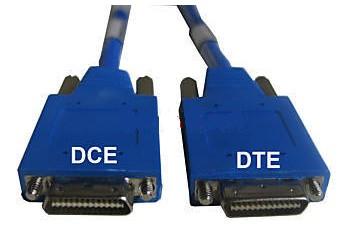
Next, you added a WIC-2T card, which has dual-serial ports. This allows you to create WAN connections. We’ll use a DTE/DCE cable to link the routers together. They’re also blue, like the console cables, but a darker blue color.
Because the VPN subnet is located externally to the organization, the switch will be left as-is and won’t be configured.
However, you will need to think about configuring the IP addresses of the two computers and the printer. These three end devices will be on the 192.168.110.0/24 subnet. This means that we won’t be putting the printer on the Printing subnet.
Here’s the addressing plan of the VPN subnet:
PC1-VPN | PC2-VPN | Prn-VPN | Gateway |
192.168.110.1/24 | 192.168.110.2/24 | 192.168.110.3/24 | 192.168.110.254 |
Configure Your Router for Security
You’re going to configure the basic parameters of the router, firstly to ensure that it is secure. Network devices must be configured systematically, adopting good practice from the start, even though it’s quite fiddly. You’ve already done it for the switch, so I’m going to give you the configuration for secure access.
You’re going to configure the following:
The host name
A password for privileged EXEC mode
SSH version 2 configuration, creation of an admin user and of an SSH key inserted into a domain name
A password for accessing the console port
A password for the VTY lines for SSH access
Password encryption
Display of a legal notice regarding non-authorized access
Copy of the non-volatile memory configuration
Router> enable
Router# configure terminal
Enter configuration commands, one per line.  End with
CNTL/Z.
Router(config)# hostname VPNRouter
VPNRouter(config)# enable secret 1234-Metropolitan:1234
VPNRouter(config)# ip ssh version 2
VPNRouter(config)# ip domain-name tbagency.com
VPNRouter(config)# username admin secret 1234-Metropolitan:1234
VPNRouter(config)# crypto key generate rsa
The name for the keys will be: VPNRouter.tbagency.com
Choose the size of the key modulus in the range of 360 to
2048 for your
  General Purpose Keys. Choosing a key modulus greater than
512 may take
 a few minutes.

How many bits in the modulus [512]: 1024
% Generating 1024 bit RSA keys, keys will be
non-exportable...[OK]

VPNRouter(config)# line console 0
VPNRouter(config-line)# password 1234-Metropolitan:1234
VPNRouter(config-line)# login
VPNRouter(config-line)# exit
VPNRouter(config)# line vty 0 15
VPNRouter(config-line)# transport input ssh
VPNRouter(config-line)# login local
VPNRouter(config-line)# exit
VPNRouter(config)# service password-encryption
VPNRouter(config)# banner motd #Access to Authorized Persons Only!#
VPNRouter(config)# exit
VPNRouter#
%SYS-5-CONFIG_I: Configured from console by console

VPNRouter# copy running-config startup-config
Destination filename [startup-config]?
Building configuration...
[OK]
VPNRouter#
Here’s a short video showing you how it’s done:
Let's Recap!
In this chapter, you’ve seen:
how to add a Cisco router and a WAN link using a serial connection between the two routers.
how to configure security settings on your two routers, essentially equivalent to a switch.
Now you've added the router and configured its security settings, you’re going to configure the router interfaces.
