Check Your Application’s Performance Using Locust

Performance testing involves running processes that test the speed, response time, stability, and resource usage of a software application under a given workload.
For example, one performance criterion might be to say that an application must be able to handle 500 concurrent users. The goal here isn’t to cover 80% or 90% of the code in the testing (which is what we did in unit testing), but rather to cover the parts of the functionality that present a risk to the application’s use of resources.
The main aim of performance testing is to identify and eliminate bottlenecks that might disrupt data flow within an application.
In this chapter, we’re going to learn about Locust, which is an open-source performance testing framework that is really easy to use.
Understand Performance Metrics
A number of different metrics can be measured when testing. These performance indicators will help to identify blockers or validate performance thresholds defined in the specification. Here are some useful performance indicators that can be measured during performance testing:
Throughput: amount of data sent
Memory usage: amount of data stored in memory
Response time: elapsed time between sending a request and receiving the response
CPU: CPU usage
By analyzing the different metrics, we can decide whether we need to change some code or configuration parameters to achieve the desired values.
Let’s look now at how we’re going to leverage the Locust framework to carry out our performance testing. Locus enables you to measure response times for different features, while also taking the number of users and number of application requests into account.
Configure Locust
Before starting to create your first performance test, you need to install Locust in your environment using the command pip install locust.
Once you’ve completed the installation, you can test if Locust has been properly installed by running the following command on the terminal:locust --help.
You should now see some really useful documentation showing all of the Locust commands, as shown in the below image:
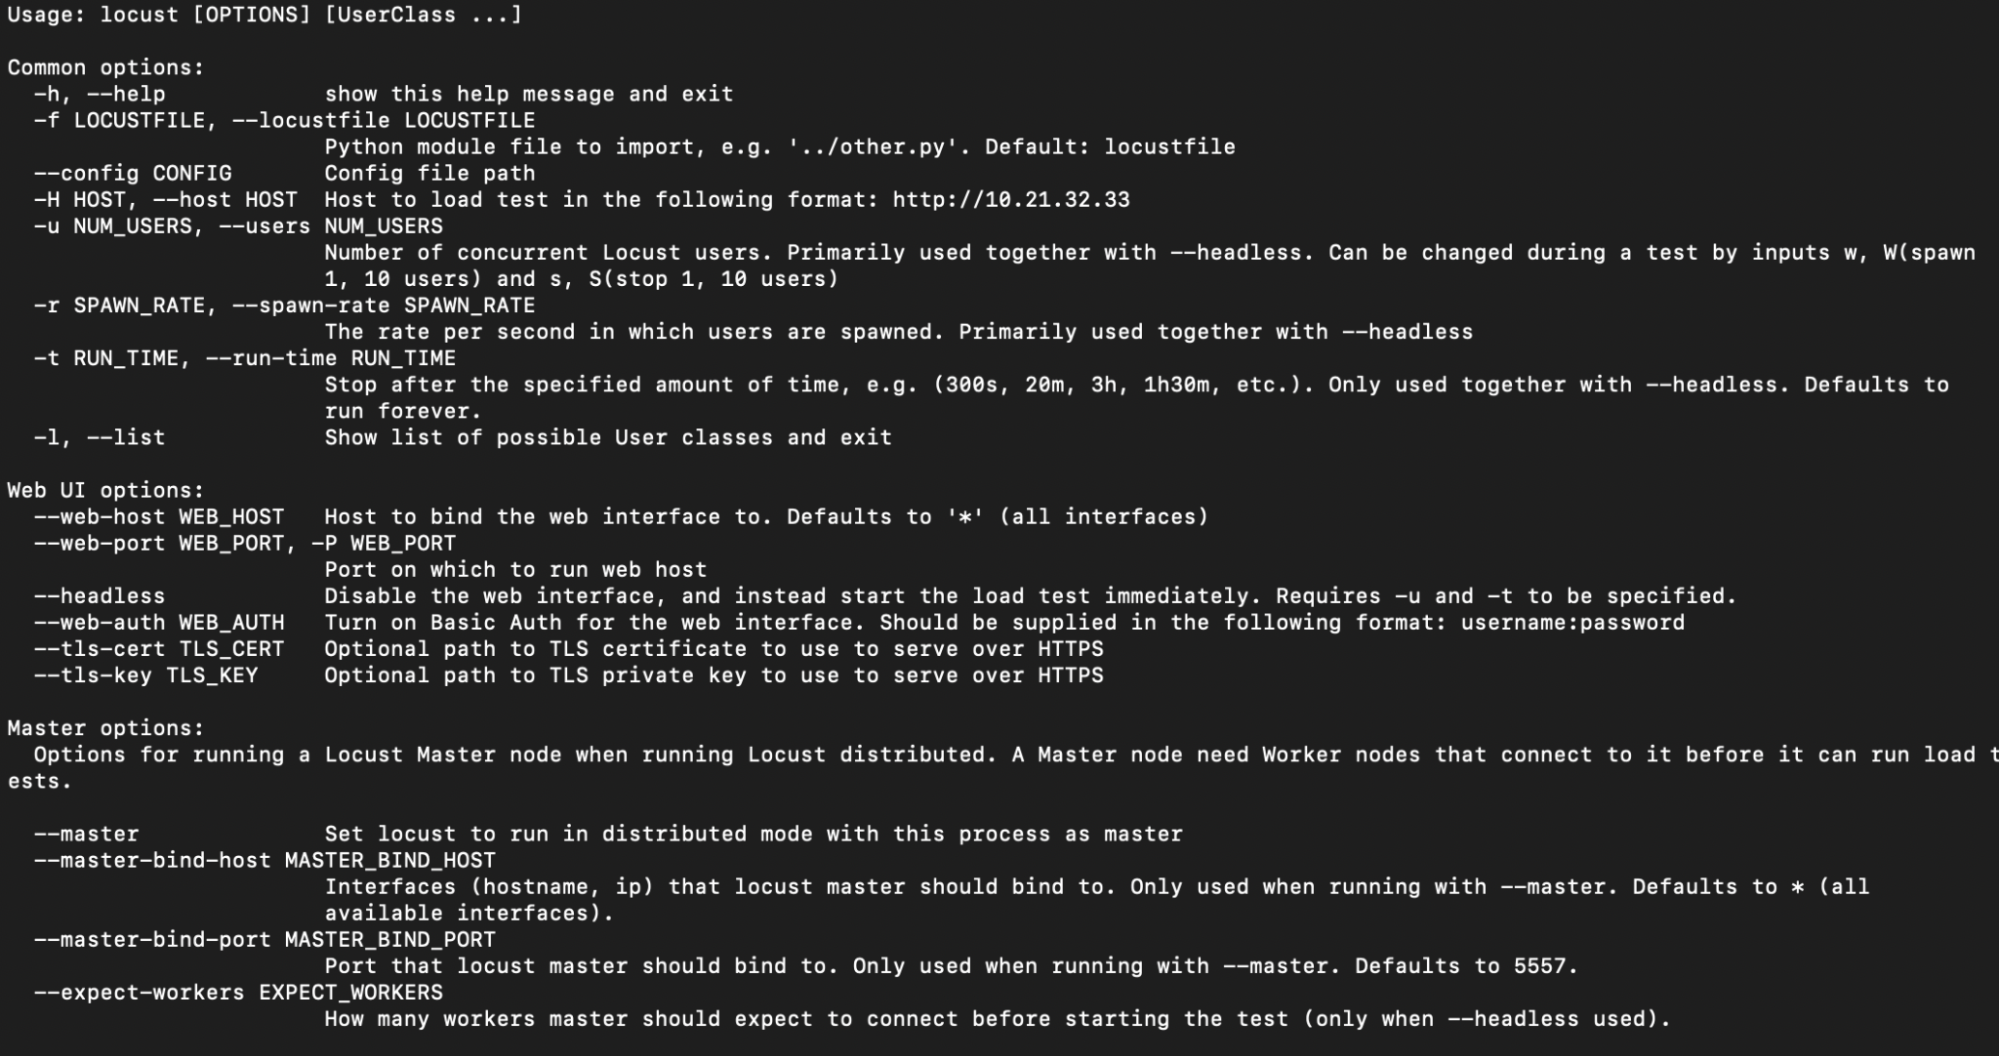
Throughout the rest of the chapter, we’re going to explore the basic features that Locust provides and we’ll see how to write a test script for our OC-commerce Django project.
Write a Locust Script
To begin with, we need to create a folder to hold the script. To stay aligned with what we did for the other types of testing, you’ll create aperformance_tests folder in the tests/ folder structure. Now you can create the locustfile.py file in this new folder.
First of all, we’re going to create a simple test to check the response from the home page (/home).
In your new locustfile.py file, add the following import instruction:
from locust import HttpUser, task Next, create a class as a subclass of HttpUser, which we’ll call ProjectPerfTest.
class ProjectPerfTest(HttpUser):The HttpUser class is an instance ofHttpSession, which provides us with a test client. As with unit testing, the client can make a request to your chosen URL.
In other words, when the test starts, Locust will create an instance of this class for each user that it’s simulating, and each of these users will run in its own thread.
You can now create your scenario in a method preceded by the @task decorator. Locust will treat any method containing the @task decorator as a task to be run.
Here’s our test that will carry out requests on the home page.
class ProjectPerfTest(HttpUser):
    @task
    def home(self):
        self.client.get("/home")
Control the Number of Occurrences of a Task
You can control the weighting for your tasks using a reference task and therefore increase the number of times a task is run. For the following tasks, you can add an integer n as an argument for the @task decorator, to increase the number of times the task will be run. If you specify this integer n , this particular task will be run n times more often than the first task.
For example:
@task(3)
def login(self):
    response = self.client.get("/user/login")
In this example, thelogin() task will be run three times more often than the home() task. If we add a new task using the@task(6) decorator, this task will be run six times more often than our reference task, which in our case is the home() task.
Create a POST Request
You can also create POST requests by providing data in the second argument of the post() method. You can use the following code for a user login:
self.client.post("/user/login", {"username":"userTest", "password":"passwordTest"})In addition, theHttpUser class provides two methods that are called when Locust is started and stopped.
on_start()on_stop()
These methods can be used to configure a user and test them logging in and logging out, for example.
Note that only methods that contain the @task decorator are treated as scenarios that need to be run. You can add further methods to factorize or configure your scenario.
Run a Locust Script
We now have the following script:
from locust import HttpUser, task

class ProjectPerfTest(HttpUser):
    @task
    def home(self):
        response = self.client.get("/home")


    @task(3)
    def login(self):
        response = self.client.get("/user/login")
Let’s test it by opening a terminal pointing at the directory that contains the locustfile.py file.
If you’ve named your script file locustfile.py, you just need to run the locust command on the terminal.
Otherwise, you need to specify the name of the file preceded by the -f option, as follows: locust -f filename.py.
You should see the following output on your terminal:

Open your browser and type in the URL http://0.0.0.0:8089 as indicated on the terminal to access the Locust web interface. You should see the following page:
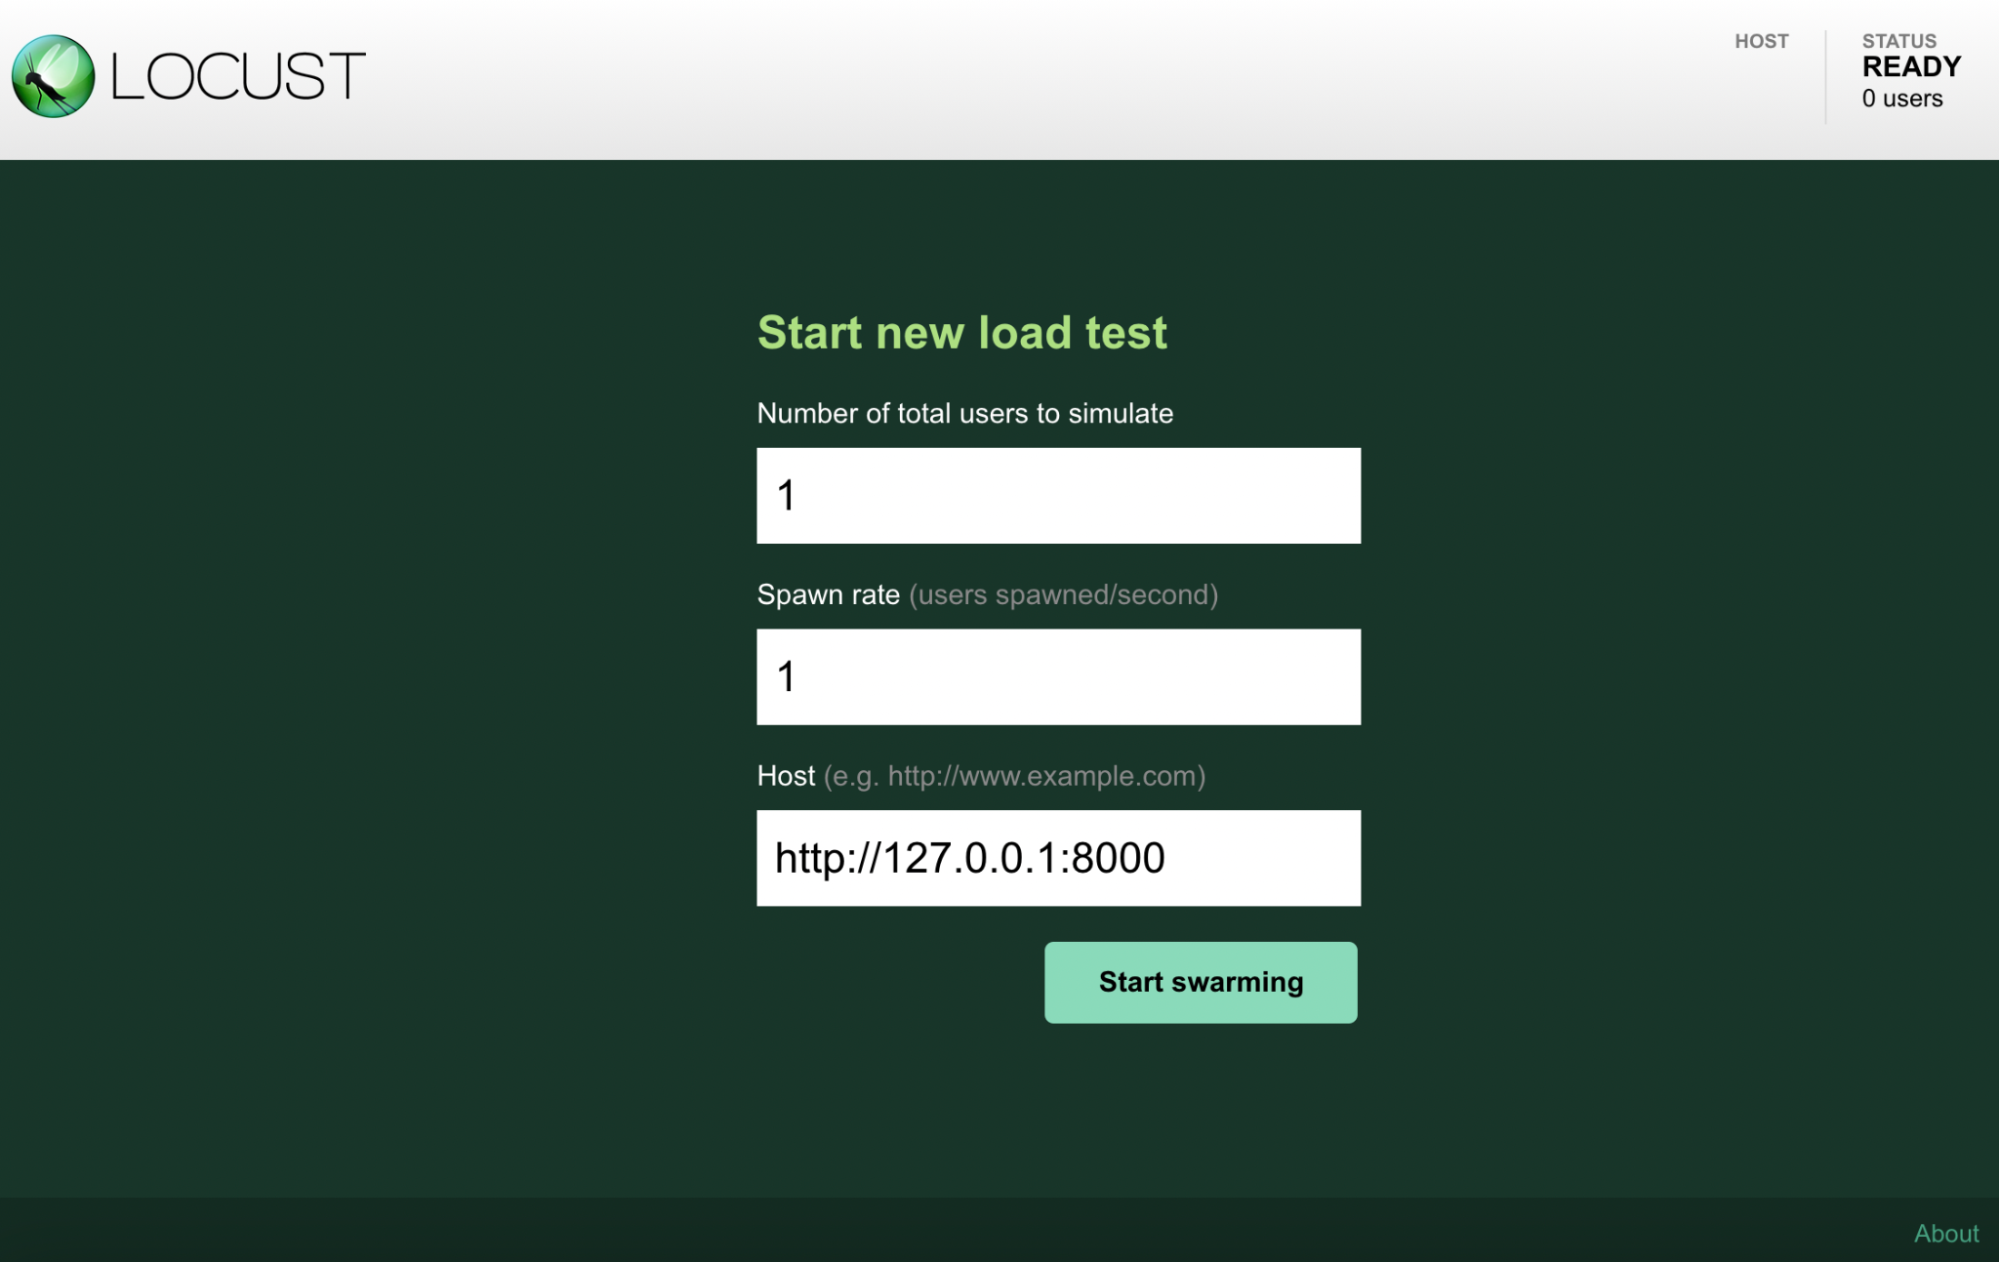
On this page, you need to specify the following:
Number of total users to simulate: self-explanatory!
Spawn rate: the number of users created per second until the total number of users is reached.
Host: the address of your application, which in our case is localhost.
When you’re ready, click on the Start swarming button. The framework will continue to execute the tasks indefinitely until you manually stop the test by hitting the Stop button at the top right of the page.
Next, you can analyze the results using the summary table or the Charts tab, which shows the results of the test in graphical format.
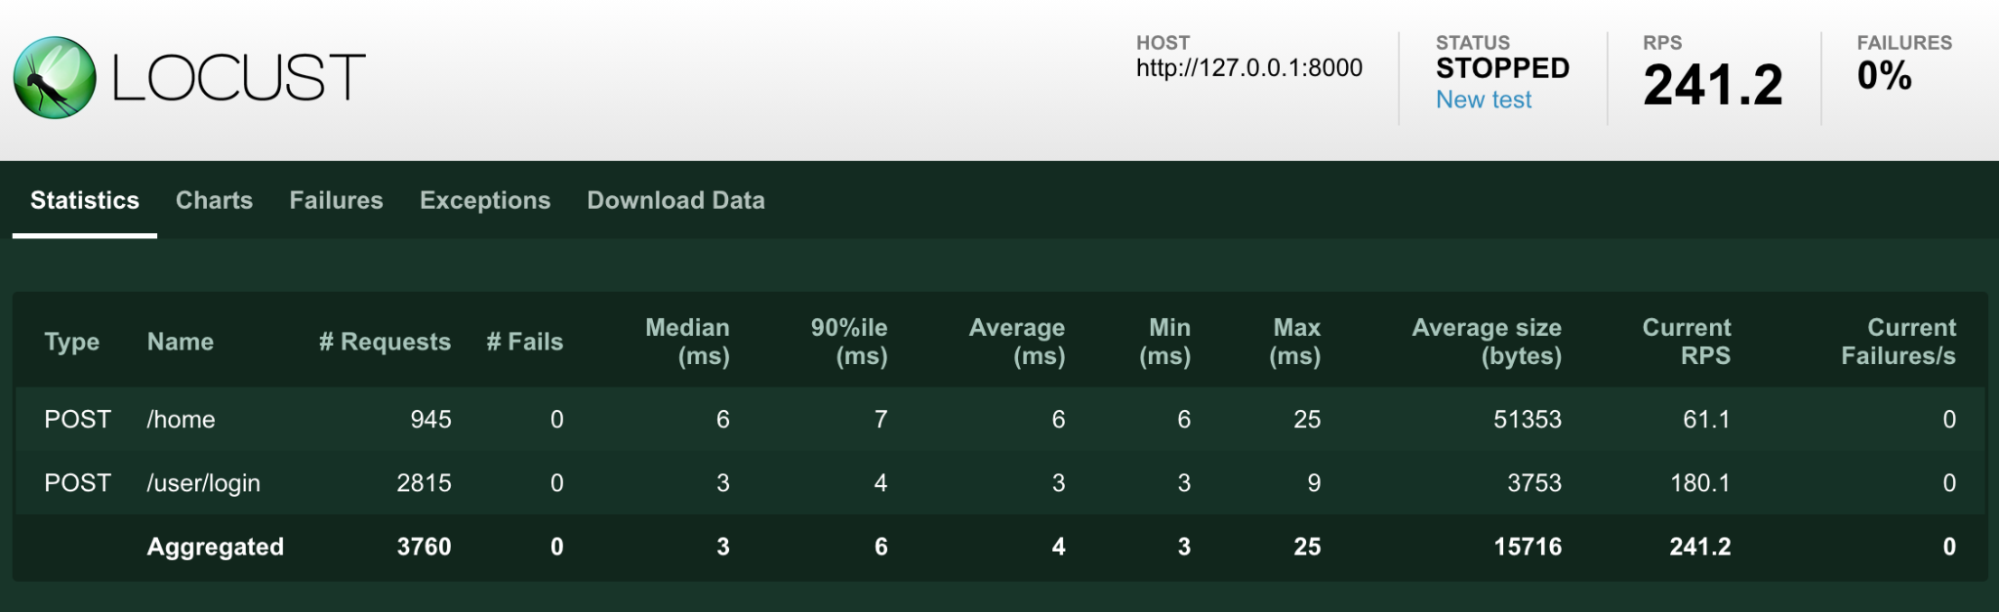
The statistics provided in the table allow us to analyze our application’s performance. Here are the various parameters:
Requests: total number of requests carried out up to now
Fails: number of requests that failed
Median: median response time in milliseconds
90%ile: 90th percentile response time in milliseconds
Average: mean average response time in milliseconds
Min: minimum response time in milliseconds
Max: maximum response time in milliseconds
Average size: average response size in bytes
Current RPS: current number of requests per second
Current Failure/s: total number of failures per second
Over to You!
Now that you’ve seen how to create performance tests using Locust, you can go back to the locustfile.py file and add some new tasks.
Your Mission:
Add a task for:
a user signing up.
a user profile.
a user’s favorites.
Vary the task weighting using the
@taskdecorator.Amend the number of users and the number of users per second.
Find a suggested solution on GitHub!
Let’s Recap!
Performance testing involves assessing an application’s performance in terms of response times and stability.
Locust is an open-source tool used in performance testing. It enables you to test the application’s workload by simulating thousands of concurrent users of the application.
Each test is created in a method of an
HttpUsersubclass.Tasks must be created in a method preceded by the
@taskdecorator, otherwise they won’t be run.
Now that you’re an expert on all aspects of the testing pyramid, we’re going to look at one final point about a test methodology that is used in all organizations. Come on, just one more chapter to go!
