Create Your First AWS Server

Before delving into the murky depths of AWS, I’m going to give you a little taster. AWS is such a rich and complex offering that they’ve actually created a service to simplify using the other services! So, I think that’s a good place to start. We can then dig around in the depths at our leisure later on.
The service I’m going to tell you about is called Amazon Lightsail. It’s a simplified interface that enables you to set up your website in record time.
Launch Your First Server With Amazon Lightsail
Amazon Lightsail is the embodiment of cloud computing’s ultimate promise. A turnkey solution for launching a full-capacity website, able to handle as much traffic as one of the biggest websites in the world, in just two minutes.
This level of abstraction means you get less of the flexibility offered by some of the lower-level AWS services (e.g., EC2). However, because we’re just starting out in the world of the cloud, it’s the ideal environment for us.
Let’s try to create a server that can host a classic PHP website. Are you ready? Right, let’s get started!
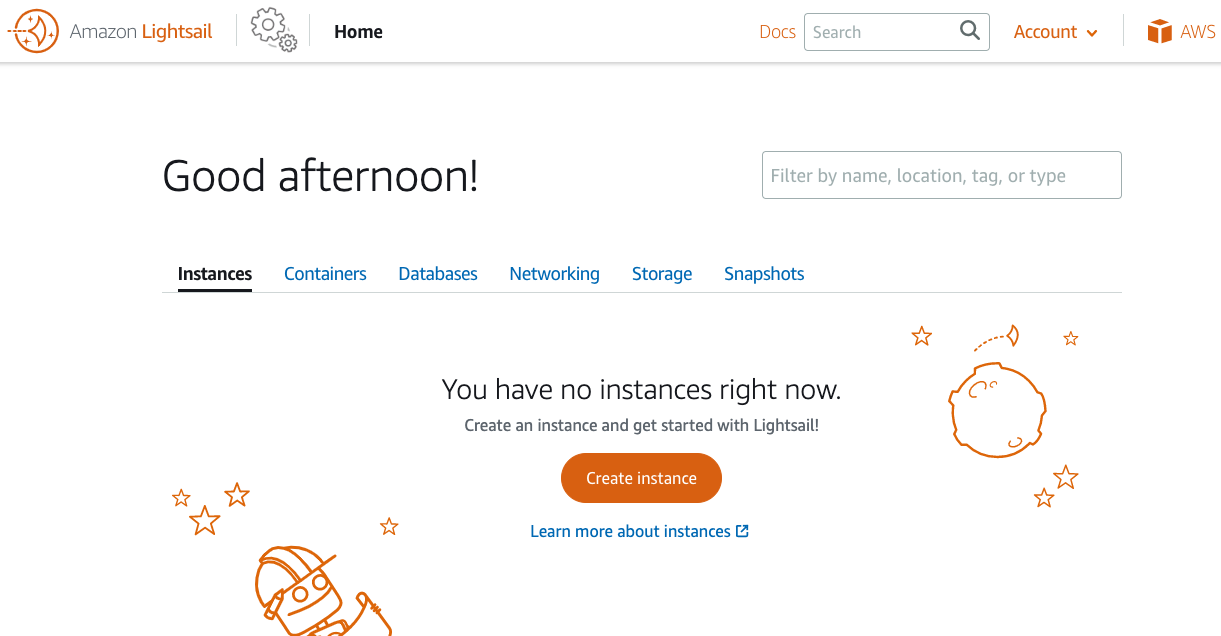
Navigate to the AWS management console and search for the Lightsail service.

We’ll end up at the Lightsail console.
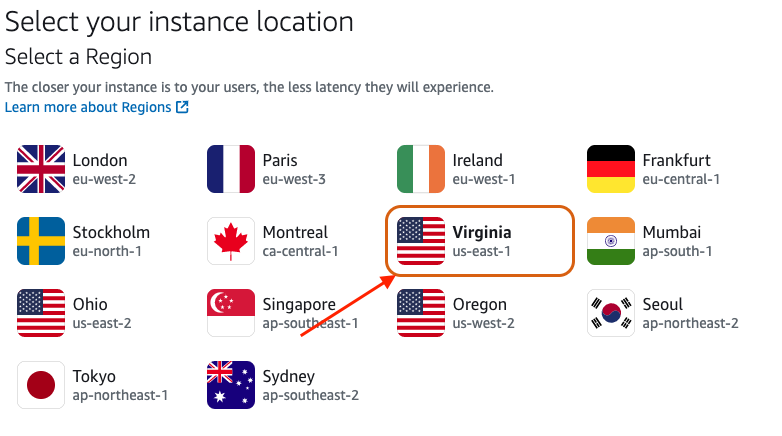
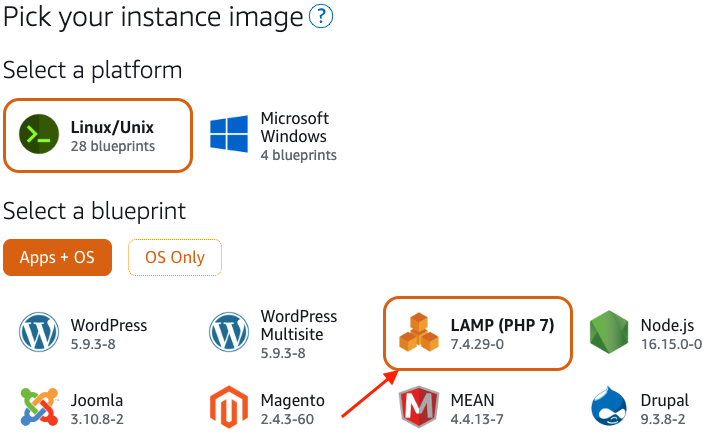
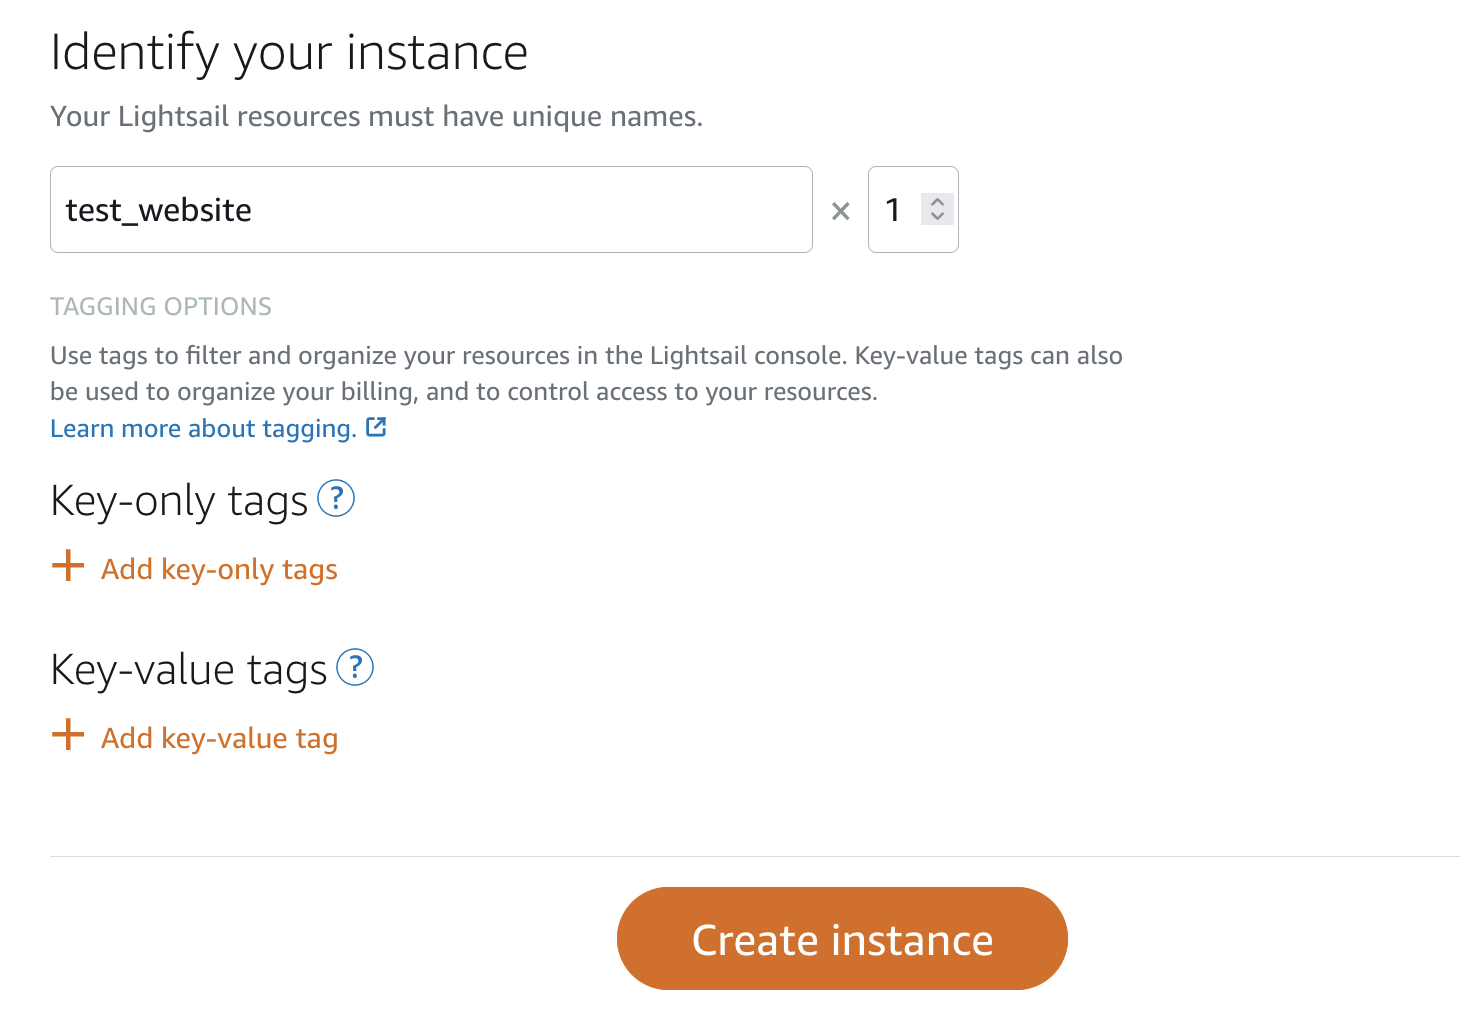
Click on “Create instance,” change the region as required and select a preconfigured “LAMP” stack server (Linux, Apache, MySQL, PHP).
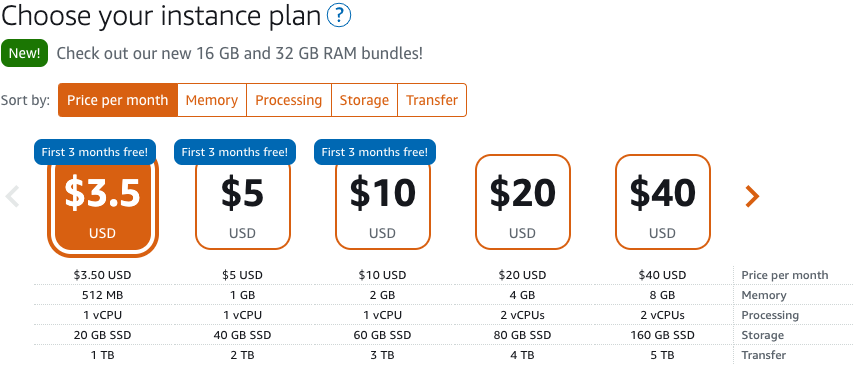
Stay on the same plan, which is free for three months.
Give your server a name so you can easily identify it and click on “Create instance.”
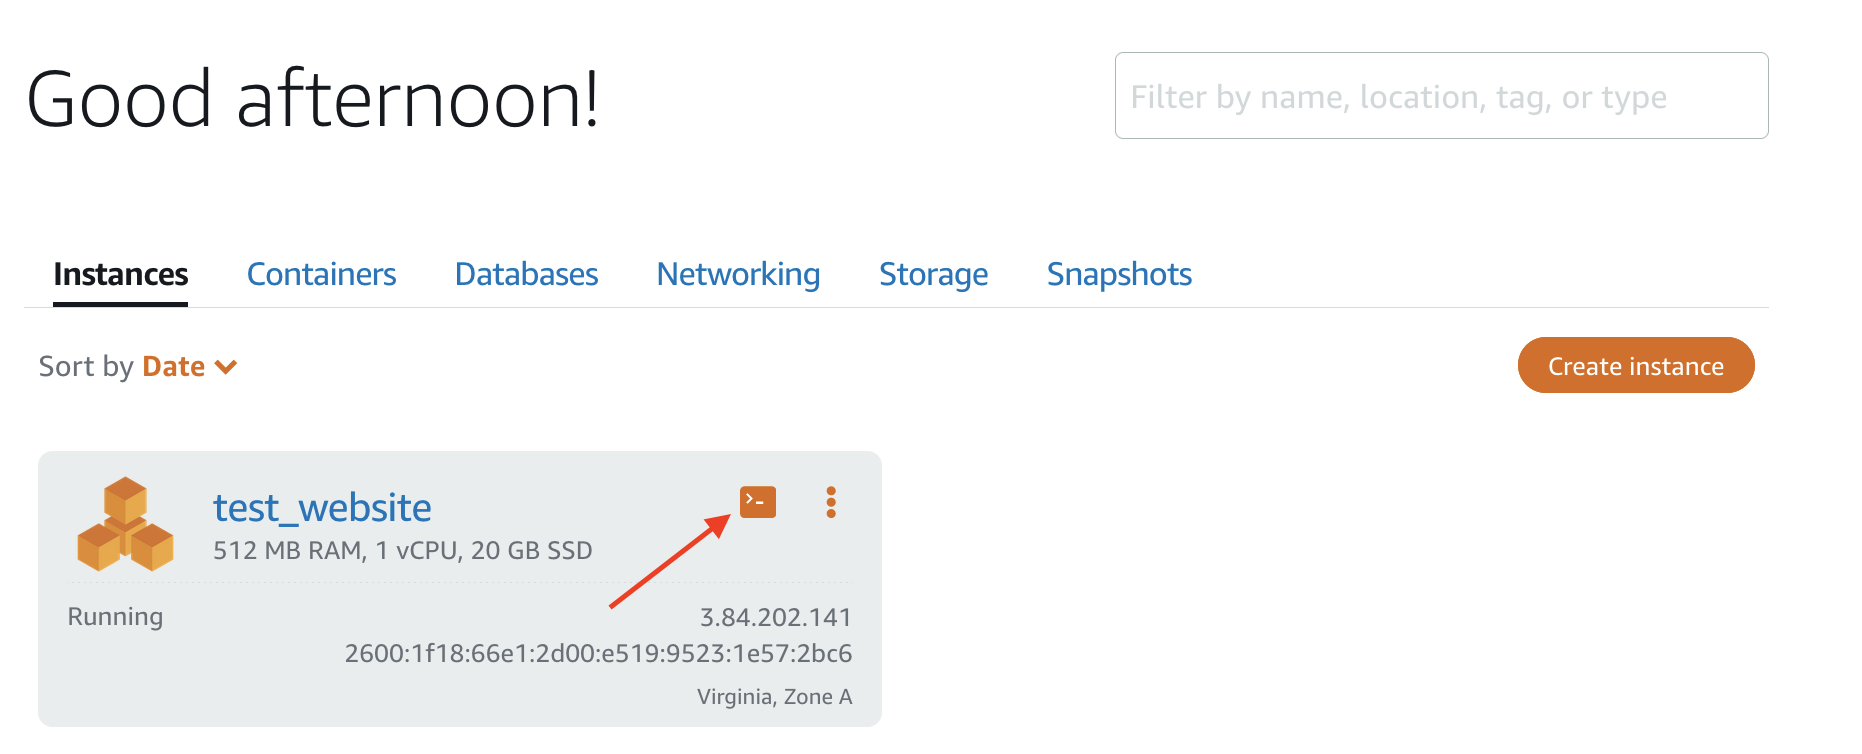
As promised, just two minutes later, our instance is ready to use!
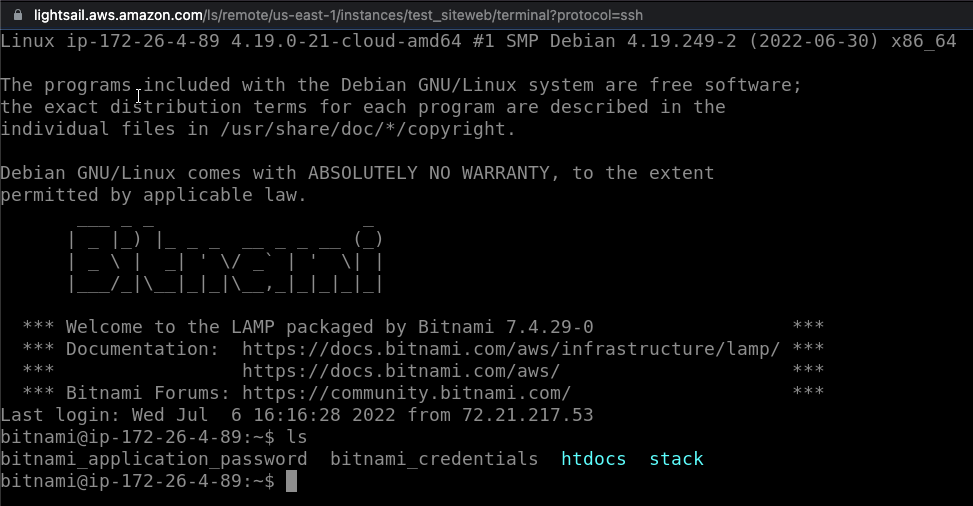
The instance has a public IP address, routing rules and a suitable firewall, 20 GB hard disk, fully operational LAMP stack and so on. We can connect to the machine from the browser by clicking on the little terminal icon:
Here we can see the well-known htdocs directory, where we can place the PHP files for our website.
Of course, you can use your favorite SFTP client—FileZilla, CyberDuck etc.—to transfer multiple files at a time.
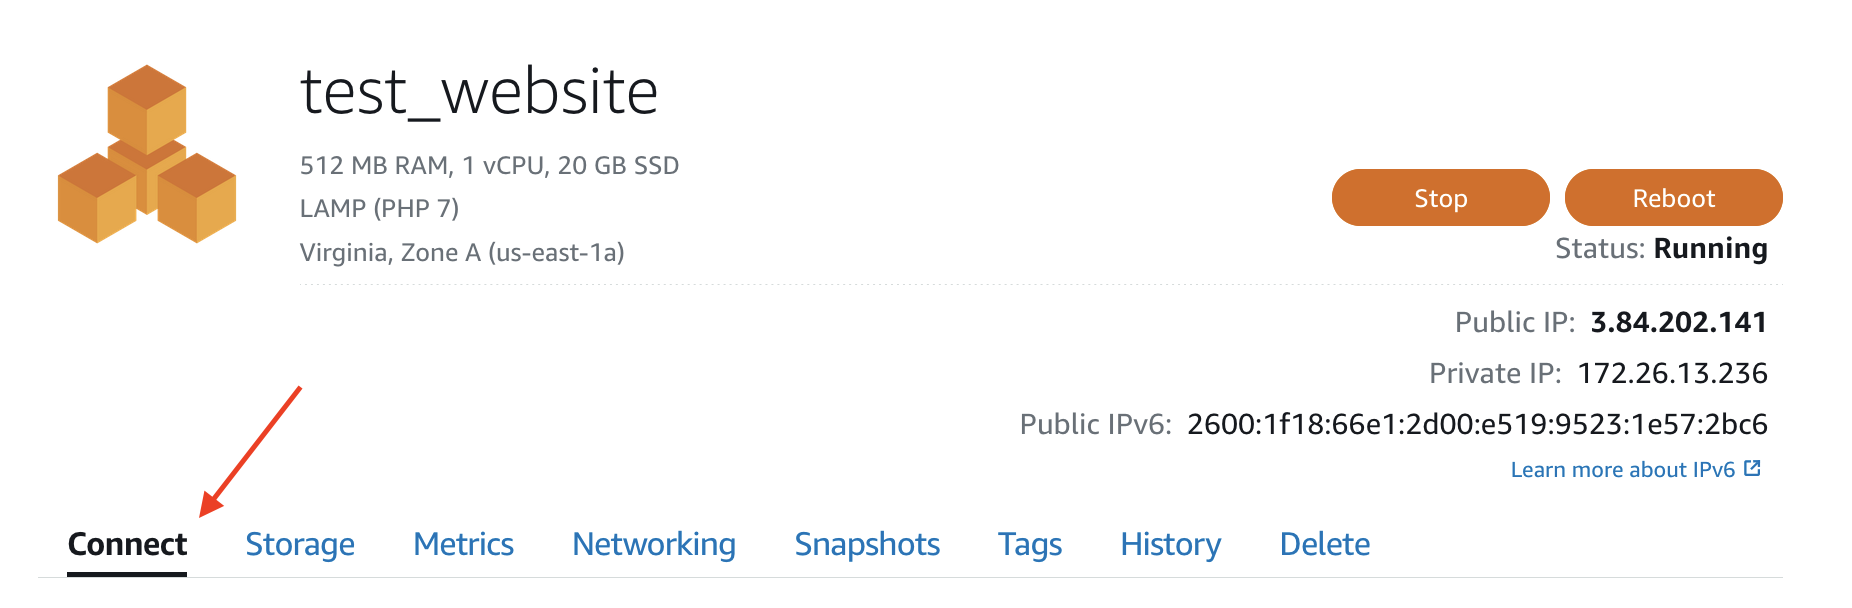
To do this, go to the “Connect” menu on your application:
Then click on the “Download default key” button.
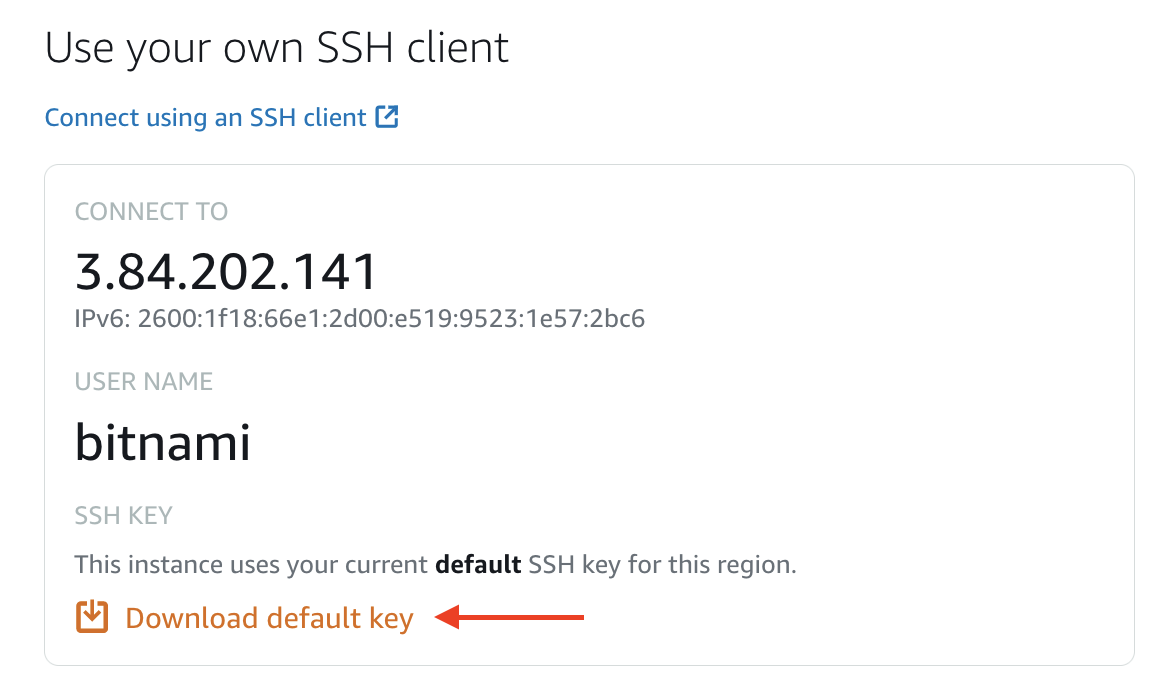
Configure the SSH key in your favorite SFTP client, along with the IP address (3.84.202.141 in this example) and the username (bitnami, in our case).
You’re now ready to add your PHP files!
If you want to back up your machine before making any big updates, Lightsail gives you the option of creating a copy of your hard drive. This copy is called a snapshot in AWS. Navigate to the “Snapshots” menu:
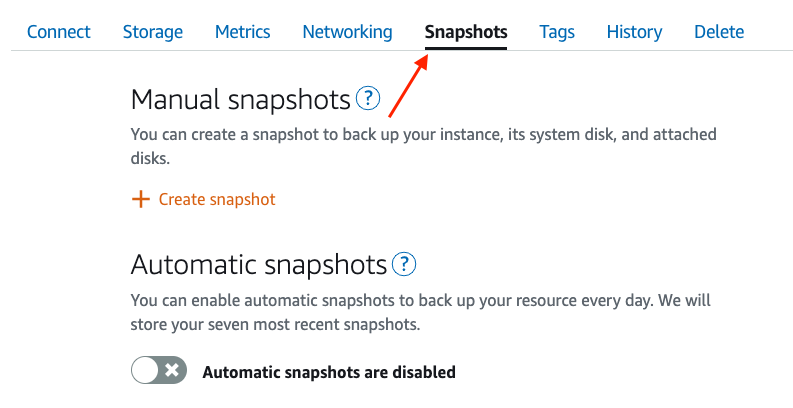
Click on “Create snapshot,” wait for 30 seconds and that’s it!
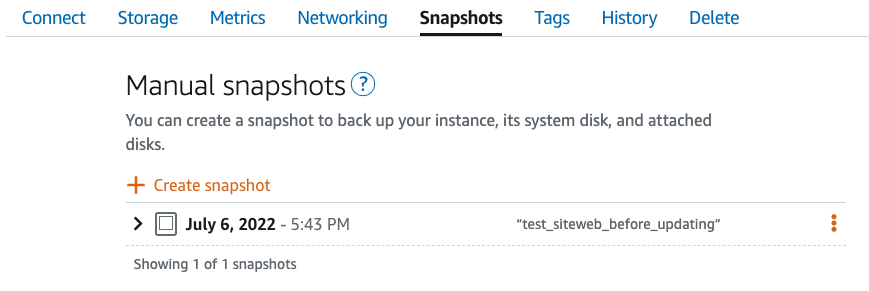
If anything goes wrong and you want to go back to the previous version of your website, you just need to restore your instance from this backup.

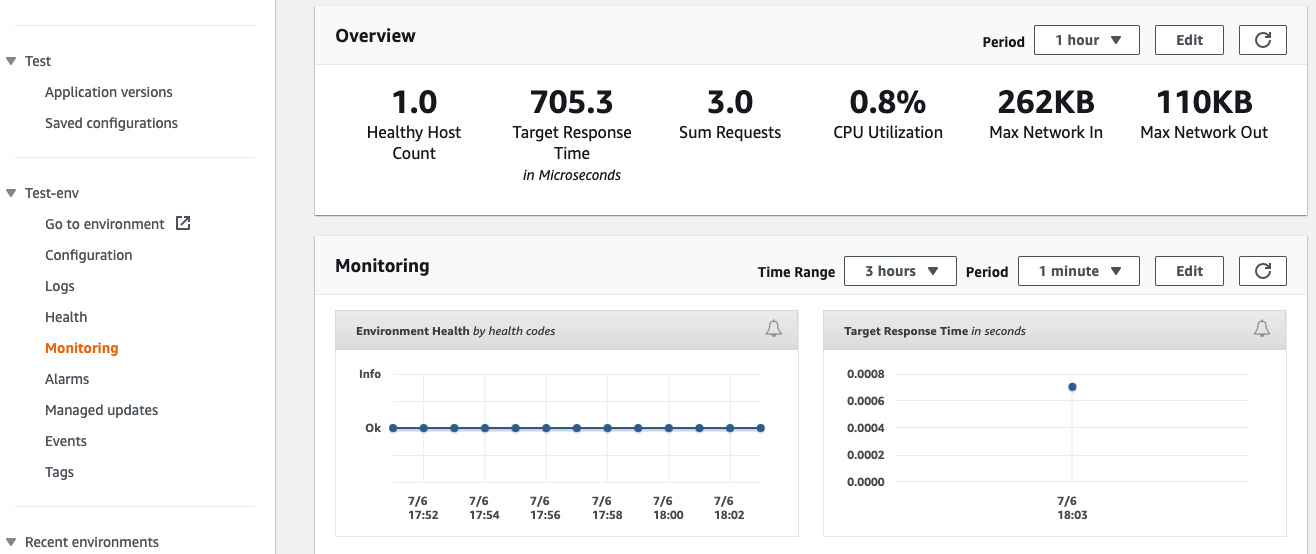
You can also monitor your instance’s performance by going to the “Metrics” section.
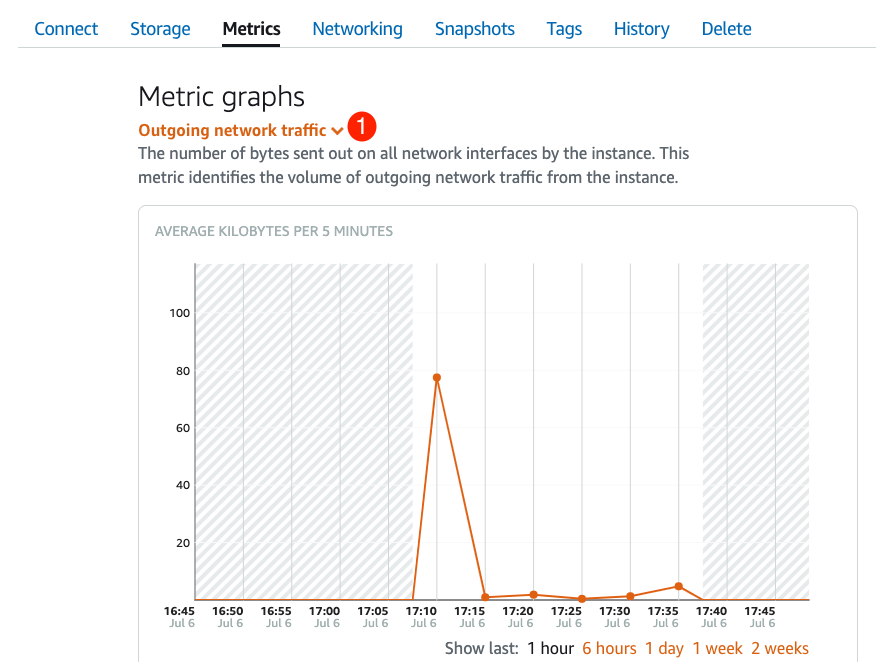
Choose the type of metric (1) that you want to check. For example, in the image above, we want to monitor outgoing network traffic. The peak at around 17:10 corresponds to the testing I was carrying out.
Congratulations! You’re now a cloud expert!
Okay, but what’s the difference between Lightsail and other more standard hosting services?
Lightsail gives you access to the robust reliability of AWS data centers but in a refreshingly simple way. For well-defined purposes such as creating a website or blog, Lightsail is highly efficient. You can easily add more machines or a database, and divert traffic to different machines, all in just a few clicks.
The simplicity comes at the cost of a lack of flexibility in environment configuration. It’s not possible to adjust the spec of a machine you’ve already created. All machines are exposed to the internet by default. An instance can only have one public IP address, and so on.
If you want more flexibility but with a similar level of automation, here’s a service that might be of interest: Elastic Beanstalk.
Create a Complex Server With Elastic Beanstalk
Navigate to the “Elastic Beanstalk” section and check which geographic region you’re in (have a look at the menu top right). This indicates where your servers will be running.
If one day you’re unable to find your servers in the AWS console, there’s no need to panic. Just check that you’re looking in the right geographic region!
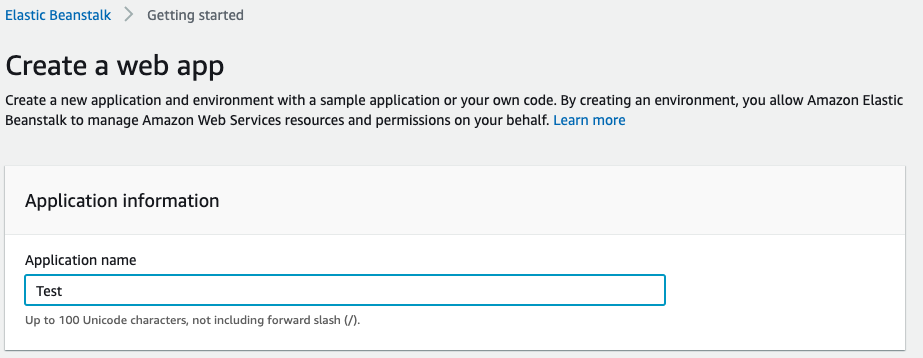
Click on “Start,” then fill out the form on the page that opens.
You need to give a name to your application, which is the name of the project that you want to be hosted online. If you don’t have anything particular in mind and you just want to try it out with me, you can call it “Test.”
Next, you need to choose your application platform. You can choose between a number of platforms, such as PHP, Python, Ruby, Java, and Go. This will depend on which language you’ll be using to code your website.
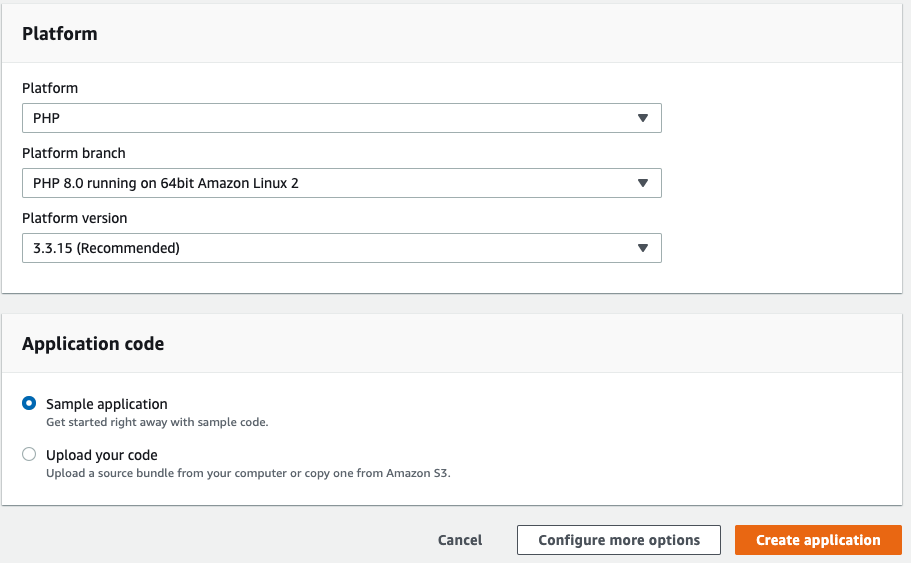
Depending on which option you choose, Elastic Beanstalk will start up a preconfigured server to meet your requirements (which will save you time).
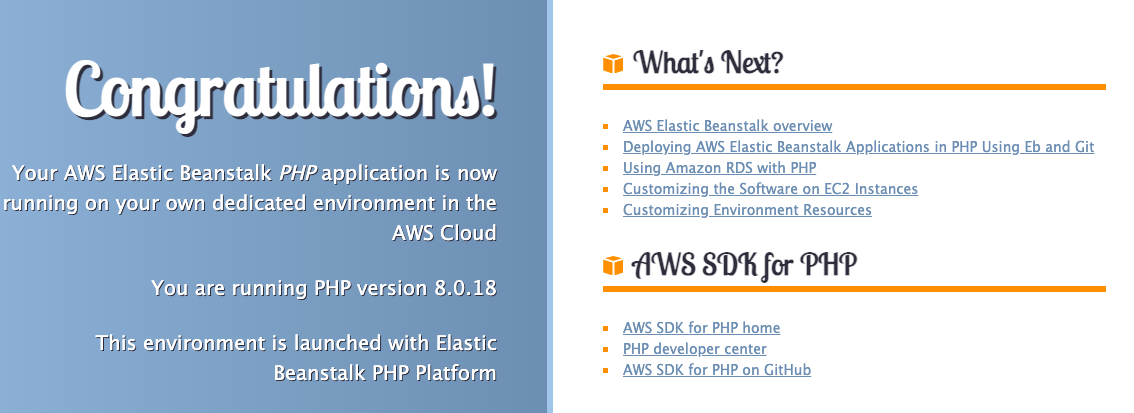
You’ll then be asked if you already have the code for the application you want to be hosted. If you do, you can send a ZIP file. If you’re just exploring, as I am here, you can leave “Sample application” checked:
Then click on “Create application.” A console is displayed showing how the server launch is progressing:
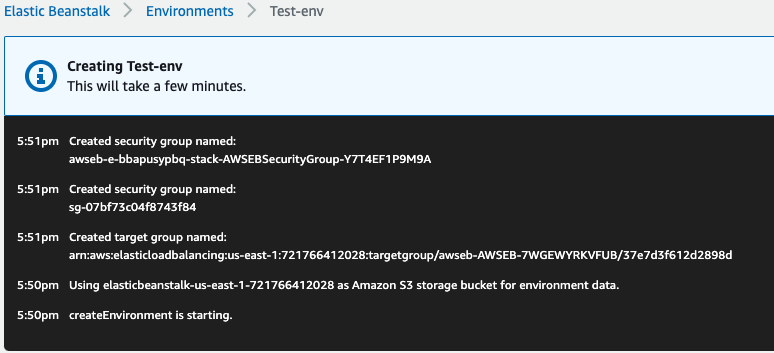
You’ll need to wait for a few minutes, as all these services take a little while to launch. When that’s finished, you’ll be automatically redirected to the home page of your application on Elastic Beanstalk.
Get to Grips With the Elastic Beanstalk Interface
Here’s what the home page of an Elastic Beanstalk application looks like:
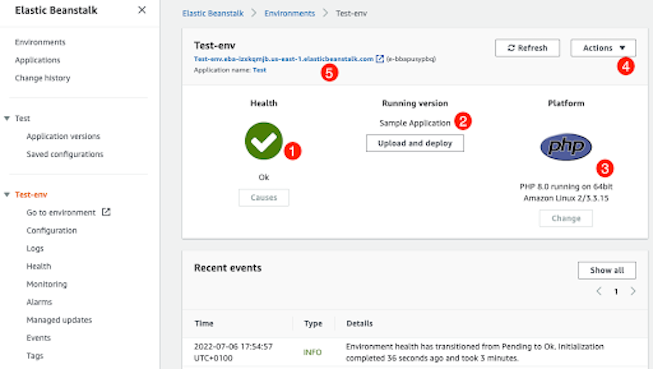
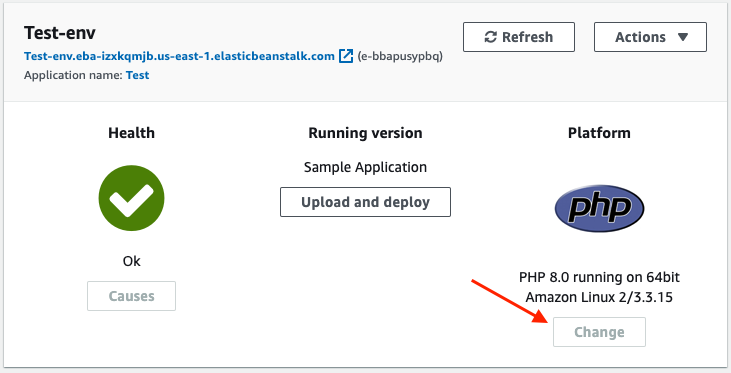
Here you can see:
the server status (all running fine, apparently!). If you have any issues, you can click on “Causes” to see the errors.
the name of the application installed on your server. We’ve put a demo application on there, but we can send our project in a ZIP file if we want to.
the server type. Here, we selected PHP, so Elastic Beanstalk has launched a Linux server with PHP installed on it for us.
actions that are available to you. For example, you can relaunch the environment (which will restart the server), clone it to make a copy, or shut it down and delete it.
your server’s web address so that you can test your application. Click on this to see the demo application using the server.
If the page is displayed, this means that your server is operating correctly and it’s able to send a PHP page. It’s nothing particularly special, but it does show you that it’s working.
On the left-hand side of the Elastic Beanstalk admin interface, there are some menus that will be of interest. For example, under “Configuration” > “Capacity” you’ll see that AWS has a default setting for the environment, to quadruple its size if you’re ever inundated with traffic.
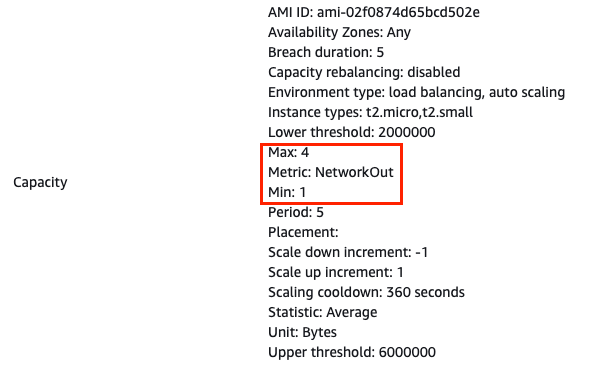
But don’t worry, when the traffic returns to normal levels, AWS will take care of removing any excess machines.
I’ll leave you to explore the rest of the menus, but be careful, because when you’re starting out, it might seem rather complicated.
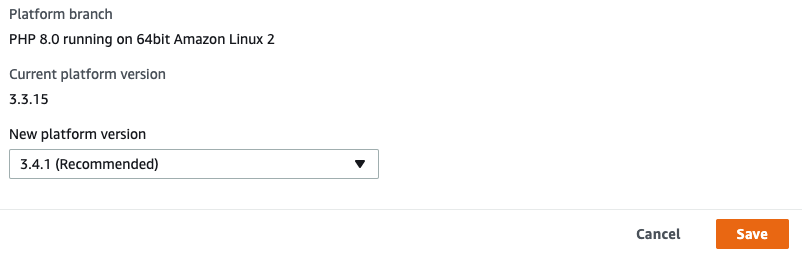
Elastic Beanstalk also lets you know when updates are applied to your environment. When a new version of PHP or the operating system is available, AWS will display a new “Change” button.
Choose the new platform environment version and click on “Save.”
What Next?
Elastic Beanstalk is designed to be simple. There aren’t actually that many options, but there are enough to launch servers for simple applications. I’d advise you to familiarize yourself with this service a little more before we go any further.
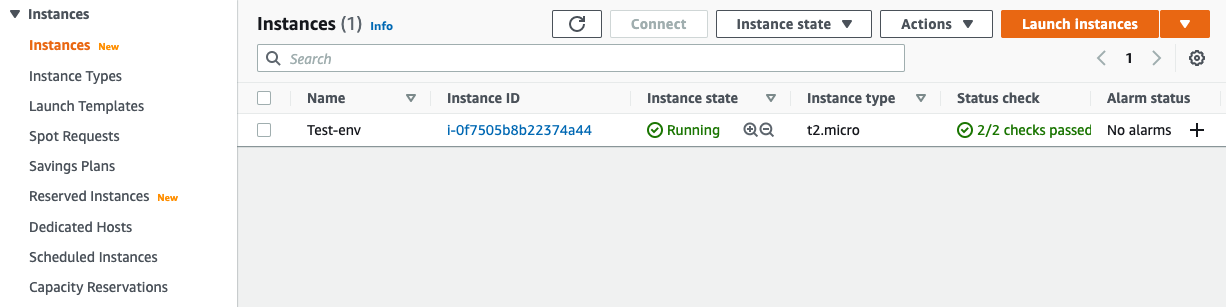
Behind the scenes, Elastic Beanstalk has generated an EC2 server and has done some configuration for us. If you return to the list of services, go to the “EC2” section and then select “Instances.” You’ll see the test server that you’ve just launched.
As I said, Elastic Beanstalk exists to simplify how other services, such as EC2 and RDS, are used. You can of course explore under the hood of these services and customize them, but be careful if you’re not sure what you’re doing!
Let’s Recap!
Amazon Lightsail creates preconfigured machines using a simplified interface. This makes it ideal for hosting websites, blogs, and e-commerce sites.
Websites can be backed up quickly by creating snapshots from the Lightsail interface.
An Elastic Beanstalk application is a collection of low-level resources within EC2 that can be easily managed from the single Elastic Beanstalk interface.
With Amazon Lightsail and Elastic Beanstalk, you can monitor your application’s performance using CPU usage and network request volume graphs.
In the next part of this course, we’re going to start delving into the underbelly of AWS! So, are you ready to switch off autopilot and go manual?
