Back up and Restore Your Instance
It’s very easy to perform backup and restore processes on our AWS servers. That’s the advantage of using virtual machines in the cloud.
By default, AWS is not going to back up your EC2 instances for you. So, you really need to plan ahead. Let’s face it, it’s better to have a backup ready to go before the server goes down! 😛
Determine Your Backup Method
There are two solutions for backing up an EC2 instance. Each has pros and cons.
Creating an AMI from your server is the simplest way. The entire contents of the disk and server configuration will be copied. However, each AMI takes up space (and can end up costing money), because all of the server contents are copied each time.
Creating an EBS snapshot (i.e., a disk snapshot) is the cheapest option. Backups are incremental, so the first 10 GB disk backup might use 10 GB while the second might only use 1 GB if only 1 GB has changed since the last backup. The snapshot option is a bit more complicated to set up, because you need to attach the disk to the server (but it’s not too complicated).
Which one should you choose?
I’m going to show you both methods. If you’re not sure, why not create an AMI to start with, as that’s the simplest option.
Back up and Restore an AMI
Let’s go through how this works using an AMI. This is the simplest method we can use to start with.
Back up Using an AMI
You just need to select your EC2 instance and then go to “Actions” > “Image” > “Create image.”
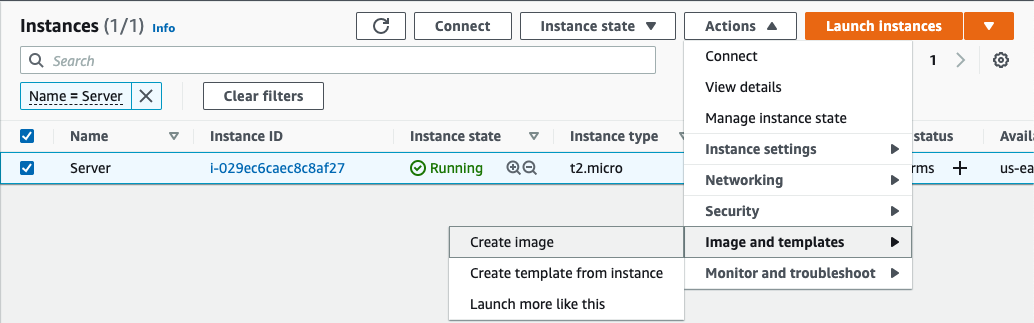
You’ll be asked to provide a name for your image (I’ve used “MyBackup” as an example):
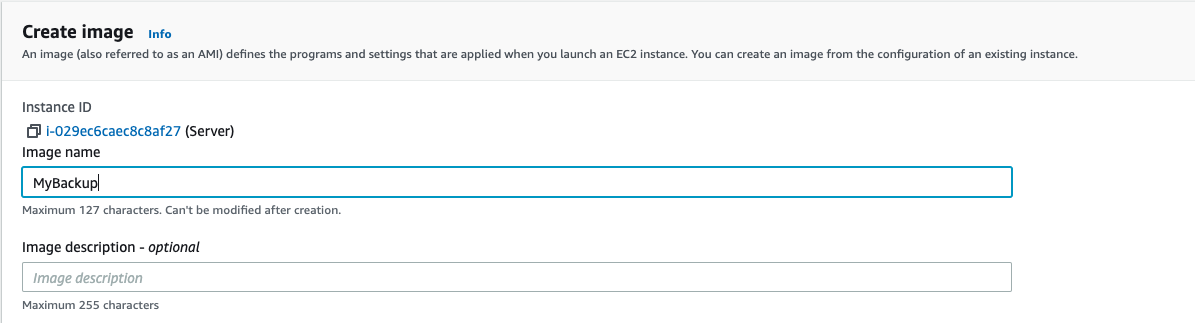
There’s nothing you need to change here. Just give a name to your image and then click on “Create image.”
You can find your image in the “Images” > “AMI” menu.

Restore Using an AMI
Has your server crashed? Do you want to travel back in time?
You just need to go to “Images” > “AMI” (see screenshot above), select your backup and click on “Launch.” A new server will then be launched using this AMI, which will restore your server back to the state it was in when the backup was taken.
If you’ve created an Elastic IP address for your server, you just need to associate it with the new server. Et voilà! Your website visitors will never know that they’re now using your restored server. 😊
Delete the Old AMIs
The more AMIs you store, the more space you use. At some point, you could risk going over the AWS free usage limit. It’s best to do some regular housekeeping of your old AMIs. Go to “Actions” > “Deregister AMI” to delete the AMI.
Your EBS snapshot won’t be automatically deleted, so next you need to navigate to EBS snapshots, then go to “Actions” > “Delete snapshot.” It’s actually these EBS snapshots that take up space, so don’t forget this step!
Back up and Restore an EBS
It’s a little more complicated to use an EBS snapshot, but it is a cheaper option. This is because the first snapshot will be 10 GB if your disk uses 10 GB, but any subsequent backups only store the changed elements. This is known as incremental backup. So, if one GB of data has changed since your first backup, the second backup will only use one GB.
Back up Using an EBS Snapshot
Navigate to the “Elastic Block Store” > “Volumes” menu. Select the disk for the instance you want to back up. This part should be easy as you probably only have one volume.
Then click on “Actions” > “Create snapshot.” You’ll be asked to provide a name for the snapshot:
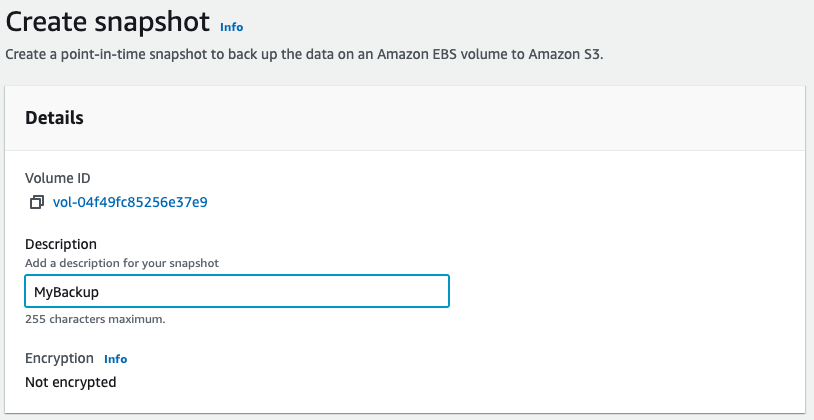
Right, the snapshot has been created.
Once you’ve created your snapshot, it will appear in “Elastic Block Store” > “Snapshots”:

Restore Using an EBS Snapshot
Has your server crashed? Do you need to restore it?
This is where things get a bit tricky. Start by selecting your EBS snapshot and then click on “Actions” > “Create volume”:
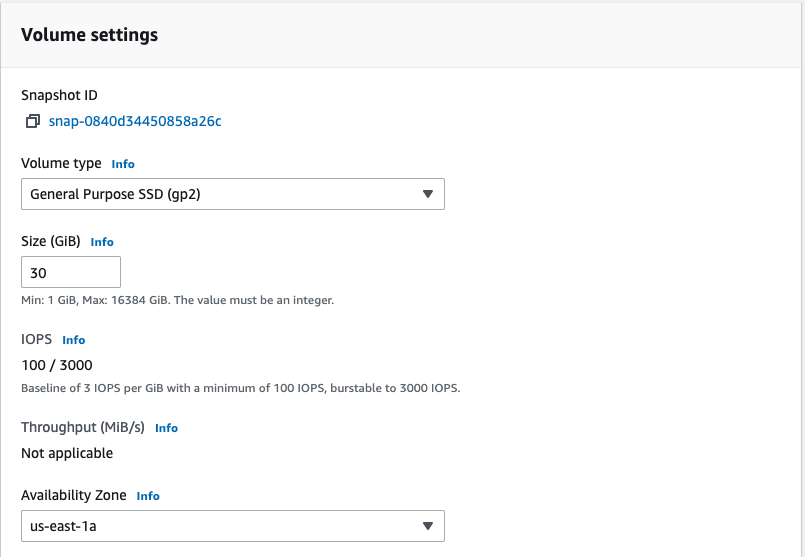
After a few moments, a new EBS volume is created based on your snapshot.
We’re not done yet, though. Now you need to:
stop the EC2 instance.
detach the “broken” EBS volume currently associated with the instance. From EBS Volumes, go to “Actions” > “Detach volume.”
attach your “clean” EBS volume that was generated from the backup. From EBS Volumes, go to “Actions” > “Attach volume.”
launch the EC2 instance.
delete the “broken” EBS volume, which is no longer needed.
Basically, what you’re doing is stopping the server, changing the disk and restarting the server!
Delete Old EBS Snapshots
If you don’t want to store loads of backups (which could end up costing you money), you can delete the old backups on the “Snapshots” page.
Because these are incremental backups, they don’t usually take up too much space.
Let’s Recap!
An AMI backup saves the instance configuration and creates a copy of all disks attached to the instance.
An EBS snapshot only backs up one disk at a time. It’s an incremental backup.
Restoring an AMI requires a new instance to be created.
Restoring an EBS volume requires a new volume to be created, which is then attached to an existing instance.
After our little tour of AWS’s biggest computing service, it’s now time to turn our attention to another major challenge, and that’s storage!
