Understand AWS Billing Tools

Amazon EC2, S3, RDS, and IAM are often cited as the essential AWS services. But there’s one service that easily trumps them all in terms of importance, and that’s the billing service!
Yes, this is a service all on its own.
In a world of pay as you go, managing your cloud costs really can give you a competitive advantage. If you can cut your Amazon EC2 costs in half, you could give your clients better discounts. This will attract more clients, increase your revenue, and more.
Let’s have a look at this omnipresent service, known as “AWS Billing console.”
Get to Grips With Billing Principles
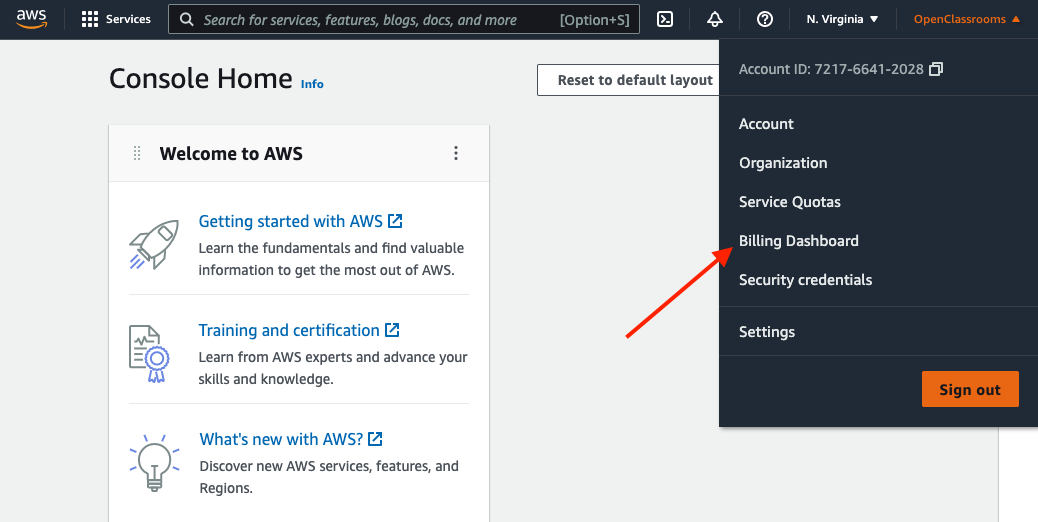
To navigate to the billing service, click on your account name and choose “Billing Dashboard.”
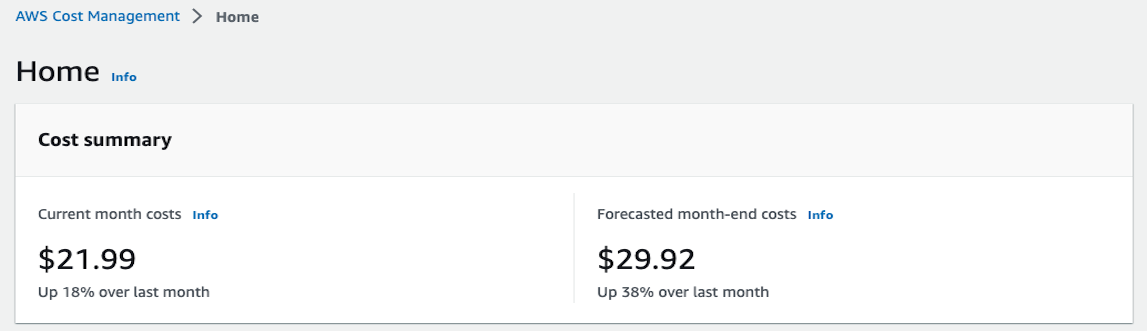
You’ll end up in the main billing console. In the center, you’ll find an overview of your actual and provisional costs, number of active services, etc.

Because we’re only using free tier services on this course, you should see no charges on this screen.
In the menu on the left, there are three main menu sections you should become familiar with:
Bills (1): here you’ll find details of your bills by service, region, and usage type. AWS can provide you with information per gigabyte to the nearest 10 megabytes.
Payment History (2): here you’ll find your invoices once the payment is made.
Cost Explorer (3): this is a subservice that provides full cost management on AWS, including expense graphs and savings plan monitoring. If you notice any unusual costs, this would be your starting point.
Cost Explorer is the main query tool for cost centers, so we’re going to focus on that in the next section.
Discover Cost Explorer
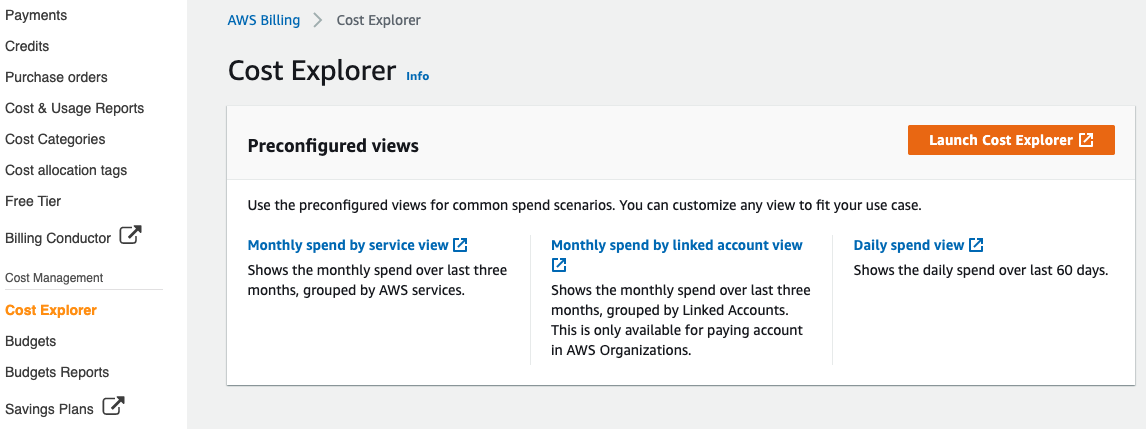
In the “Billing console” menu, click on “Cost Explorer” and then “Launch Cost Explorer”:
You’ll end up in a whole new console with dozens of menus. Don’t worry, though. As always with AWS, you don’t have to know about everything on every single screen. That will come with time.
Click on “Cost Explorer” in the left-hand menu. You should see a similar graph.
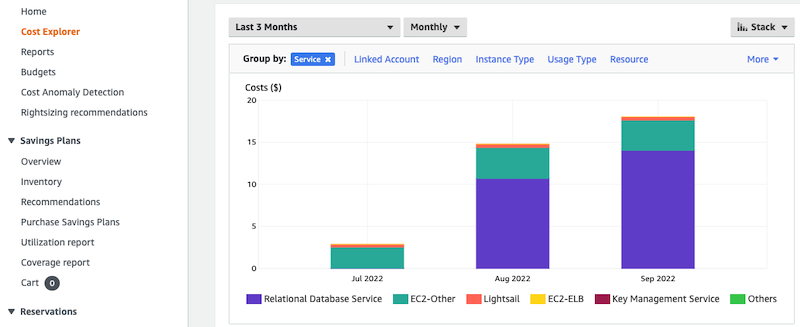
As you can see, for this AWS account, RDS and EC2 instances are beginning to cost almost $18 per month. We can adjust the filters to group costs by usage type:
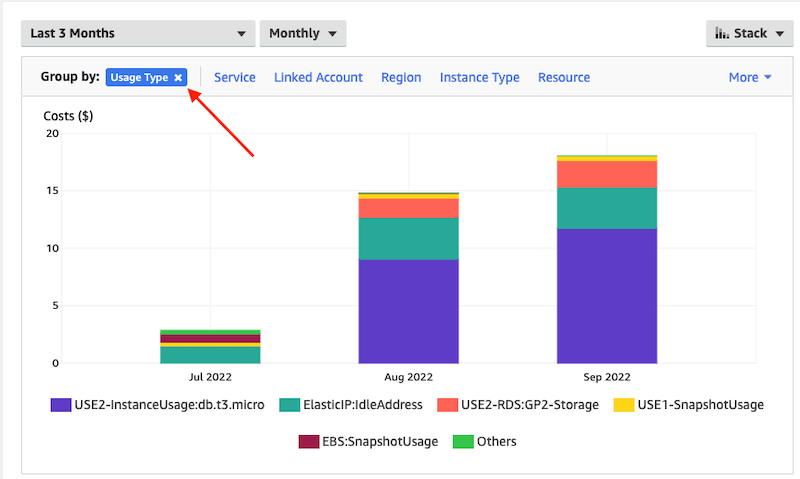
Here we can see that we have costs associated to an idle Elastic IP address as well as EBS and Snapshot usage, in the us-east-1 region. Do we really need the Elastic IP anymore? That could save us some money.
So, you know how to explore and monitor your costs, which is great, but it’s not quite enough. In this final section of the course, I’m going to give you some tips for reducing your AWS costs as much as possible.
Reduce Costs
In most AWS environments, Amazon EC2 usually represents the highest cost. This is logical, because CPU is the fundamental measure of any computing task. So, how do we reduce costs without changing our software architecture?
Savings Plans
Savings plans are the easiest way to save up to 60% of your EC2 costs if you’re happy to commit for several years. Let’s look at the classic case of a developer with perhaps three Linux servers on AWS.
Carry out a cost visualization using the EC2 Instance Savings Plans option for a one-year commitment with no initial fees.
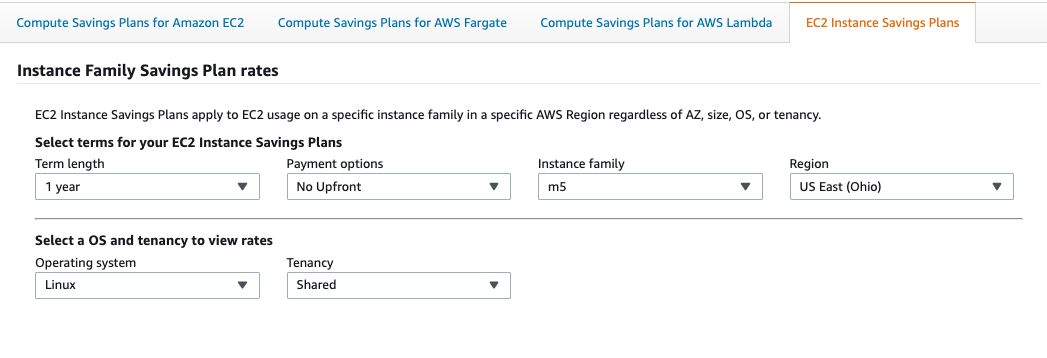
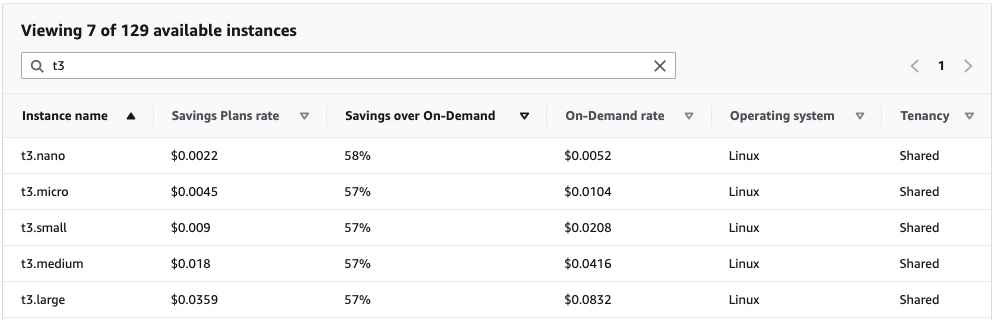
As you can see, we can save 57%. No initial fee, no catch. You just need to commit to leaving the servers running all year round, which wouldn’t be unreasonable for a website.
“So, where do I sign?” I hear you asking! You’ll see, it’s really easy.
Navigate to Cost Explorer and then select “Savings Plans.”
Click on “Purchase Savings Plans.”
Enter the region and the instance family the same way we did in the visualization.
Set the commitment price multiplied by the number of instances, i.e., 0.009 x 3 = 0.027.
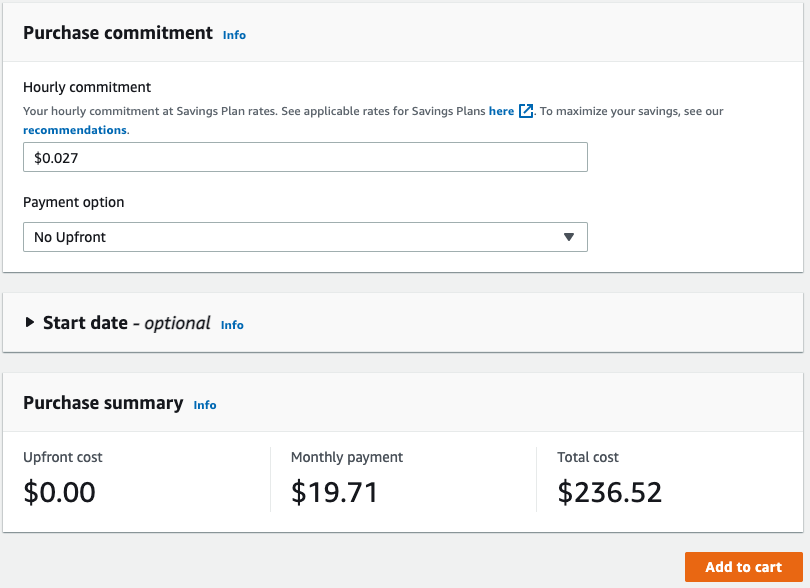
You’ll continue to benefit from saving plans even if your instance size needs to change. You can always use a number of savings plans to cover any usage that goes beyond your commitment.
RDS Reserved Instances
It’s not only Amazon EC2 that offers ways to save money with a longer-term commitment. Amazon RDS also offers a similar option called “Reserved instances.”
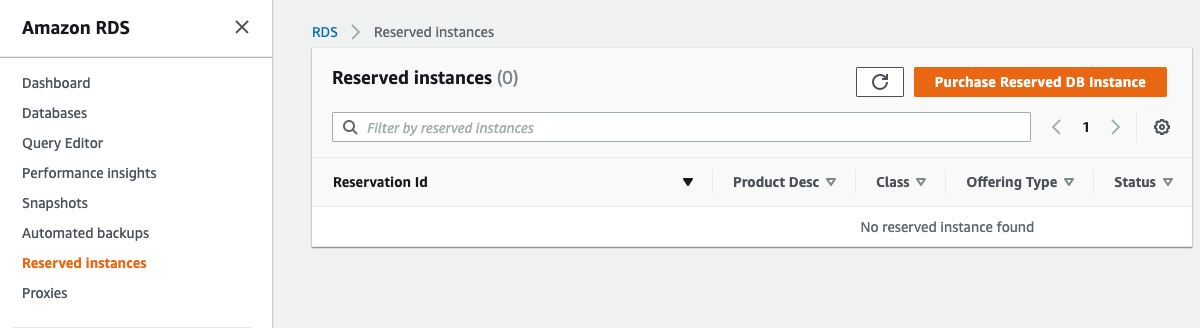
Navigate to the RDS console this time and select “Reserved instances,” then click on “Purchase Reserved DB Instance.”
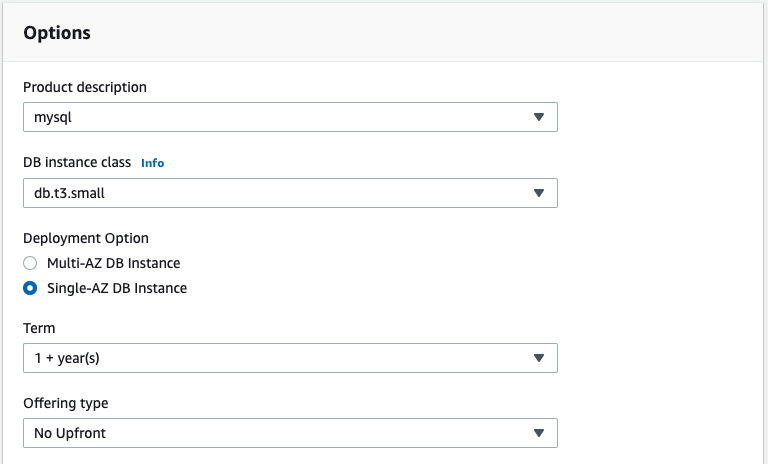
It’s the same principle. You define the instance you want to use, its type and your commitment term, and you’ll be offered a price that could be up to 60% or 70% lower than standard, on-demand pricing.
This configuration gives us an hourly rate of $0.024, which is a 40% discount.
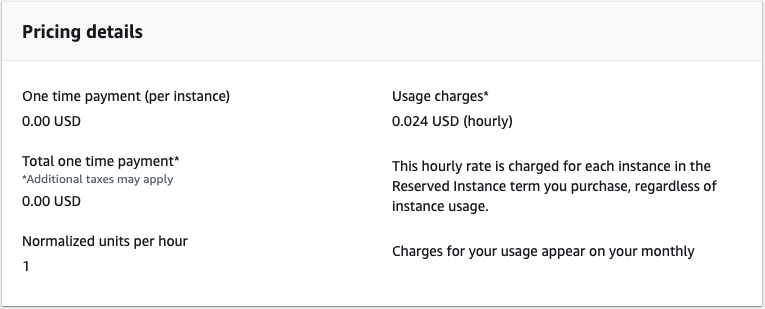
Given that we didn’t choose an initial payment option, we don’t have to pay anything yet. We just need to confirm our commitment and this will apply an immediate discount to our current RDS instance. It really is as simple as that!
S3 Intelligent Tiers
Although storage prices on Amazon S3 are pretty reasonable ($0.024/GB), if you use the service to store database backups and other large files, you might go beyond the threshold of $50 per month.
Storing an object using S3 Glacier Flexible Retrieval comes out five times cheaper than storing it as a Standard object. This is a significant saving, but the downside is that it can take a few hours to access the file. The other issue is that you need to constantly review your objects’ storage classes to optimize costs.
Fortunately, AWS has developed a new dynamic storage class, called S3 Intelligent-Tiering, to automate this optimization process. Basically, AWS will monitor your file usage over the previous 30 days and will gradually move files that are rarely used into cheaper storage classes.
Here’s how it works:
Recently used files will still be billed at $0.024/GB.
Files not used within the last 30 days will be switched to the infrequent access tier and billed at $0.0131/GB, a 46% saving! Access times remain unaffected.
Files not used within the last 90 days will be switched to the “Archive Instant” access tier. They’re billed at $0.005/GB, which is an 80% saving. And still, access times remain unchanged.
You can choose Intelligent-Tiering whenever you place a file in the bucket. You can also apply it to all files by defining a lifecycle rule.
Go to the “Management” menu for your S3 Bucket.
Click on “Create lifecycle rule”.
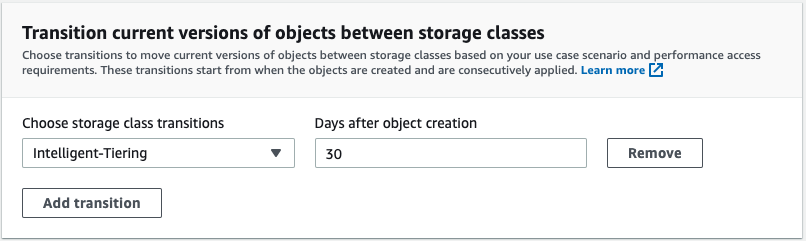
Add a rule to move files to the Intelligent-Tiering storage class after a few days, for example:
We’ve now covered the main tips for optimizing billing on AWS. As you go through and explore the AWS services, it’s worth knowing that it’s possible to configure your resources to minimize your costs. When you’re working in a “pay-as-you-go” environment, this really is a key functionality! So, feel free to use it!
Let’s Recap!
Cost Explorer is the key AWS tool for monitoring costs in detail, visualizing service usage, and so on.
Amazon EC2 savings plans can save you up to 60% depending on your chosen configuration, while still being flexible around instance families selected.
RDS reserved instances offer up to 70% discount, but you are then committed to a particular type of instance for between one and three years.
Intelligent-Tiering on S3 will reduce your storage costs by automatically placing unused objects into less costly storage classes.
Well done, we’ve completed the final chapter of this course! So, how about we do a little quiz to consolidate all of this newly acquired knowledge?
