Install a Virtual Machine With an ISO File

Install a VM With an ISO File
If you don't find a ready-to-use VM disk on the web, you’ll have to create an empty one and install the operating system on it manually.
In our case, we’re going to install the Android operating system onto our VM using its ISO file.
Once you’ve downloaded them, let’s look at what to do next.
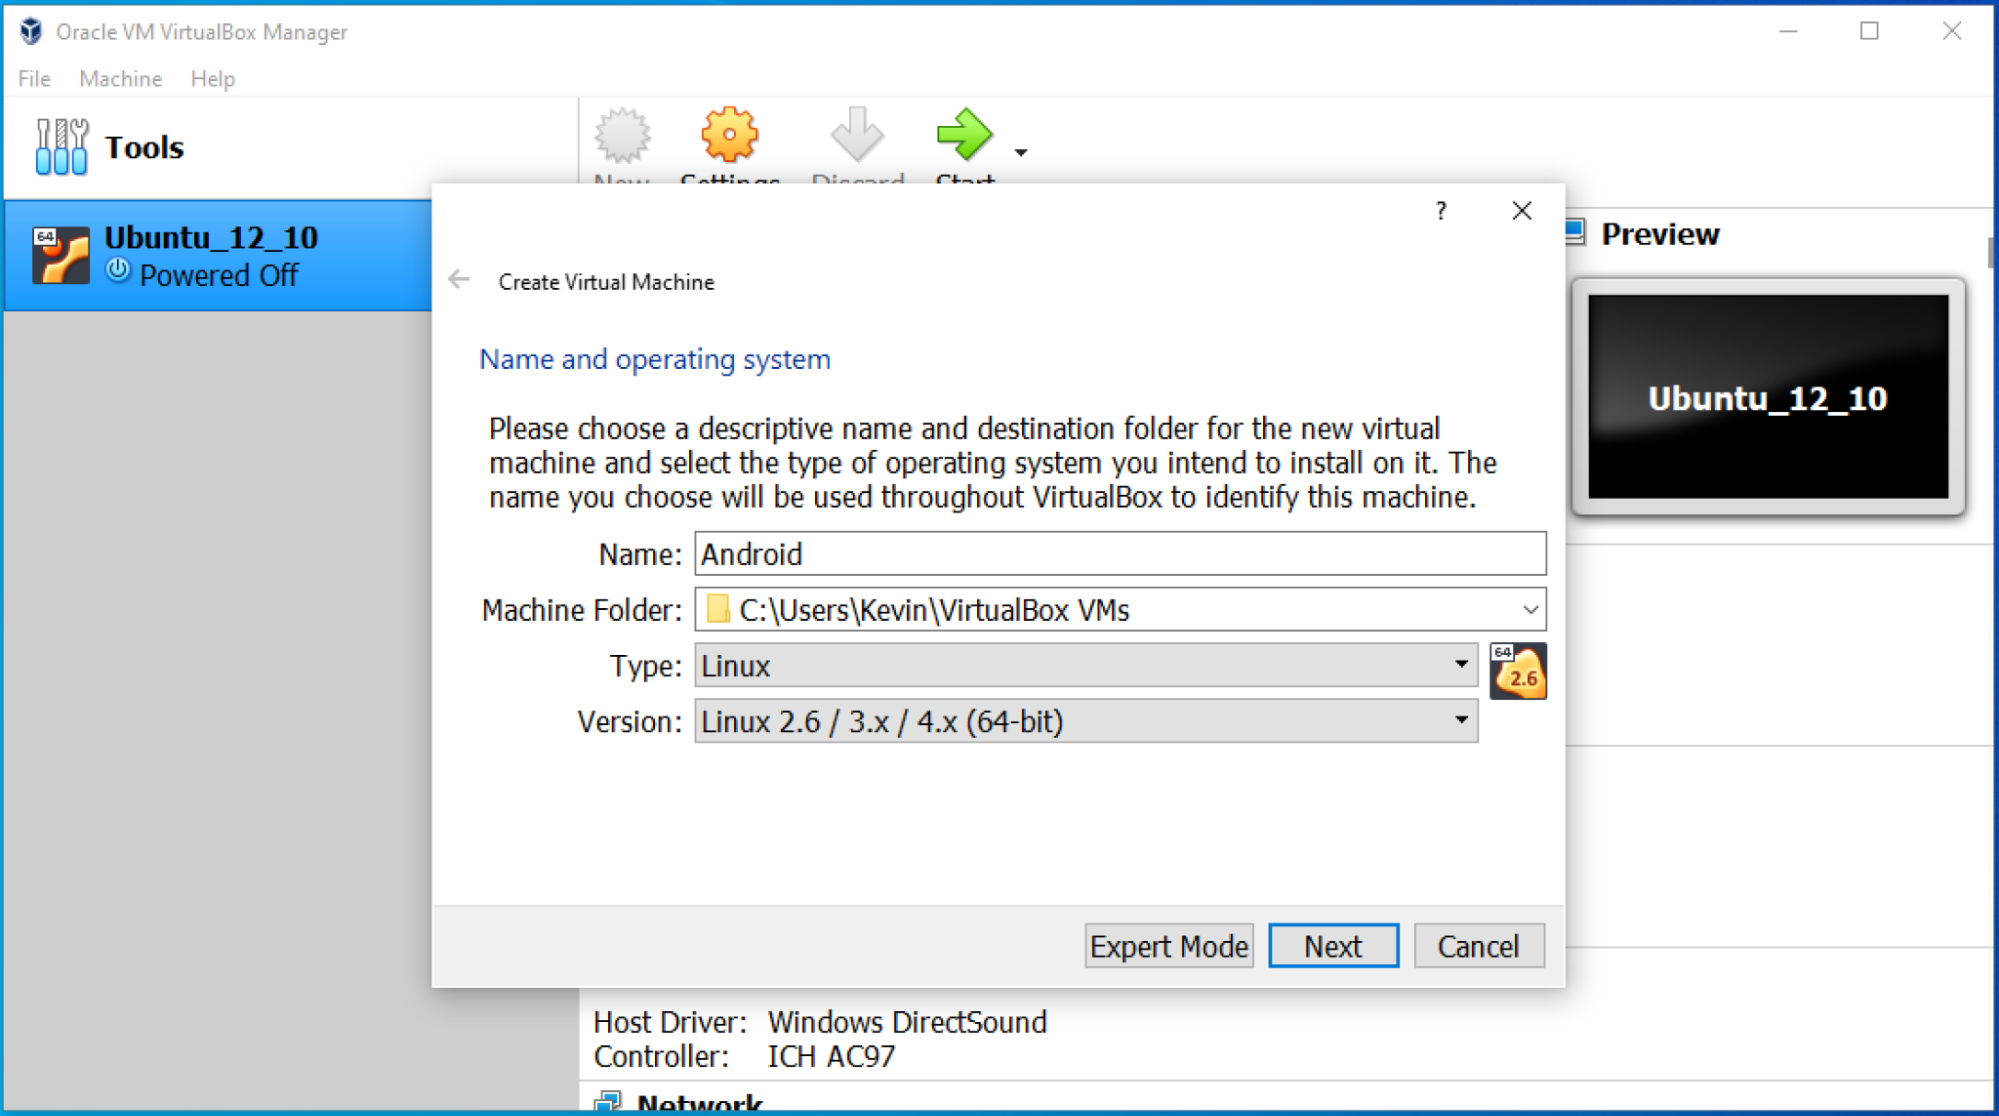
Step 1: Assign the Correct Specifications
Create the VM with the following specifications:
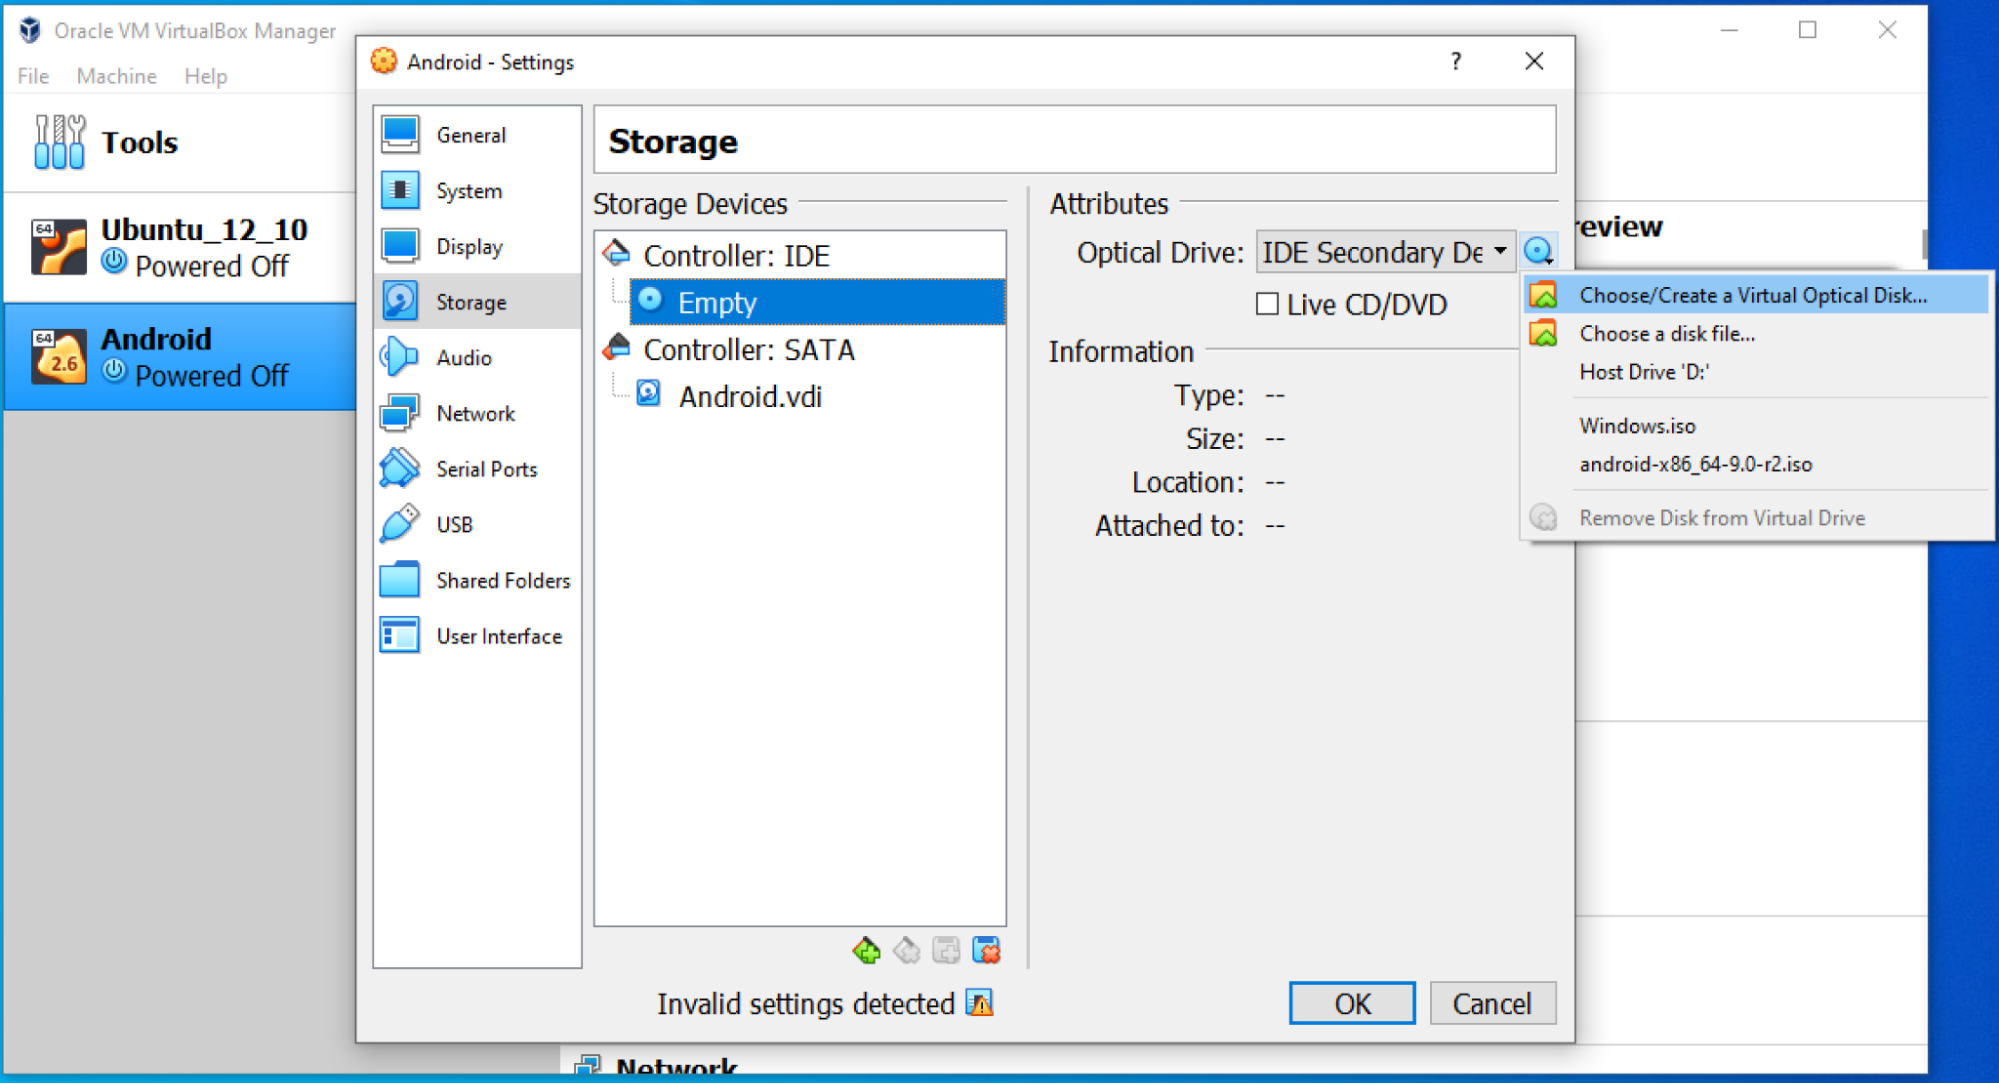
Step 2: Mount the ISO File
Mount your ISO file on your VM’s IDE controller (insert the installation CD on a physical machine).
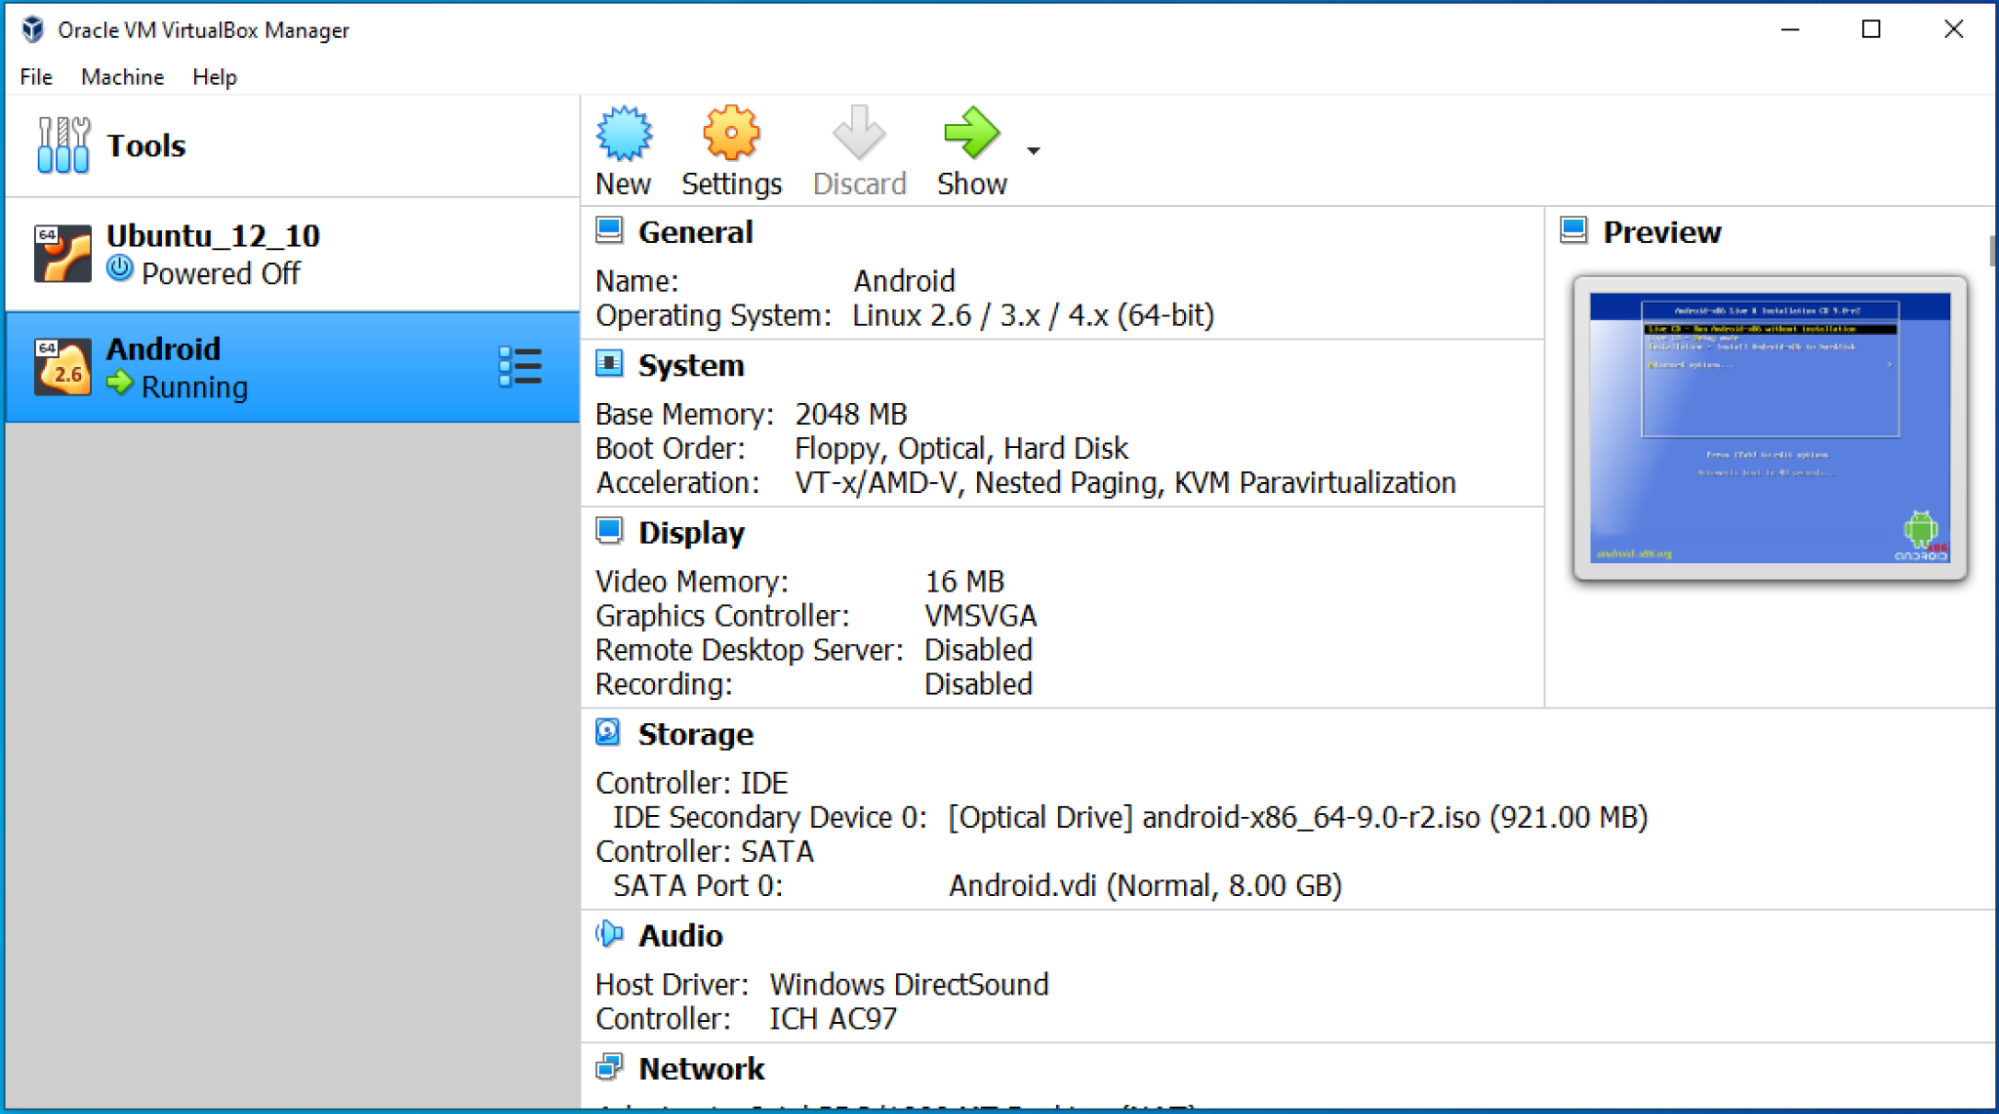
Step 3: Install the Virtual Machine
Launch your VM and start installation.
Troubleshooting Common Problems
This kernel requires an x86-64 CPU, but only detected an i686 CPU. Unable to boot - please use a kernel appropriate for your CPU.Solution: Activate the VT-x or AMD-v option in the BIOS of the host machine.
Solution: In the first window, when creating the VM (where you enter the name and type of VM, i.e., Windows/Linux/Max, etc.), the Version field allows you to choose the exact operating system. Make sure you select 32-bit if the operating system you’re installing is the 32-bit version. The same applies to 64-bit.
Take a Closer Look at Steps 1 - 3
We’ve covered the first part of creating a VM from an ISO disk image. Follow the video below to make sure you understand before moving on:
Step 4: Create a Bootable Partition
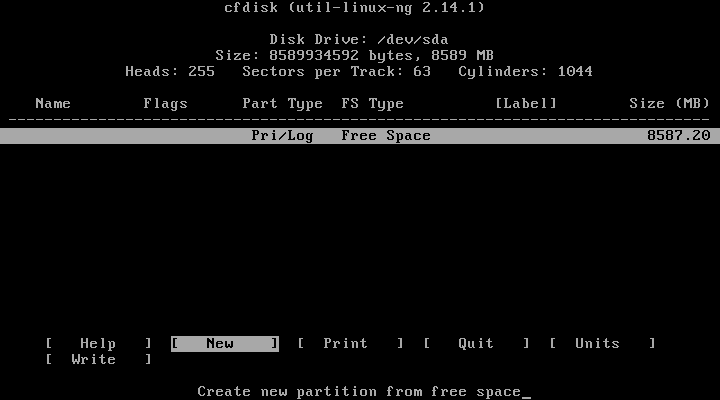
Now you need to create your blank disk’s partition table.
1 - Choose Create/Modify partitions.
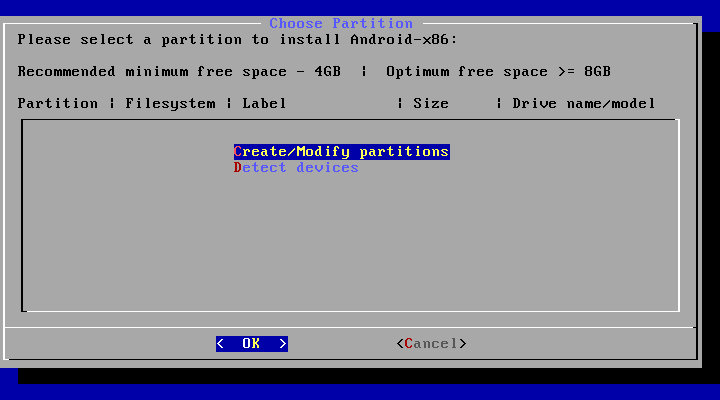
2 - Don’t use GPT (this will create an MBR table).
3 - Select New to create a new primary partition with all the space available.
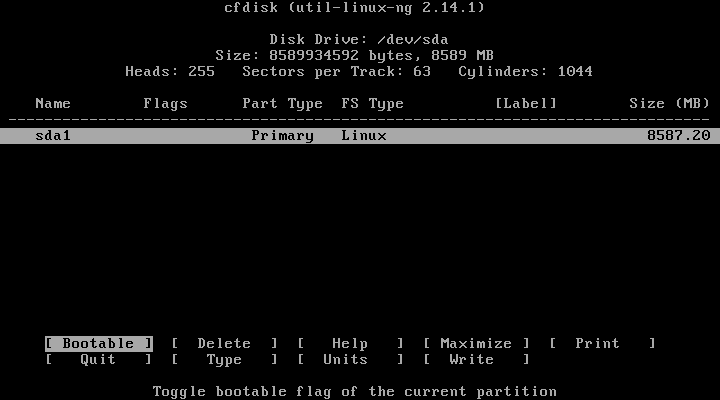
4 - Make this partition bootable by clicking on the Bootable option to allow the VM to start on this partition. Non-bootable partitions are mainly used for storage, but not for installing operating systems.
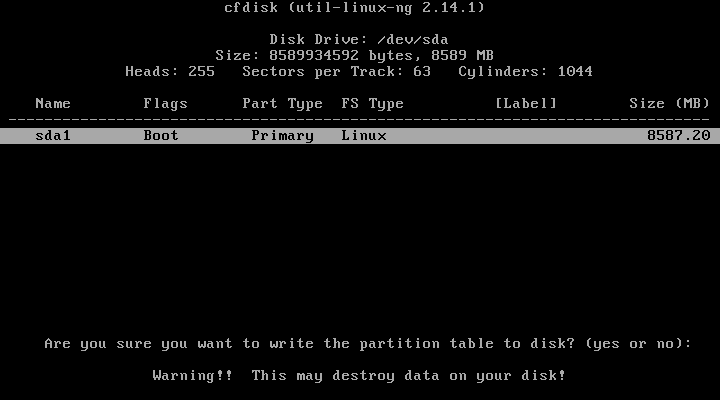
5 - Select Write so that you can write to the partition.
Step 5: Install the Virtual Machine
Your disk is now partitioned and you can install Android on it.
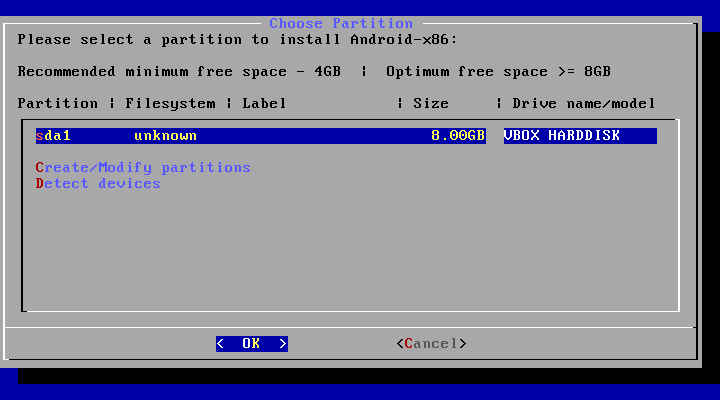
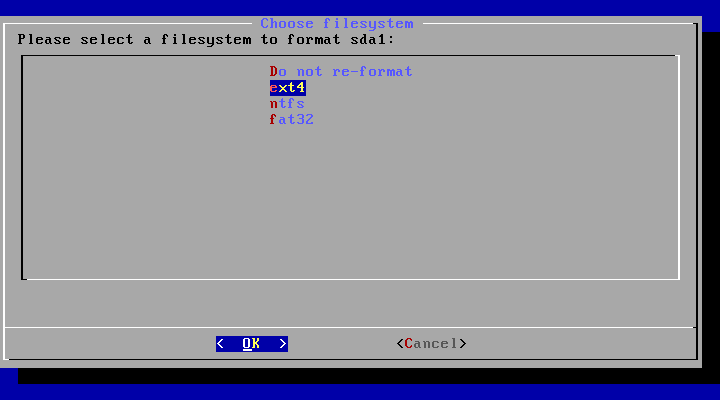
1 - Select the file type ext4, which is the file system used by Android 8.
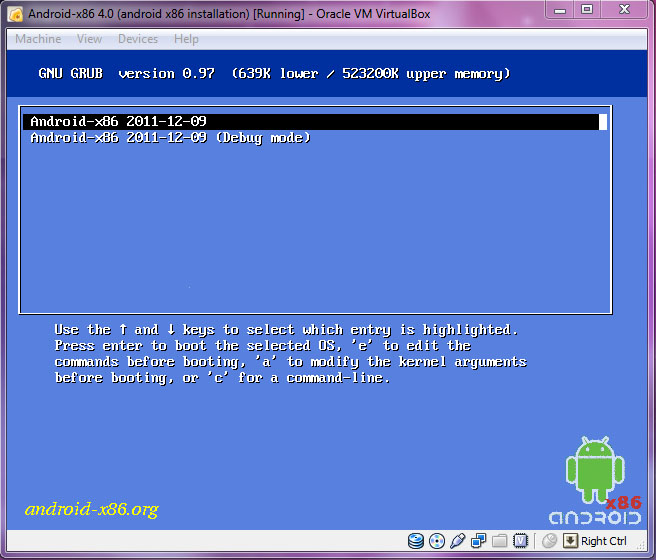
2 - Install GRUB, which is the machine’s boot loader script.

GRUB will allow you to access this selection screen at start-up:
3 - Make the directory/system rewritable (this will allow you to change the directory later on).
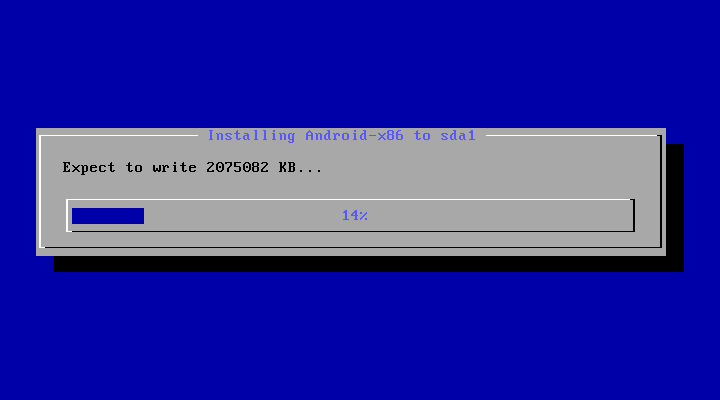
4 - Installation can now begin.
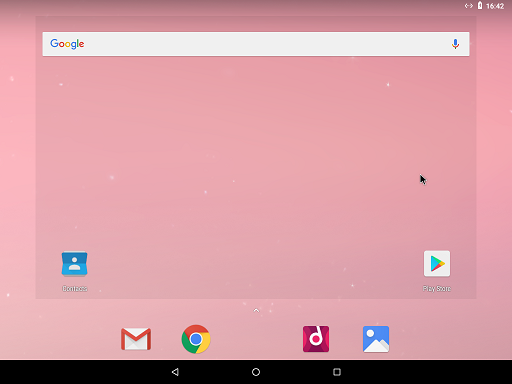
5 - And your VM is ready!
Take a Closer Look at Steps 4 - 5
Your Android machine is now operational! Check the short video below to follow my installation steps for the final part of the Android VM creation:
Let’s Recap!
If you cannot find a ready-to-use VM online, you can create a blank one and install the operating system using an ISO file.
You must mount the ISO onto the VM. The installation will begin when the VM is powered on.
To partition the drive correctly (for Android), follow the steps outlined above, making sure the partition is bootable.
Use filetype ext4 and install GRUB to complete the Android OS installation.
Now that you can create VMs, we’ll take a closer look at communication between our virtual machines in the next chapter.
