Capture a Windows 11 Master Image

To deploy Windows 11 workstations with a FOG server, you first need an operating system image. Unlike MDT/WDS, you cannot add a ready-to-deploy WIM file directly, so you will use a Windows 11 master machine that you will capture in FOG Server.
Prepare FOG for the Capture
Start by preparing your deployment server to receive the image from your master machine.
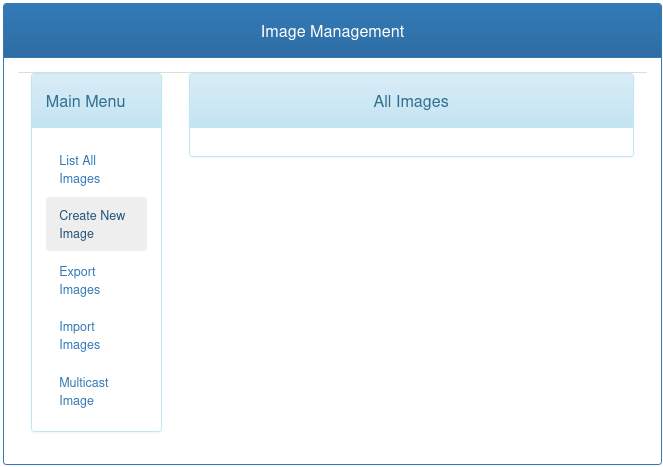
In the FOG web interface, go to the Images menu and create a new image. It will be just an empty shell for now.
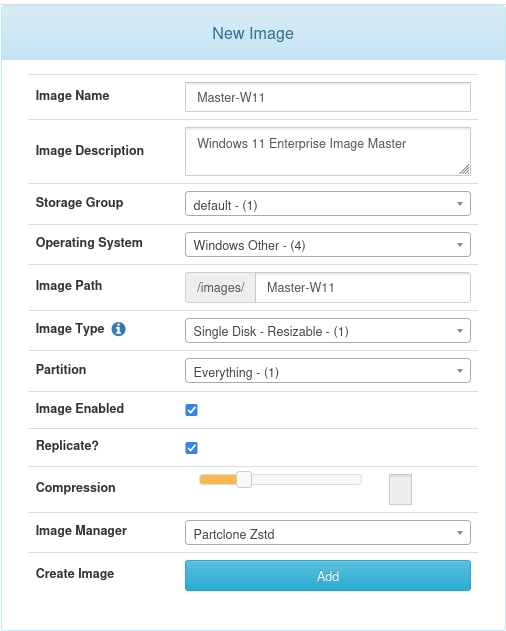
Give the image a name and, if you want, a description so it is easy to identify—for example, “Master-W11.” In the operating system field, select “Windows Other (4).” Leave all other options at their default values and click Add.
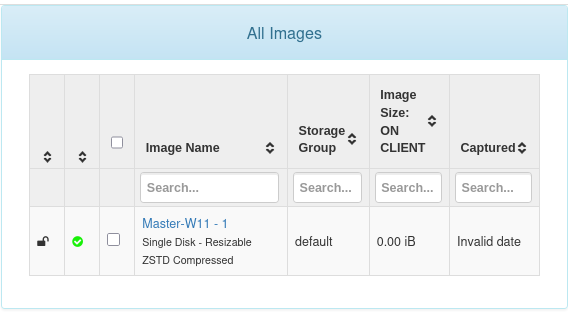
Your image has been created successfully. For now, no capture has taken place yet, so its size is still zero.
To save time during deployment, configure FOG now so it automatically assigns this image to future machines that are deployed.
Go to the FOG Configuration menu, then to FOG Settings, and open the FOG Quick Registration category. Set the options like this:
Select the QuickReg AutoPop checkbox: this automatically pre-fills some information when a machine is registered in FOG (MAC address, serial number, and more).
Select the “Master-W11” system image you created earlier to assign it automatically to all future machines that are registered.
Fill in the QuickReg Sys Name field with “PC-**” to define the naming format for future machines.
Set the QuickReg Sys Number field to “1” so machine names increment automatically, for example PC-01, PC-02, and so on.
Leave the other options at their default values.
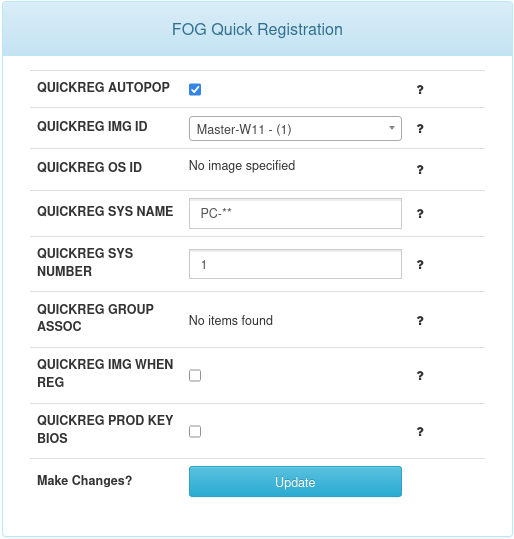
Remember to click the “Update” button to apply the changes.
That is all you need to do in FOG for now. The next steps happen directly on the master machine. 🙂
Link a Master Image to the FOG Server
Now move to your master machine, which has already been customized but not yet generalized with Sysprep. To save even more time during deployment and skip much of the initial OOBE setup, use an answer file named unattend.xml, stored at the root of the C drive.
I’ll make it easy for you—I’ve included it here, you can download the unattend.xml file here 😜
To connect your master machine to the deployment server, install the “FOG Client.” The FOG client is an agent installed on machines managed by the FOG server. It lets you run various administrative tasks remotely and centralize system management. For example, it can:
Register hosts
Rename machines
Join an Active Directory domain
Manage printers
Deploy software
Run scripts
Watch the walkthrough in this video:
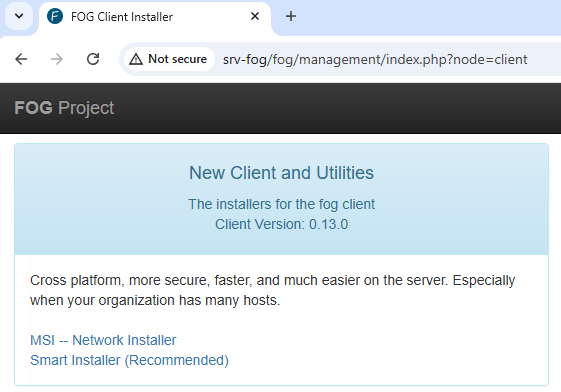
On the master machine, open a web browser and go to the following address to download the client in MSI format: http://srv-fog/fog/client.
Install it with the standard wizard: accept the license terms, then enter the FOG server IP address in the “Server Address” field. Do not change any other option.
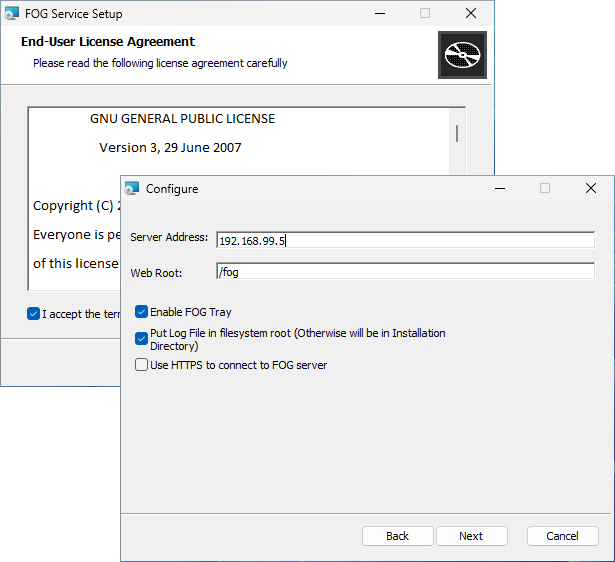
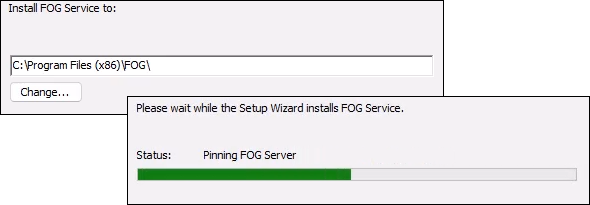
Leave the default client installation path and continue to the end of the wizard.
To speed up the upload of your master machine to FOG, run this PowerShell command to restart the service:
Restart-Service -Name "FogService"
After a few seconds, go to the FOG web interface, open the Hosts menu, and list all machines. You will see one machine that represents your master machine.
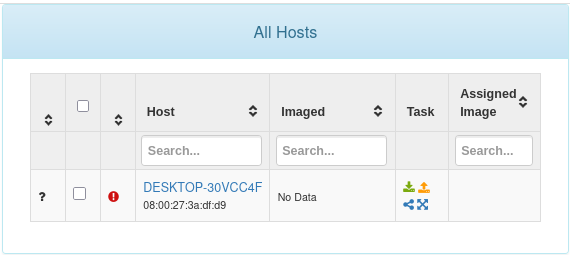
Click its name to view its details, then click “Approve this host.”
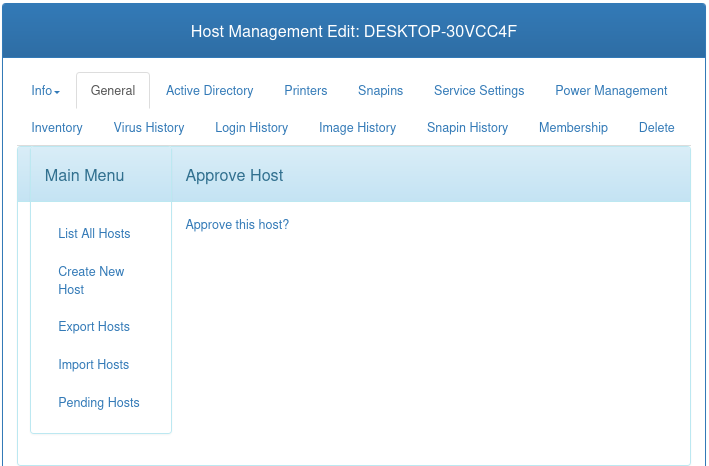
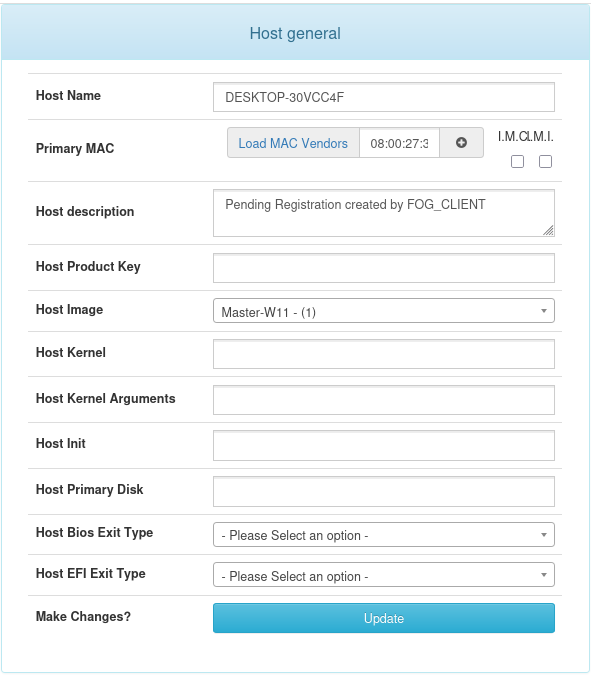
Once the machine is approved, you will be taken automatically to the machine’s General menu. Here, assign the “Master-W11” system image in the Host Image field, then click the “Update” button to save.
The master machine is now linked to the server through the FOG client.
Before you capture it, finish preparing the machine by using Sysprep to generalize it, return it to OOBE, include the answer file, and shut it down.
On the master machine, open a terminal and enter these two commands:
cd C:\Windows\System32\Sysprep
sysprep.exe /generalize /oobe /shutdown /unattend:C:\unattend.xml
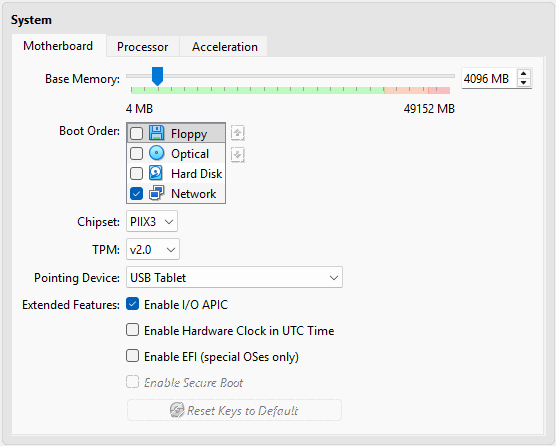
Once the virtual machine is shut down, go to its settings and open the System menu.
In the Advanced Features section, clear the “Enable Secure Boot” and “Enable EFI” checkboxes. In the Boot Order section, clear every checkbox except “Network”.
Your master machine is now ready to be captured in FOG!
Start the Capture
Watch the walkthrough in this video:
Now return to the FOG web interface and open the Hosts menu.
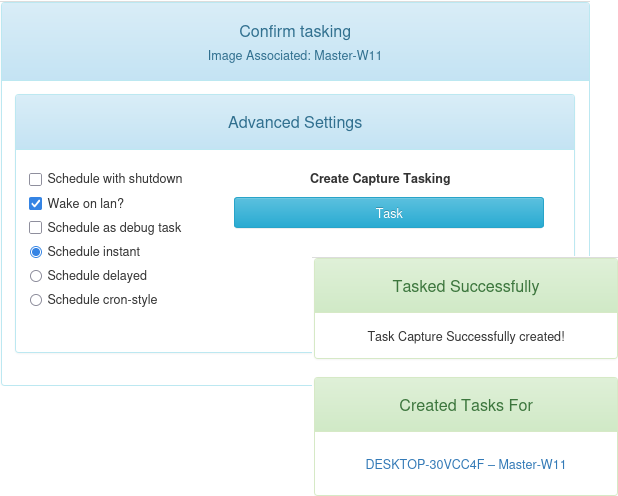
In the Task column, click the orange icon with the upward arrow to assign a capture task to the master machine.
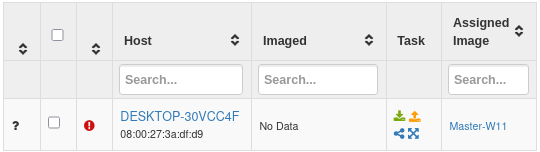
Confirm the assignment by clicking the Task button without changing any advanced settings.
Start the master machine. It will boot over the network through iPXE and receive an IP address from the DHCP service.
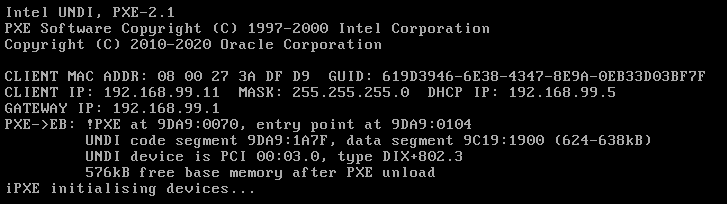
The machine will then contact the FOG server and receive the required instructions, in this case to run the capture task.
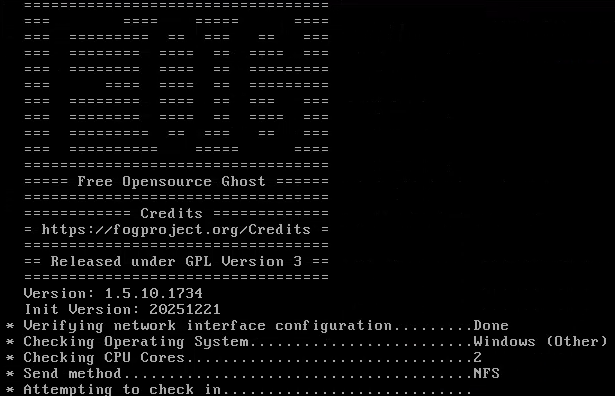
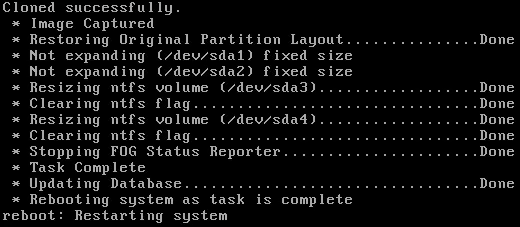
After a few seconds, the capture starts. Partclone, an open-source tool designed to clone or restore disk partitions, handles this step. At this stage, Partclone is copying the contents of your master machine’s hard drive to the FOG deployment server.
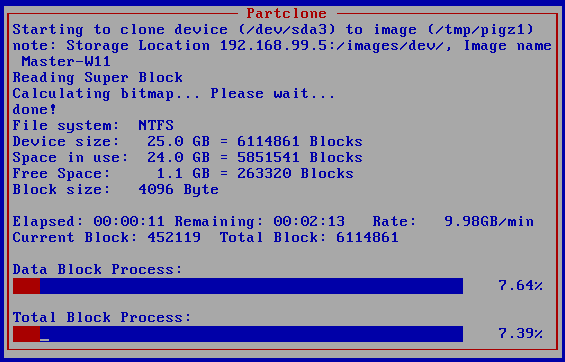
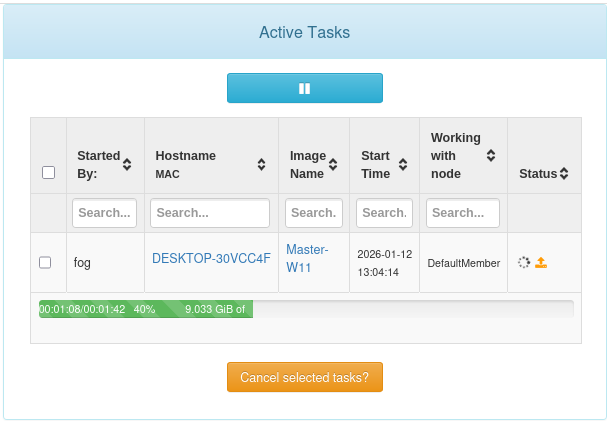
You can track the capture progress from the Tasks menu, then Active Tasks, in the FOG web interface.
Once the process is complete, a prompt on the master machine will confirm that the capture succeeded, and the machine will restart automatically. You can then shut down the master virtual machine for good.
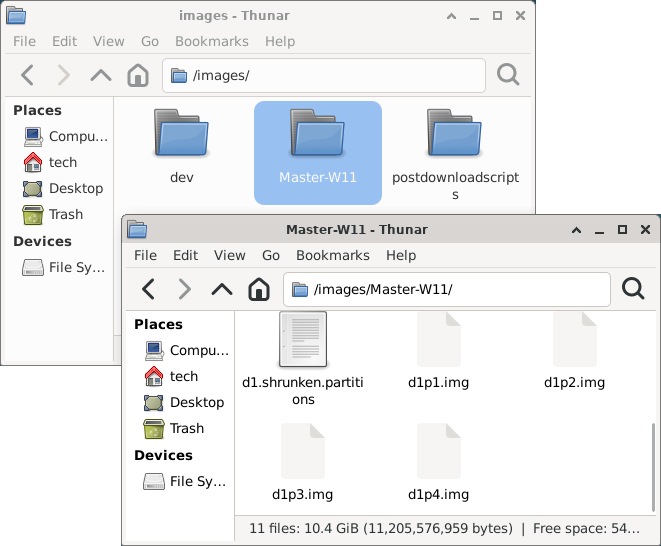
In FOG, if you open the Images menu, you will now see that the Master-W11 image contains a captured system with today’s capture date and its size.

The files that make up the master system image are stored in /images on the FOG server.
You have finished capturing your Windows 11 master machine. The system image is now ready to be deployed to other machines.
That is what you will do in the next chapter 🙂
Let's Recap!
Unlike MDT/WDS, FOG does not handle WIM files. You must capture an image from a host.
Create an empty image in the Images menu in FOG to receive the master capture.
Use the FOG client to register the master machine and simplify its management.
After approving the machine in FOG, assign the empty image and activate a capture task from the Hots menu.
When the master boots, Partclone captures the disk and stores the system image in FOG, where it is visible in the Images menu.
You have polished your system image and it is ready to be captured. Now it is time to master cloning with FOG so you can reuse it whenever you need.
