Choose the Right Storage for Your Data Layer
We spent the first two sections of the course separating the layers using MVC. Now in this section of the course, we’ll look at various options we have for implementing these layers. In this chapter, we will look at various options for the data layer.
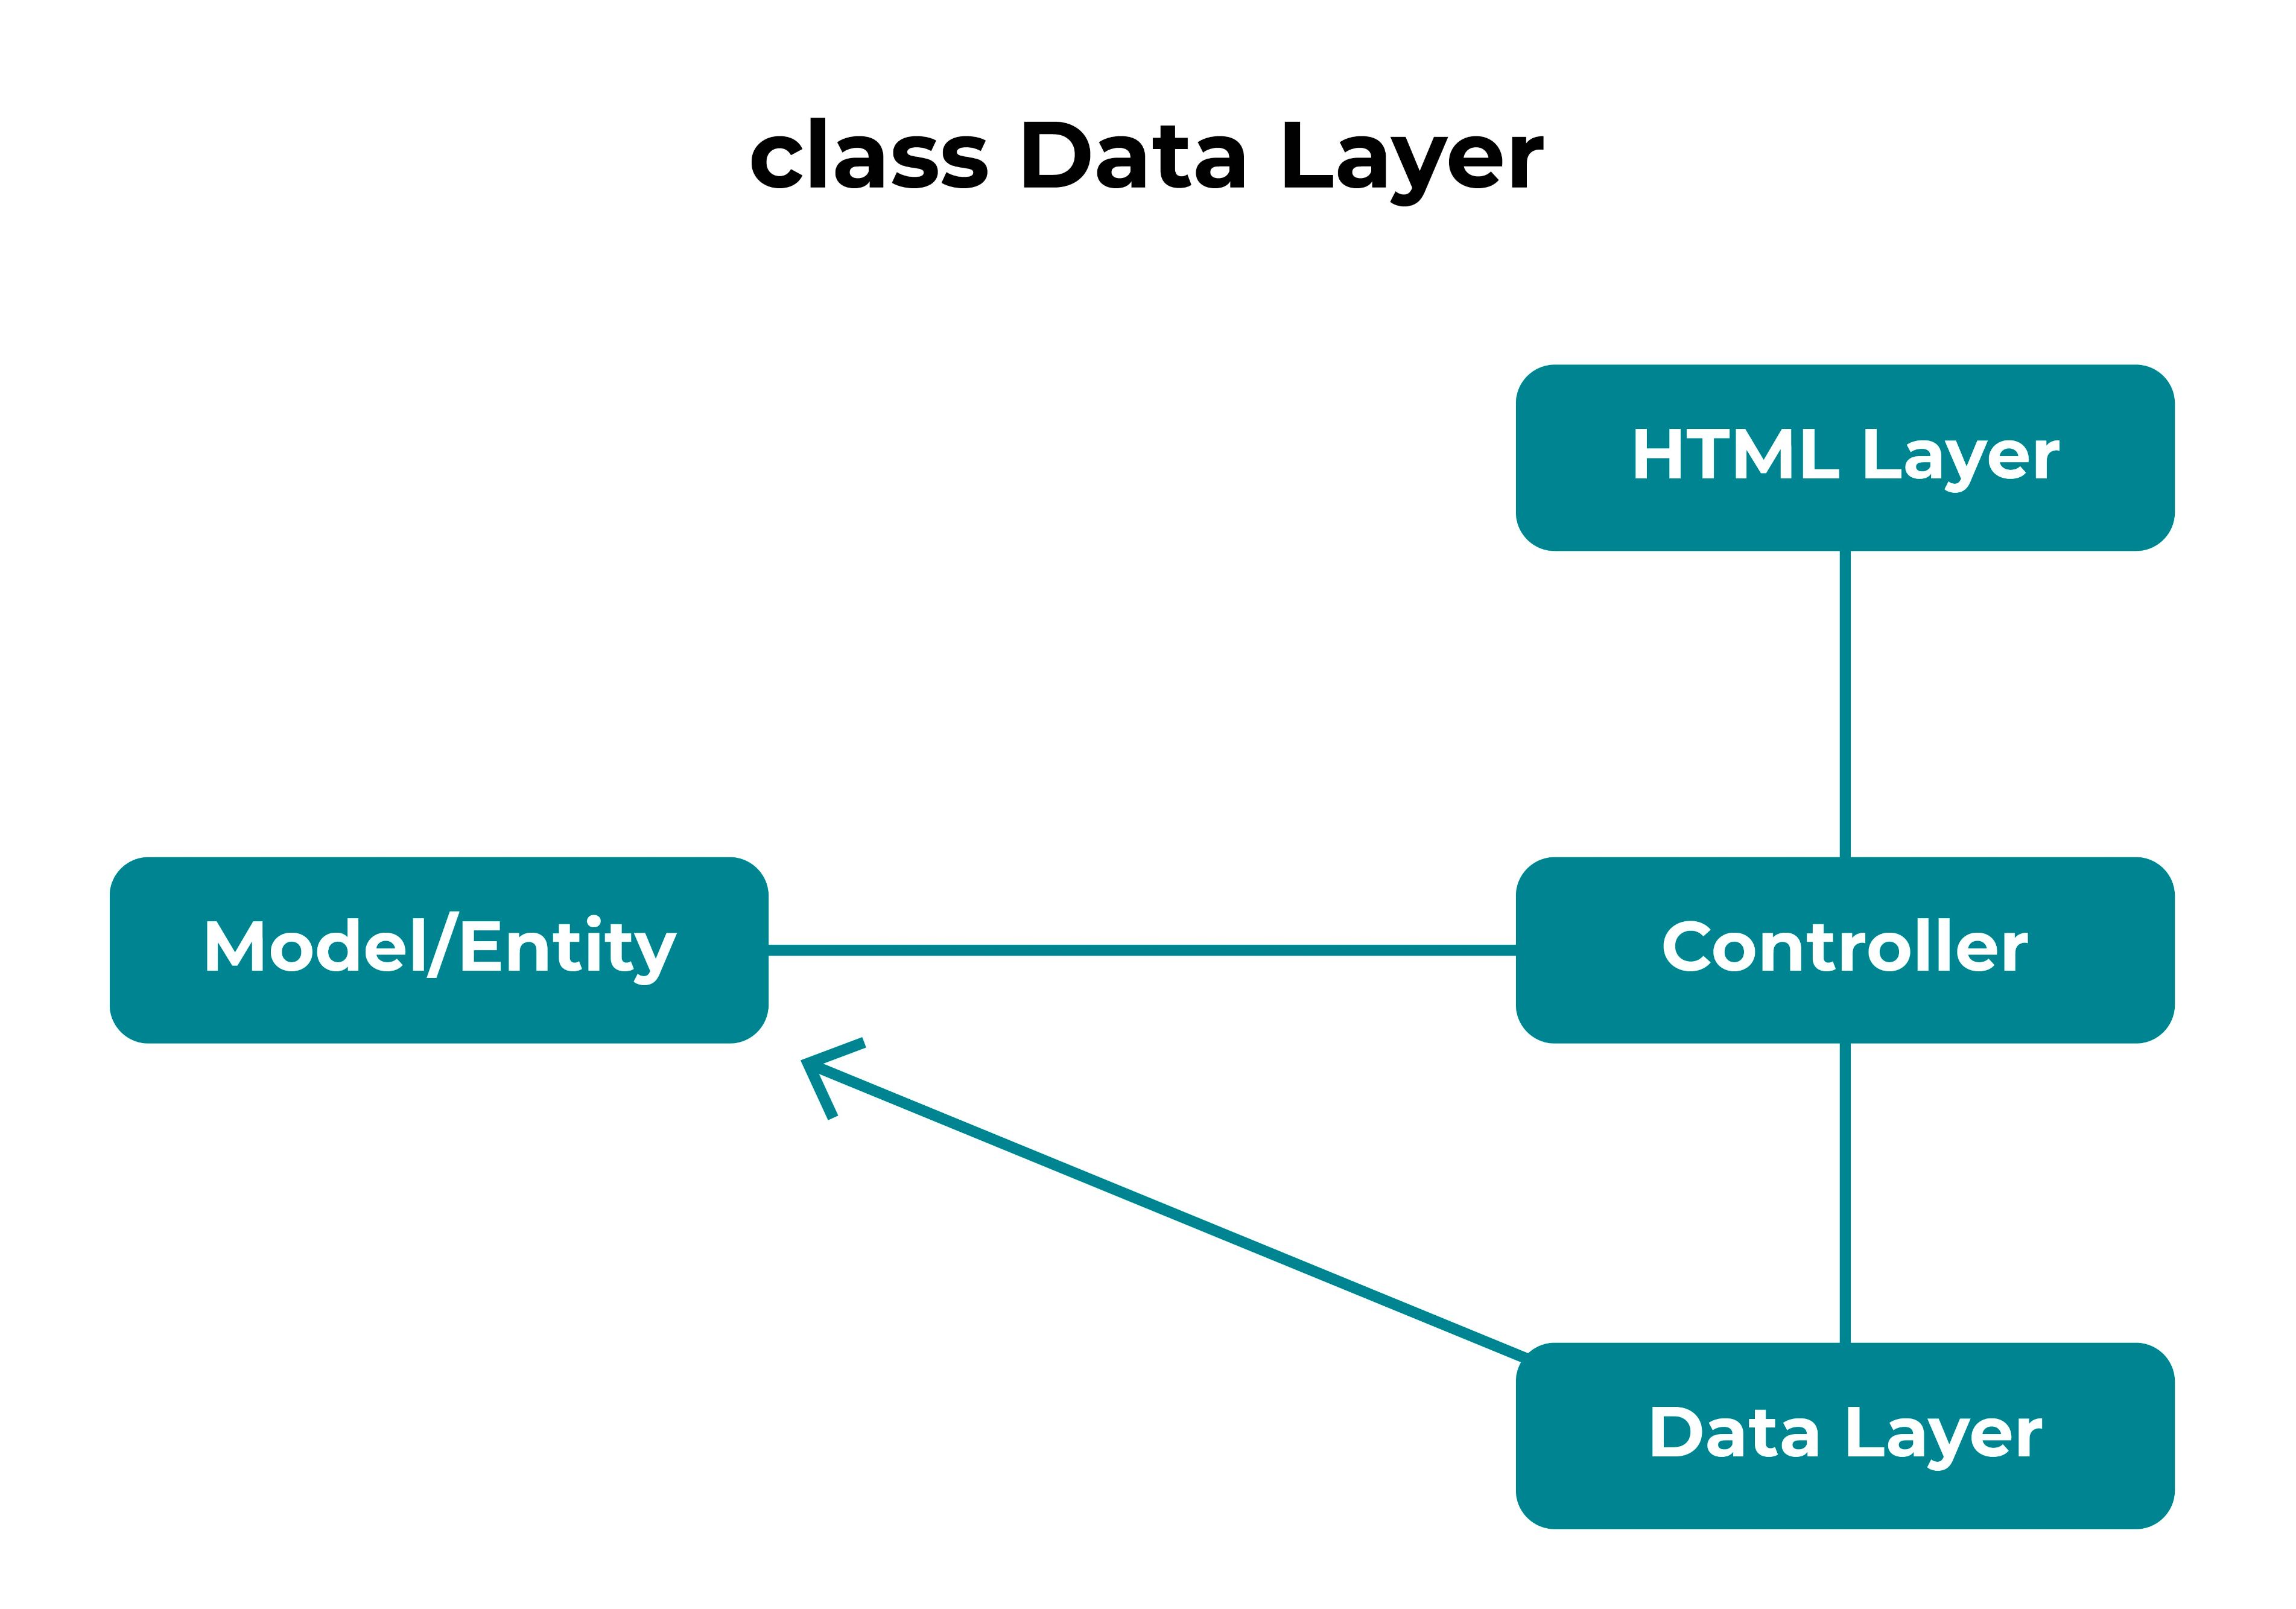
The best reason for separating the data layer is that we can change it with minimal impact to the rest of the system. As you recall, in our application, model objects don’t directly make calls to the data layer anymore. We now have a data layer that calls them:
When we started using the Spring Boot framework, the only thing we needed to do to our model classes was to add an annotation (@Entity), and a set up getters and setters. When an object is needed, the framework creates it and then calls the appropriate setters to initialize the object. When the object is modified, the getters are called, and the values are stored.
How is that storage done again?
Just by using the Spring Boot framework, we have automatically generated the standard database CRUD (create, retrieve, update, and delete) operations. That’s a great starting point. But usually, we want more sophisticated data manipulations. Remember our "find clients with outstanding balances" user story? It was simple to add that capability to our client repository class. We added a method to perform that exact search. So yes, technically, it was a "retrieve." However, the caller of the method didn't need to jump through the SQL hoops to make it happen. It was hidden from the called element via the method (i.e., an API).
We'll explore the advantages of using an API to support decoupled web architecture in the next section.
Limit What Other Layers Can Do Via an API
Putting the data layer behind an API enforces the rule that no other layer manages data. If we allow other layers to talk to our data store directly, we end up with problems. There is no rules enforcement.
What do you mean by "rules enforcement?"
I'll explain with an example. In the original application, we saw that any class could open an SQLite connection, and write information to any table. The client class could open the pilot table and make a change. Here is a line from the original Client.java implementation:
ResultSet rs = DairyAirDb.getResultSet("SELECT * from clients");It is accessing the client table, of course. But there is no rules enforcement ensuring that this line doesn't access any of the other tables in our database. This means we can easily end up with an illegal or incorrect stored value. For example, the client and pilot tables both have a field called telephone. Without rules enforcement, we can write a query to modify the client address that looks like this:
“UPDATE pilots SET telephone= ‘new telephone’ WHERE id = 5”;Oops. 😅We were thinking about something else, and accidentally wrote "pilots" as the table name.
Well, that's not so bad...is it?
It's even worse than it appears. In the future, we will want to call that pilot. When we retrieve her phone number, we’ll end up calling some client instead. (Embarrassing!).
Then we have to spend time trying to figure out why we get a client instead of a pilot. Since the SQL is scattered all over, we have to search for all the insert and update functions! It's not too bad in this small application, but imagine an extensive application with hundreds of such statements. 😬 Once the problem is found, we'll likely examine our other SQL statements to make sure we haven’t made that mistake elsewhere.
I’ve worked on systems that have had this “wild west” mentality, and unless you’re being paid by the hour, it’s not a lot of fun. 😠
So, how does an API help?
If we implement the data layer through an API, it’s much easier to track down these types of errors, because it must be one of the API functions causing the problem, which is a much smaller subset of code to look at. After separating the layer, and putting in the repository classes, the above mistake can’t happen. The client repository class only accesses the client table.
Another subtle advantage is that we can indicate what data is mandatory for a data operation, as well as what data is optional. In the data operations that the other layers call, we can look at the incoming parameters. If mandatory fields are missing or incorrect, we can return a meaningful error back to the caller, rather than proceeding with a call that will fail, or worse, set fields to illegal values.
We see this with the annotations on some of the fields in our model classes. For example, in Client.java we have the following:
@NotBlank(message = "First Name is mandatory")
private String firstName;
Now that you've seen the value of using an API to manage your data layer, let's see how to implement it.
Implement a Data Layer With an API
Remember how we wanted to list all the clients who had an outstanding balance? We added the following to ClientRepository:
@Query("SELECT c FROM Client c WHERE c.outstandingBalance > 0.0")Since the repository classes have been separated from the entities they control, it is easy to add new searches and manipulations. They all just go into the repository and controller classes. We don’t modify the model/entity classes at all!
With a couple of additions, we can implement changes to our API that enable us to accommodate all kinds of new user stories. Let's see this user story adding capability in action. We will add the functionality for a completely new user story that has cropped up during discussions with Dairy Air:
“As the chief mechanic, I want to see all unfixed maintenance issues so I can schedule mechanics to work on them.”
We’ll do this in a similar way that we added outstanding balance capability to the client API:
Add a button to the maintenance screen.
Add a query to MaintenanceRepository class.
Add an API endpoint to the MaintenanceController class.
Step 1: Add a Button to the Maintenance Screen
Edit the file src/main/resources/maintenance.html and add this line below the other button declaration:
<a href="/maintenance/unfixed" class="btn btn-primary">Not Fixed</i></a></p>Re-run the application to make sure the button appears on the maintenance screen.
Step 2: Add a Query to MaintenanceRepository Class
Edit the file MaintenanceRepository and add the following method:
List<MaintenanceIssue> findByFixed(String fixed);When we call this method from the controller class, we will pass in a blank “” to find those items that do not have a fixed date value.
Step 3: Add an API Endpoint to the MaintenanceController Class
Edit the file MaintenanceController and add the following lines:
@RequestMapping("/maintenance/unfixed")
	 public String unFixed( Model model) {
    	model.addAttribute("maintenance", maintenanceRepository.findByFixed(""));
		 return "maintenance";
	 }
And just like that, we have a new API capability! We have added a new endpoint (maintenance/unfixed), which searches for maintenance issues that do not have a fixed date.
Choose a Data Store
The biggest advantage we get by putting data into its own layer is flexibility. All the other layers that need the data layer know nothing about the actual data storage. They only need to know how to talk to the layer, which is given by the API. But we still need to choose how we store our data.
What kind of data store options do we have?
Here are three options you'll likely come across:
Relational databases and SQL
Column family
Document store
Let's look at each one.
Option 1: Choose Relational Databases and SQL
If the data to manage is very structured, then we can rely on the reliable SQL database. SQL databases are very good at managing data with a structure that rarely changes over time. We might need to add a table or column to our schema occasionally, but overall the data format stays the same. If this is your situation, pick this proven technology.
One disadvantage to relational databases is size considerations. Many implementations allocate the same amount of space (memory and disk) to a row that has empty fields, as a row that is full of data. So if your data ends up with many “empty spaces,” you may consider the next option on our list.
Option 2: Use Column Family
A column family database is like SQL but more flexible. The most common are:
Cassandra
HBase
Accumulo
DynamoDB
Hypertable
If our data isn’t quite so clean and neat, we can opt for a flexible column family approach. It is similar to the column approach of a SQL database, but the columns have much more dynamic flexibility. Every row doesn’t have to have the same column structure as every other.
For example, if you have an empty field, a column family database would skip storing a field if it was empty, or contained null. So if we have data that is somewhat unpredictable, where many fields vary from row to row, this is a better option. Some example data that works well in a column family are blog posts or a data stream from a medical device.
Option 3: Select a Document Data Store
Finally, if our data doesn’t conform to any structure at all, we can use a document data store. Some common ones include:
CouchDB
MongoDB
Marklogic
Terrastore
OrientDB
RavenDB
Jackrabbit
A document store is essentially free form. We give the data an identifier (a key) and then a value to associate with it. The great part is the associated data can be anything we like: text, images, audio/ video recordings, or tax records.
The data we store in these are often more key/value pairs. For example, if we have a medical data record, we can store the data based on the patient’s ID number as the key. However, we can easily add additional metadata like when and where the patient was at the time of the record. Or we can attach a series of x-rays, along with a diagnosis, and a physician’s recommended course of action. As you can see, this type of record has no real form/structure that is easily captured in a relational database. So if your data is all over the place, a document store is probably your best choice.
Implement an SQLite Data Store
Currently, in our Spring Boot application, we are using an in-memory data store. We will switch to using SQLite as the persistent store (Option 1) since the original application used it, and we can leverage all the legacy data stored in it.
We’ll follow these steps:
Add SQL dependency to our POM file.
Add SQLite specific dialect.
Modify the application.properties file to include SQLlite.
Add a persistence.xml file to the resources.
Modify the ID attribute of all entity classes.
Let's get started.
Add SQL Dependency to Our POM File
Replace the com.h2database dependency with the following in the pom.xml file:
<dependency>
    <groupId>org.xerial</groupId>
    <artifactId>sqlite-jdbc</artifactId>
    <version>3.25.2</version>
</dependency>
<dependency>
    <groupId>com.zsoltfabok</groupId>
    <artifactId>sqlite-dialect</artifactId>
    <version>1.0</version>
</dependency>
Add SQLite-Specific Classes
SQL is a standard. That means every organization that implements it does it a little bit differently. Also, Spring Boot doesn’t know how to interact with SQLite specifically, right out of the box. We need to add a couple of files that glue SQLite, our model, and Spring Boot together.
Create a package named “com.dairyair.dairyairmvc.sqlite.”
Create a class named SQLiteDialect.java that extends org.hibernate.dialect.Dialect in the package.
Look in the GitHub repo to see what goes into the class. It’s mainly a bunch of look-ups.
Add a class named
SQLiteColumnSupport.javathat extendsorg.hibernate.dialect.identity.IdentityColumnSupportImplin the package.Then add the following lines of code. It tells Spring Boot how to treat our ID columns (which are always integers), and how to increment that ID each time we add a row:
@Override
	public boolean supportsIdentityColumns() {
    	return true;
	}

	@Override
	public String getIdentitySelectString(String table, String column, int type)
  	throws MappingException {
    	return "select last_insert_rowid()";
	}

	@Override
	public String getIdentityColumnString(int type) throws MappingException {
    	return "integer";
	}
Modify the application.properties File to Include SQLite
Modify the file src/main/resources/application.properties to include the following:
# DB PROPERTIES #
spring.datasource.url = jdbc:sqlite:dairyair.db
spring.datasource.driver-class-name = org.sqlite.JDBC
# pretty print the sql queries to stdout
spring.jpa.properties.hibernate.format_sql=true
spring.jpa.show-sql=true
Add a persistence.xml File to the Resources
Look in the GitHub repo to see what goes into the file, which are settings for SQLite.
Modify the ID Attribute of all Entity Classes
Edit Client.java, MaintenanceIssue.java, Pilot.java, Plane.java and Reservation.java such that the annotation on each ID attribute can be auto-generated correctly for SQLite. Change the GenerationType from AUTO to IDENTITY. The code should look like:
    @Id
    // @GeneratedValue(strategy = GenerationType.AUTO)
	@GeneratedValue(strategy = GenerationType.IDENTITY)
	private long id;
Let's see how this is applied to one of our original snippets (below):
public class Client {
	@Id
	@GeneratedValue(strategy = GenerationType.AUTO)
	private long id;
With the modification, it becomes:
public class Client {
	@Id
	@GeneratedValue(strategy = GenerationType.IDENTITY)
	private long id;
Now our application is back to saving and restoring data from a SQL database!
Let's Recap!
Don’t let other layers directly control the data layer. To avoid this, write an API to mirror the intent of the data layer.
Choose an appropriate way to store your data:
Use SQL if the data is nice and organized.
Use Column NoSQL if the data is likely to be organized, but changing.
Use document store if the data is free-form.
Now we're ready to manage some communication between our different layers!
