Prepare MDT for Windows 11 Deployment

This chapter explains how to prepare MDT for a turnkey Windows 11 deployment, from adding the operating system image to integrating applications and customizing a task sequence.
Add an operating system image
Adding an operating system image in MDT is the foundation of deployment.
Find the steps in this video:
We will use the image from an official Microsoft Windows 11 Enterprise evaluation ISO: Download Windows 11 Enterprise
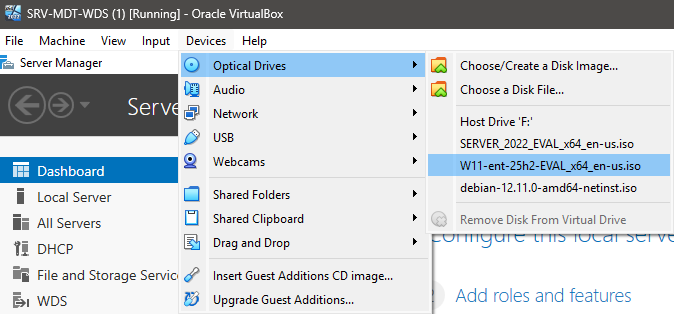
Mount the Windows 11 ISO in the server optical drive.
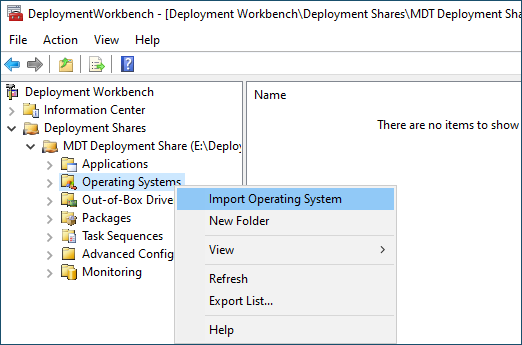
In the "Deployment Workbench" console, right-click "Operating Systems" and select "Import Operating System".
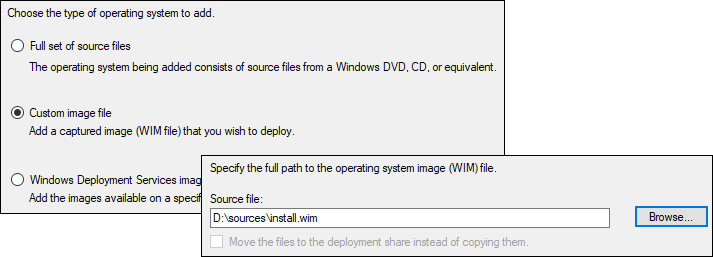
Select the "Custom image file" option to use only a WIM file. For the source, browse to the install.wim file located in the "Sources" folder on the Windows 11 ISO.
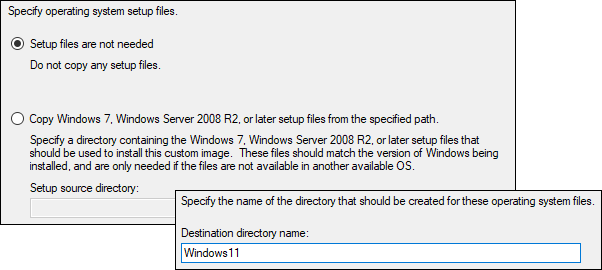
Leave the "Setup files are not needed" option selected and define the folder name where the operating system will be stored, for example “Windows11”.
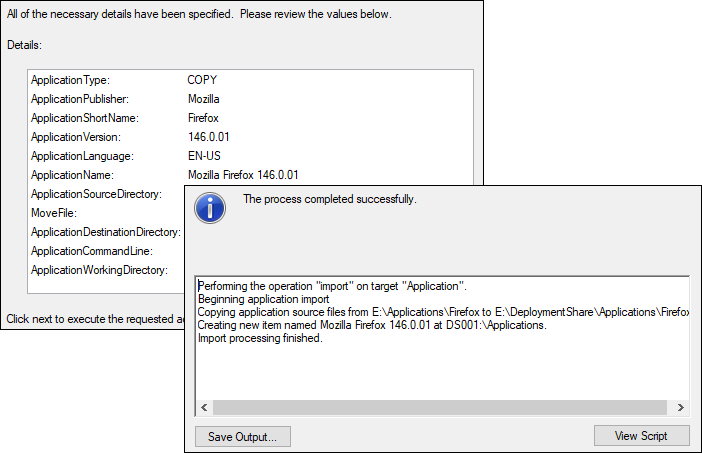
Check the information in the summary and click "Next" to start the import, which will take a few seconds.
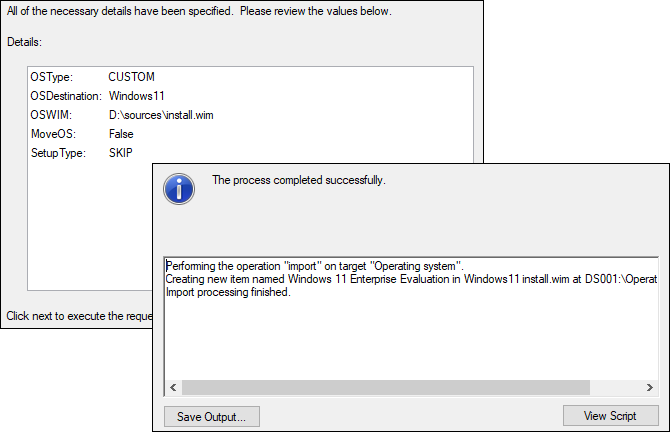
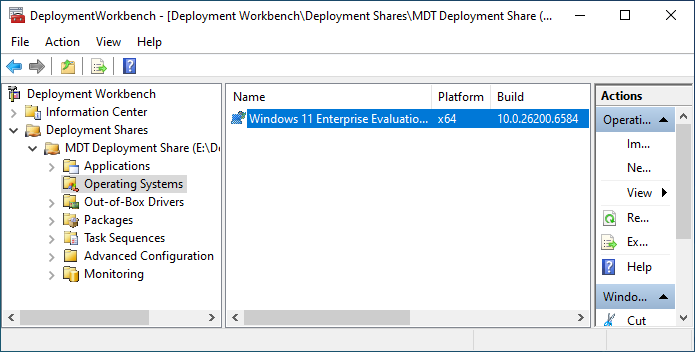
Once the import is complete, the Windows 11 operating system will be available in the MDT console.
Add applications to deploy
In this second part, I suggest adding applications to MDT so they can be installed silently, without user interaction, after the operating system is deployed.
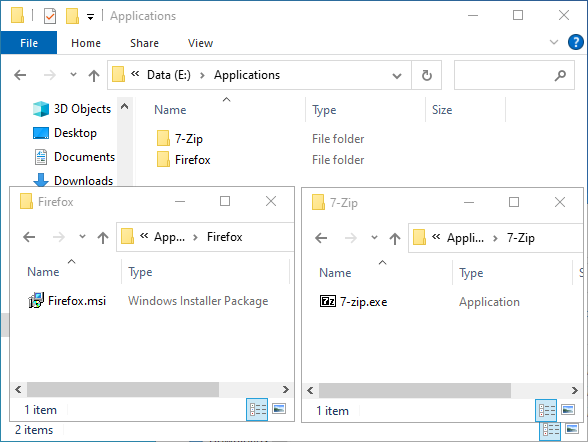
Firefox in MSI format: Firefox Win64 MSI EN-US
7-Zip in EXE format: 7-Zip .exe 64-bit x64
Find the steps in this video:
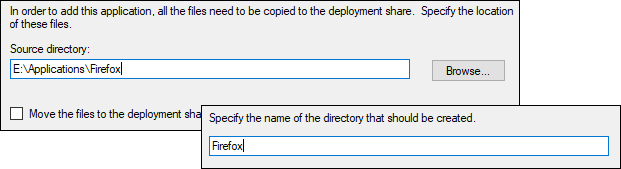
To keep everything organized, create a folder named “Applications” or “Software” on the server. Inside it, create one subfolder for each application and place the installation file in the matching folder.
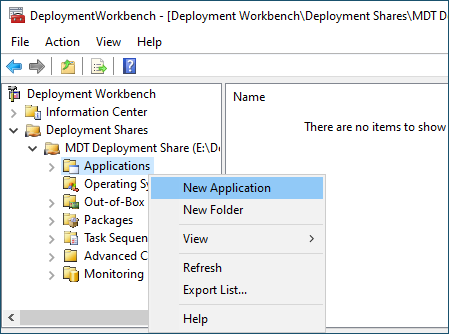
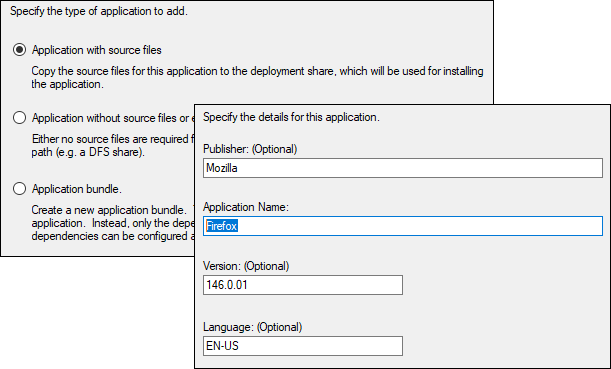
In the "Deployment Workbench" console, right-click "Applications" and select "New Application".
Select "Application with source files" as the application type to add. In the "Details" window, enter the application name. You can also add a version, publisher, and language if you want.
The source folder to declare is the folder where you placed the application setup file. In the next destination window, enter a folder name that will be used internally by MDT.
The next window, "Command Details", is the most important one. To automate application installation through MDT, you need to use a command line and add the silent options supported by the installer.
For an MSI file, which is the file type used by Windows Installer, use the “msiexec” command followed by the options you need. See standard Windows Installer command-line options.
For the Firefox application, my command breaks down like this:
msiexec: calls the Windows Installer program
/i: option indicating that you want to perform an installation
File.msi: the exact file name with its extension
/q: option that performs a silent installation

Check the information in the summary page and start adding the application to MDT.
Repeat the same steps to add 7-Zip to MDT. The command for this application, which comes as a traditional EXE file used to run programs in Windows, will be the following. For more details, see the 7-Zip FAQ.
7-zip.exe /S
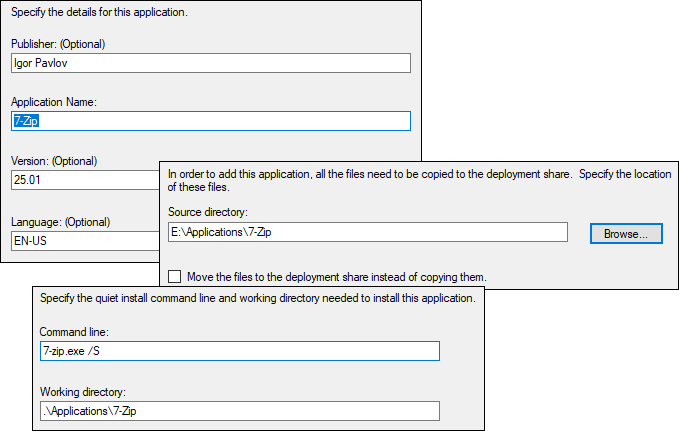
Here, /S is the EXE option for a silent installation.
Once added, the applications will be available in the MDT console.

The operating system and applications are ready to be deployed. Let us move on to the next step: creating a task sequence.
Create and customize a task sequence
In MDT, a task sequence is a series of automated steps used to deploy an operating system or perform specific configurations on a target computer.
Find the steps in this video:
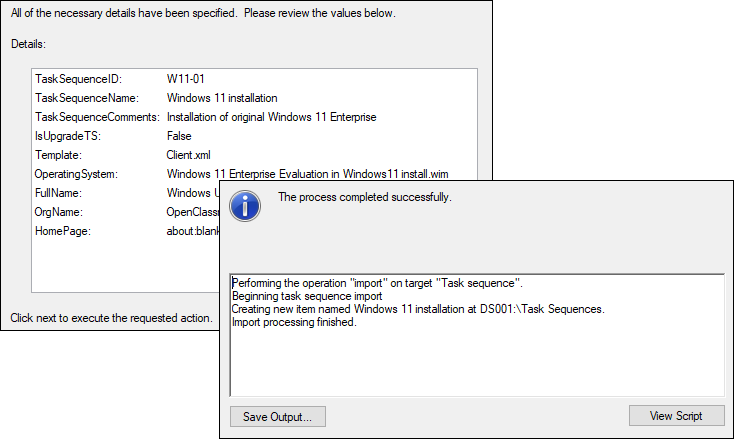
In the "Deployment Workbench" console, right-click "Task Sequences" and select "New Task Sequence".
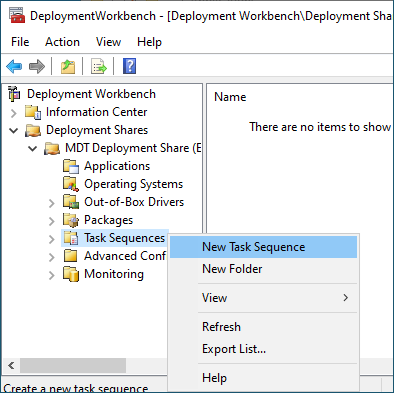
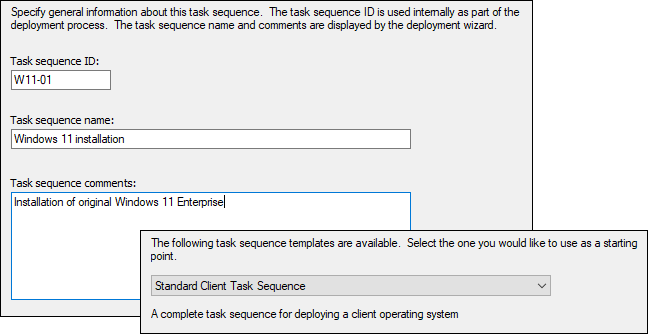
Define an identifier (ID), which will be used internally during deployment to identify the task sequence to create, for example W11-01 or simply “01”, then give this task sequence a name.
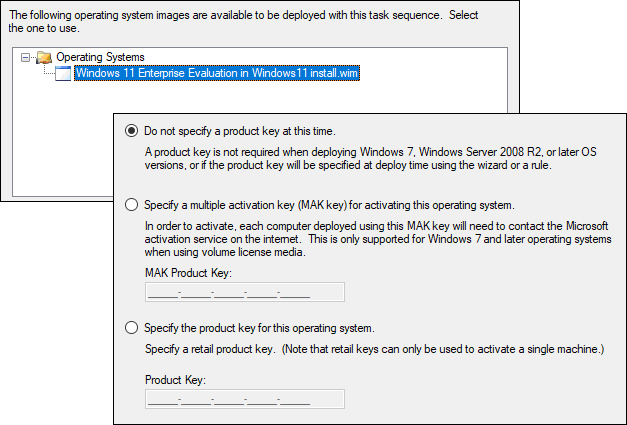
Select the operating system to deploy, in our case Windows 11 Enterprise that we added earlier. Select the "Do not specify a product key at this time" option.
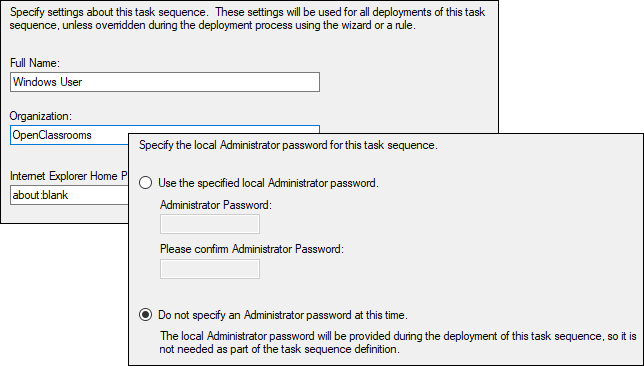
Define any organization name you want, for example the company name, then select the "Do not specify an Administrator password at this time" option.
You are getting used to the process by now 😉: make sure everything is correct in the summary, then finish creating the task sequence.
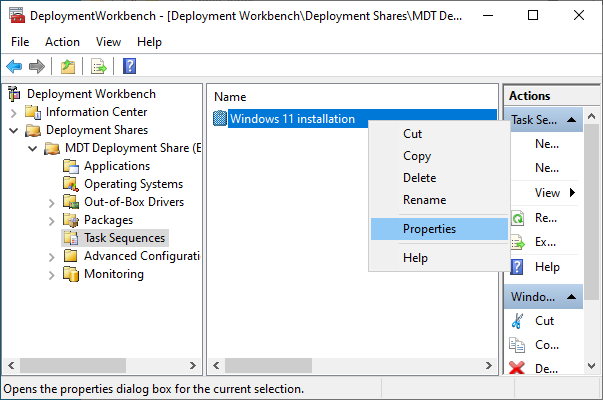
Open the properties of this task sequence.
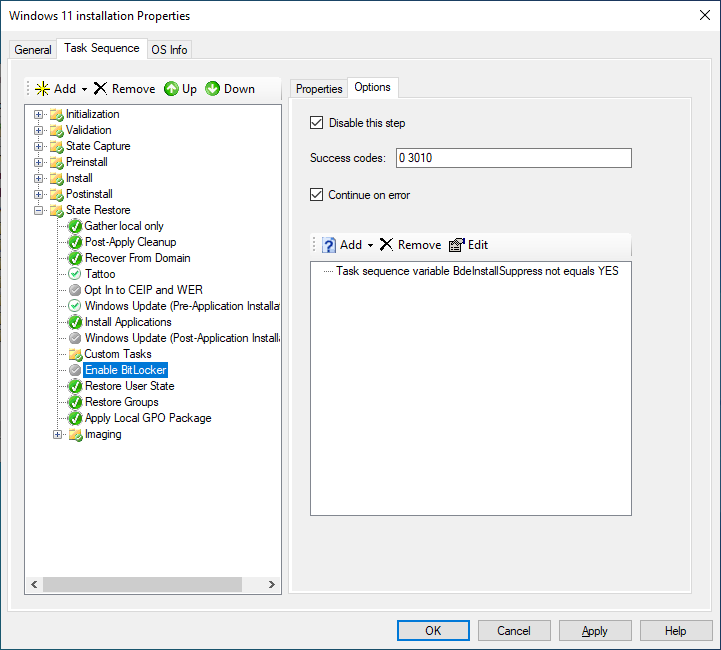
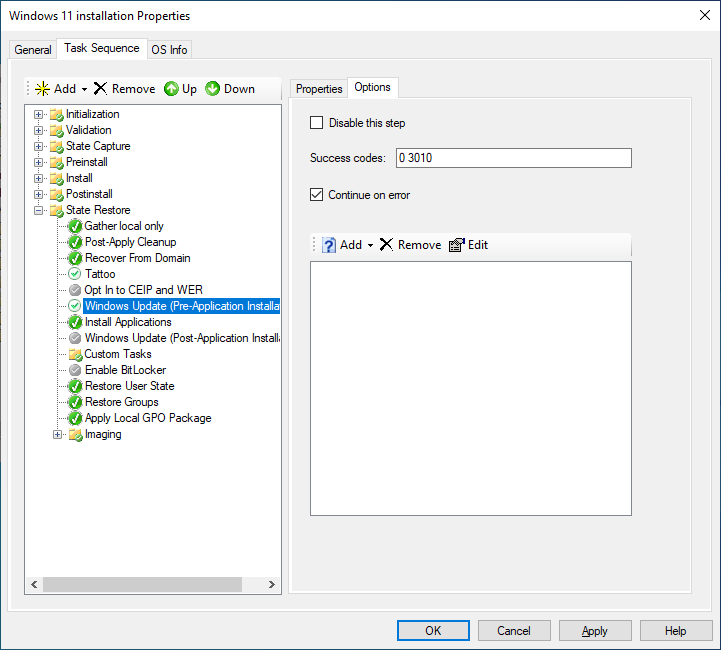
In the "Task Sequence" tab, you can see every available action from the "Standard Client Task Sequence" template selected when you created the task sequence.
In this course, we are going to make two simple changes that will make turnkey Windows 11 deployment easier:
Disable BitLocker
Install system updates before applications.
To disable BitLocker, click "Enable BitLocker". In the right pane, go to the Options tab and select "Disable this step".
To run updates before application installation, click "Windows Update (Pre-Application Installation)". In the right pane, on the Options tab, clear the "Disable this step" checkbox.
The task sequence is ready. There is only one last step before starting deployment: add a WinPE boot image to WDS.
Generate the boot image for WDS
In WDS, a boot image is a file used to start a client computer so it can receive a Windows installation over the network, the well-known PXE boot.
To do that, WDS needs a Windows PE-based image containing the tools required to run the task sequence defined in MDT. We are now going to generate that image.
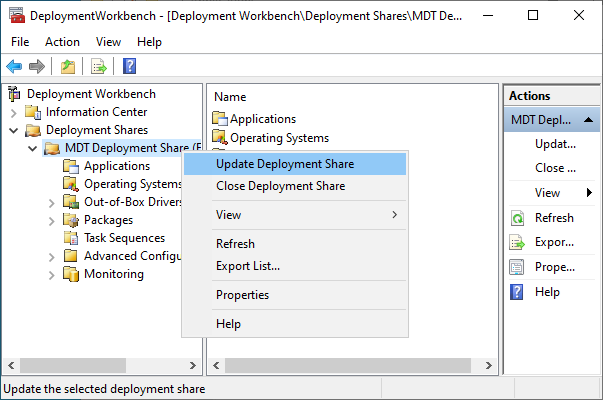
In the "Deployment Workbench" console, right-click the "Deployment Share" name and click "Update Deployment Share".
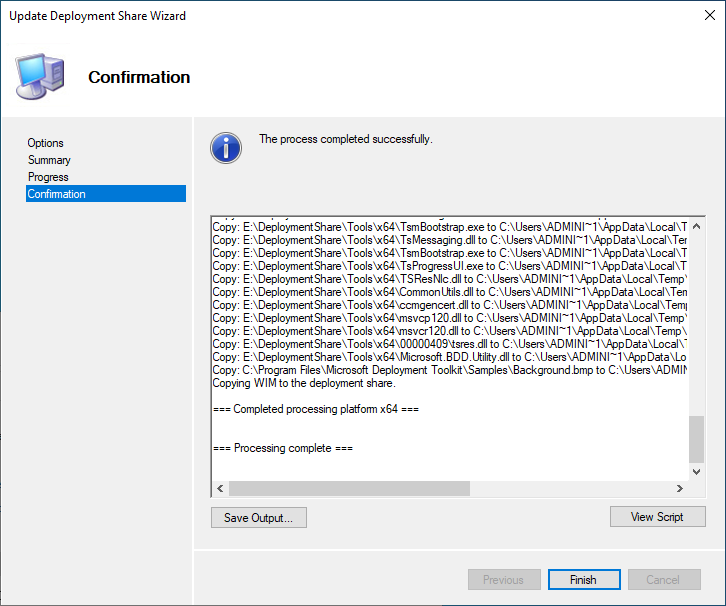
Select the "Optimize the boot image updating process" option and start generating the boot image. Nothing complicated here 🙂

This step may take a little time the first time you generate the image.
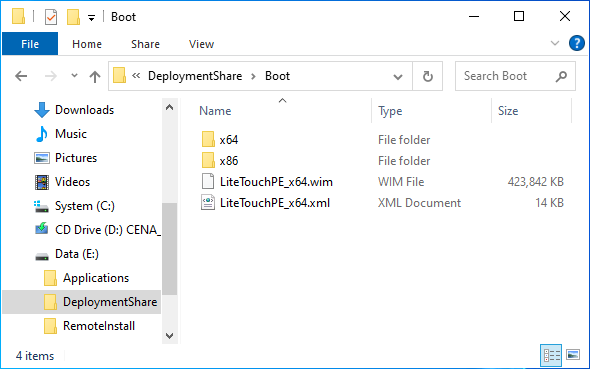
Once it is done, go to E:\DeploymentShare\Boot and confirm that a WIM file named LiteTouchPE_x64 is present. This is our boot image.
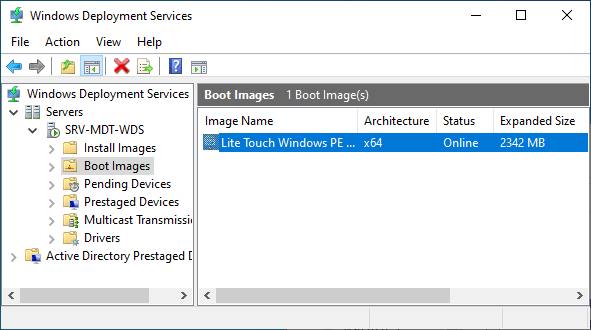
Open the WDS management console, expand the deployment server, and right-click Boot Images to add an image. For the location, browse to the file generated by MDT in E:\DeploymentShare\Boot.
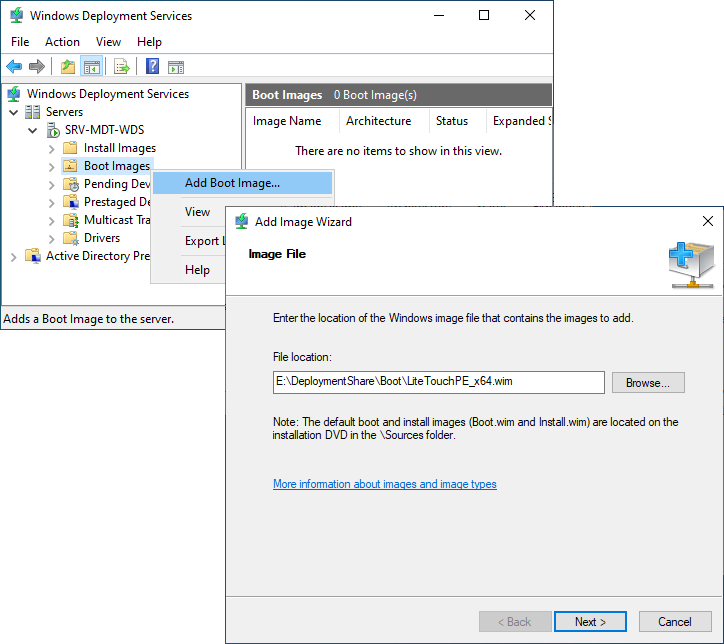
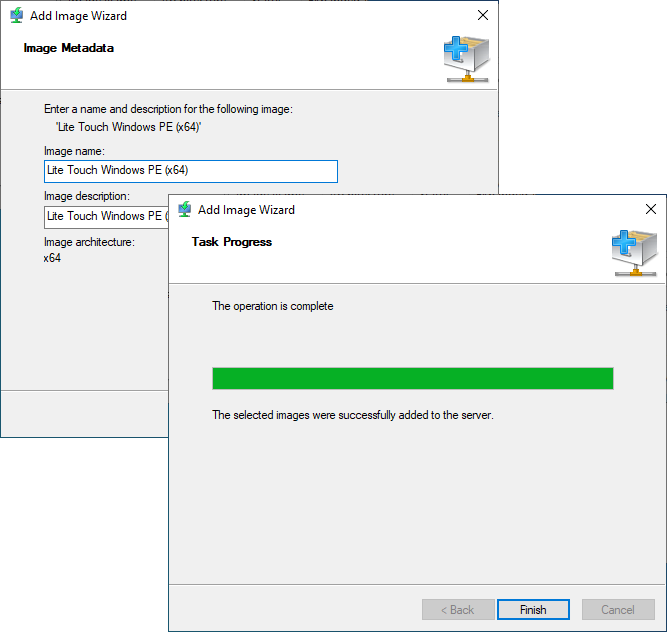
You can define a name and description for this image, then finish adding it.
WDS is now ready to answer PXE client requests.
Your deployment server is now fully configured to deploy a ready-to-use Windows 11 machine. See you in the next chapter 😀
Let's Recap!
To provide a new ready-to-use machine, you need to prepare MDT for full deployment, for example:
adding an operating system
adding applications to deploy
adding a task sequence
Application deployment is handled through command lines that will run on future machines.
A task sequence is a series of steps that automates deployment.
You can modify, add, or remove task sequence steps to customize deployment.
Once MDT is ready, you need to generate a Windows PE-based image named Lite Touch, which contains the tools and settings required by PXE clients.
The Lite Touch image must be used as the boot image in WDS so future machines can be deployed over the network.
Your tools are in place and your sequences are well defined. You are ready to take action. Let us test the result of your work by deploying a Windows 11 machine over the network.
