Create The Final Image of Your Master

In this chapter, you will learn how to use the DISM command-line tool to generate your master image. You can then convert it to an ISO and deploy it from a bootable USB drive or inside a virtual machine.
Generate a System Image with DISM
To create the final system image for our master image, we will use a native Windows command-line tool: DISM, or Deployment Image Servicing and Management.
Our system image will use the WIM format, Windows Imaging Format, a Microsoft disk image file type.
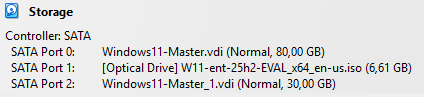
Before continuing, add extra storage to the master image, either a second disk or a physical USB drive. In my example, I added a 30 GB disk.
To use DISM, restart the master image not from the disk, but from the optical drive where the Windows 11 ISO has already been inserted.
At the first screen, press Shift and F10 on the keyboard to open Command Prompt, then launch Diskpart.
List the available disks so you can identify the disk number for the secondary storage
list disk
In my case, it is disk
1. Le disque0is the master image disk. Select the new disk.
select disk 1
Create a primary partition that uses all available free space.
create partition primary
Assign a letter to this partition so you can identify it easily later, for example
Swhich is unlikely to already be in use.
assign letter=S
Format the partition as NTFS.
format fs=ntfs quick
List the available volumes so you can find the letter of the volume that contains the customized operating system.
list volume
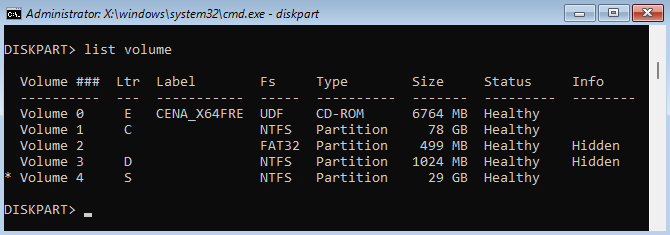
You can identify it easily by its size, which should be larger than the other partitions, by its NTFS format, and by the fact that it is not hidden. In my case, the letter isC.
So, remember:
The master image volume to capture is
C;The volume where the final master image will be stored is
S.
QuitDiskpartwith the commandexit.
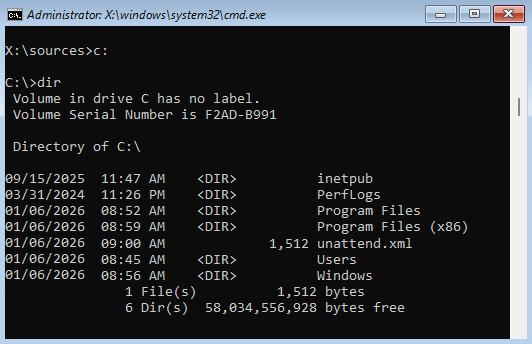
Back in the terminal, typeC:or the letter that corresponds to the master image volume you want to capture. Use the command dirto display the contents. You should see folders such asProgram Files, Users,Windows, etc.
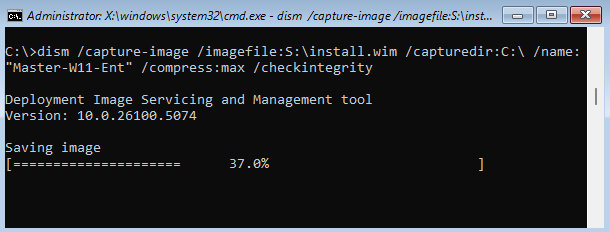
You will now runDISMto start the capture with the following options:
/Capture-Image: indicates that you want to capture a system image/ImageFile: specifies where the captured image will be saved/CaptureDir: defines the source directory to capture/Name: assigns a name to the captured image/Compress(optional): reduces the size of a Windows image/Checkintegrity(optional): checks the integrity of an image
Here is the full command. Adjust the drive letters to match your environment:
dism /capture-image /imagefile:S:\install.wim /capturedir:C:\ /name:"Master-W11-Ent" /compress:max /checkintegrity
The capture will start. This step can take several minutes because the generated file will be large.
Once the capture is complete, you can verify that the fileinstall.wimexists on your secondary storage by using the dir.
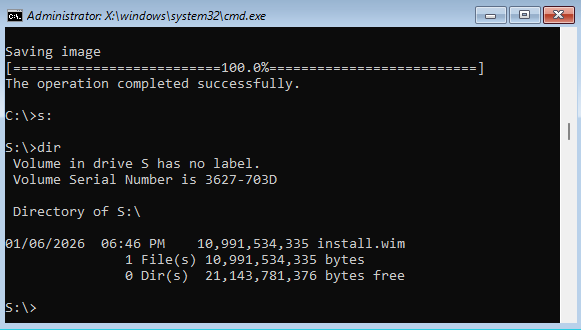
You can now let the master image boot normally from its disk and retrieve theinstall.wimfile and use it however you want.
This file can be used directly in MDT, for example, or added to the Windows installation files inside an ISO. Which is precisely the method we are going to look at next. 😊
Turn the System Image into an ISO File
For this step, you will need the following items on a Windows machine, physical or virtual:
The
install.wimfile generated with DISM;The Windows ADK "Deployment Tools" feature, installed beforehand;
The Windows 11 ISO used to install the master image;
A file extraction tool such as "7-Zip" installed.
To recreate a bootable ISO file, we will use Oscdimg, a Microsoft command-line tool designed to create ISO images from files and folders.
Oscdimg and the boot files we need are included in a Windows kit named "ADK," which you can download in its latest version here:Windows ADK.
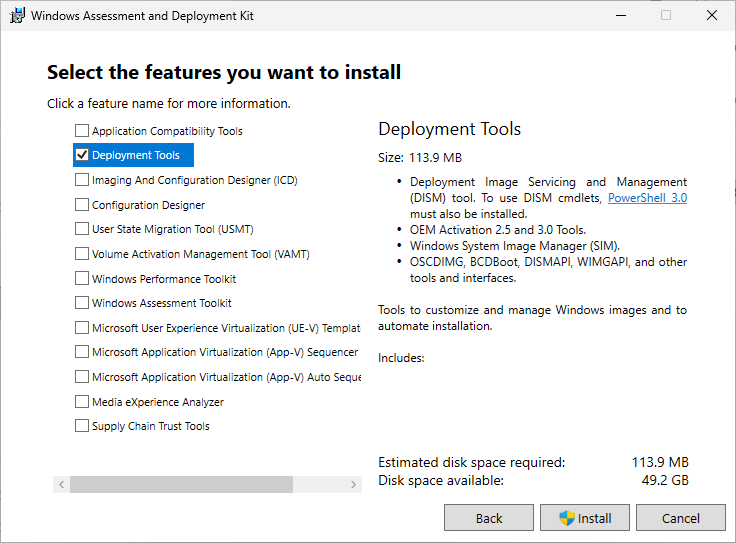
When you install ADK, only select Deployment Tools.
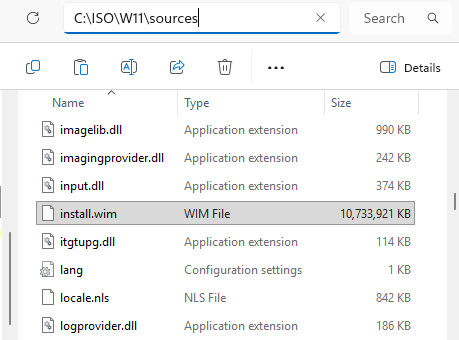
On your machine, create a folder and extract the contents of the original Windows 11 ISO into it by using 7zip. In my case, at the root of driveC:\I created a folder named ISO and a subfolder named W11where I extracted the contents of the Windows 11 Enterprise Evaluation ISO.

In the Sourcesfolder, replace the originalinstall.wimfile with the file captured from your master image and created with DISM. The file name must be "install.wim".
Open Command Prompt and enter the command that takes you to the folder containing the oscdimg tool:
cd C:\Program Files (x86)\Windows Kits\10\Assessment and Deployment Kit\Deployment Tools\amd64\oscdimg
Before I show you the full command, here is what the options mean:
-m: ignores the maximum size limit for the ISO image-u2: uses the UDF file system used on CD/DVD media-udfver102: sets the UDF version to 1.02, which is compatible with UEFI-bootdata: defines the boot files required for both BIOS and UEFIC:\source: path to the folder containing the Windows 11 installation filesC:\destination.iso: path where the ISO file will be generated, including its file name and extension.
Enter the following command carefully, adapting the folder paths to match your machine:
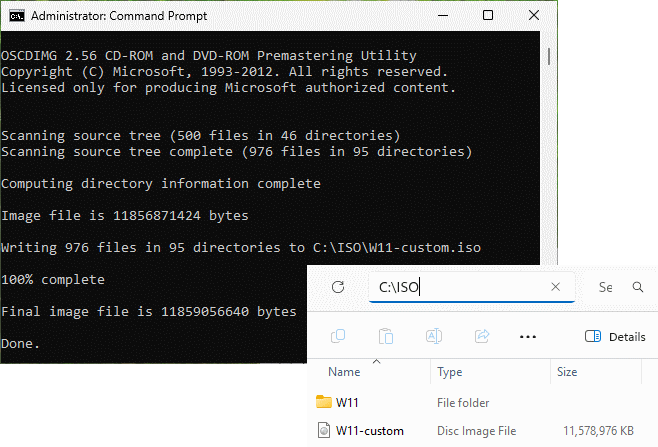
oscdimg.exe -m -u2 -udfver102
-bootdata:2#p0,e,bEtfsboot.com#pEF,e,bEfisys.bin
"C:\ISO\W11" "C:\ISO\W11-perso.iso"
The ISO file that contains your customized Windows 11 image will be generated very quickly. It will be available in the destination folder specified in the command.
You can now use the ISO directly in a VM. It is ready. 🙂
In the last part of this chapter, I will show you how to create a bootable USB drive that contains your customized ISO.
Create a Bootable USB Medium
To create your bootable USB medium, take a USB drive and insert it into your machine.
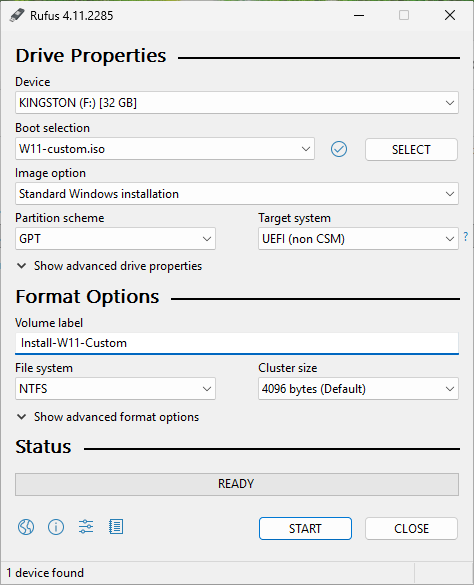
In terms of software, I recommend using Rufus. It is free, easy to use, and requires no installation. You can download it here: Rufus.
In Rufus, click the Select button to choose the generatedISOfile. Rufus will detect the system and automatically set the required options. Make sure the partition scheme is GPTand the target system isUEFI. Optionally give the volume a name and set the file system toNTFS.
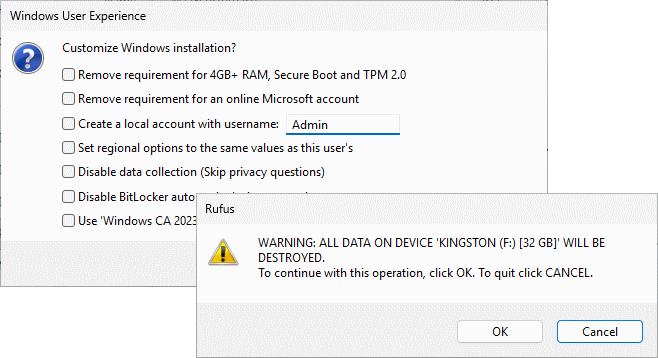
Click Start. If Rufus offers to customize the Windows installation, clear every checkbox and click OK. Then click OK to confirm formatting the USB drive.
Wait while the bootable USB medium is created. Once it is finished, the contents of the USB drive will be similar to those of an ISO file. All that is left is to test it on a physical machine or in a virtual machine.
Let's Recap!
A master image must be captured before it can be deployed to other machines.
The DISM tool:
Can create or modify WIM system images
Runs from the command line
Is included in Windows
Once the master image has been created in WIM format, it can be used directly in MDT/WDS or replace the
install.wimfile in a Windows ISO.The Oscdimg tool:
Can generate ISO image files
Runs from the command line
Is included in the Windows ADK Deployment Tools
The generated ISO file can be used directly in a virtual machine as an installation medium or from a bootable physical medium such as a USB drive.
Congratulations, your master image is ready. You can now use it to deploy Windows 11 efficiently to new machines. There is just one step left to complete the course: a quiz to validate what you learned and reinforce the key concepts.
