Make Your First Requests on an API
In the last chapter, we spoke about HTTP verbs and how they let you take specific actions when making an API request. Remember GET, POST, PUT, and DELETE? The time has come to learn a bit more and put them into practice! 🙌
What Is CRUD?
CRUD (create, read, update, and delete) is a list of basic actions that you can do to a resource. While CRUD is not really a technical mechanism, each CRUD action has an associated HTTP verb. The mapping is as follows:
CRUD Action | Associated HTTP Verb |
Create | POST |
Read | GET |
Update | PUT |
Delete | DELETE |
GET to it: Making Your First GET Request
Now that we've covered all the background of an API, let's use one to get some data! 🏋️♀️ We'll be using the GET HTTP verb and the GitHub API (from GitHub) to get data about a specific GitHub user.
We'll be using Postman to query the API, which you’ve already downloaded.
Ready? Then let’s go! 🚀
Start by opening up the program.
We touched on this last chapter, but it’s always good to revise what you’ve learned. Let’s go into a bit more detail about what you see here, from top to bottom. 🕵️
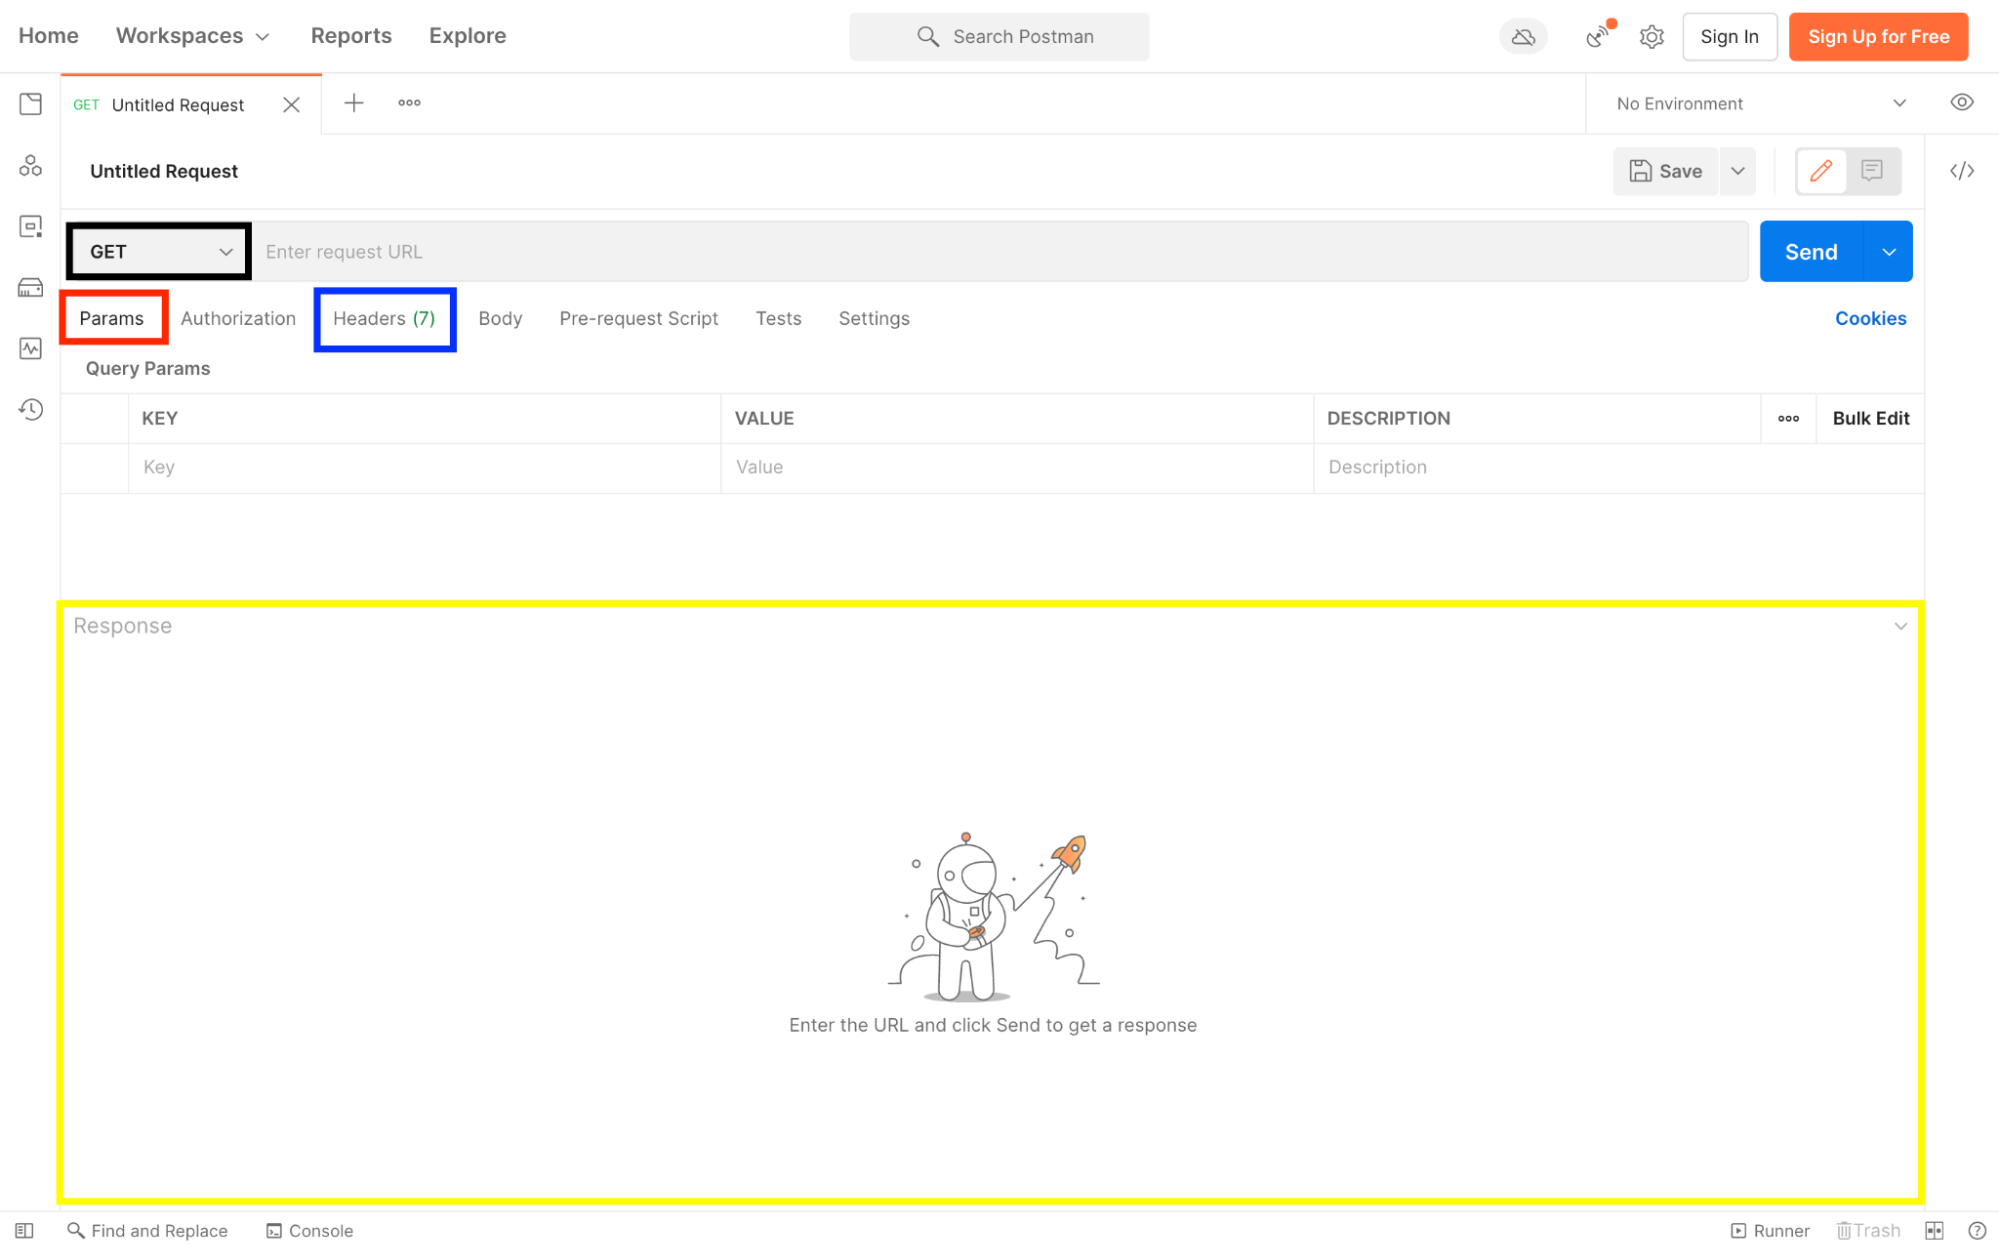
The first line (highlighted in black) allows you to select your request type from the drop-down menu (in our case, this will be GET) 🤫.
Next to that, you can fill in the complete URL of your request.
There is a small button (highlighted in red) called Params. If you click it, you have a place to define the key-values of your parameters.
To the right, (highlighted in blue), you can click on Headers. This will allow you to define your request headers.
And finally below that, in yellow, you can see the place for the body of your response.
We want to get information about a user. But how? What URL should we use? 🤔
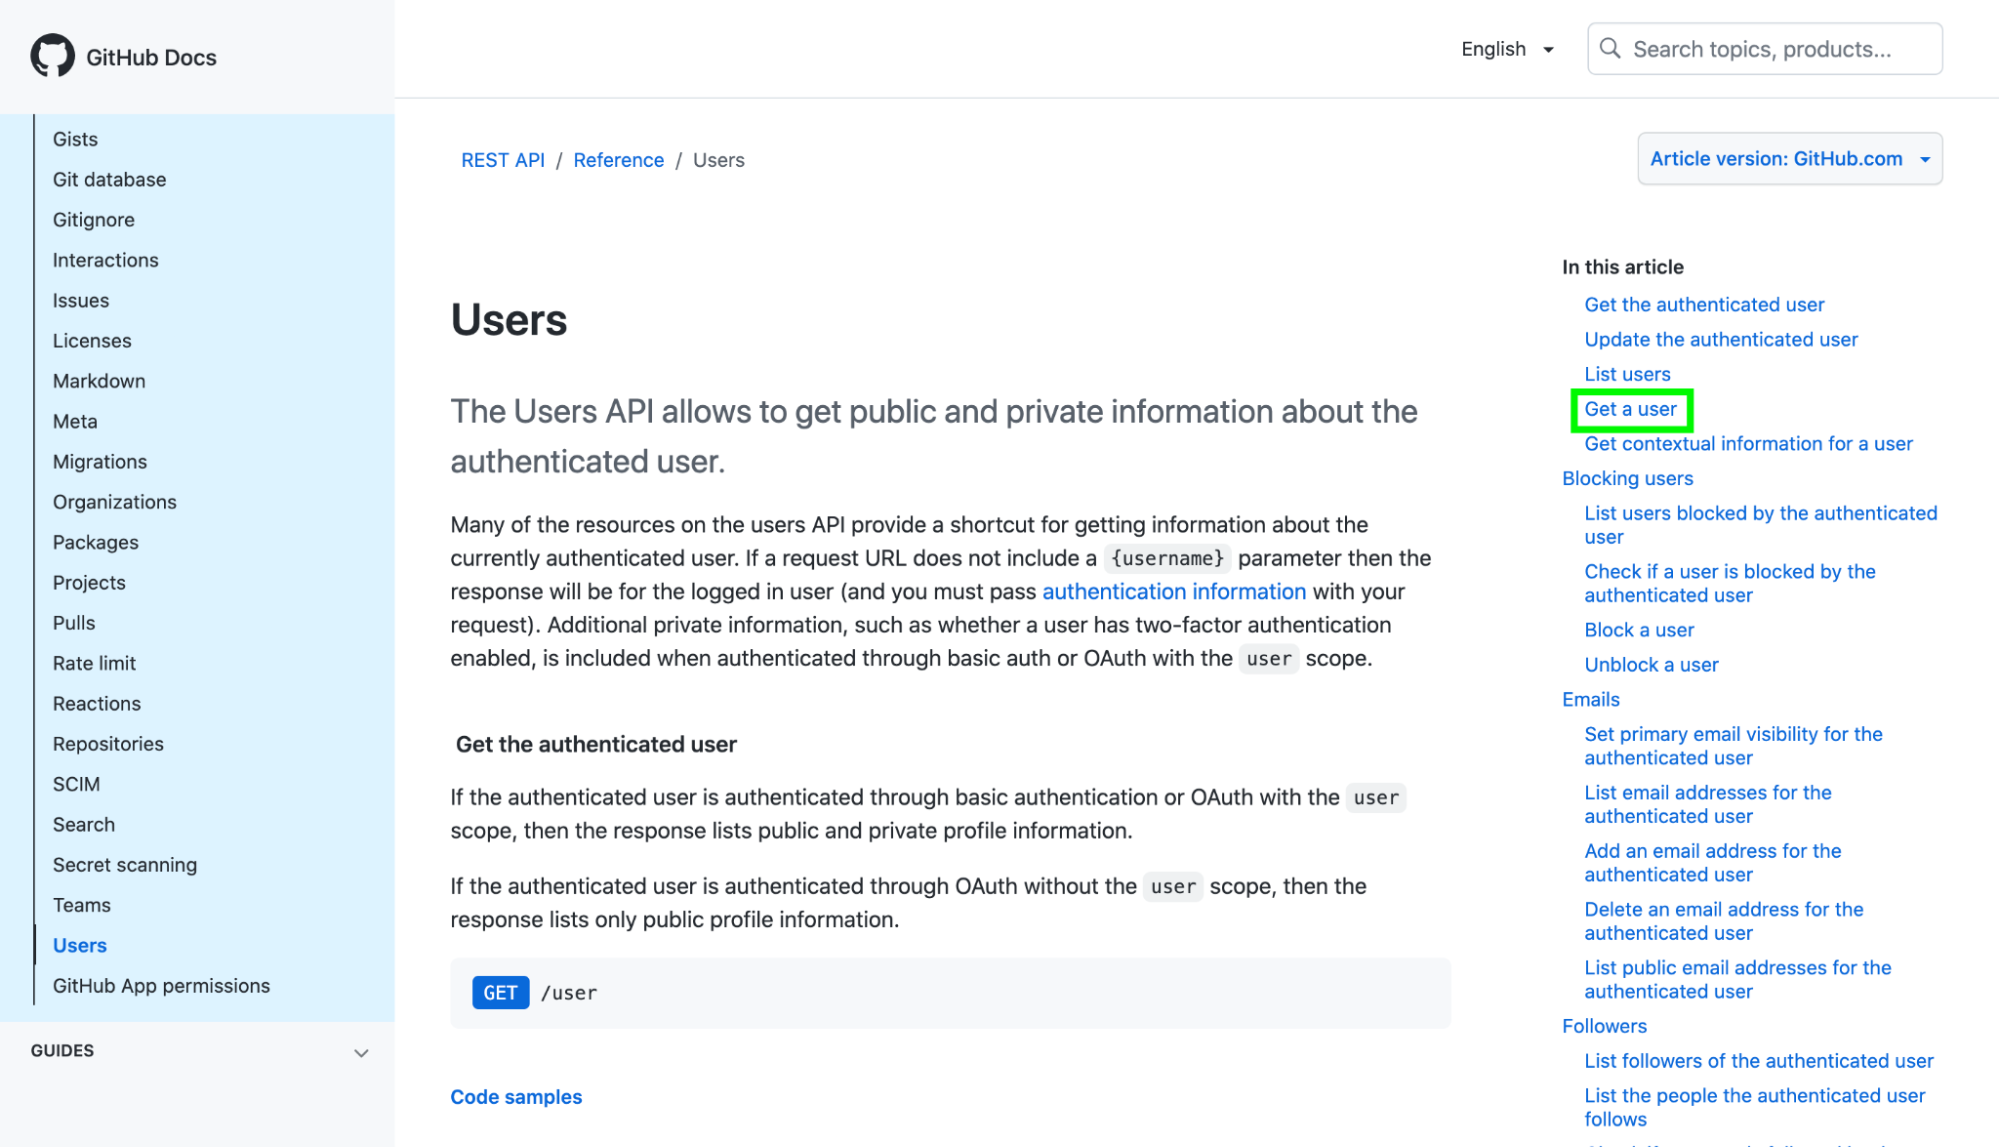
There’s one important thing you need to do first before querying the GitHub API about a specific user: check out the GitHub documentation. In particular, the Users section, because that’s what you’re interested in. The documentation is the API user manual. It’s how you find out what resources, URIs, and endpoints you can use to query data.
Head to the Users section of the GitHub API using this URL: https://developer.github.com/v3/users/
To get a single user, click on Get a user.
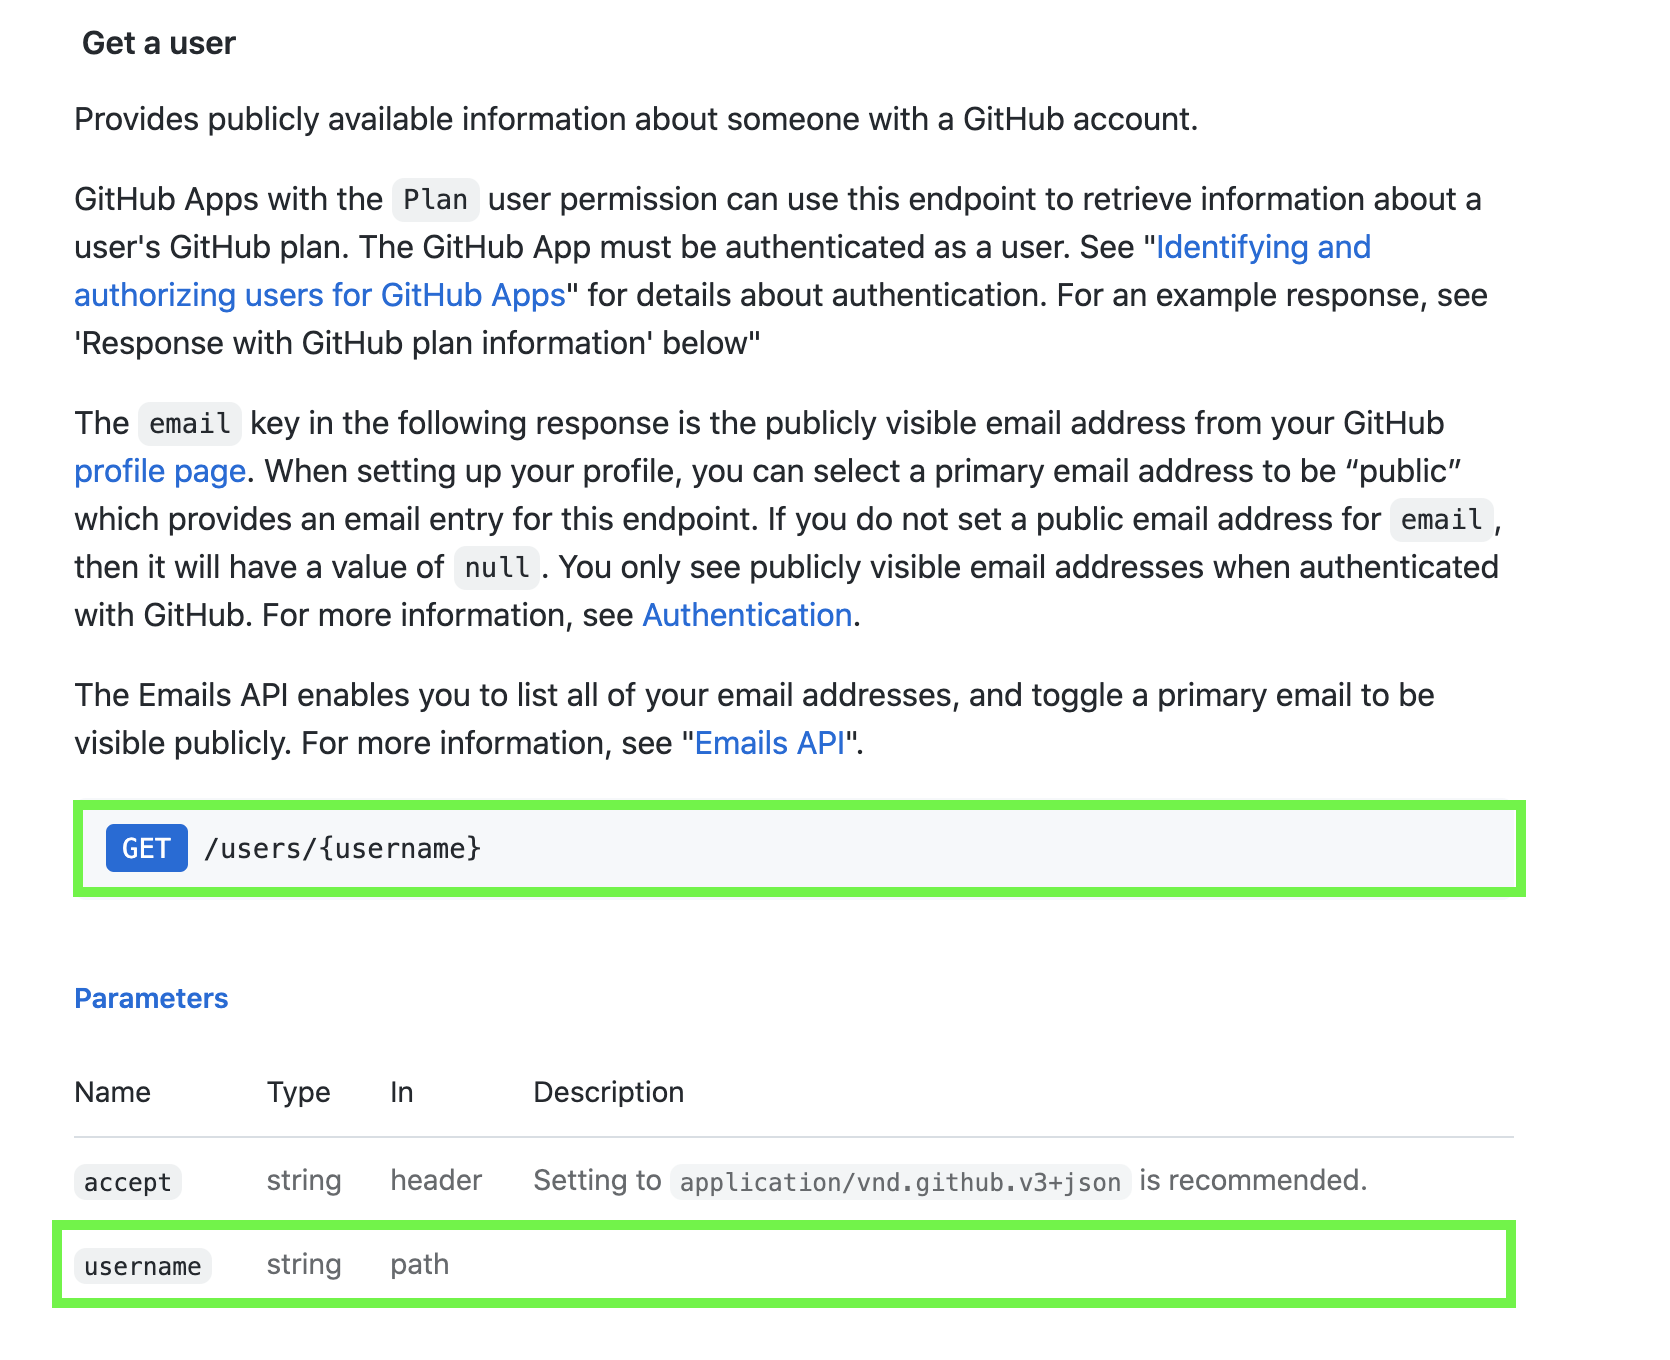
You learn several things from the documentation:
This section provides the publicly-available information about someone with a GitHub account.
You can access user information with GET /users/:username.
An example response:

Perfect! 🙌
To recap, this means that to get user data about the user “tenderlove” (oh yes, this is a real username! This man exists and is actually one of the Ruby on Rails contributors 👌), you’ll go to Postman and enter https://api.github.com/users/tenderlove in the URL, and then hit Send.
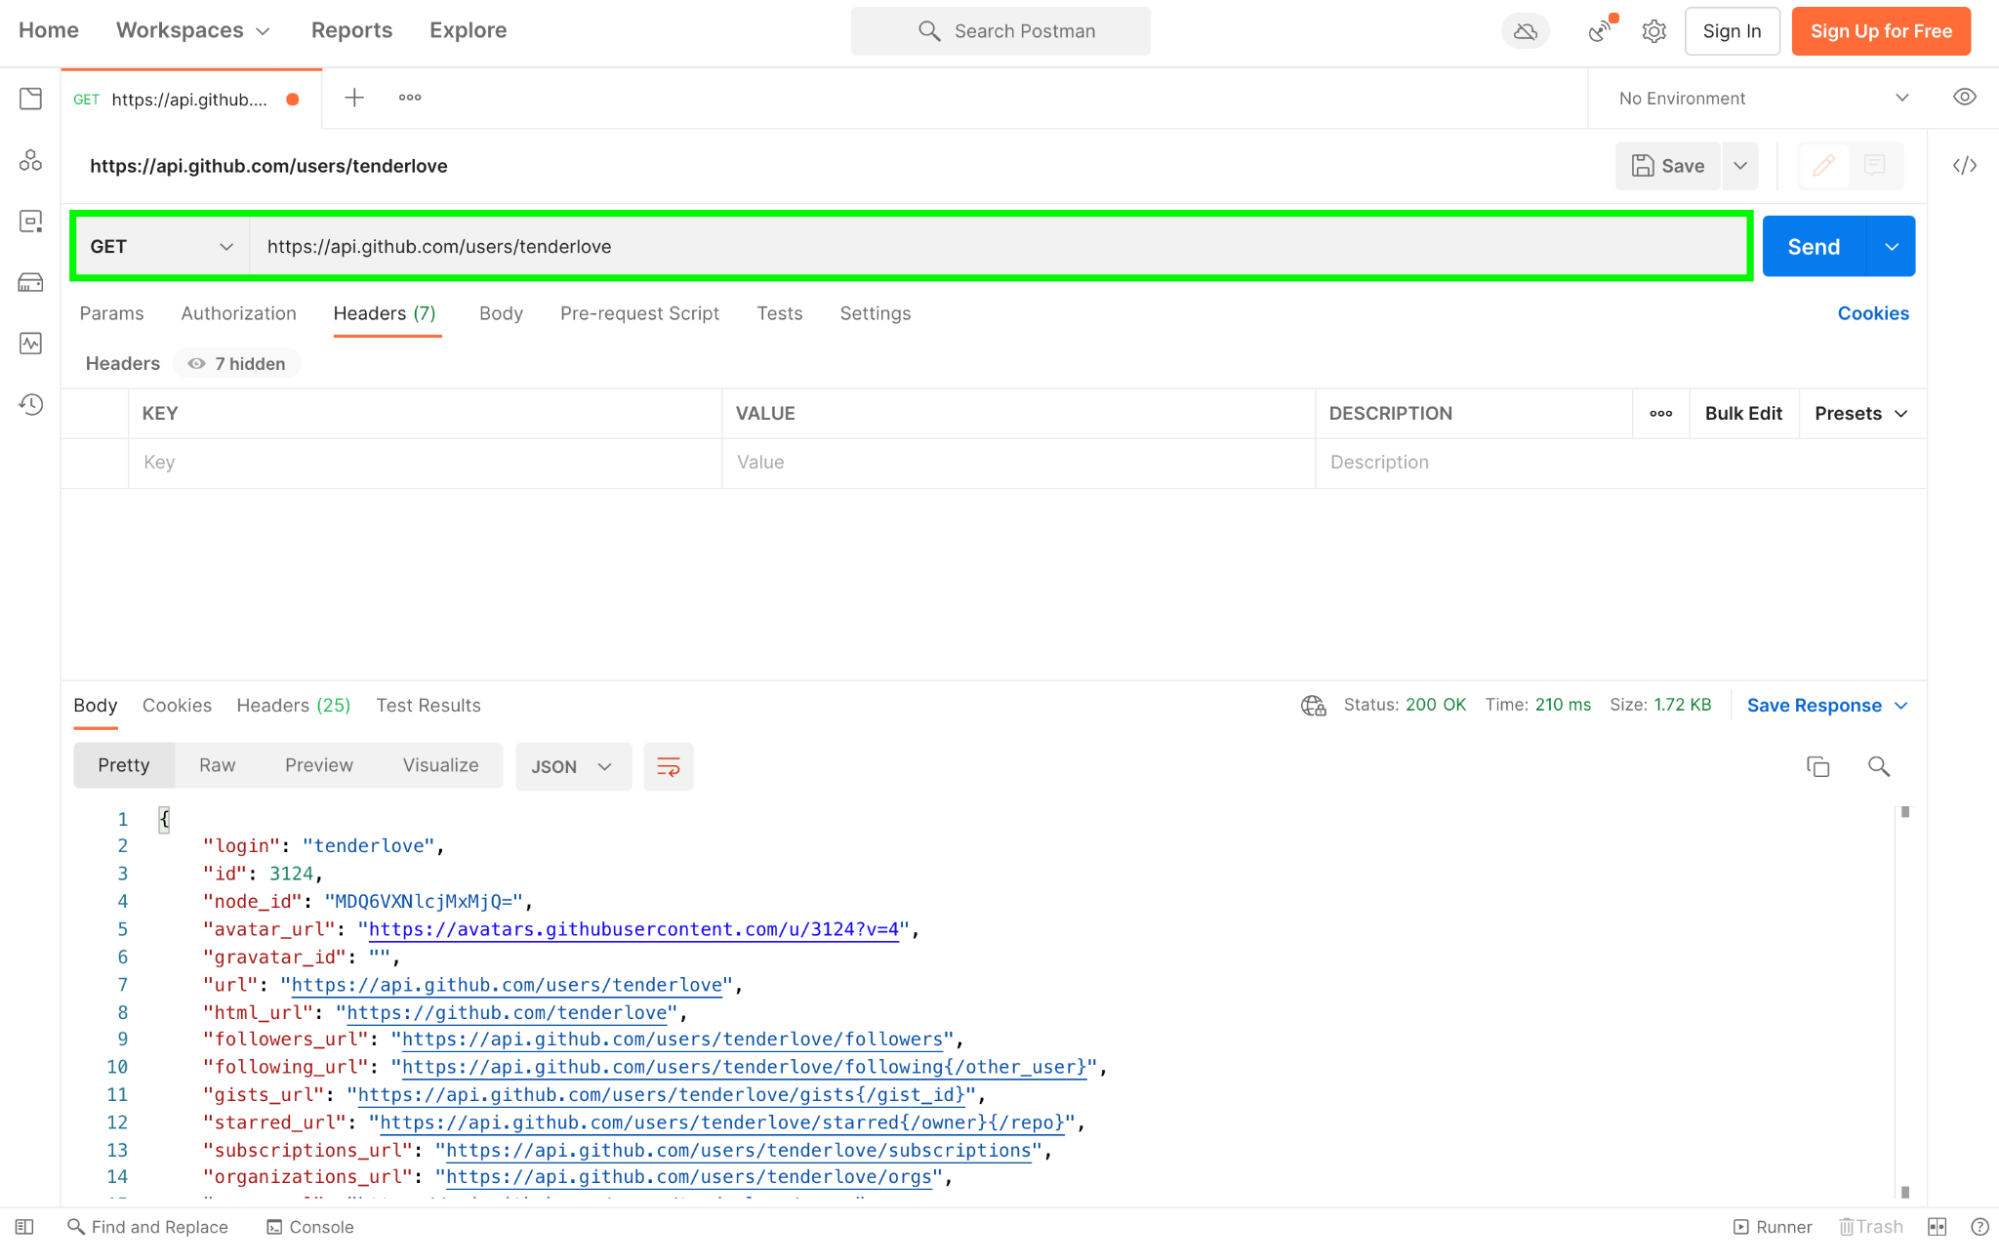
And there you go! You successfully made your first GET request!
Why not replace tenderlove with your own GitHub username and see the response? 😉 You could also compare the data retrieved by the API and the data from GitHub – you’ll see that they’re the same!
Here’s a video of how to do just that:
GET is the most commonly used HTTP verb. It lets you request a dataset, but also specific data. As you saw with the GitHub API, with a GET request, you will be getting specific data by a specific ID; in this case, your GitHub username. You also saw how your browser, or client, uses an API to display the data on a website. Here, the response is in JSON.
You can even make GET requests straight from your browser because REST endpoints use the same HTTP protocol as the web. Try going to https://api.github.com/users/tenderlove now, and you'll see!
Use Documentation to Know How to Use the API
As you can see, API documentation is like a detailed user manual. Since each API is different, you wouldn't know how to use one without clear documentation.
What information does this documentation give us? ✋
The documentation lists all the different possible API calls, typical requests and responses, and which verbs to use with each request. This Ghibli API is a good example.
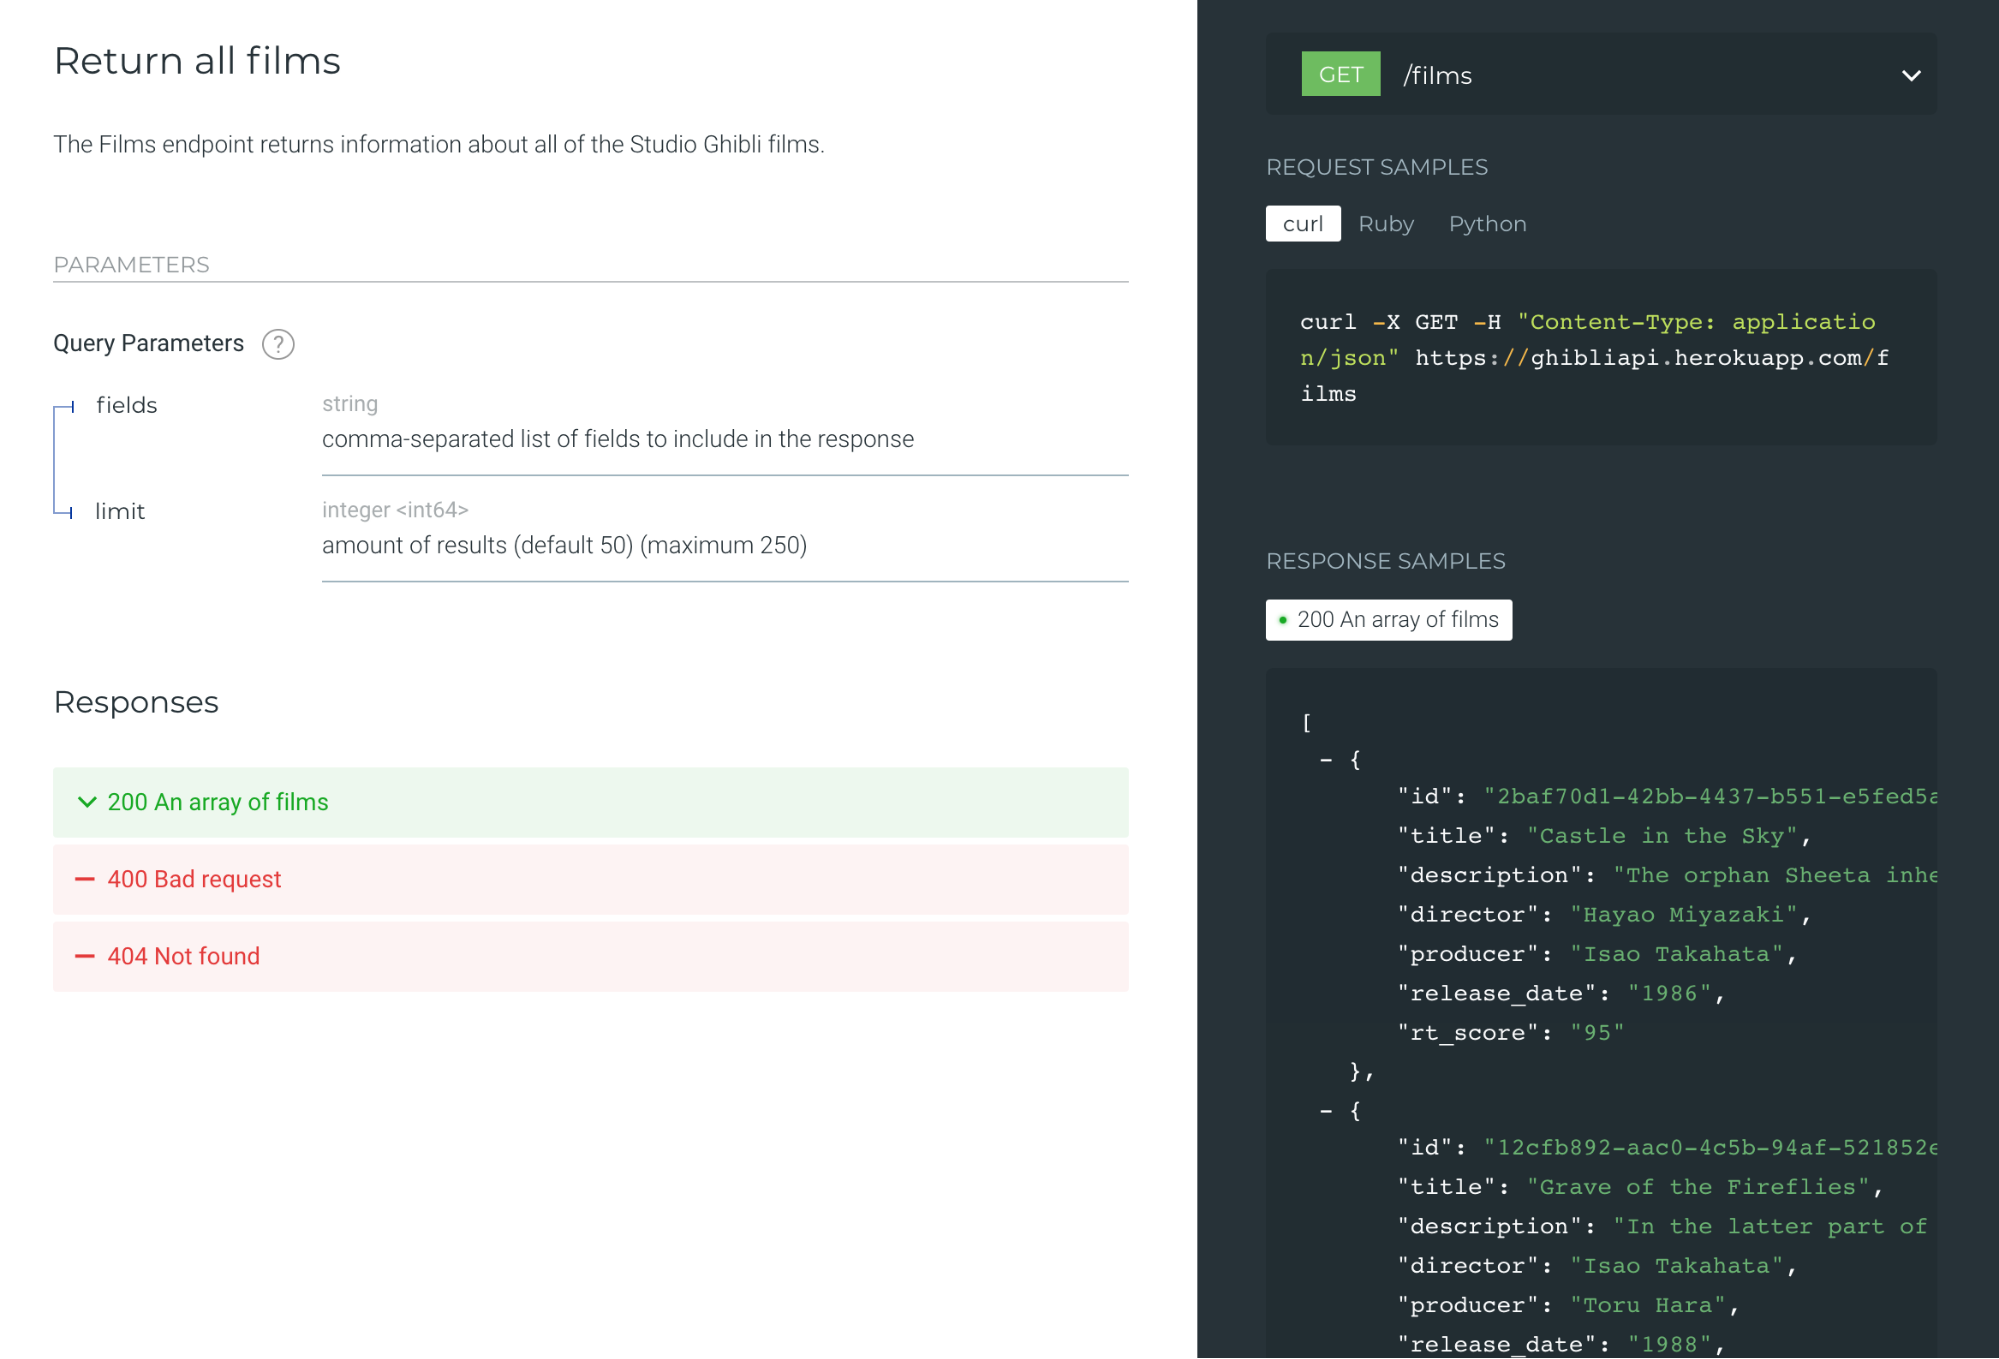
In this example, to get all of the Ghibli movies, you can see that all you need to do is a GET request at https://ghibliapi.herokuapp.com/films. You also have an indication about the error message that the API returns if the request is not formatted properly (400) or if the resource is not found (404). You’ll also see that if your request is successful, you’ll get a response in the form of an array, which contains a list of Ghibli movies. You’ll find an example of this data in the box on the right.
Let’s Recap!
CRUD stands for create, read, update, and delete.
GET is the HTTP verb for viewing data and can be used with an ID to get specific data.
Apps use GET to present information on web pages.
Use Postman to test out APIs.
Documentation is an API’s user manual.
You can use documentation to find the list of endpoints along with the corresponding HTTP verb.
Whether for personal or professional purposes, using an API means using data. This data may at times be sensitive, and it’s important to keep it secure. We’re now moving on to data security and authentication, which is super important.
