Launch Your First EC2 Instance

Okay, are you ready to launch an EC2 instance? Not so fast! What type of instance do you want to launch?
Yep, there’s a wide range of servers to choose from! Choosing the server that best suits your needs is essential if you want to get the best value for money for the level of performance you actually need.
Choose the Right Type of Instance
Let’s start by having a look at the list of instance types provided by Amazon EC2 on the Instance Types page:
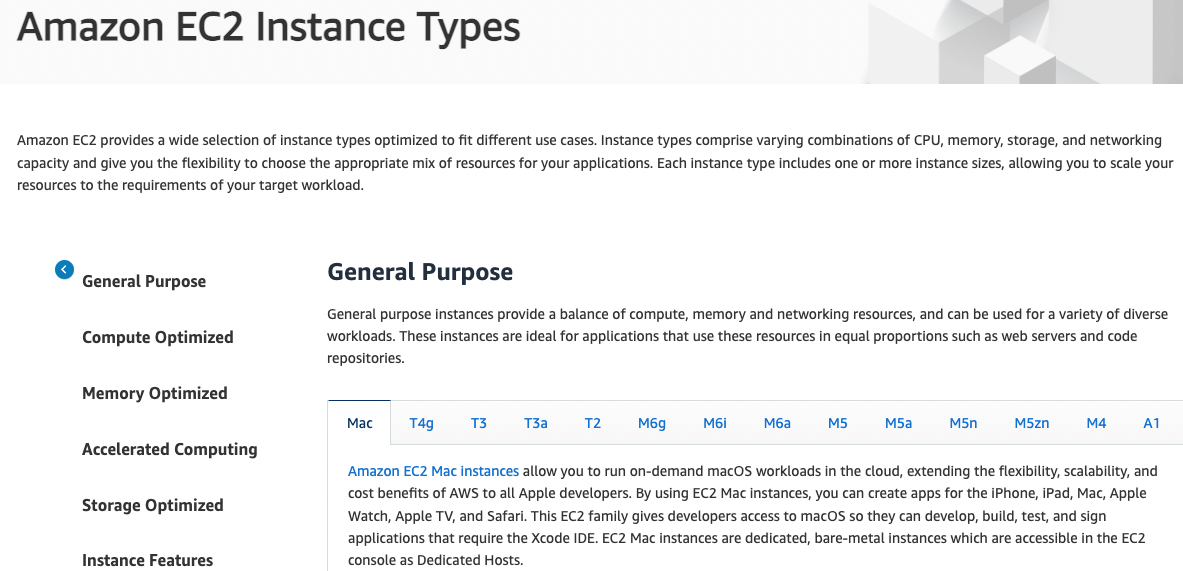
There are so many different types of instances that they’ve grouped them into several categories:
General purpose: these are servers that “balance” processing power, RAM, and disk space without favoring any one of these. These are the ones that we’d usually use to host a website. But of course, EC2 isn’t just for hosting websites, and that’s why we have other types available.
Compute optimized: these are calculation powerhouses! Their processors can churn through huge volumes of instructions per second. They can be used for scientific modeling, distributed analysis or as web servers that need super high performance.
Memory optimized: these servers have lots of available RAM. And I mean lots! You can have up to 24,576 GB of RAM (which is almost 24 terabytes!). Your application would have to be extremely memory-hungry to need that much. This would apply to a database stored in RAM, for example.
Accelerated computing: these servers are also calculation powerhouses, but these ones use graphics cards (GPU). They’re used for things like machine learning, managing driverless vehicles, voice recognition etc.
Storage optimized: these servers have high-performance hard disks. It’s not so much that they have huge amounts of storage, but the disk access is very fast. They can be used for MapReduce or Hadoop distributed computing or for managing distributed file systems.
For each of these categories, there are dozens of different types of servers with varying performance levels.
Help!!! Hadoop, distributed computing, driverless cars… I don’t understand!
Well, that’s good, because neither do I!
But honestly, there are too many different types of servers and it’s impossible to understand the purpose of all of them. Most people are likely to use general purpose servers to host websites.
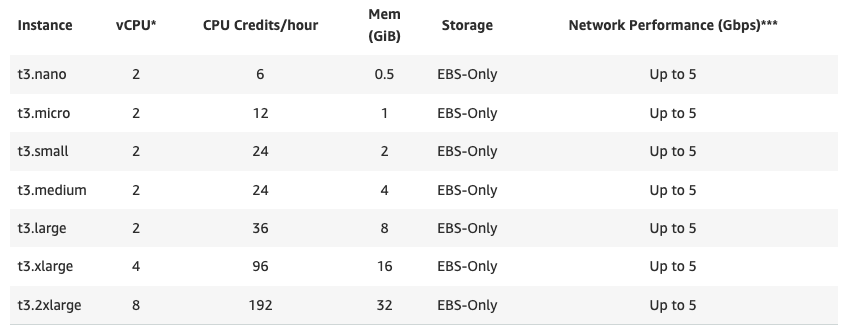
The t2.micro instance in particular is one that is free for a year. You can leave one t2.micro server switched on permanently for a whole year without having to pay anything.
Other types of instances are needed for very large websites or for those who have very specific requirements. That doesn’t apply to us, though.
Choose the Correct Pricing
As if it wasn’t enough trying to get your head around all the different types of servers, there are also different pricing structures for servers.
Navigate to the EC2 Pricing page to see the different types.
We have:
on-demand: this is what we’re going to use, and it’s the simplest. There’s no ongoing commitment. Need a server? Just request one. Don’t need it anymore? Give it back.
spot instances: are you a bit of a miser? Well, spot instances are for you! You can run machines using AWS’s spare capacity. These machines can be up to 90% cheaper. However, AWS can reclaim them at any time, unlike machines that use on-demand pricing.
reserved instances: do you know for sure that you’re going to need a server for a whole year? If you’re happy to commit, reserved instances can save you up to 72%. They belong to you for the duration of your commitment.
savings plans: these are less restrictive than reserved instances. Instead of paying for a year upfront, you commit to a minimum usage per hour over the course of one year. In exchange, AWS gives you a 30% discount. So, for example, if you know that your website will need an EC2 machine for a year costing 15 cents per hour, you can sign up for a savings plan at 10 cents per hour and save 30%.
dedicated hosts: rather than managing virtual machines, you can ask for an entire physical machine. You might need this if you have software licenses that need to be linked to physical servers (such as Windows Server), or if you don’t want to share your machine with anyone else.
Which one should we use? Well, on-demand pricing is the most flexible and, in most cases, the most suitable, too. Instances are billed by the second.
Launch Your First Instance
Right, that’s enough talking. Let’s get down to business! Go ahead and launch your first EC2 instance manually. I’m sure you must be super excited! What do you mean, you’re not?
If you remember from what we covered previously, you’ll know that we’re going to launch a general purpose, t2.micro EC2 server on an on-demand pricing basis as part of the free tier service. If this doesn’t sound at all familiar to you, I’d advise you to go through the previous chapter again.
Instance Launch Page
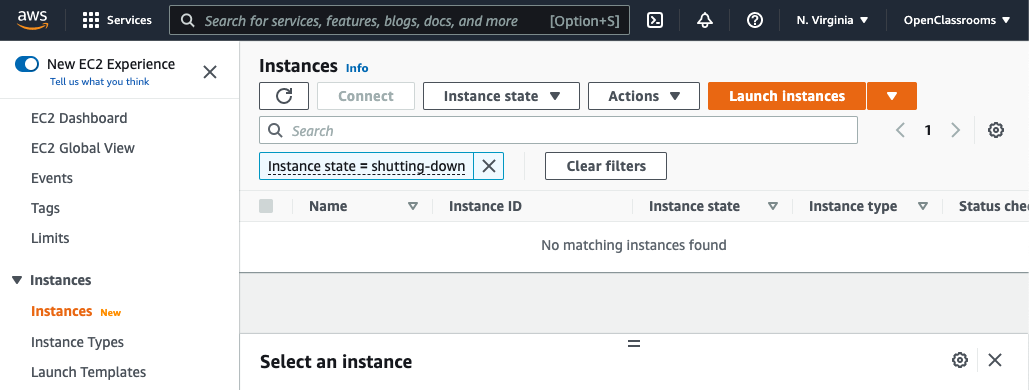
Navigate to the EC2 section and select “Instances.” Click on “Launch Instance”:
When you click on “Launch Instance,” a multi-step wizard will open. The first step involves choosing your AMI.
Select Your Starting Image (AMI)
Even if you want to start with a blank server, you’ll need to have an operating system installed to get you started. No one actually starts with a completely blank server.
An AMI is a disk image. It represents a server at a particular point in time and can be used as a starting point.
AMI Starting Image
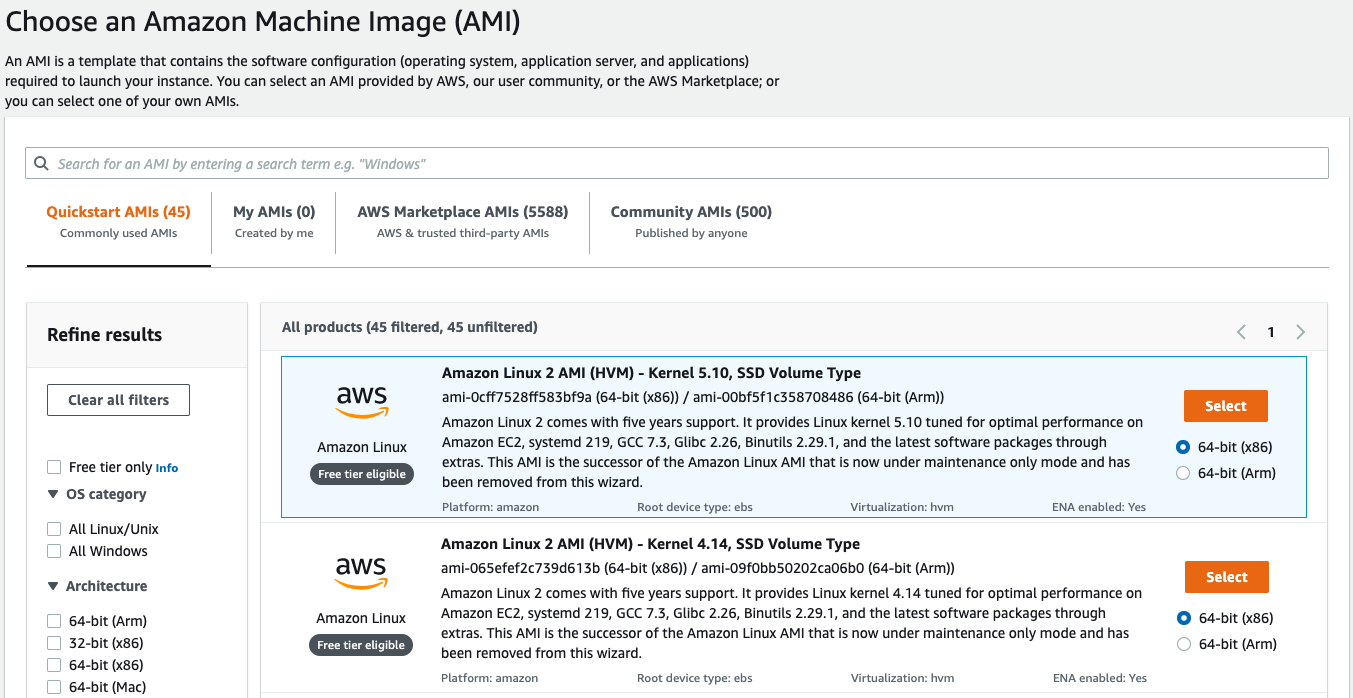
The first step for you will be choosing your operating system:
Amazon Linux AMI: a Linux distribution that is optimized for Amazon EC2. This is essentially the default option.
Ubuntu Server: a server version of a Linux Ubuntu distribution that you can choose if you like.
SUSE Linux: if SUSE is your thing.
Red Hat: if Red Hat is your thing.
Windows Server: if Windows Server is your thing. Be careful, though. It’s not Linux, it’s very different.
Preconfigured Marketplace AMIs
As well as these images, there are many other AMIs that are not so blank! These preconfigured servers can save you lots of time, because the base software you need is already installed.
For example, if you need to set up a web server running a PHP website, you’ll need Apache, PHP and possibly some tools such as phpMyAdmin, Memcached, etc. Unless you enjoy spending hours installing everything manually (each to their own!), it’s probably better to use a preconfigured AMI.
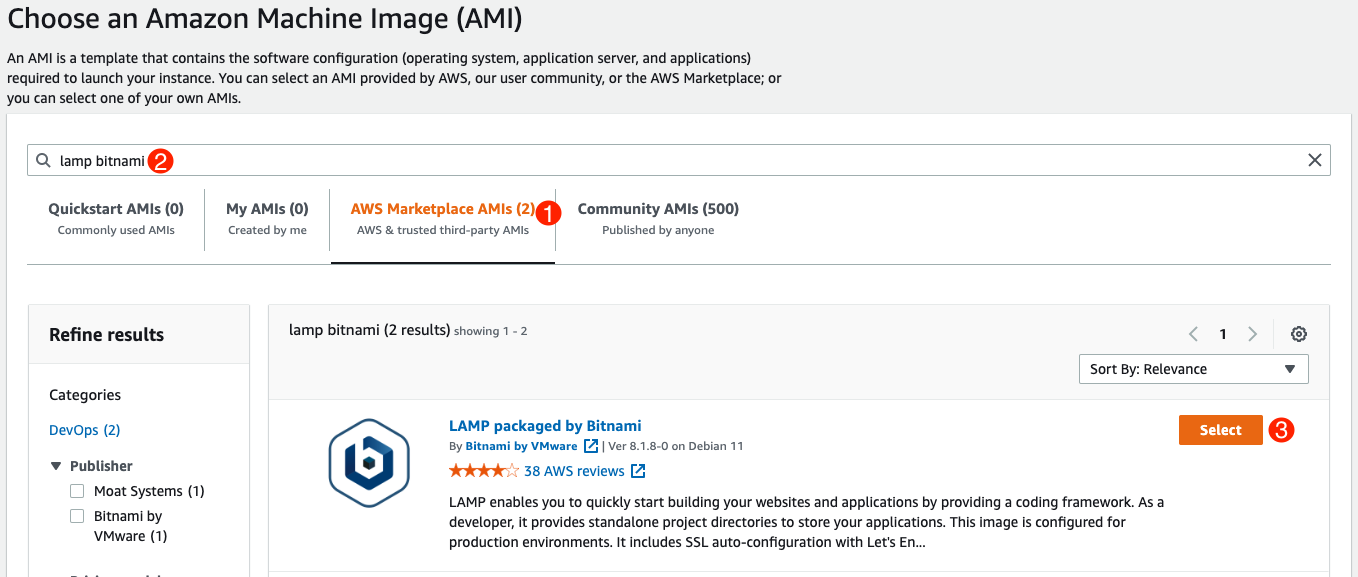
Go to AWS Marketplace (don’t worry, there are free AMIs available). Search for “LAMP bitnami” and select “LAMP packaged by Bitnami.” This is also “free tier eligible,” so you can use it for free.
If you want another type of server, you can of course choose another image. It won’t make any difference to the next part of the course as long as you make sure you select a Linux-based server.
As you can tell, AMIs are quite AMIable (Sorry, I couldn’t resist…)
Choose an Instance Type
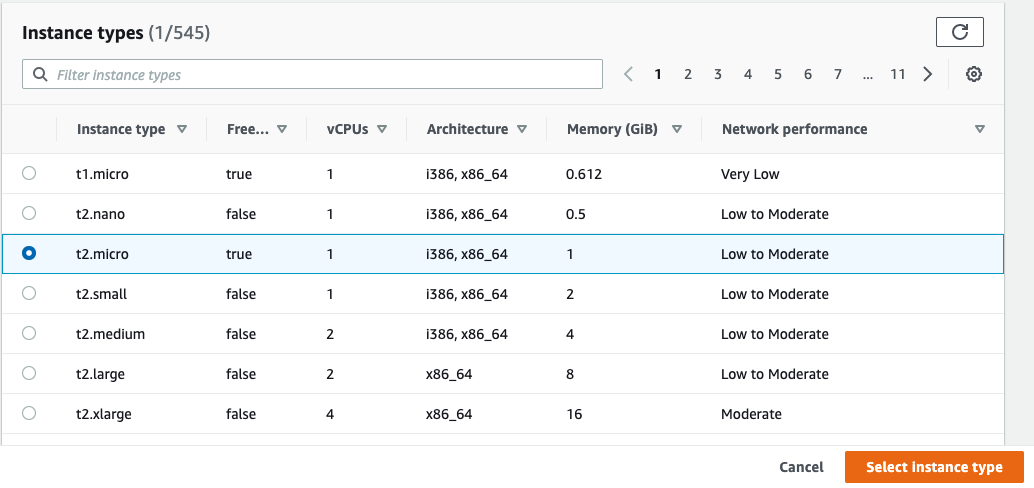
Once your license has been checked (depending on the type of AMI you’ve chosen), you’ll be asked to choose the instance type. This defines your server power.
As I said, we’re going to select the t2.micro (default), which is free tier eligible. This means we don’t have to spend too long thinking about it.
We’ve answered all the main questions. So now:
we either launch our server with the default configuration by clicking on “Review and Launch.”
Or:
if we want to see more details, we can click on “Next: Configure Instance Details.”
In theory, you could just click on “Review and Launch,” but I want to quickly show you the other steps in the wizard.
Configure the Instance
There are a number of options for configuring your instance more precisely.
The first thing you’ll be asked is how many instances you want to launch (in our case, one). You have the option to create an “Auto Scaling” group, which will automatically add and remove servers based on traffic levels. However, this can be a little complex, so we’re not going to cover it here.
Next, you have some options for configuring the network so that your servers can communicate with each other. This is a bit like the connectivity work that system administrators will be familiar with, but all in the cloud.
An IAM role is a system that allows you to grant permissions to the instance so that it can interact with AWS services. IAM is the AWS service where you can manage various users with different permissions.
Basically, we’re not going to touch any of these settings.
Add Storage
EC2 keeps some things separate:
On the one hand, we have the server (the processing power).
On the other, we have the disks. These could be hard disks or SSD (flash memory) depending on the type of instance you’ve selected.
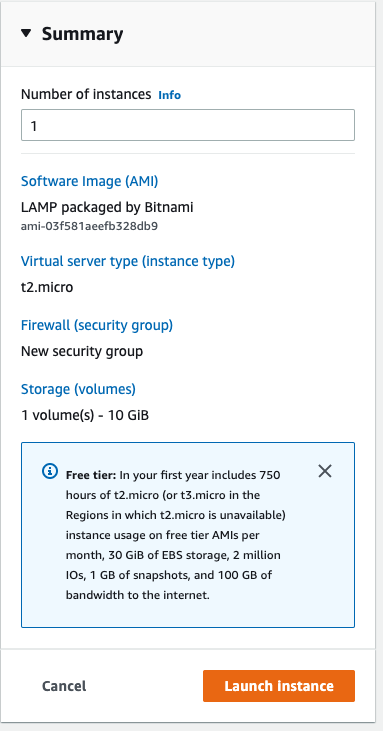
Disks are managed using an EC2 subservice called EBS (Elastic Block Store). By default, you already have a 10 GB EBS volume configured:
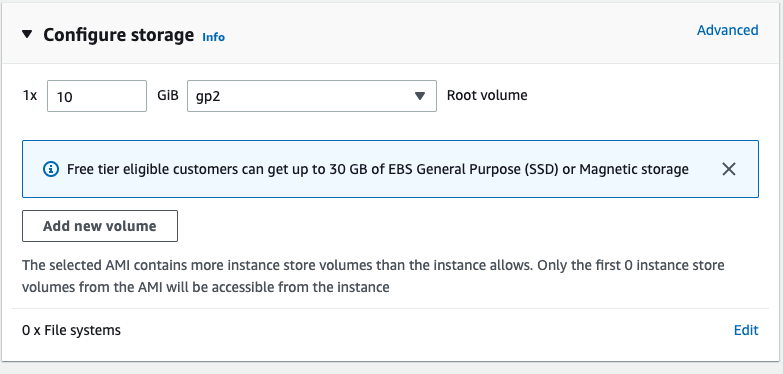
It’s up to you whether 10 GB is enough, given that you can have up to 30 GB as part of the free tier offer, as we’ve seen.
By default, your disk is an SSD. This is what we’d recommend if you’re not sure which one to choose.
It’s worth knowing that if you change the “Volume Type,” you can also have an even faster SSD or a magnetic disk (i.e., an old-school hard disk).
For our testing, we’ll just leave the default values as-is.
Add Tags
This section enables you to “tag” the server so that you’ll quickly be able to find it again:
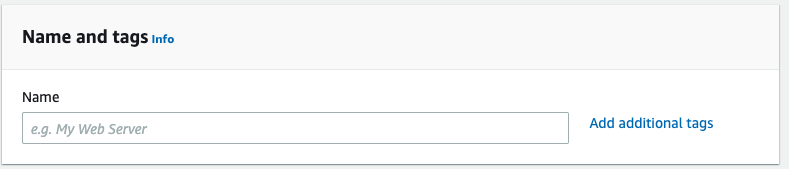
This works using a key-value system. For example, if you like, you could add a “site = openclassrooms” tag. The key is “site” and the value is “openclassrooms”. This means that if you’re performing a search at some time in the future, you’ll easily be able to find all servers that are linked to the OpenClassrooms site.
For now, we’ll just leave it blank.
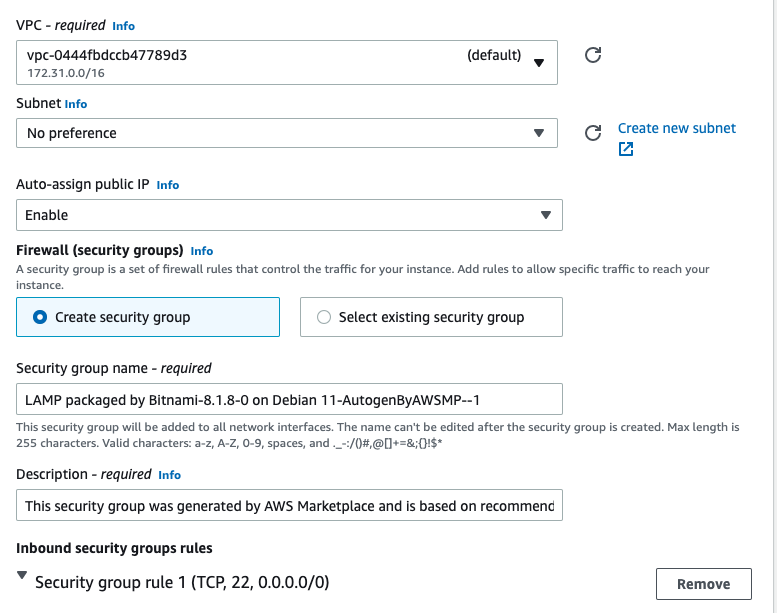
Configure Security Group
This is where you’ll configure your firewall:
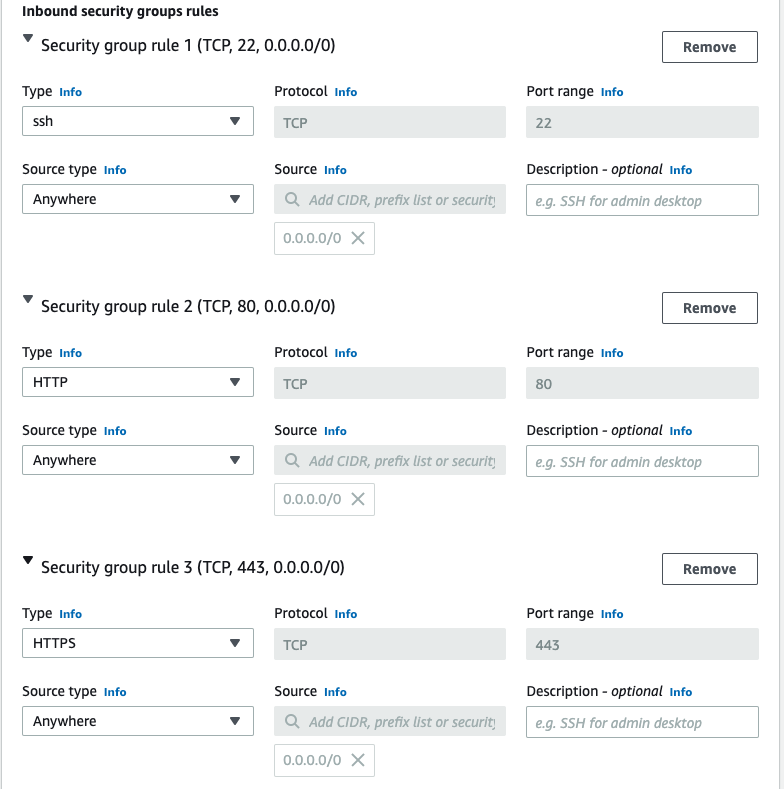
Here, my server will launch with a new security group that only allows certain types of incoming traffic. For example, we can see that my server allows SSH, HTTP and HTTPS access from anywhere (which is what 0.0.0.0/0 means).
Security groups can be shared between a number of servers. Give them a name that’s easy to remember (e.g., “Web server firewall config”).
Launch Your Server
Next, click on “Review and Launch.” You’ll be able to review your configuration once again.
Then, you’ll be asked which SSH key you want to use to connect to the server. If you want to connect in command line mode, you’ll need a key pair (public-private).
In the window that pops up, you can either select an existing key pair (if you’ve already created an AWS server) or create a new key pair if it’s your first time. Let’s imagine that it’s your first time:
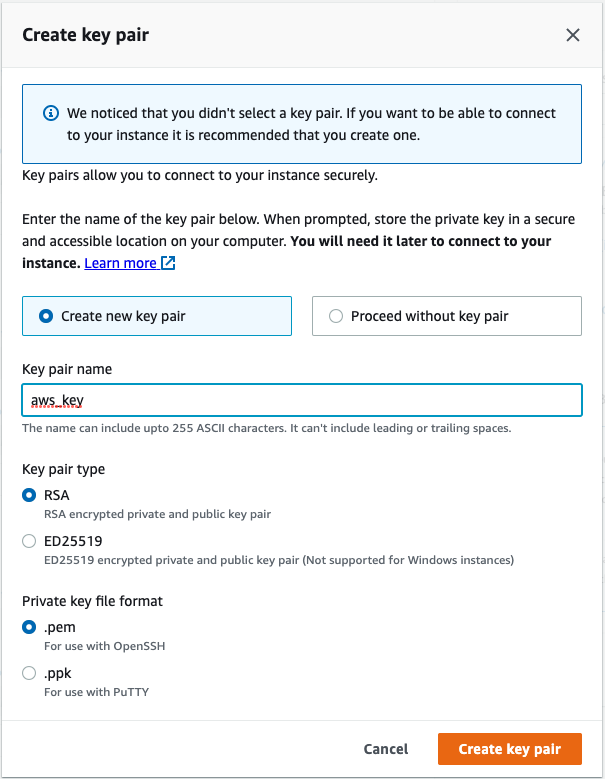
This step is really important! Click on “Download Key Pair.” This will download a .pem file that will enable you to access your server. Save it in a secure location—don’t publish it on the web as that would be fatal!
Phew, so here we are. You can click on “Launch Instances.” After a few moments, the server starts up and appears in the list of “Instances.” Yay!
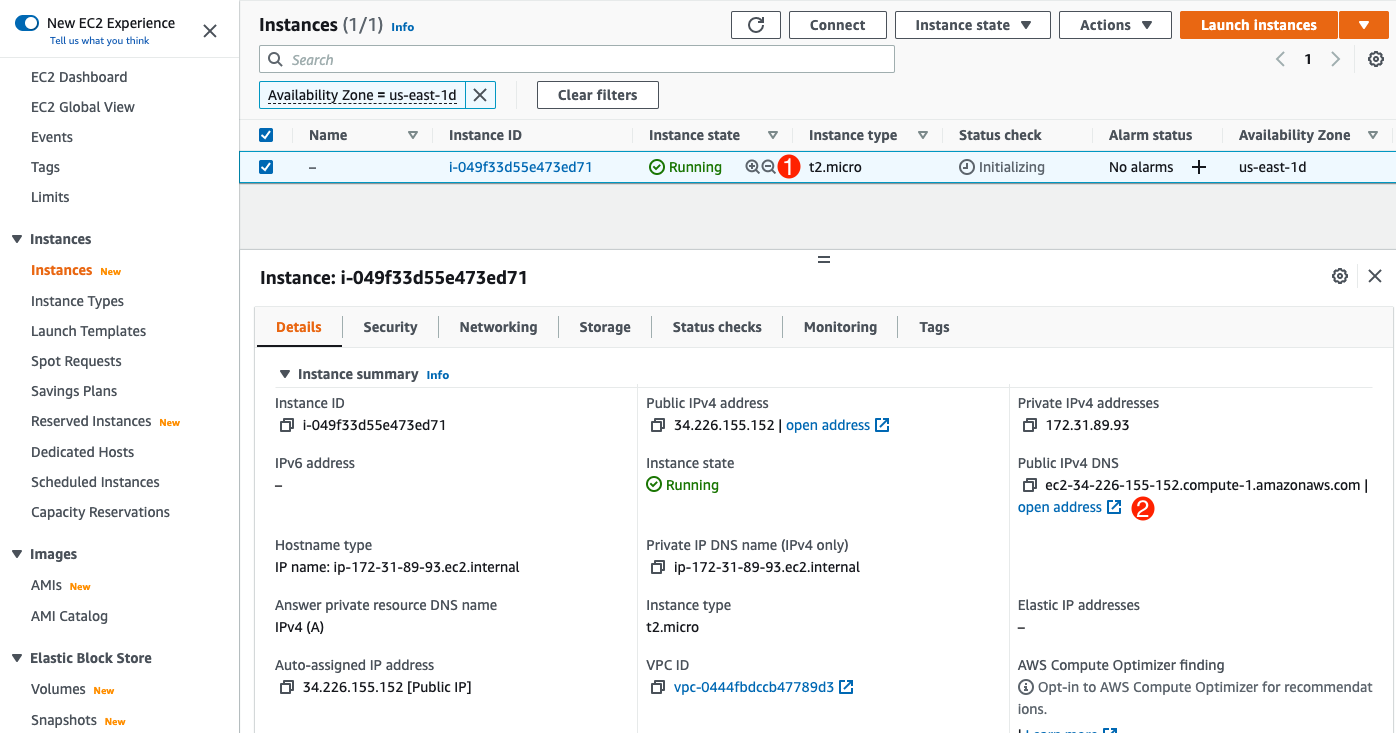
You can see that the type t2.micro instance is green and the status is “Running” (1).
There’s a lot of information in the lower part of the screen. The most important is probably “Public IPv4 DNS” (2), which displays your server address. If you copy and paste this into your browser, you’ll see what your web server displays by default.
You can right-click on the instance to stop, reboot or terminate it. If you terminate it, it will be deleted (it will be displayed briefly before disappearing completely).
Let’s Recap!
EC2 offers various types of instances with different prices. The t2.micro instance is ideal when you’re starting out, because it’s included in the free tier offer.
An AMI is an image that includes an operating system and optionally some pre-installed tools. All EC2 instances are created using an AMI.
An EBS volume is disk storage that is assigned to an instance.
A security group lets you configure firewall rules, limiting network access to the machine.
Right, so shall we actually connect to our server now?
