Install and Configure a Linux Deployment Server

A deployment server centralizes operating system installation and management across multiple machines, making setup and maintenance easier in a professional environment. In this chapter, you will install FOG Server on Linux, an open-source deployment tool.
Explore the FOG Project
The FOG Project (Free and Open-source Ghost) is an open-source initiative that provides a free alternative to proprietary operating system cloning and deployment solutions such as Microsoft MDT and WDS. It brings together a community of developers and users who work together to improve and evolve the solution.
The project’s main product is FOG Server, a tool designed to capture, manage, and deploy system images to multiple machines from one central location.
FOG Server works in PXE (Preboot Execution Environment) mode, which lets client machines boot from an image over the network without physical media—this is known as PXE boot.
Here are the main features of FOG Server:
Capture and deploy images for different operating systems
Automate installations with custom configurations
Manage machines remotely through a web interface
Support PXE so clients can boot from the network
Install applications on running systems
Unlike MDT and WDS, which provide very detailed Windows deployment customization, FOG Server offers fewer options but a simpler web interface for efficient OS deployment, making it ideal for environments that need a quick setup.
FOG Server is also completely free, which makes it an accessible alternative to proprietary tools while still covering core image deployment needs.
So, what do you think? Let’s get started. 😀
Install FOG Server
On a Debian server, which will act as your deployment server, install FOG Server.
Open a terminal and switch to the root user environment with this command, then enter the root account password you set when you installed Debian:
su -
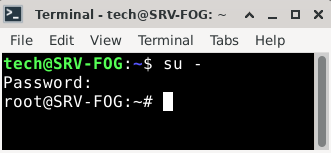
Move to the tmp directory:
cd /tmp
Download the archive for the latest stable version of FOG Server
wget https://github.com/FOGProject/fogproject/archive/stable.tar.gz
Extract the archive:
tar xvf stable.tar.gz
Run the FOG installation script:
fogproject-stable/bin/installfog.sh
From this point on, answer the setup prompts to complete the configuration.
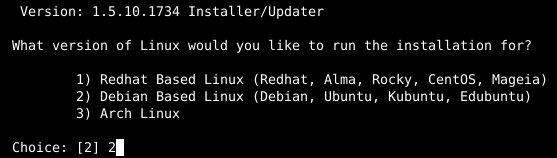
Enter the number that matches the operating system where the installation will run. For this course, we are using Debian, so enter “2” and press the Enter key.
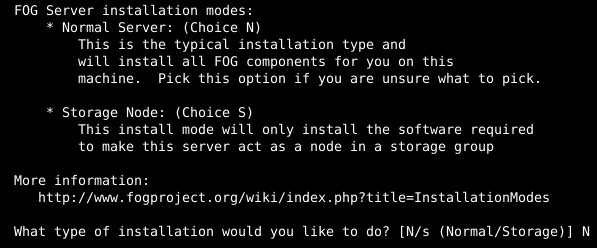
The script asks which installation mode you want for FOG: a normal server, which includes all FOG components, or a storage node only, which installs only the software needed to work as part of a storage group. You want a full server, so enter “N” and continue.
The machine’s IP address, defined when the operating system was installed, was detected on the network interface named “enp0s3.” The installer asks whether you want to change this interface. Enter “N.”

Next, define the basic DHCP service settings. DHCP will automatically distribute the network configuration required by client machines.
The first question asks whether you want to configure a router address (gateway) for the DHCP server. Answer “Y” for yes. Then enter the router address, which is the gateway address for your local network. Because this address is already configured on the server, it will be detected automatically. Press Enter to use 192.168.99.1.

The next questions concern the DNS service, which translates domain names into IP addresses. Answer “Y” to the first question to let the DHCP service manage DNS on the network. As with the gateway, the DNS address is detected automatically. Press Enter to use 1.1.1.1.

Finally, answer “Y” to use the DHCP service.

Answer “Y” to install language packs for FOG, even though the translation quality is not perfect. You will see that for yourself later. 😉

Answer “N” so the server does not use HTTPS.

The machine name was detected and you want to keep it, so answer “N” to leave it unchanged.

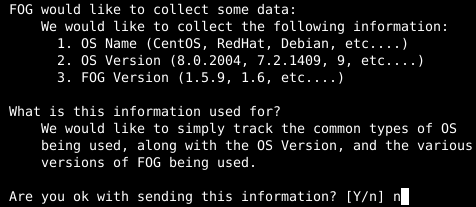
Answer “N” to the next question about sending data to FOG.
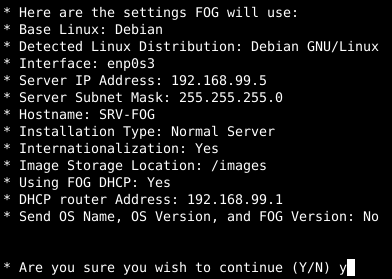
Review the summary of the selected settings, then enter “Y” to start the installation.
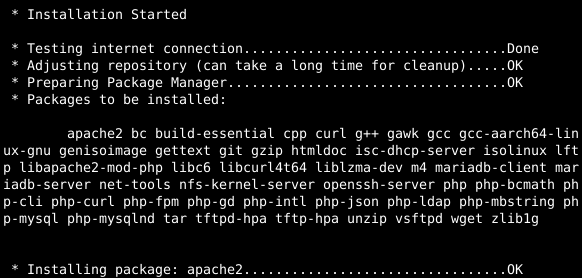
Wait a few minutes while the setup downloads, installs, and configures all the packages required for FOG to work properly.
A message will appear on screen telling you that the database schema must be installed or updated through the FOG web interface.
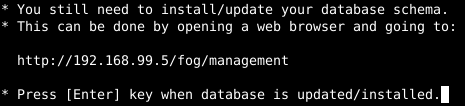
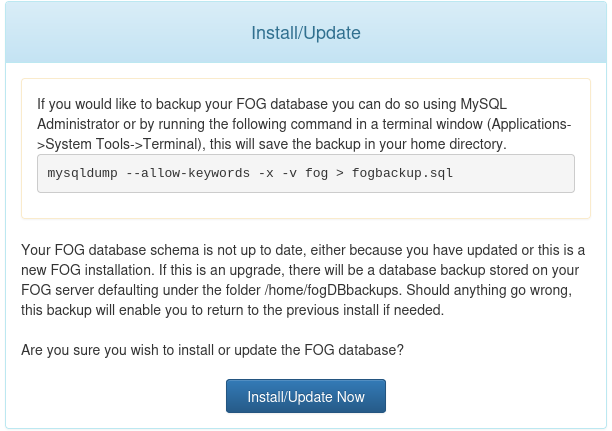
Without closing the terminal yet, open a web browser and go to the FOG web interface at the address shown: http://192.168.99.5/fog/management. Click the “Install/Update Now” button.
When you see “Install / Update Successful!”, return to the terminal and press Enter to tell the setup that the database has been initialized and the process can continue.
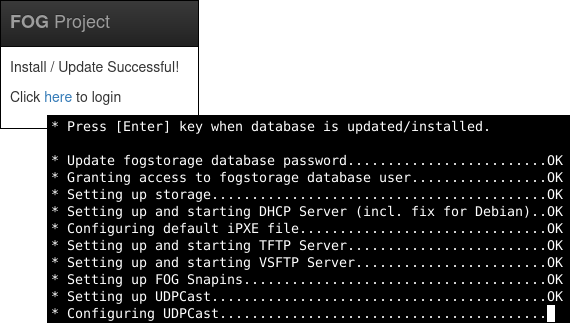
Once the installation is complete, the terminal will display the link to access FOG, the same one as before, along with the default credentials to use:
Username: fog
Password: password
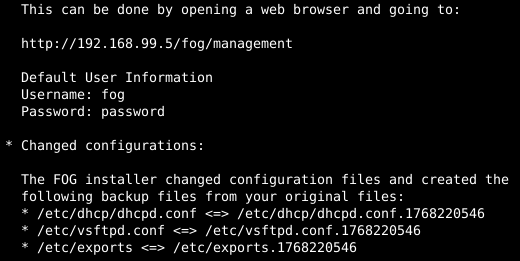
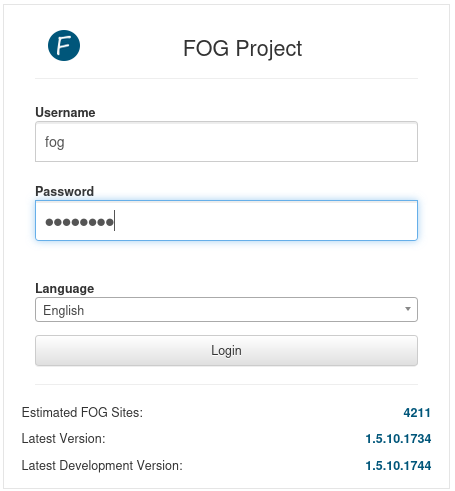
Go to the FOG web interface at http://192.168.99.5/fog/management and sign in with the default credentials. You can also select French as the interface language.
You will land on the dashboard.
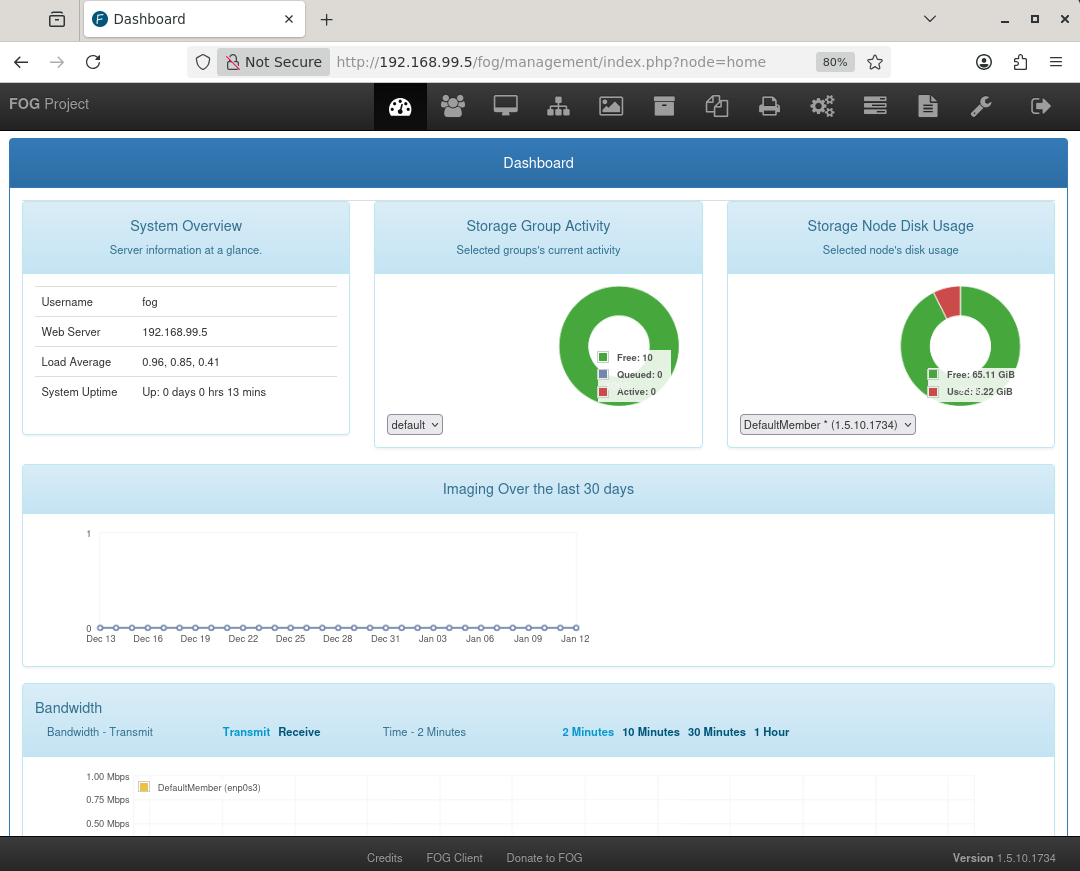
Congratulations, you have installed a deployment server on Linux! 🥳
Explore the Menus and Configure FOG
Let’s quickly review the purpose of each menu and its icon so you can find your way around the FOG web interface more easily:
Icon | Name | Purpose |
Dashboard | Quick overview of the FOG server status and current activity | |
Users | Manage user accounts that can access the web interface | |
Machines | Manage computers registered on the server | |
Groups | Organize machines into logical groups to simplify management | |
Images | Manage the system image files used for deployment | |
Storage | Manage storage nodes if you add another server | |
Snapin | Automate software installation and script execution on machines | |
Printer | Manage network and local printers linked to machines | |
Configuration du service | Manage the FOG client settings installed on machines | |
Tasks | Manage and track operations performed on machines | |
Reports | Generate and export data about system usage | |
Configuration FOG | Manage the FOG server global settings |


Before you use FOG to deploy Windows 11, update a few simple settings.
First, change the default password for the fog account. Go to the Users menu, then click “List All Users” on the left.
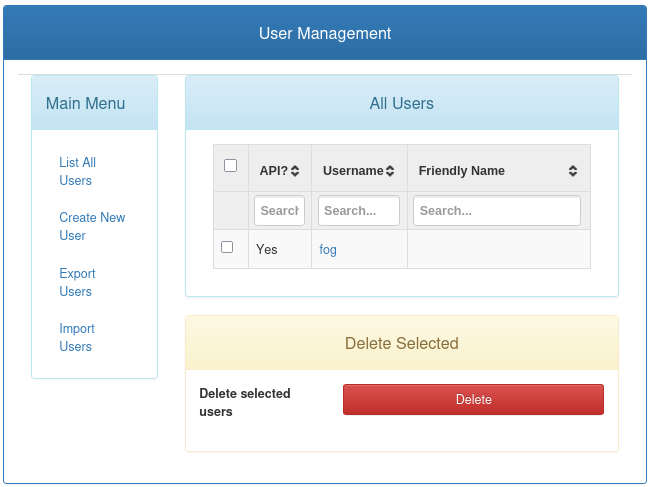
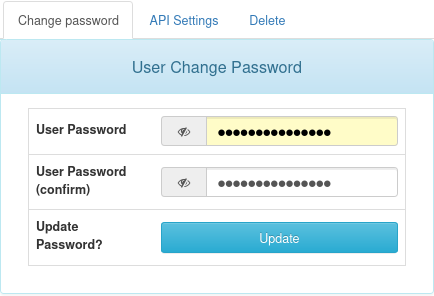
Click the user name, then go to the “Change Password” tab. Enter the password you want and click the “Update” button.
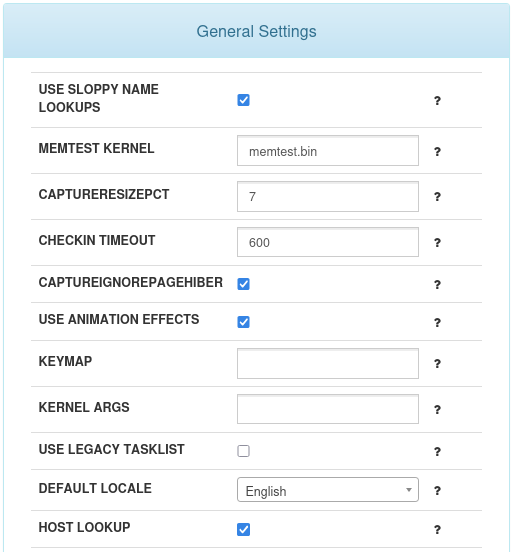
To automatically display the FOG interfacein the language of your choice each time you sign in, go to the FOG Configuration menu, then click “FOG Settings” on the left.
These settings are grouped into different categories. The one you need is called “General Settings.” Select your language in the “DEFAULT LOCALE” option. Be sure to click the “Update” button at the bottom of the category to save your changes.
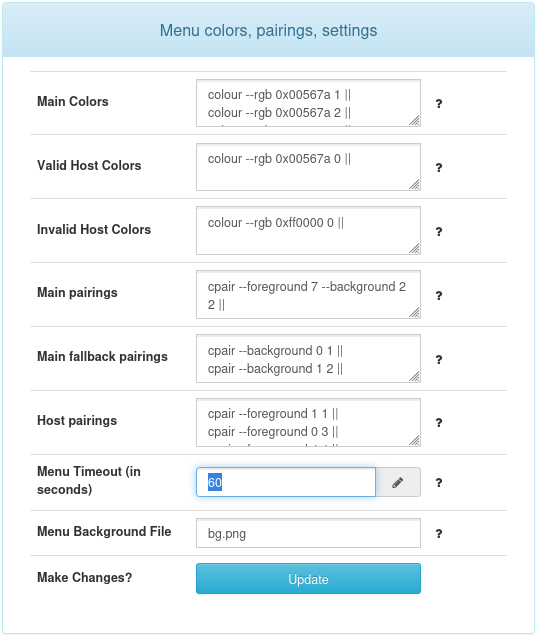
One last change for now: increase the PXE menu display time, which is set to 3 seconds by default. 😅
Still in the FOG Configuration menu, go this time to “iPXE General Configuration” on the left, then to the “Menu Color, Associations, Settings” category. Replace “3” with “60” in the “Menu Timeout” option and save the setting.
Your FOG deployment server is now configured!
In the next chapter, you will learn how to capture a Windows 11 master image efficiently on your server.
Let's Recap!
FOG is a complete, free open-source tool for centrally cloning and deploying operating systems.
FOG offers fewer advanced features than WDS/MDT, but it is an efficient, fast solution that uses fewer resources.
It is installed interactively through a script run from a terminal.
You use FOG through a dedicated web interface.
Your FOG environment is now up and running. Great job! Now move on to the next crucial step: creating and customizing a Windows image.