Execute the Steps of Risk Management
Identify Risks before You Address Risks
Proper risk management is not just about making a list of risks at the start of the project. It can be split into five steps:
Learning about the project.
Identifying and describing the risks.
Evaluating the risks and their potential impact on the project before ranking them.
Prevention strategy: defining actions to limit the potential impact.
Monitoring the development of risks throughout the project lifecycle (a key step).
Completing these five steps will ensure effective project management, as well as effective risk management throughout the project lifecycle.

Completing each of these steps will help reduce your vulnerability to risks. However, if you miss any, your project could be vulnerable!
Don’t forget that you probably won’t anticipate all the risks even if you do a detailed analysis. As in much of life, there is no risk-free option in project management.
Your experience, ability to anticipate, and reactions, are essential parts of the process.
You will need to:
identify new risks
decide when they may present problems
make quick decisions when problems occur
That is why it is important to come up with a risk management strategy.
Define A Risk Management Strategy
These five steps (done in this order) will help you to ensure the security of your projects. Here’s an overview to help you better understand how to manage your risks.
1. Use the Project Description
It would be hard to develop a good strategy if you didn't understand the project before working on it.
Many of the risks you will identify will be linked to the context and the stakeholders.
Be sure to consider the current organizational structure, the available technical equipment (for digital projects), and the current and required use.
All methods for describing a project are important for risk analysis. The more detailed and specific the project description, the easier it will be to handle a wide range of risks.
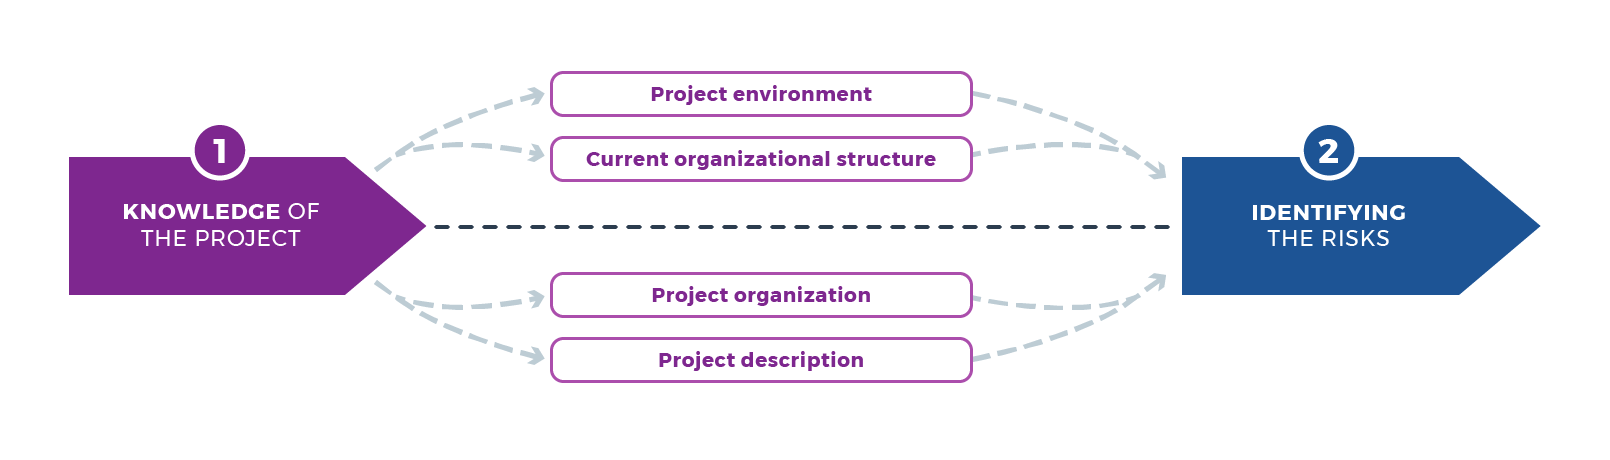
In the next chapter, you will see how to use the project description. For now, just remember that it is impossible to produce a proper risk analysis without one.
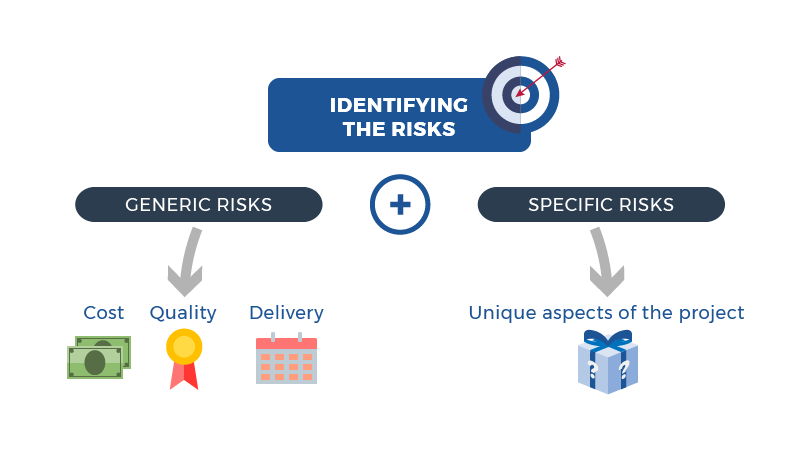
2. Identify the Risks
You have the project description, and now you need to identify the associated risks. To do this, go through the generic aspects as well as the unique (or specific) ones. Completing the first step (describing the project) allows you to create your list of risks.
Generic Risks
Identify them by focusing on basic aspects of the project such as cost, quality, or delivery and determining whether the risk is high or low.
Specific Risks
Identify the risks that are unique to a specific project.
During the identification phase, describe the risks in detail, clearly outlining all the different factors.
3. Rank the Risks
Not all risks are equal. We should prioritize them in the following way:
First, consider their potential impact on your project in case they become problems.
Then, rank them according to their potential impact, and determine which could have the biggest.
This phase is essential, but if you try too hard to guarantee your project’s security, you could end up paralyzing it. You must accept that you can’t do everything yourself.
The Pareto principle states that 80% of the consequences come from 20% of the causes. It works for risk management too!
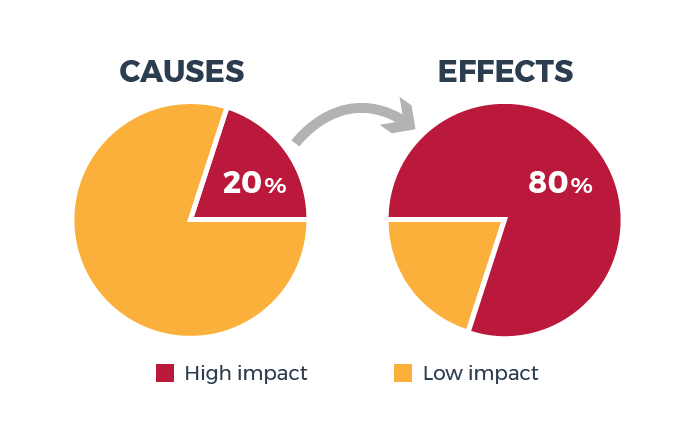
It’s not always exactly 80-20, but remember, just a few of the risks represent the majority of the potential impact.
Identifying a risk doesn’t automatically tell you what you need to do. You must tailor the response to the situation. Ranking the risks helps limit the number you must focus on.
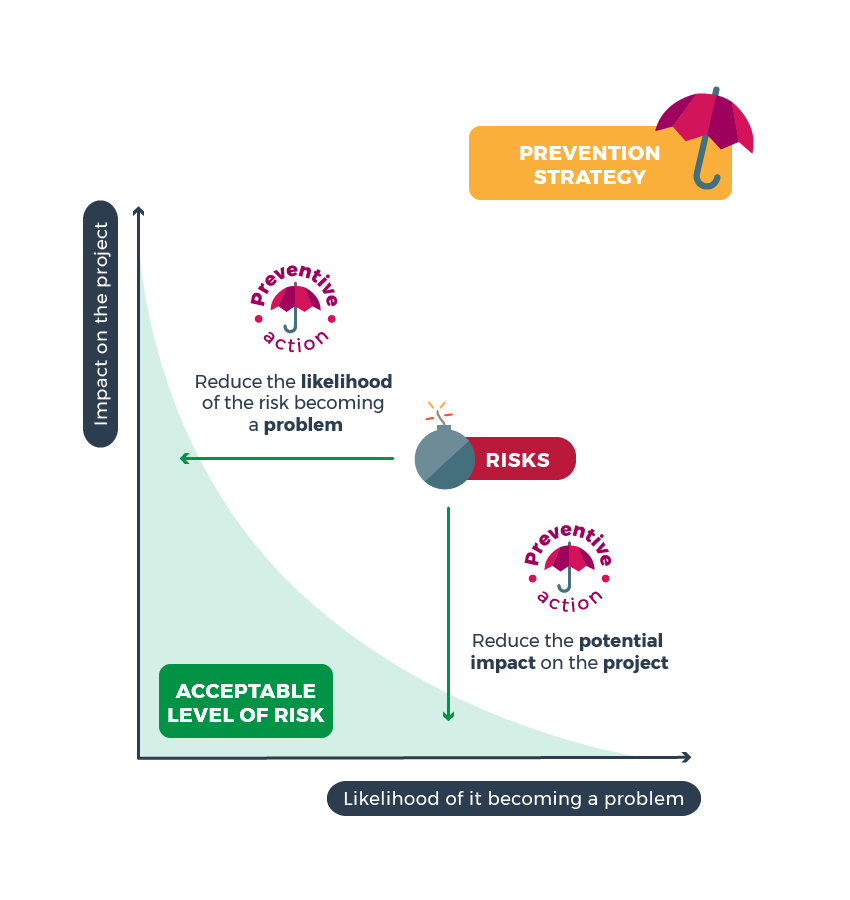
4. Prevent the Risks
Some people will panic, whereas others will avoid or stop an issue as quickly as possible.
Likewise, identifying your project’s risks and doing nothing about them would be a waste of time.
According to Merriam-Webster, to prevent means “to keep from happening or existing.” You’ll do this with your strategy by implementing steps.
How can you reduce the chance of a risk becoming a problem? How can you reduce the potential impact of this problem on the project?
You must answer these two questions in your prevention plan. First, this plan will outline the various measures you have created to decrease the risks identified during phase 2. Then you would focus mainly on preventing the risks you ranked as the most critical during phase 3.
In the last chapter, I was telling you about my beach walks near cliffs 🌊. There were ”Danger: risk of falling” signs, which is an example of safety factors a preventive action can take to reduce a risk (in this case, falling off a cliff).
5. Monitor the Risks
The previous phases often happen before the project has begun and are the foundation of your risk management strategy.
But don’t forget the last part! This final step does not involve any deliverables. Yet, it is just as important as all the others for two reasons:
The risks you identified at the start of the project can change, much like the project as a whole. The potential impact of the risks can increase or decrease due to various factors including changes in the project environment. You should revisit the prevention plan and update the criticality levels at meetings.
New risks can appear due to a change in the project’s scope, an altered project environment, or new stakeholders. Every time a significant change occurs, you should check for any additional risks. To do so, go back through the previous steps, identify the new threats, rank them by order of impact, and outline preventive actions.
Let's Recap!
There are five key steps for an effective risk analysis strategy.
Project description tools are the basis for risk analysis.
Rank risks according to their potential impact.
Identifying the risks is not enough; you must also implement actions to reduce their potential impact.
Your risk management is not finished once you have drafted the prevention plan. You must keep monitoring and reevaluating the risks throughout the project lifecycle.
You now know what risk is, when to launch your risk analysis, and the key phases in risk management. This quiz will help to confirm that you understand these concepts.
After the quiz, come back for the second part of this course, where we will work together on a risk analysis.
