Track Conversions With the Facebook Pixel
 I briefly explained in the previous chapter that you can set up a campaign for a particular objective: to generate conversions on your site.
Find Out What Conversion Is
In web marketing, conversion is when your user performs an action that corresponds to your objective. Let’s use a soccer game as an analogy: when a player scores a goal, the whole stadium stands up and shouts "Goaaaaaaaaaal!" At the end of the game, the coach counts the goals and analyzes the strategies that worked (or didn’t) with the players.
Similarly, when you make a sale on your site, chances are you're happy (you can also express your joy by shouting "Goaaaaaaaaaal" if you like!). You’ll also want to analyze the parameters that led to this sale (where the person came from, what pages they visited, etc.) and the percentage of sales generated.
Conversion Pixels help you set up conversions. It's a small piece of JavaScript code embedded in the Page that generates the conversion. When the code is loaded, it sends a message to Facebook saying, "Hi Facebook! I just recorded a sale of the SoHipster Shaving Kit for $20. Will you post it on my dashboard?”
Each message sent by the code is called an event. It corresponds to a significant action performed by your user that you want to see on your dashboard. You can have several events: for example, you can integrate the Pixel into the thank you page that appears after a purchase and configure it for the purchase event. But you can also configure it to send a “videoPlayed” event every time a user watches a video.
Once the Pixel is correctly installed and each event is properly configured on your site, you can go to your dashboard to have an overview of all events. You will see your Pixel, a list of all your events, and the number of times they have been triggered.
You will then be able to configure a new campaign where the objective will be the conversion, i.e., the realization of one of the events. Neat, huh?
Create Your Campaign With a Conversion Objective
How do you record your conversions with the Pixel in practice? Here’s a little demonstration in the ads manager:
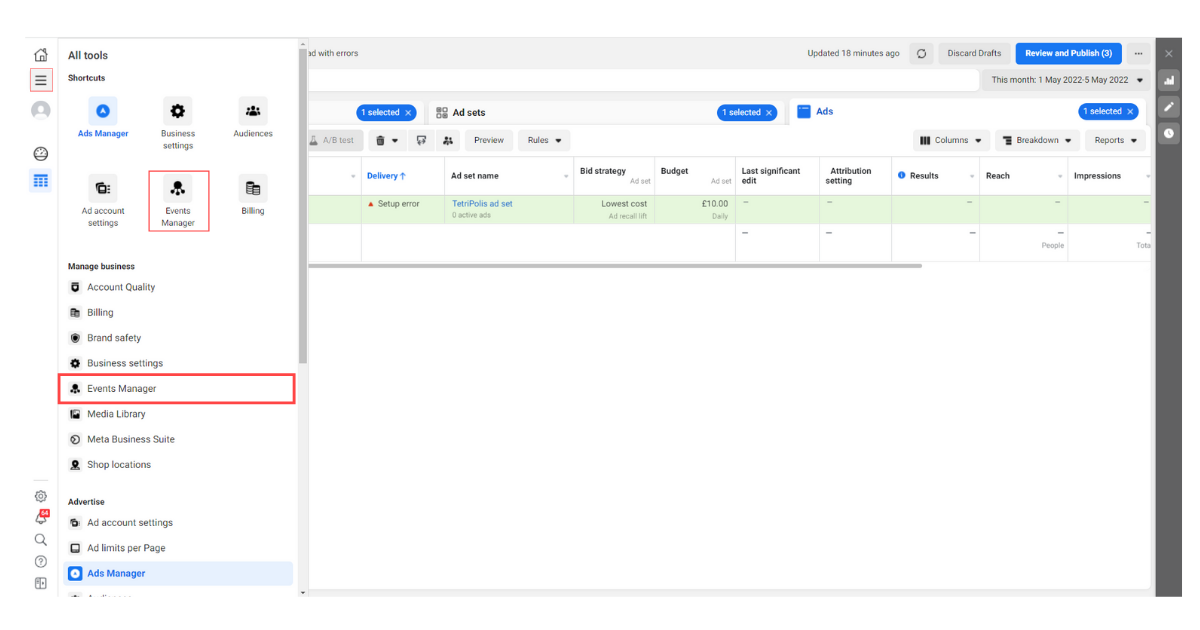
On your dashboard, click on the hamburger icon at the top left in All Tools, then click on Event Manager.
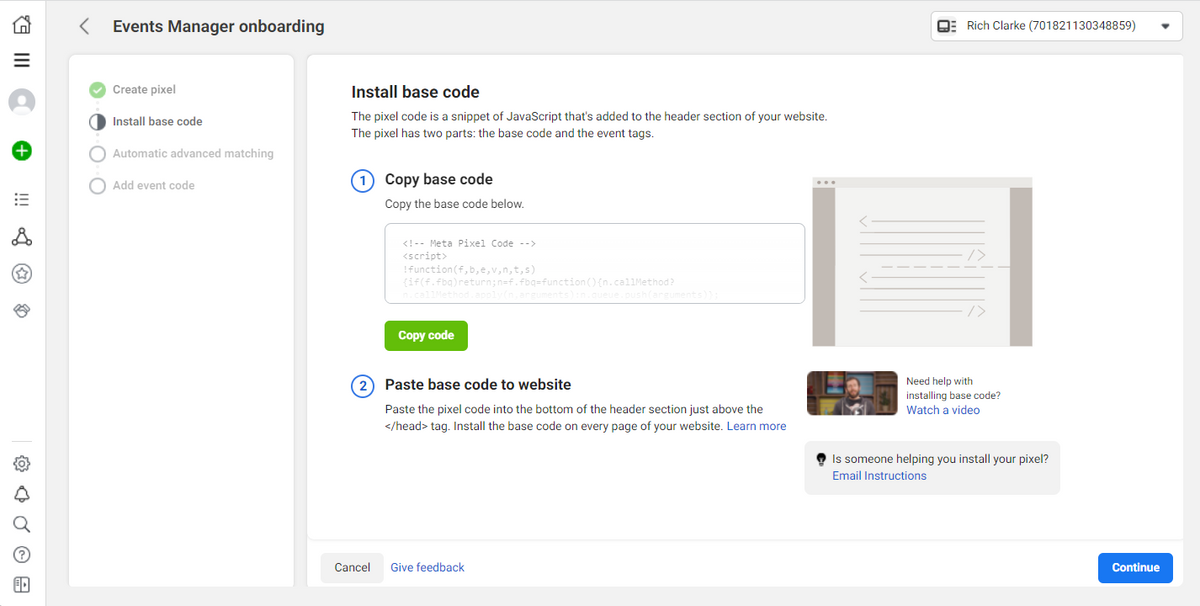
Click either Create or Continue Pixel Configuration.

Click on Install code manually, then copy the code that appears and paste it into the <head> of your Page.
Choose the Use a partner integration option.
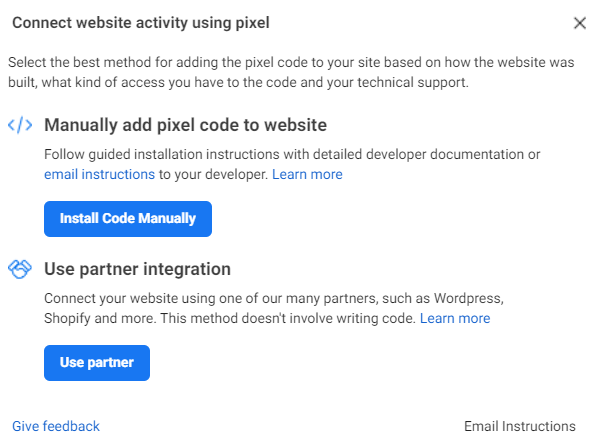
Choose the CMS used on your website and let Facebook guide you.
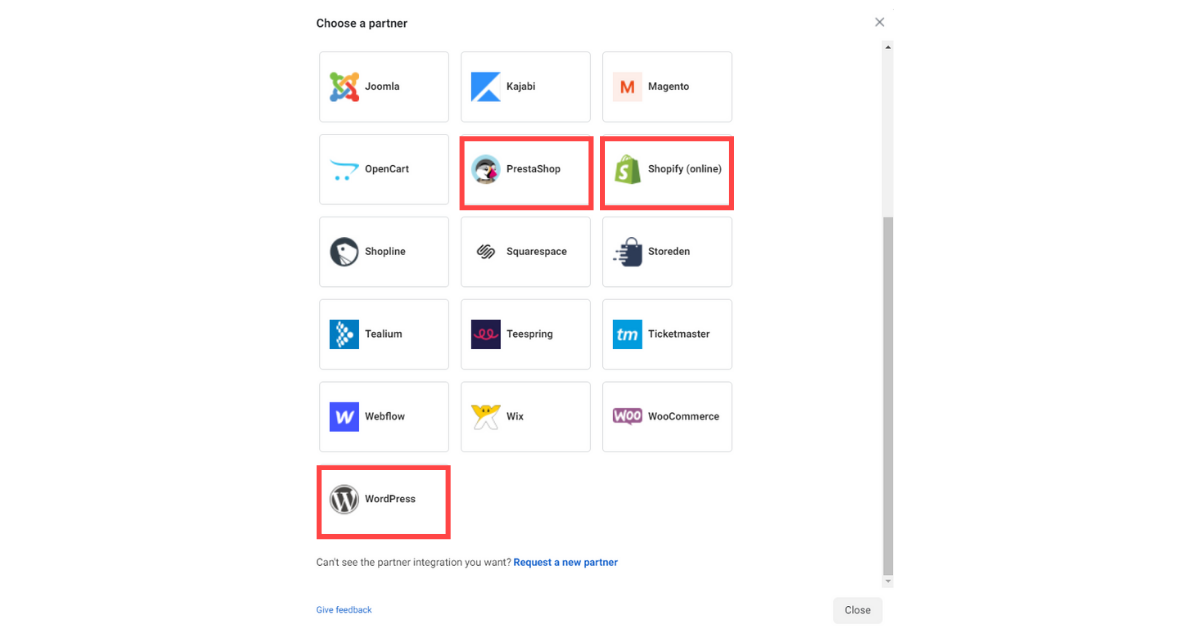
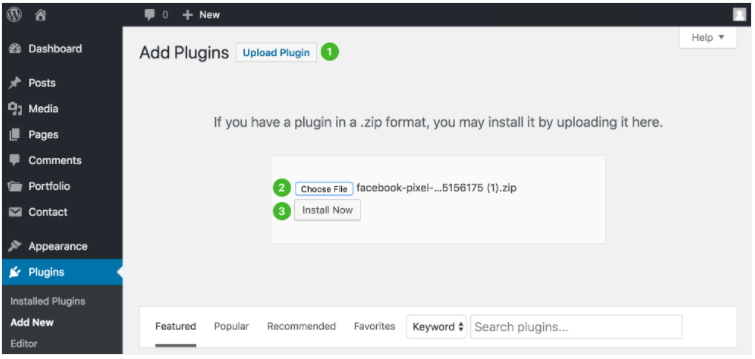
Facebook offers a multi-step guide to installing the Pixel easily on your CMS with plugins:
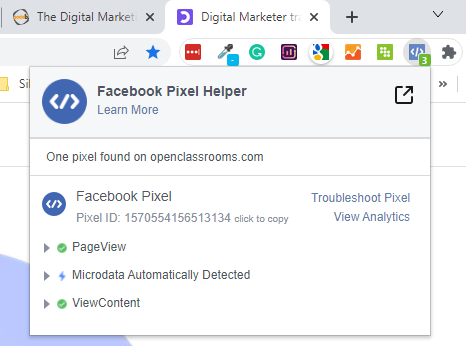
Load the Page that generates a conversion and return to the Pixels list in your dashboard. You should see a new Pixel with an Active status (green dot).

You can also download the Facebook Pixel Helper Chrome extension. Once it's installed, go to the Page you want to test and click on the extension icon. Then you'll know if the tracking code is working or not.
Let's Recap!
Using the Facebook Pixel, you will be able to keep tabs on the events that happen on your website or app after someone clicks on your ad.
You can only have one Pixel per ad account.
You can record as many events as you want via your Pixel.
The Pixel allows you to choose the conversion campaign objective.
There are several ways to install a Pixel (manually, via a CMS, or by contacting your webmaster).
Congratulations, you’ve configured your Pixel! Feel free to use it to start a new practice campaign. I'll see you in the next chapter, where we’ll delve into monitoring and conclusions!
