Report Anomalies to Developers With Jira

Discover Jira
Jira is a highly popular and versatile project management tool used in software development. It is widely adopted for tracking and managing tasks, issues, and projects.
Jira is designed to help teams plan, track, and manage their work throughout the software development lifecycle. Testers use it to create, track, and manage defects they encounter during the testing process.
Jira is highly customizable and offers a wide range of features to support teams in managing their development projects effectively.
Now that you have a clearer understanding of Jira and how it supports software testing, let’s move on to the next step: installing it.
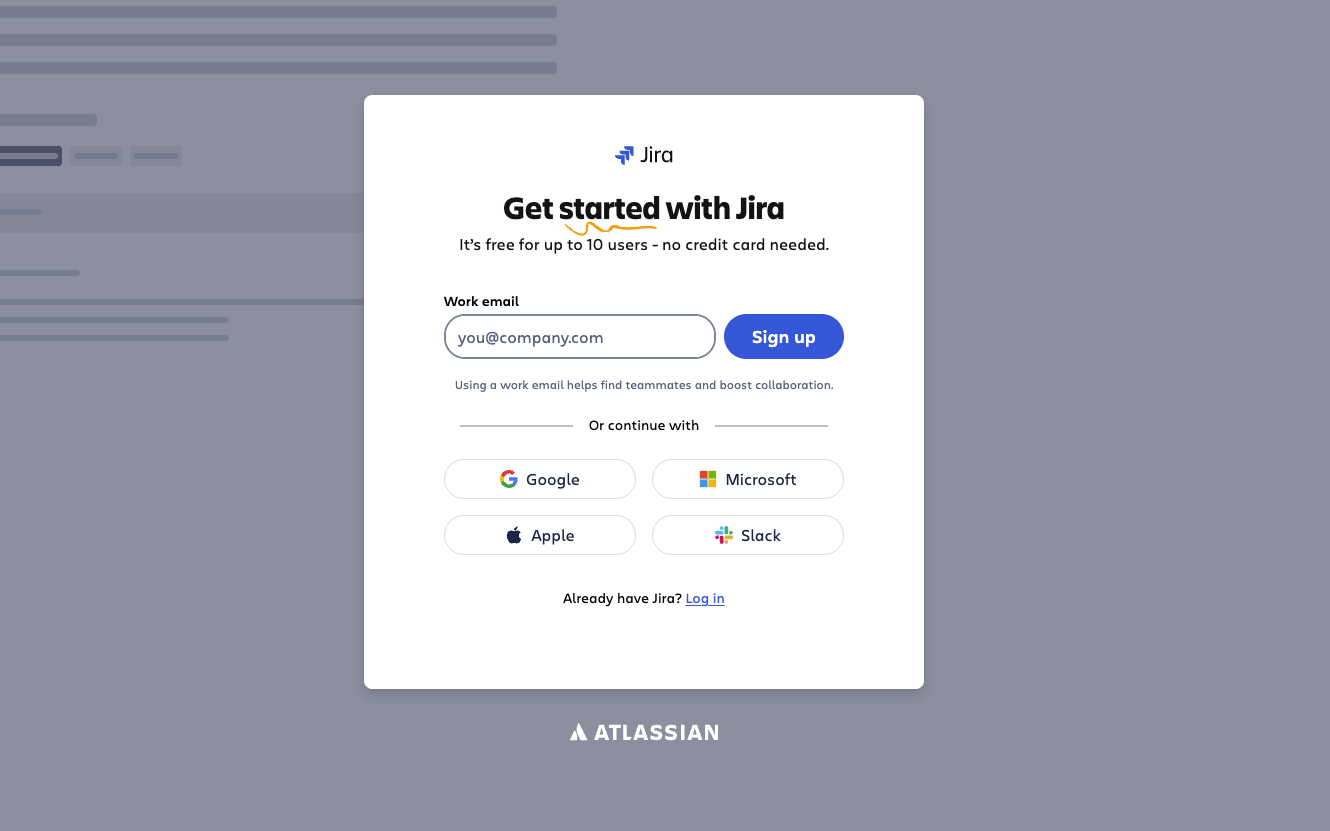
First, go to Free - Jira Software to create a free environment.
Click the “Sign up” button on the pop up screen to access the account creation interface.
Once your account is created, Jira will ask you to name your environment. Enter the name you want in the “Your site” field.
Then answer the following questions:
The type of team you’ll be working in, choose “Software development”.
Your role, select “QA Engineer” or “QA Manager”.
Your day-to-day tasks.
How you plan to use Jira. Here’s an example response:
I am “discovering” Jira. I configure Jira for “my development teams.” My team is discovering Agile methodologies. Our mission is to “fix bugs.” Our deadlines are “flexible.”
Next:
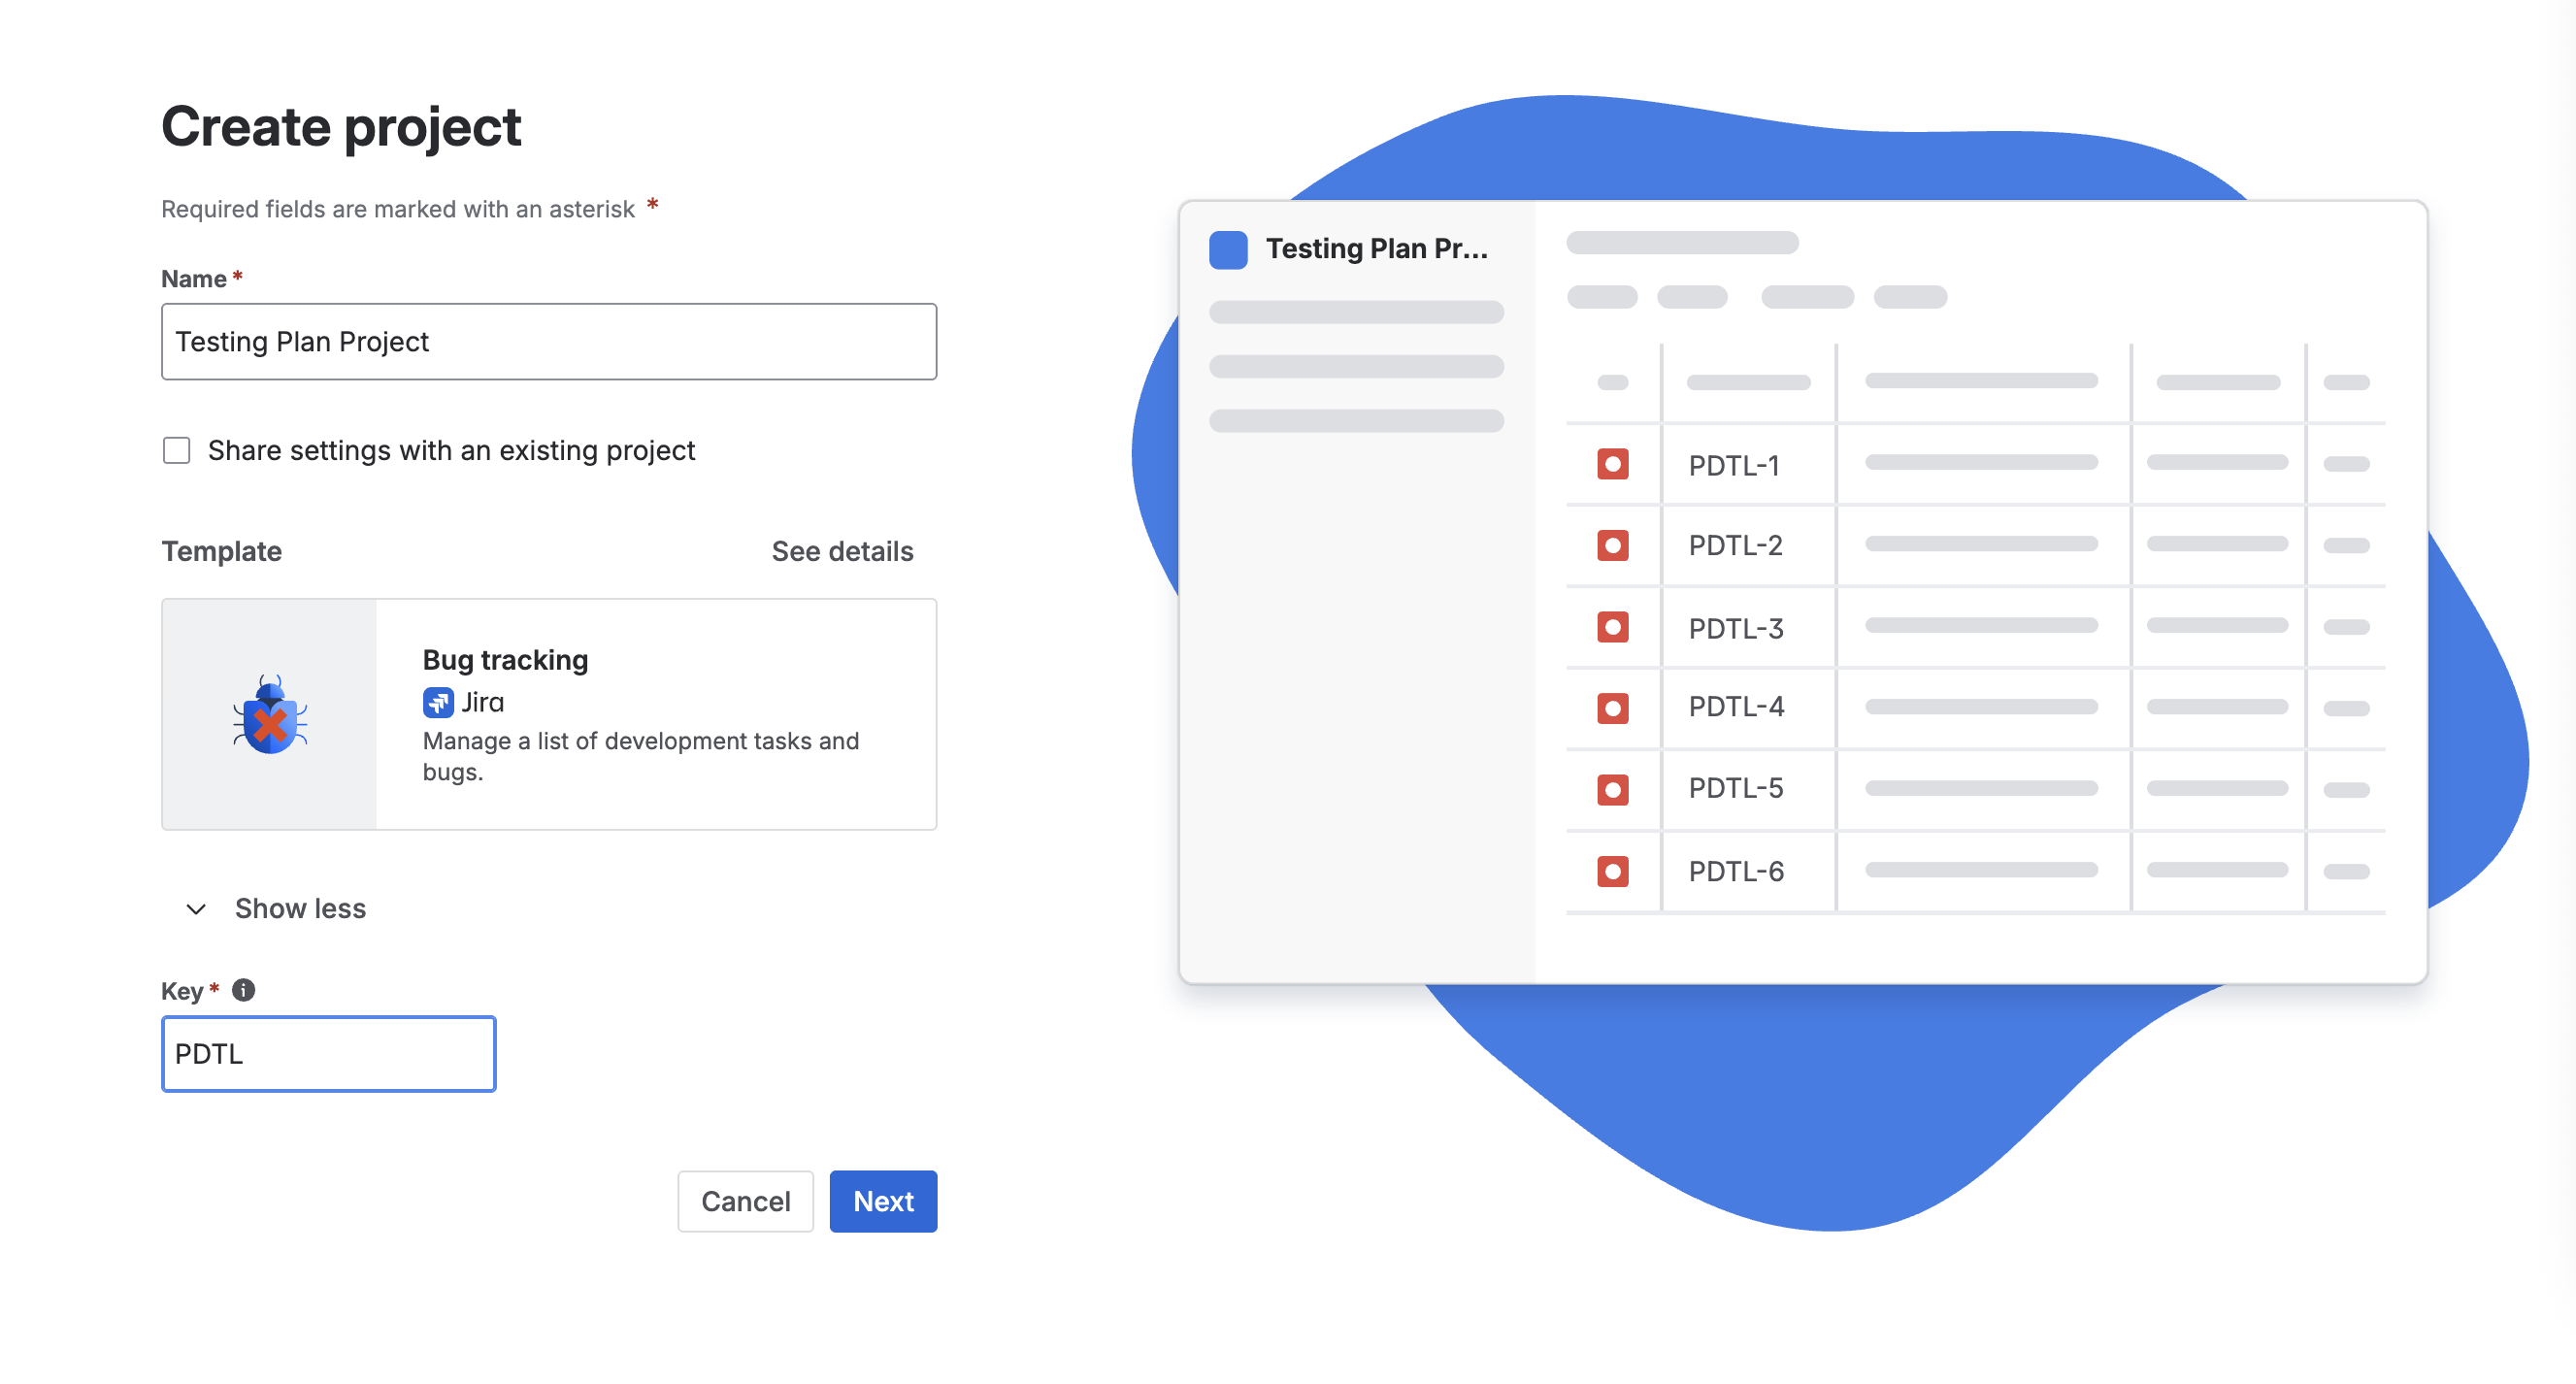
Choose a project name.
Click “template” to modify the default template.
Select the “Bug Tracking” template.
Keep the default project type.
You will now be prompted to select tools to connect to Jira. You can skip this step for now, you can configure integrations later if needed.
Your environment is ready! You’re now on your default board page:
Create Your First Ticket
It’s time to create your first ticket!
At the top of the screen (previous picture), you’ll find a “Create” button that lets you create all types of tickets.
Click “Create.” You’ll see a list of available ticket types (Space templates screen):
Improvement: suggestions for improving the software.
Task: technical or development work required to implement a feature.
New feature: a user story or feature linked to a team and project.
Bug: used to report defects.
Epic: a high-level feature that may span several teams or projects.
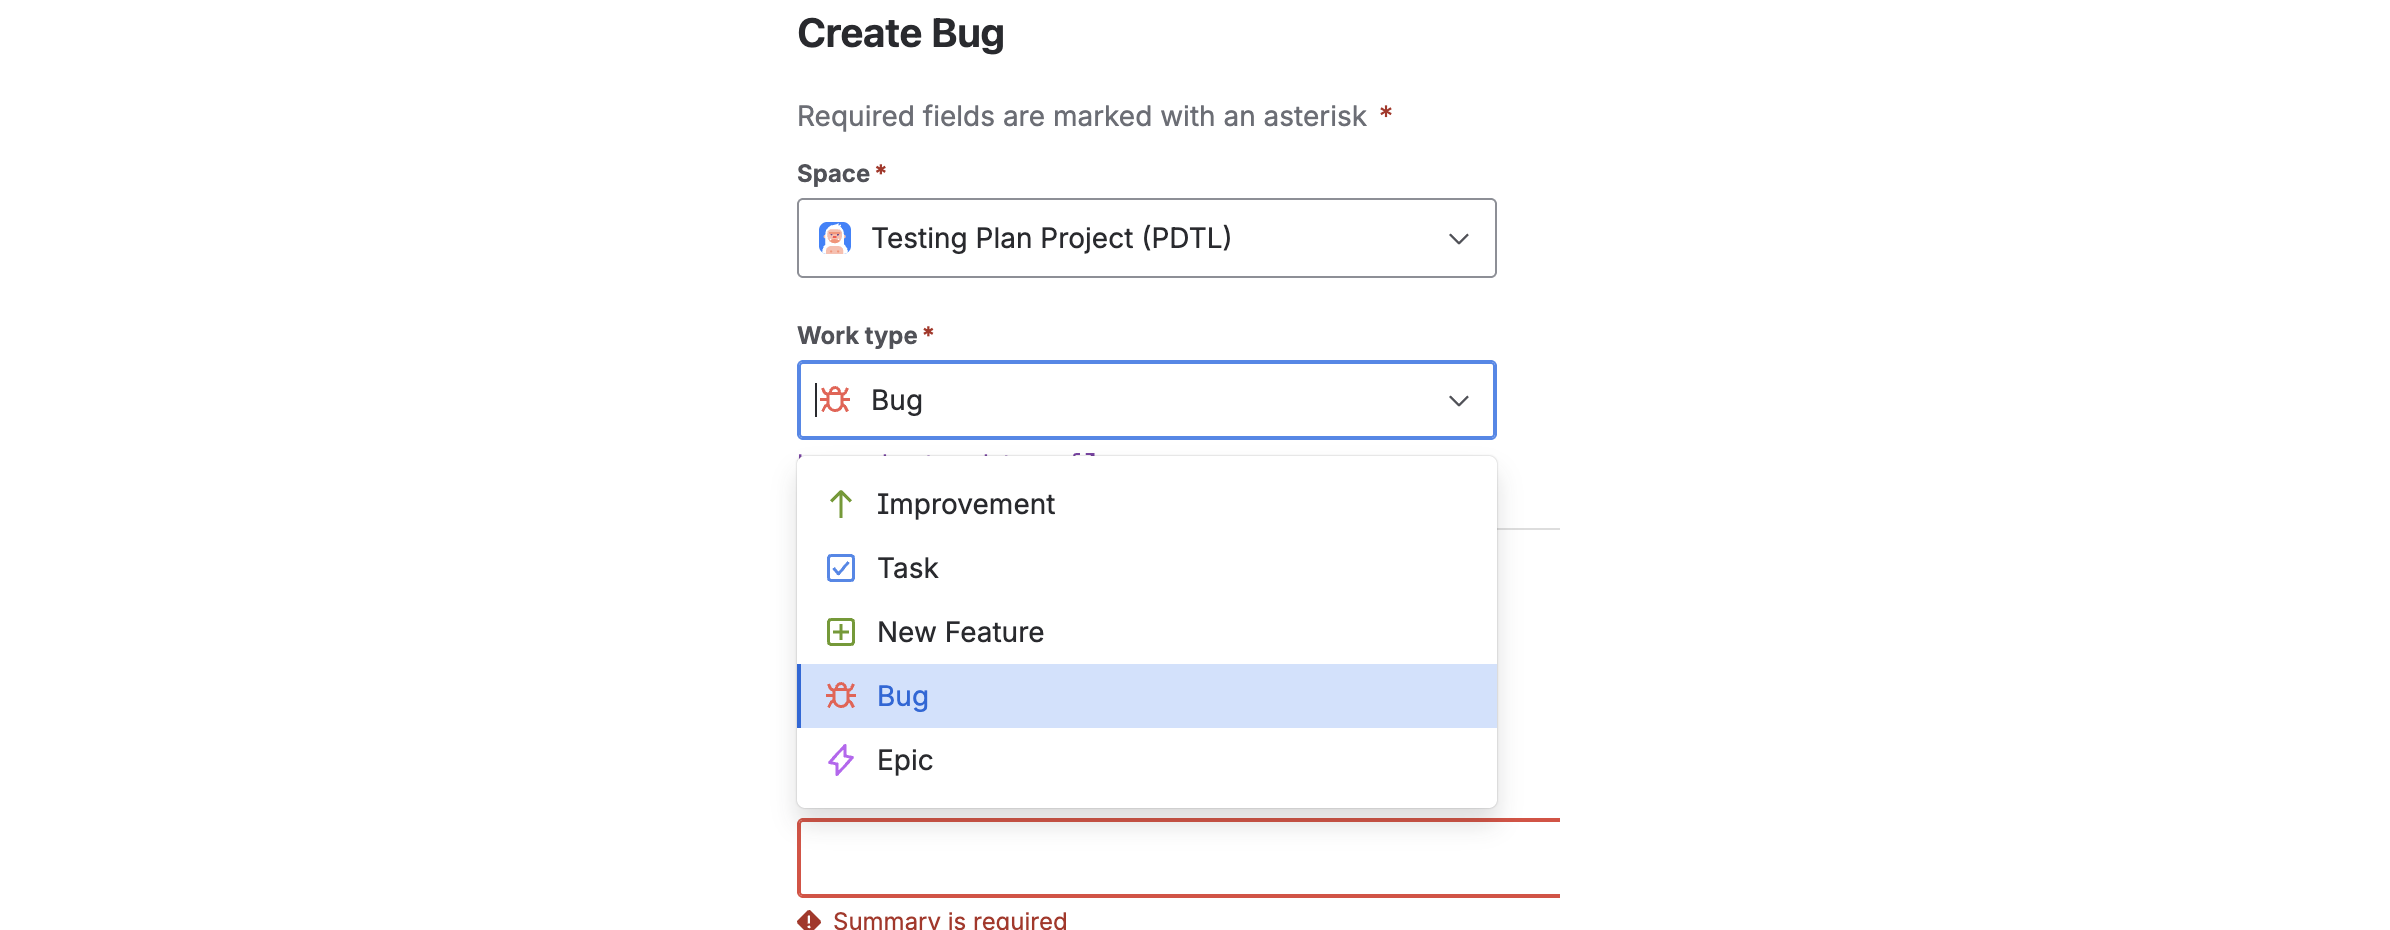
Select the “Bug” type.
Leave the status set to “To Do” because the bug you’re creating will need to be processed. We will later cover how ticket workflows operate.
In the “Summary” field, write a short sentence describing the problem.
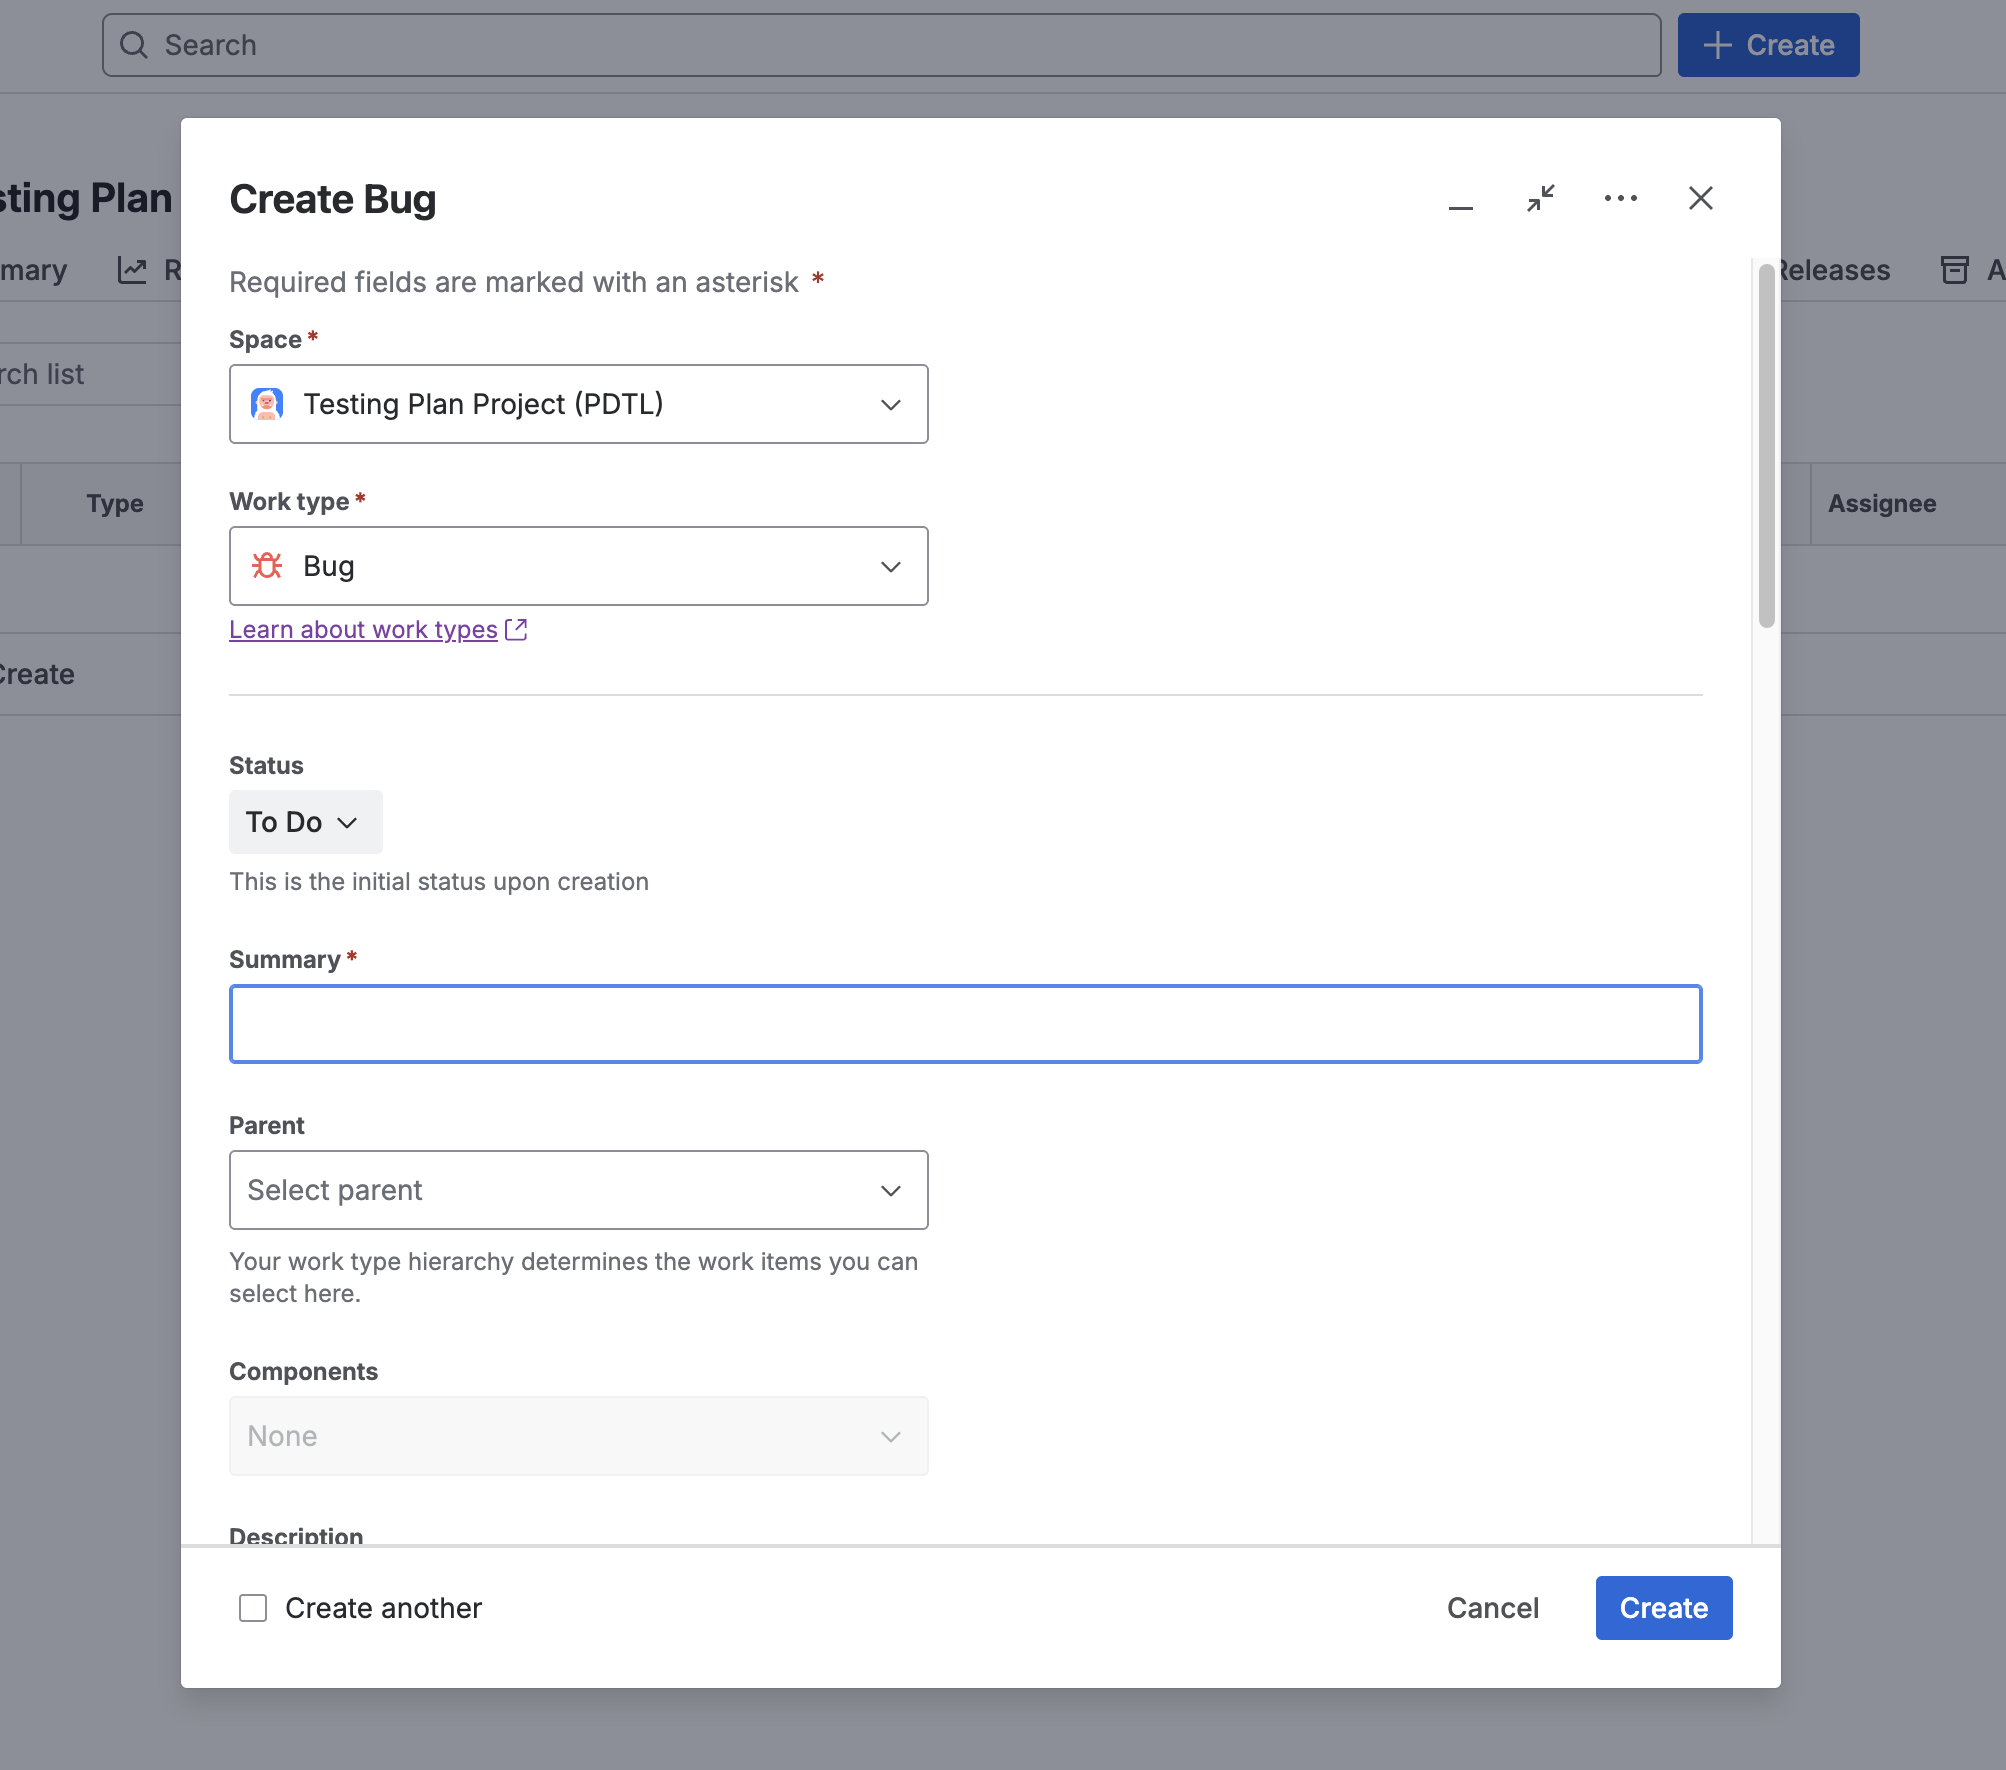
Then fill out the “Description” field. To help with this, use the anomaly template anomaly template in .docx format. This template ensures you don’t forget key elements and keeps every defect description consistent.
Once your description is complete, you’ll need to assign a criticality level in the “Priority” field.
Here are the most common levels of criticality:
Minor: a minor issue that is easy to work around and causes little inconvenience to users.
Major: a significant issue that degrades usability without completely blocking it.
Critical: a blocking issue that stops the application—or a key feature—from functioning.
As shown in the screenshot below, Jira provides additional granularity:

Here’s how these Jira levels correspond to the three categories above:
Highest: equivalent to “critical.”
High: equivalent to “major.”
Medium: also equivalent to “major.”
Low: equivalent to “minor.”
Lowest: trivial issue, equivalent to “minor.”
Because Jira is highly customizable, you may see both “priority” and “criticality” fields on some Jira setups.
Criticality reflects how serious the defect is. Priority reflects the order in which tickets should be addressed.
Over to You!
Now that your Jira board is ready, enter the defects you found in previous “Over to You!” activities using the bug template in .docx format or the bug template in .odt format)
Follow the Life of Tickets with Jira
Boards and workflows are two core Jira features for project management and issue tracking.
What are boards used for?
Jira boards are customizable views that display issues as lists or columns. They help track task progress, assign work to team members, and highlight items requiring attention.
Boards can be configured to show different issue types, filter issues by criteria, sort by priority, and display real-time status updates.
Here’s how to use your Jira board:
Access Jira: Log in and open the project of your choice.
Select “Board”: In the top-left menu, click “Board” to open it.
Configure your board: Customize columns, filters, labels, dependencies, and more—depending on your needs.
Create tickets: Add tickets for every task or defect to process.
Add tickets to your board: Place them in the appropriate column—such as “To Do,” “In Progress,” and “Done.”
Move tickets: Update ticket positions as their status changes.
Track progress: Monitor ticket movement to get an overview of the project.
Use filters: Filter by assignee, priority, deadlines, or other criteria.
Boards help you visualize project status, track tasks, and improve team communication.
What about workflows?
Jira workflows describe the steps an issue moves through—from the moment it is reported until it is resolved. They can be fully customized to reflect your team’s process.
Workflows may include steps like “New,” “Waiting for approval,” “In progress,” “Resolved,” etc.
They may also include automation rules, such as sending notifications or automatically transitioning a ticket after a specific action is completed.
Here’s how to work with Jira workflows:
Open the “Workflows” section via the Jira Dashboard → gear icon → “Issues” → “Workflows.”
Create or edit a workflow: You can start from scratch or duplicate an existing one.
Add workflow steps: These represent the states a ticket can move through (e.g., “New,” “In Progress,” “Resolved”).
Add transitions: Define how tickets move from one step to the next. Transitions may include conditions or restrictions.
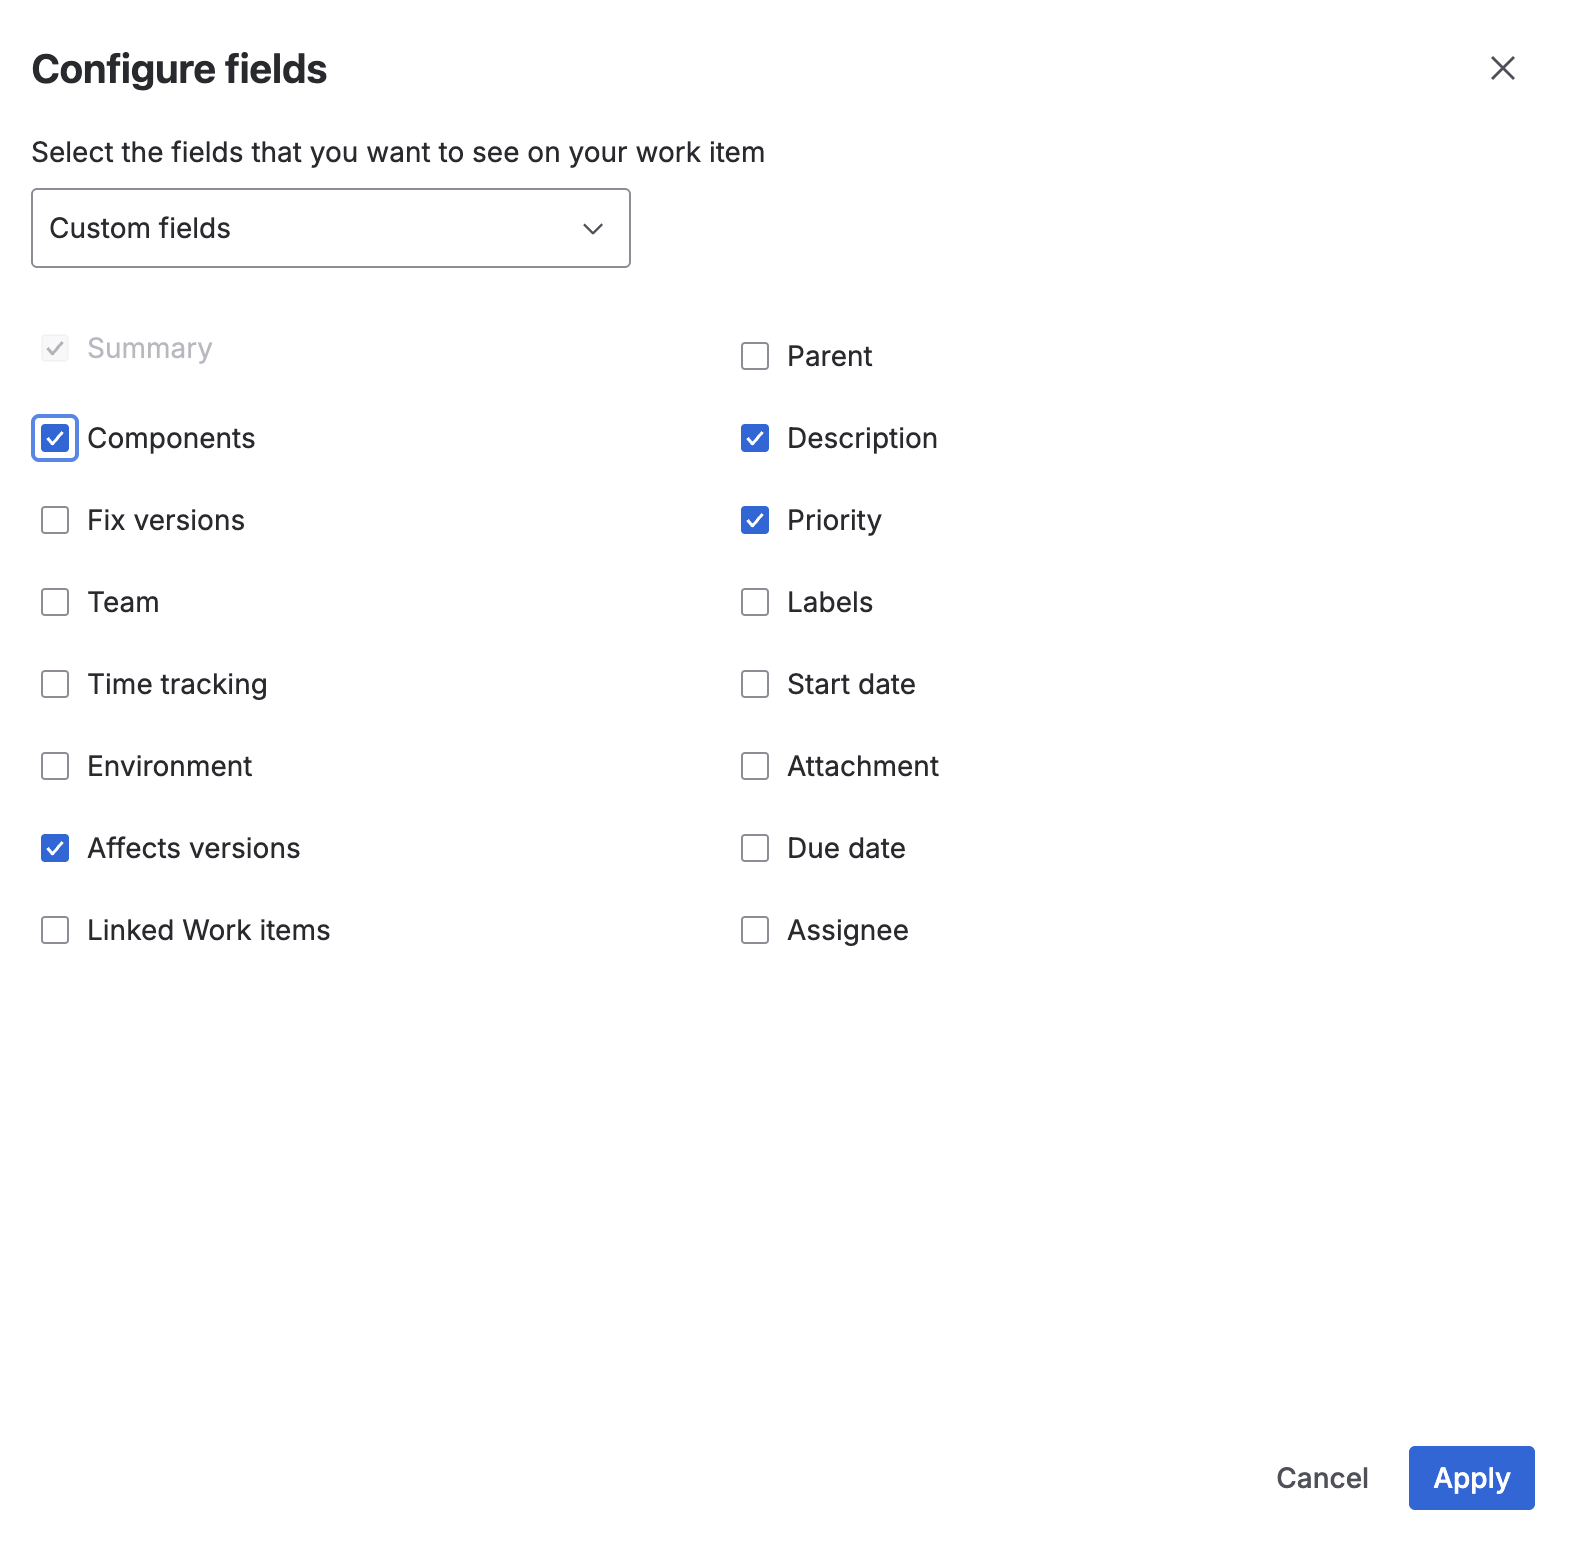
Customize fields and screens: Choose which fields (title, description, priority, etc.) appear when viewing or editing tickets.
Here’s an example defect input screen:
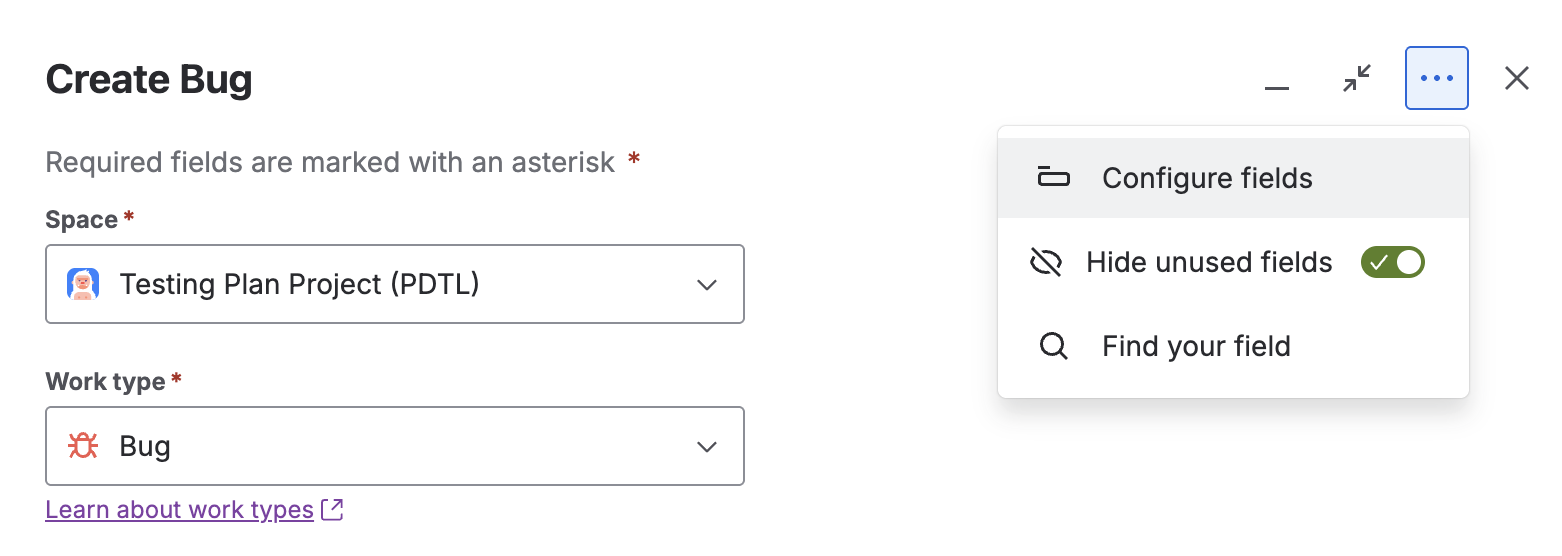
And here are the customizable fields, which you can enable or disable on the input screen:
Save the workflow and assign it to the relevant projects. All tickets in those projects will follow its defined steps.
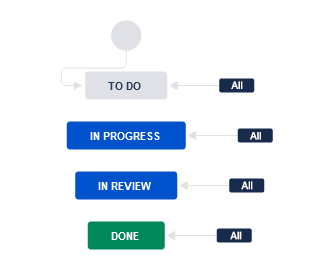
Here is an example of a free-flow workflow, where tickets can move from any state to any other:
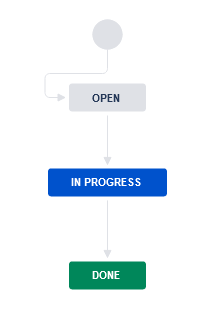
And here is a more structured, restrictive workflow:
Using Jira workflows helps standardize and optimize your team’s work processes.
Summary
You know how to create and configure a Jira environment.
You can create defect tickets using a clear structure and assign appropriate criticality.
You understand why documenting a defect well is essential.
You understand the purpose of boards and workflows.
You now have a solid understanding of testing methods. Test your knowledge in the upcoming quiz, then join me in the next section to tackle the testing campaign.
