Tweak your WordPress theme
Our first steps into theme customization will take place directly within the theme customizer, accessible at Appearance > Customize in your WordPress dashboard sidebar. These modifications will get you familiar with how WordPress thinks of design, from grandiose page layouts to individual menus and widgets.
The Sydney theme will be the base of each chapter example, though many of these customizations are available in other WordPress themes. You'll be looking at modifications to the following menu items:
Static front page
Site title/tagline/logo
Header area
Footer
Colors
Widgets
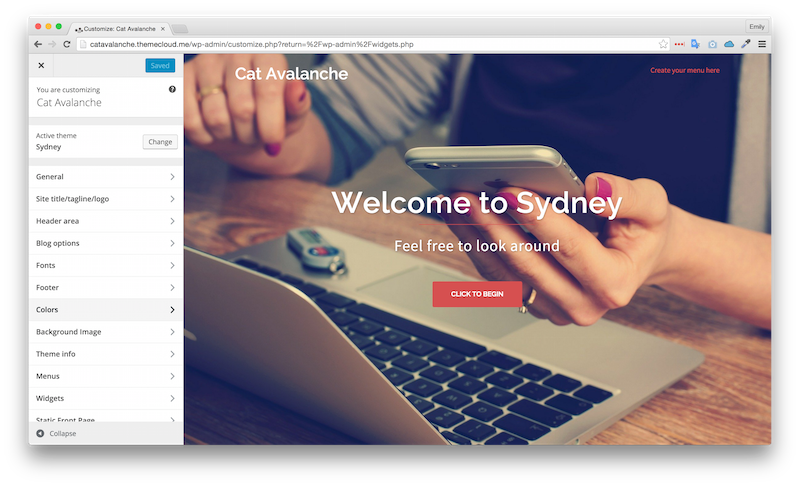
As a reminder, here's the Sydney default appearance. There's not much going on here that relates to my rock band client, but by the end of the chapter, this site will have custom images and content-specific menus and text.
You'll notice many themes have very similar customization menus. Don't be worried: these exercises will be useful no matter which theme you use!
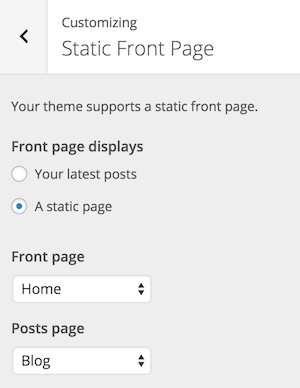
Static front page
One disadvantage of changing themes (as we changed from the WordPress default to Sydney) is that it'll reset your settings about front and post page arrangements. These are the settings you previously set up in Settings > Reading to change which page would be your homepage. No fear though! Since the Sydney customization menu gives me a tab to do this directly, I can just navigate to the bottom of the customization menu, click Static Front Page, and re-add "Home" as my front page and "Blog" as my posts page.
Alternatively, you can navigate back to Settings > Reading, exactly where you did it before.
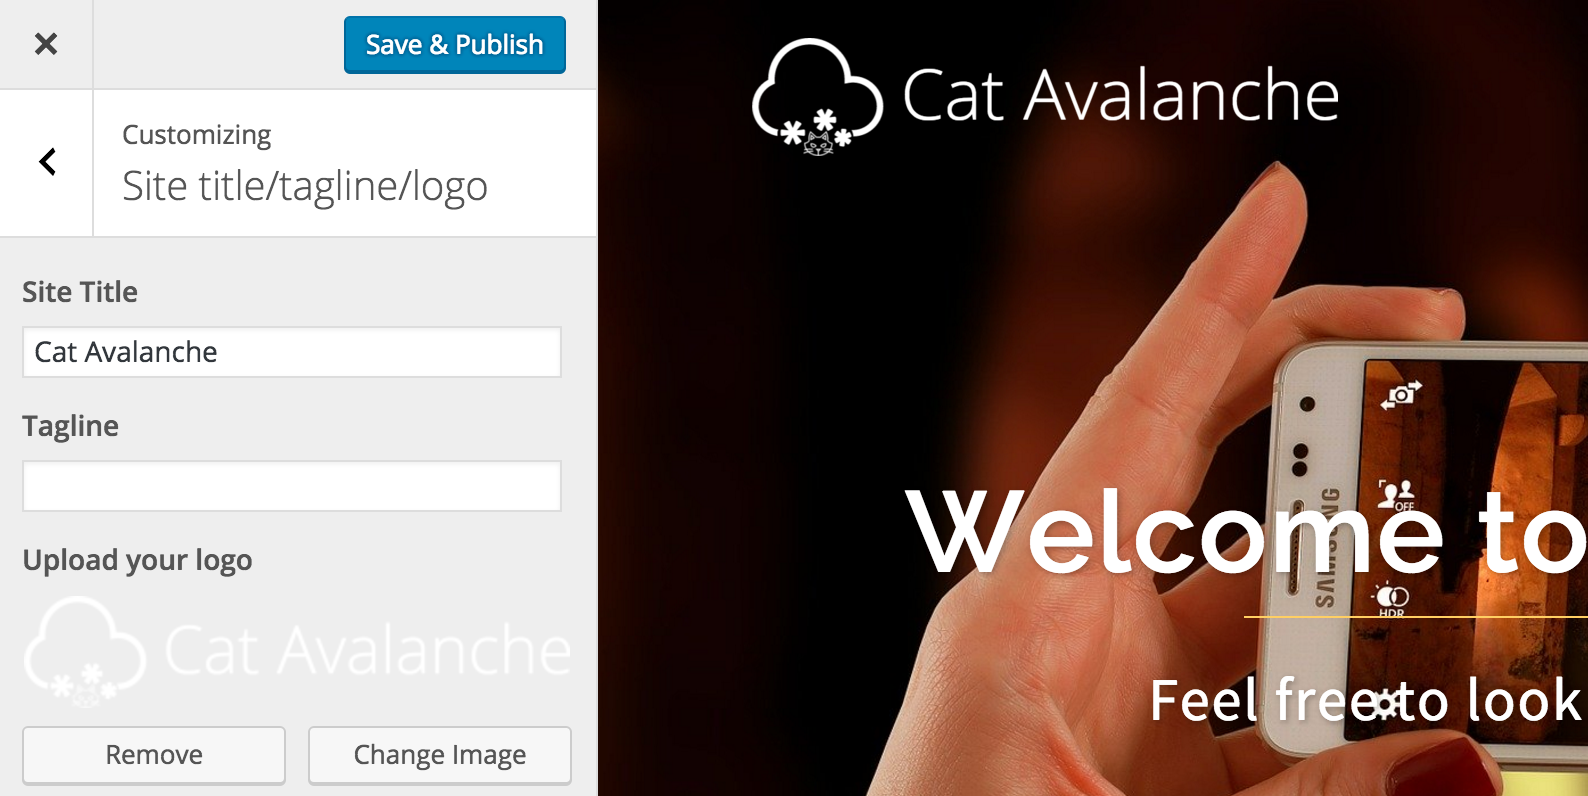
Title, tagline, and logo
Here's where you'll take care of your site's naming situation including its title and tagline (also accessible within your General Settings). Personally, I'm not a big fan of taglines unless you absolutely need an extra line of copy to describe your site. You can add it in this customization pane if so!
Simple logo upload is a feature many WordPress themes offer, which is lucky considering that one of the band's criteria was to have their logo in the top left of the website.
In theory, a client would've supplied you with their own logo, but since Cat Avalanche doesn't actually exist (shhhh, don't tell!) I made a logo using Logomakr. Knowing how to make a logo is a useful skill.
The Halloween and Snow Cloud graphics in the logo are by Freepik from Flaticon and are licensed under a CC BY 3.0.
Header area
There are 4 sections to this customization part! We'll look at header layout options and everything that comes with them. In the Sydney theme, the header is a major part of the site visuals, and you'll see shortly how to make that pack a real punch.
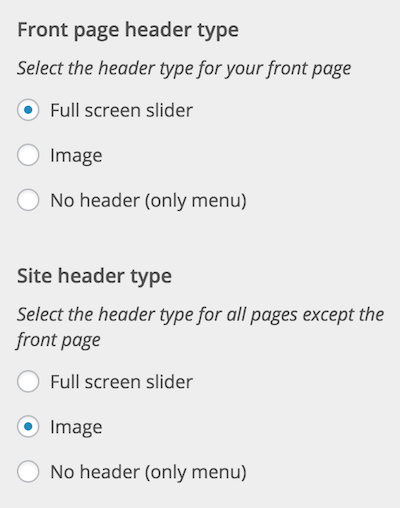
Header type
Here's where you set each page's main look, whether it's a full-screen slider or a simple but elegant header image up top. I'll leave the defaults: a full-screen header for our front page that has sliding content (since it's all the rage) and a static image at the top of our other pages.
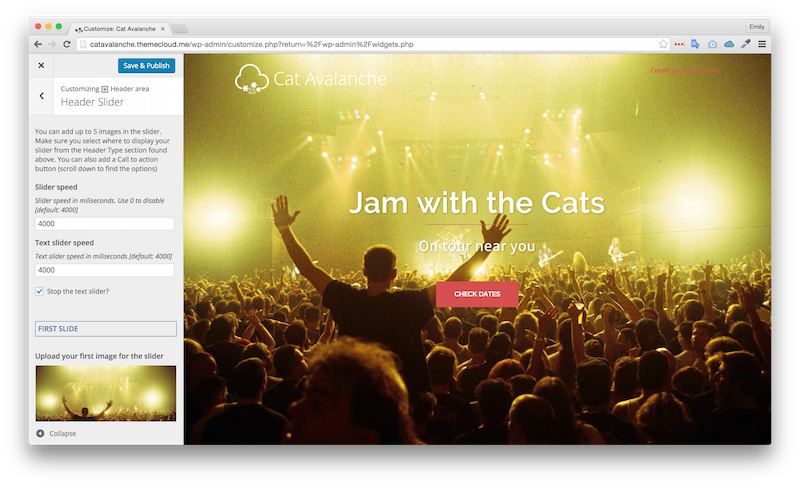
Header slider
As the band only sent us two big HD photos, we'll have a big full-screen slider on the front page for ultimate visual effect. 😎 I'm going to leave the timing defaults but could modify the number of milliseconds if I wanted the photos to change more slowly/quickly. Checking "Stop the text slider" will prevent the text from changing with each slide. Image dimensions of sample image are 1920x1275, but Sydney will adjust whatever image you upload so it'll look good!
Now's the time to also set the text for both sliders. At the bottom, you can also set a call to action button. Since my band's most interested in publicizing their tour, I'll make the button a link to the tour page.
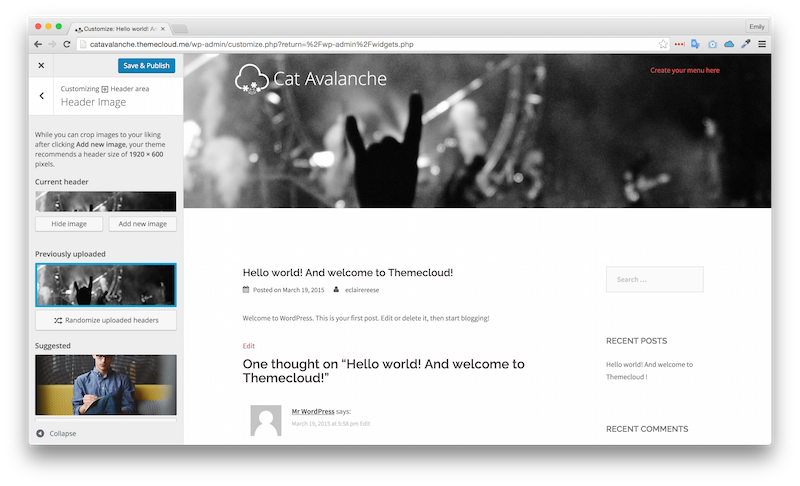
Header image
Many themes will offer you at least 2 different types of layouts that you can apply to pages depending on their content. In Sydney's case, they offer us the above dynamic slider situation as well as a well-designed static choice. The Header image tab is where you customize this other type of layout.
I've used the black and white photo the band provided me for a versatile header.
Footer
Do you think of footers as afterthoughts? Think again! A clean, simple footer is your last chance to offer other pages on your site or present crucial content before a reader gets too lazy to scroll back up, and fortunately WordPress makes footers an integral part of every page. When dealing with large site chunks like headers, footers, and sidebars in WordPress, you should think of their composition as an assembly of content blocks called widgets.
In the Sydney theme, the footer customization tab doesn't ask you to add specific content but only to indicate how many widgets (content sections) you'll have. A list of site pages and some contact information would make a nice footer, don't you think? To include those two elements, I'll select two widgets here and add them later in the flow.

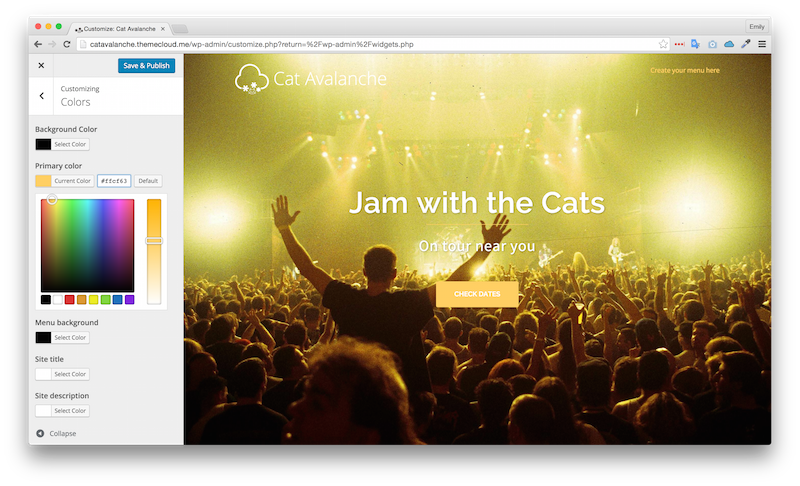
Colors
All WordPress themes will allow you to change their color schemes, whether through the editor (HTML or CSS) or directly in the theme customizer. How do you select the right colors though?! If you already have images you're using as part of the site you're building, you should select colors that complement the featured images. Alternatively, if you're building a website for a company, make sure you ask what their defined color palette is; they'll usually know the HEX codes (6 digit color codes starting with #) used in their logo and graphical elements!
Since Cat Avalanche gave me some cool photos to use on the site, I'll quickly open Photoshop and select a yellow from within the first image to use as my "Primary color." #ffcf63 looks good and matches the photo!
I've also set the Background color to black, but this makes the space around the text a little tight in my opinion. This is something I can change in the editor in the next chapter!
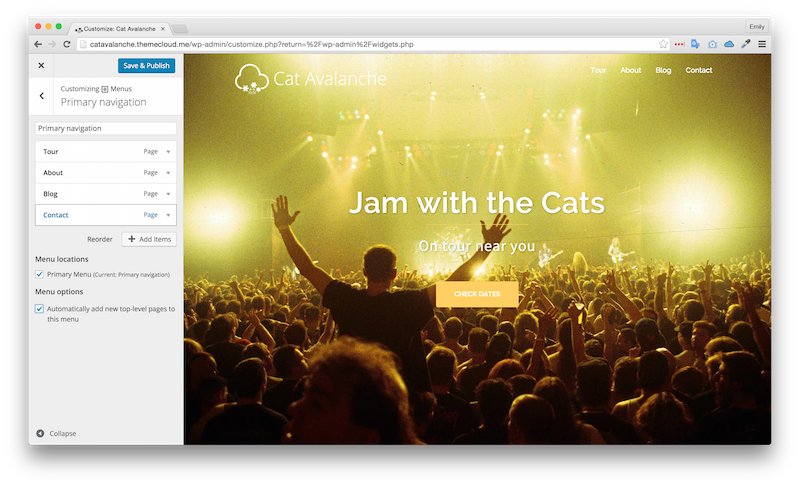
Menus
From the Menu customization tab, I can add a menu and call it Primary navigation. From there, I'll "Add item," select Pages, and individually add all the pages I want in my upper navigation. I'll check the box to make this my primary menu, which will automatically add it to the top of my site! When adding your own menus, drag and drop to reorder the menu elements left to right.
It's also possible to automatically add upper-level pages to this menu by checking the second box.
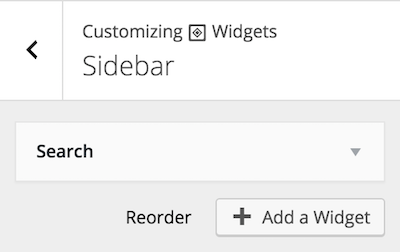
Widgets
The Widgets section will, in general, let you divvy up what your widgets are and where you're putting them. My first option in this menu is Sidebar. Personally, I'm a fan of minimal or nonexistent sidebars. I can remove all the existing elements one by one from the Sidebar list, especially since the default blog-related functionalities aren't pertinent for my client, who wants more of a general site.
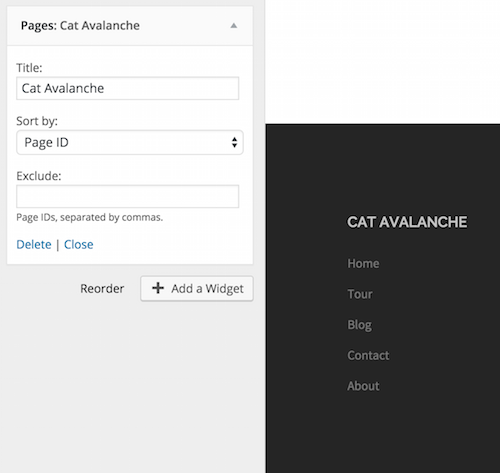
Next up, do you remember above how we discussed thinking of adding content blocks to site chunks like the footer? Now you can actually add the content blocks you want. In this menu, we have the footer available as a widget space. In Footer 1, I'll add a list of my pages with the title Cat Avalanche.
In my second footer widget (Footer 2), I'll select Text from the menu so I can add the relevant HTML:
<a href="http://twitter.com">Twitter</a> - <a href="http://facebook.com">Facebook</a> - <a href="http://instagram.com">Instagram</a></p>
<p><strong>Mailing address:</strong></p>
<p>9862 E. 14th St #7A</p>
<p>New York, NY 10014</p>
<a href="mailto:>catavalanchenyc@gmail.com">catavalanchenyc@gmail.com</a>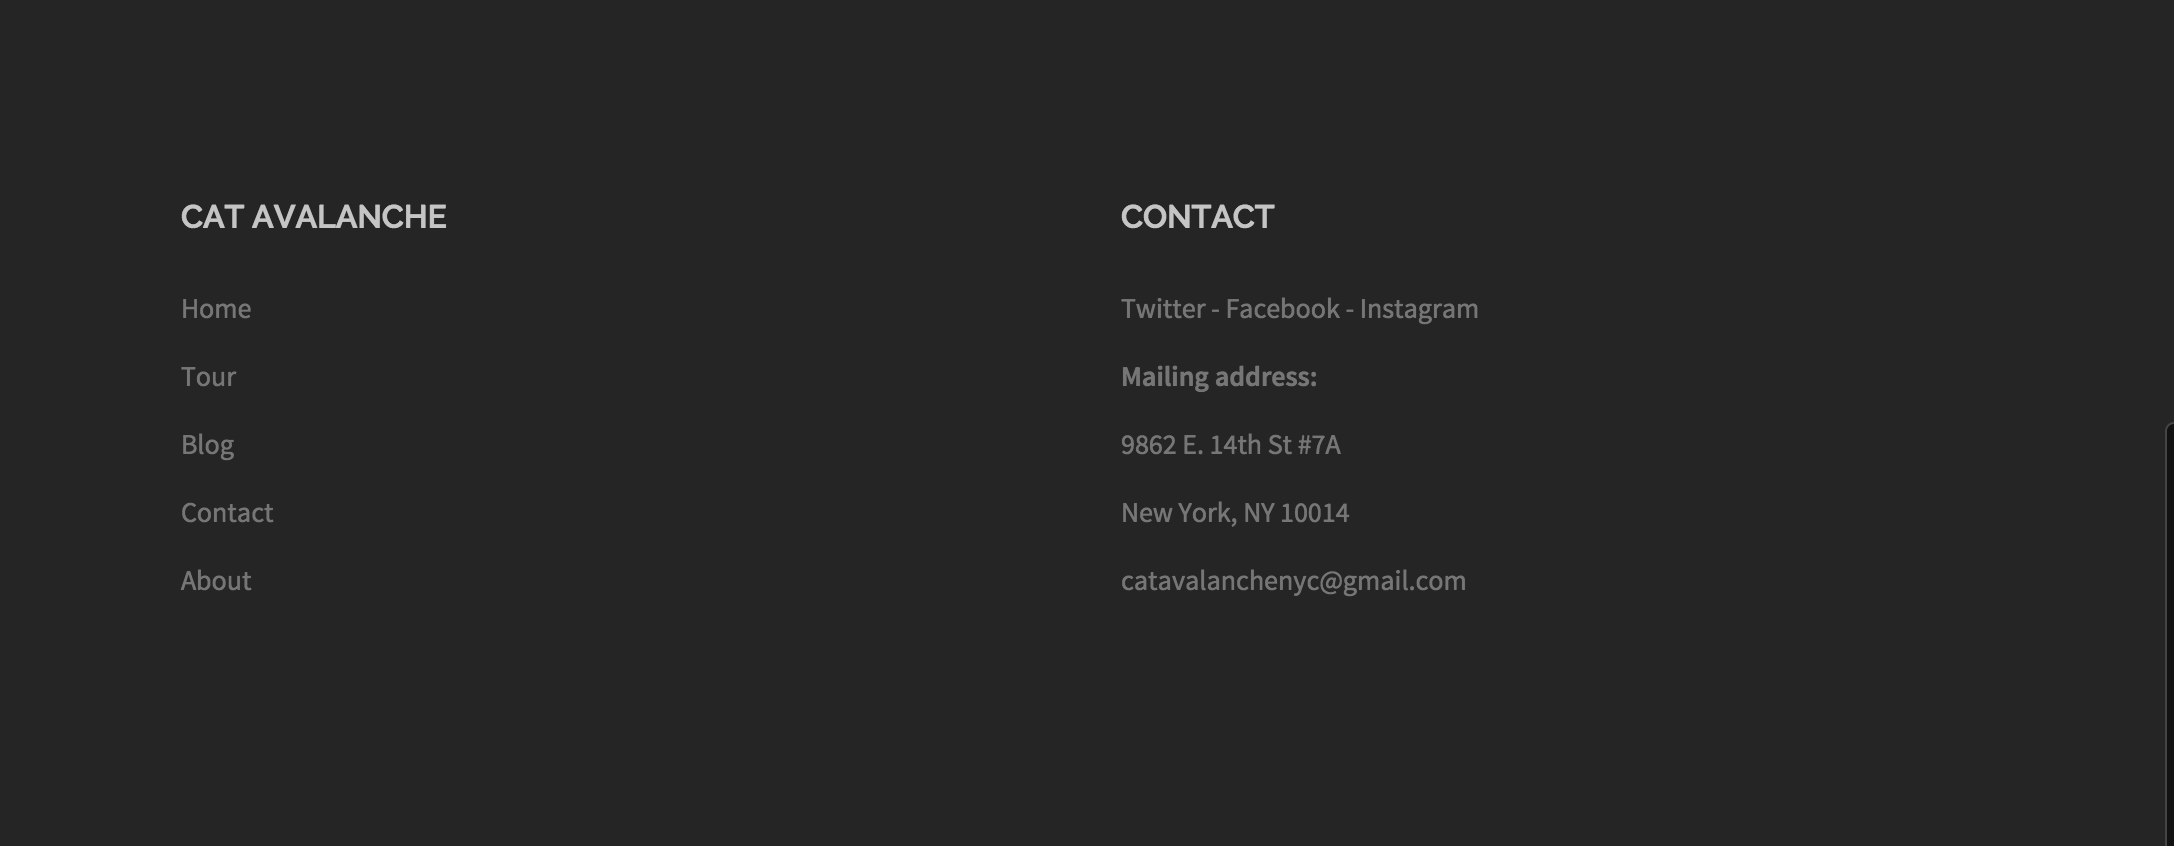
Nice footer! Here's a list of all the possible widgets you could include in a certain area of your site, like the footer or sidebar. It's up to you how you want to piece them together:
Archive: A monthly archive of your site’s Posts.
Calendar: A calendar of your site’s Posts.
Categories: A list or dropdown of categories.
Custom Menu: Add a custom menu to your sidebar.
Meta: Login, RSS, & WordPress.org links.
Pages: A list of your site’s Pages.
Recent Comments: Your site’s most recent comments.
Recent Posts: Your site’s most recent Posts.
RSS: Entries from any RSS or Atom feed.
Search: A search form for your site.
Tag Cloud: A cloud of your most used tags.
Text: Arbitrary text or HTML.
You've got a good base understanding now of how to customize a theme directly within the theme customizer. You'll see slight variations in the customizer depending on the theme you use, but the process will largely be the same. To get even more customized, we'll look at the theme's CSS next, as well as plugins to extend the site's functionality.
