Analyze Your Anomalies
Gather the Information
I’ve already found the defect now I have to investigate it. Isn’t that the Developer’s job?
When you discover defects during testing, it’s essential to make sure all useful information is collected and documented. You’ll then pass this information on to the Developer so they can fix the issue. Here are the steps to follow.
Record the steps that led to the defect
Start by writing down every step that led to the defect—from the beginning of the test to the moment the anomaly appeared. Note all actions performed, the values entered, the data manipulated, and any conditions present in the environment.
Capture as much information as possible
Collect error messages, screenshots, and event logs. These help Developers understand the defect and fix it more quickly.
Document the symptoms
Describe the unexpected behavior, error messages, displayed screens, log entries, or reports. Documenting all symptoms helps identify the root cause.
Take a screenshot
If possible, capture a screenshot of the defect. It will help verify reproducibility and support Developers when they investigate.
Identify the test data used
Document the test data used to make the defect appear: input values, configuration values, default settings, etc. This data will help reproduce the issue later.
Provide a clear, concise description
Write a simple, precise description of the defect. Avoid technical jargon that may make the issue harder to understand.
Following these steps ensures high-quality information is shared with Developers, enabling faster fixes and higher software quality.
Reproduce the Defect
Reproducing a defect is a crucial step in resolving it. Here’s what to consider:
Understand the conditions under which the defect occurred: Gather details about the usage context, actions taken, data used, and environment settings.
Repeat the exact steps: Once you understand the conditions, follow them precisely. It’s best to perform this in an isolated test environment to avoid side effects.
Verify reproducibility: Confirm that the defect appears again under the same conditions. Make sure the same symptoms are observed.
Document the reproduction steps: Clearly record how you reproduced the issue. Developers rely on this to understand and address the problem.
If the defect cannot be reproduced, it may be intermittent or dependent on specific conditions. Adjust test conditions or try different data sets.
If it still cannot be reproduced, it may not be a valid defect (e.g., due to test environment, data, or configuration issues). Still, document everything and share it with the team so Developers can investigate.
Get Started With Postman
To analyze a defect, you often need to investigate communication between components. Tools like Postman or Swagger make this easier.
Postman is an API testing tool used to test web services. Swagger also lets you document and test APIs. In this chapter, we’ll focus on using Postman to analyze defects.
Installation and Setup
Download and install Postman on your computer. Then configure any required authentication or proxy settings.
Create a request
To analyze a defect with Postman, create an HTTP request. Choose the request type GET, POST, PUT, or DELETE and specify the web service URL.
Send the request
Click “Send” to submit the request. If everything works, the server will return a response.
Analyze the response
Inspect the response to understand what happened. You can display raw text or formatted JSON. You can also view the response headers (content type, encoding, language, etc.).
Save your requests
Always save the requests you create Postman’s history makes them easy to reuse.
Once Postman is installed, you’re ready to continue the Course! 😉
Find the Root Cause With Postman
Swagger is used alongside various open-source tools to design, create, document, and use web services.
While Swagger sometimes allows direct API testing, Postman is still essential for deeper investigation.
Use Swagger to identify which endpoint to call, then create the same request in Postman. This lets you simulate communication between two components and verify both the request and the response.
What is an endpoint?
Here’s how to use Postman to analyze an API defect:
1. Gather information: As described earlier.
2. Identify the relevant API operation: If the API is documented in Swagger, it’s easier to locate the operation associated with the defect.
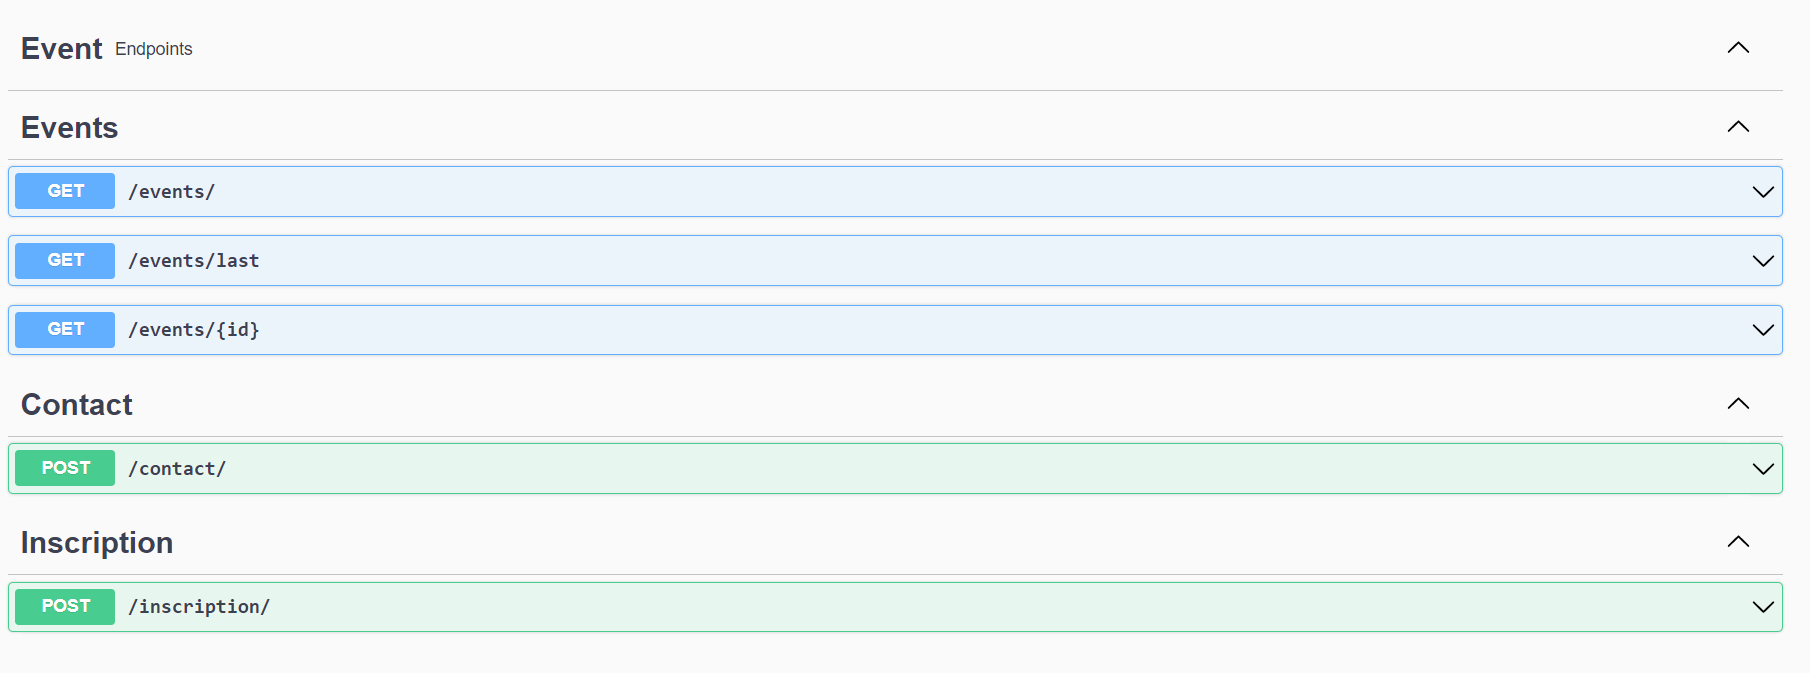
3. Test the operation: Use Swagger or Postman to call the endpoint. Enter the required parameters and verify that the response matches expectations.

4. Check for errors: If the API returns an error, review the associated error messages and HTTP status codes.
5. Use sample data: Swagger often provides example data for each operation. Use these examples to verify expected API behavior.
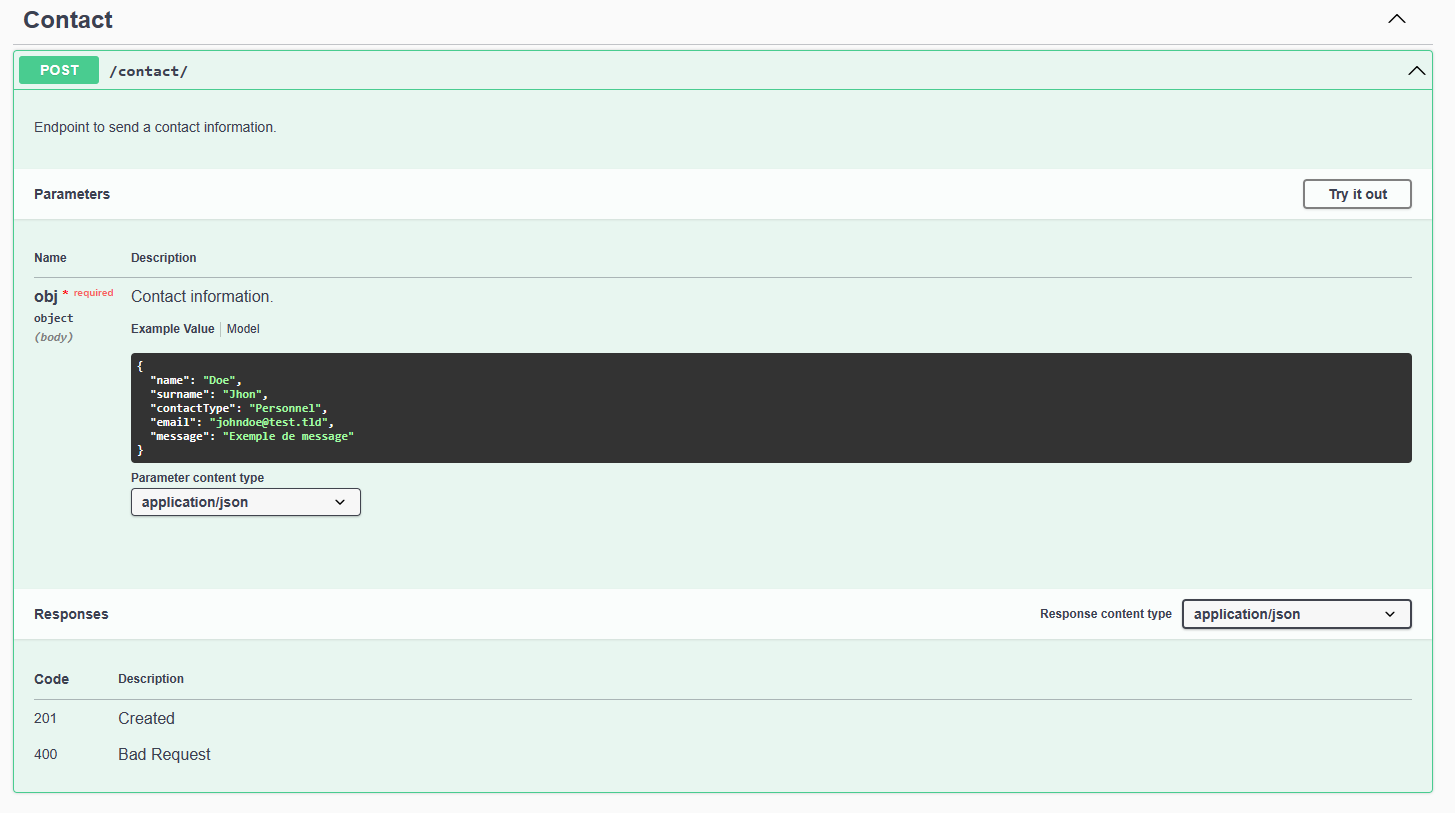
6. Compare with documentation: Compare actual results with documented behavior. Note any discrepancies.
Using Swagger in combination with Postman helps you quickly test API operations and identify the source of defects.
Over to You!

Using Swagger as your starting point, test the request that retrieves an article.
The Swagger UI is available at:
localhost:8081Find the endpoint
/posts/{id}.Run a test directly in Swagger with ID = 5.
Then create the same request in Postman.
Verify that both tools return the same result.
Summary
Before analyzing a defect, collect all relevant information.
Make sure the defect can be reproduced.
Postman lets you test communication between components through APIs.
Postman and Swagger help you understand how those components interact.
You now have the tools you need to analyze defects. Next, let’s look at how to report them in a tracking tool.
