Reuse Your Components With Props

You’ll have understood by now that reusing components is at the very heart of React’s logic. However, to be reused, components often require configuration, which is where props come in. 🥳
Discover the Props Syntax
Do you realize that you've already used a prop? That’s right – the key prop in the chapter on lists! So you’ve seen the syntax.
Let’s go back to our plant site. We’re now going to create a new component that we’ll reuse. The idea is to create a water scale and a light scale for each plant.
We’ll reopen ShoppingList.js and add the relevant data in plantList:
waterdata, which corresponds to the recommended amount of water for each plant.lightdata, which corresponds to the amount of light required.
Starting with light, in each plant item, add a CareScale component to which we’ll pass the value prop:
<CareScale scaleValue={plant.light} />But hold on, how do we get the value of a prop into our component?
You get props from the parameters of the function that defines your component.
So, for CareScale , you have:
function CareScale(props) {
    const scaleValue = props.value
    return <div>{scaleValue}☀️</div>
}

export default CareScale
But didn’t we say we wanted a scale from 1 to 3?
To do this, go for a list, which you can create manually.
You end up with:
function CareScale(props) {
    const scaleValue = props.value

    const range = [1, 2, 3]

    return (
        <div>
            {range.map((rangeElem) =>
                scaleValue >= rangeElem ? <span key={rangeElem.toString()}>☀️</span> : null
            )}
        </div>
    )
}
Congratulations! You’ve just used props!
Props are objects that you get from the parameters of your function component.
Let’s take this concept a bit further to configure our component fully.
Create Parameters
Start by specifying a type prop for the CareScale component and then reuse this component for both water and light:
<CareScale careType='water' scaleValue={plant.water} />
<CareScale careType='light' scaleValue={plant.light} />
Now adapt the CareScale to get the careType .
We can now configure the CareScale component so it can generate the data for water and light:
function CareScale({ scaleValue, careType }) {
    const range = [1, 2, 3]

    const scaleType = careType === 'light' ? '☀️' : '💧'

    return (
        <div>
            {range.map((rangeElem) => scaleValue >= rangeElem ? <span key={rangeElem.toString()}>{scaleType}</span> : null
            )}
        </div>
    )
}
As you can see, we used two different syntaxes for our props. For scaleType , we assigned a string between quotes. However, we gave scaleValue the value of an object, which we passed between curly braces.
In practice, you can give a prop any possible value in JavaScript, but syntactically, in JSX, you only have two options:
A
Stringliteral, marked by quotes.Curly braces
{}for everything else (boolean, number, JavaScript expression, etc.).
Manage Data Flow From Parent to Child
So props allow you to configure your components. They respond to the React logic, according to which data descends through your tree of components in a one-way data flow.
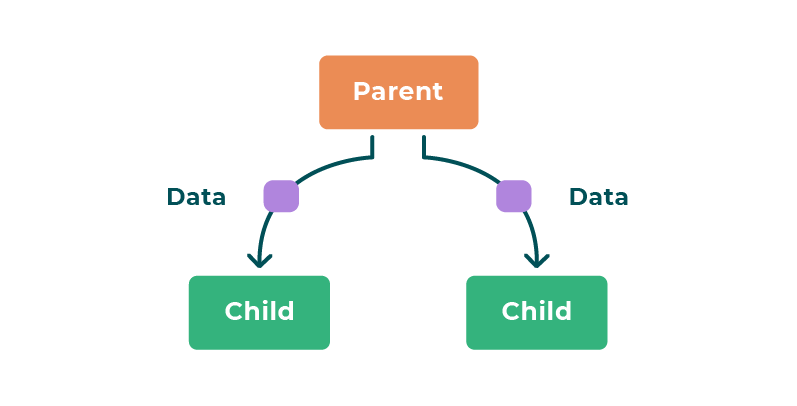
Did we mention parent and child components in the first part?
As you probably suspected, a component is the child of the component in which it was defined in the return() .
In our example, CareScale is the child, and ShoppingList is the parent.
For props, there are two rules you have to follow:
A parent component always passes a prop to its child: this is the only normal route of transmission.
A prop is read-only in the component that receives it.
Use the Children Technical Prop
Some React props behave in a slightly peculiar manner. These are called technical props.
The children prop has slightly unusual syntax, as it is not provided using an attribute but rather by nesting components within the relevant component.
So you have:
<Parent>
    <Child1 />
    <Child2 />
</Parent>
For example, if you use children to rewrite the Banner in App.js , you get:
<Banner>
    <img src={logo} alt='Jungle House' />
    <h1 className='jh-title'>Jungle House</h1>
</Banner>
Here, Img and h1 are the child nodes in the Banner DOM.
You can access these Banner child nodes in the parameters, similar to the way you get props:
function Banner({ children }) {
    return <div className='jh-banner'>{children}</div>
}
This way of using children is particularly useful when a component does not know its children in advance, e.g., on a sidebar or a modal.
To help with this, React has created PropTypes, which you can use to specify the type of prop from the very start, if required, and assign it a default value. We won’t study these in this course, so take a moment to look at them.
Give It a Go!
 It’s time to use what you’ve learned to improve our plant shop site. 🌱 You can find the code for starting this exercise on branch P2C4-Begin.
Create a PlantItem component, which will be a child component of ShoppingList.
PlantItem takes the props:
namefor the plant name.coverfor the corresponding image.id, which corresponds to the item for each element.light.water.
The name and cover will be used directly in PlantItem.
light and water , which we have already created together, will be passed to the CareScale component in PlantItem .
In styles/PlantItem.css , you’ll find the CSS classes jh-plant-item-cover and jh-plant-item , which will help you create good-looking components. Also, replace our emojis with the icons sun and water , which you can find in /assets .
You’ll find the solution on branch P2C4-Solution.
Let’s Recap!
Props are objects that you can get from the parameters of your function component.
There are two syntaxes for assigning a value to a prop:
Quotes for
string.Curly braces for everything else (names, JavaScript expressions, booleans, etc.).
Destructuring is a syntax that you can use to declare a variable by giving it the value of an object (or array).
A prop is:
Always passed from parent to child component.
Read-only in the component that receives it.
The
childrenprop is entered by nesting children in the parent: <Parent><Child/></Parent>.childrenis useful when a component doesn’t know its children in advance.
Our plant site is starting to take shape! But don’t you think it’s all a bit static? There isn’t much opportunity for interaction, is there? No problem, because that’s what we’ll tackle in the next chapter. See you there!