Prepare Your Work Environment
In the previous chapter, we dealt with all aspects related to defining the scope of testing. Now we need to prepare ourselves so that we’re ready to roll on the first day of the pentest.
As Abraham Lincoln once said:
“Give me six hours to chop down a tree, and I will spend the first four sharpening the ax.”
Learn About Penetration Testing Tools
Penetration testing is nothing new, and generally speaking, offensive tools are evolving faster than defensive ones. For some years now, there have been operating systems designed specifically for the purpose of attacks. These all-in-one operating systems include most of the tools you’ll need for pentesting:
Kali, a Linux distribution based on Debian (one of the most widely used distributions according to DistroWatch rankings).
Parrot OS, also based on Debian, but a little less popular.
Commando VM, based on Windows, but not always easy to install.
Exegol, based on Kali, but it runs in Docker.
You could install the various tools you’ll need one by one into the environment you use day-to-day, but you’d lose the advantage of having a “disposable” work environment. However, the key is to have a ready-to-use environment, dedicated to one client, so that you don’t still have client A’s data in your tools’ logs when you visit client B, for example.
Install Kali, the Gold Standard Tool
Okay, so please now download the Kali virtual machine you want to use and install it on your hypervisor. (The default credentials for these ready-to-use VM images are kali/kali.)
The installation documentation that Kali provides is excellent, so we recommend that you refer to it for guidance.
Familiarize Yourself With the Kali Environment
Now that you’ve set up your environment and have logged in, you should see something similar to this interface:
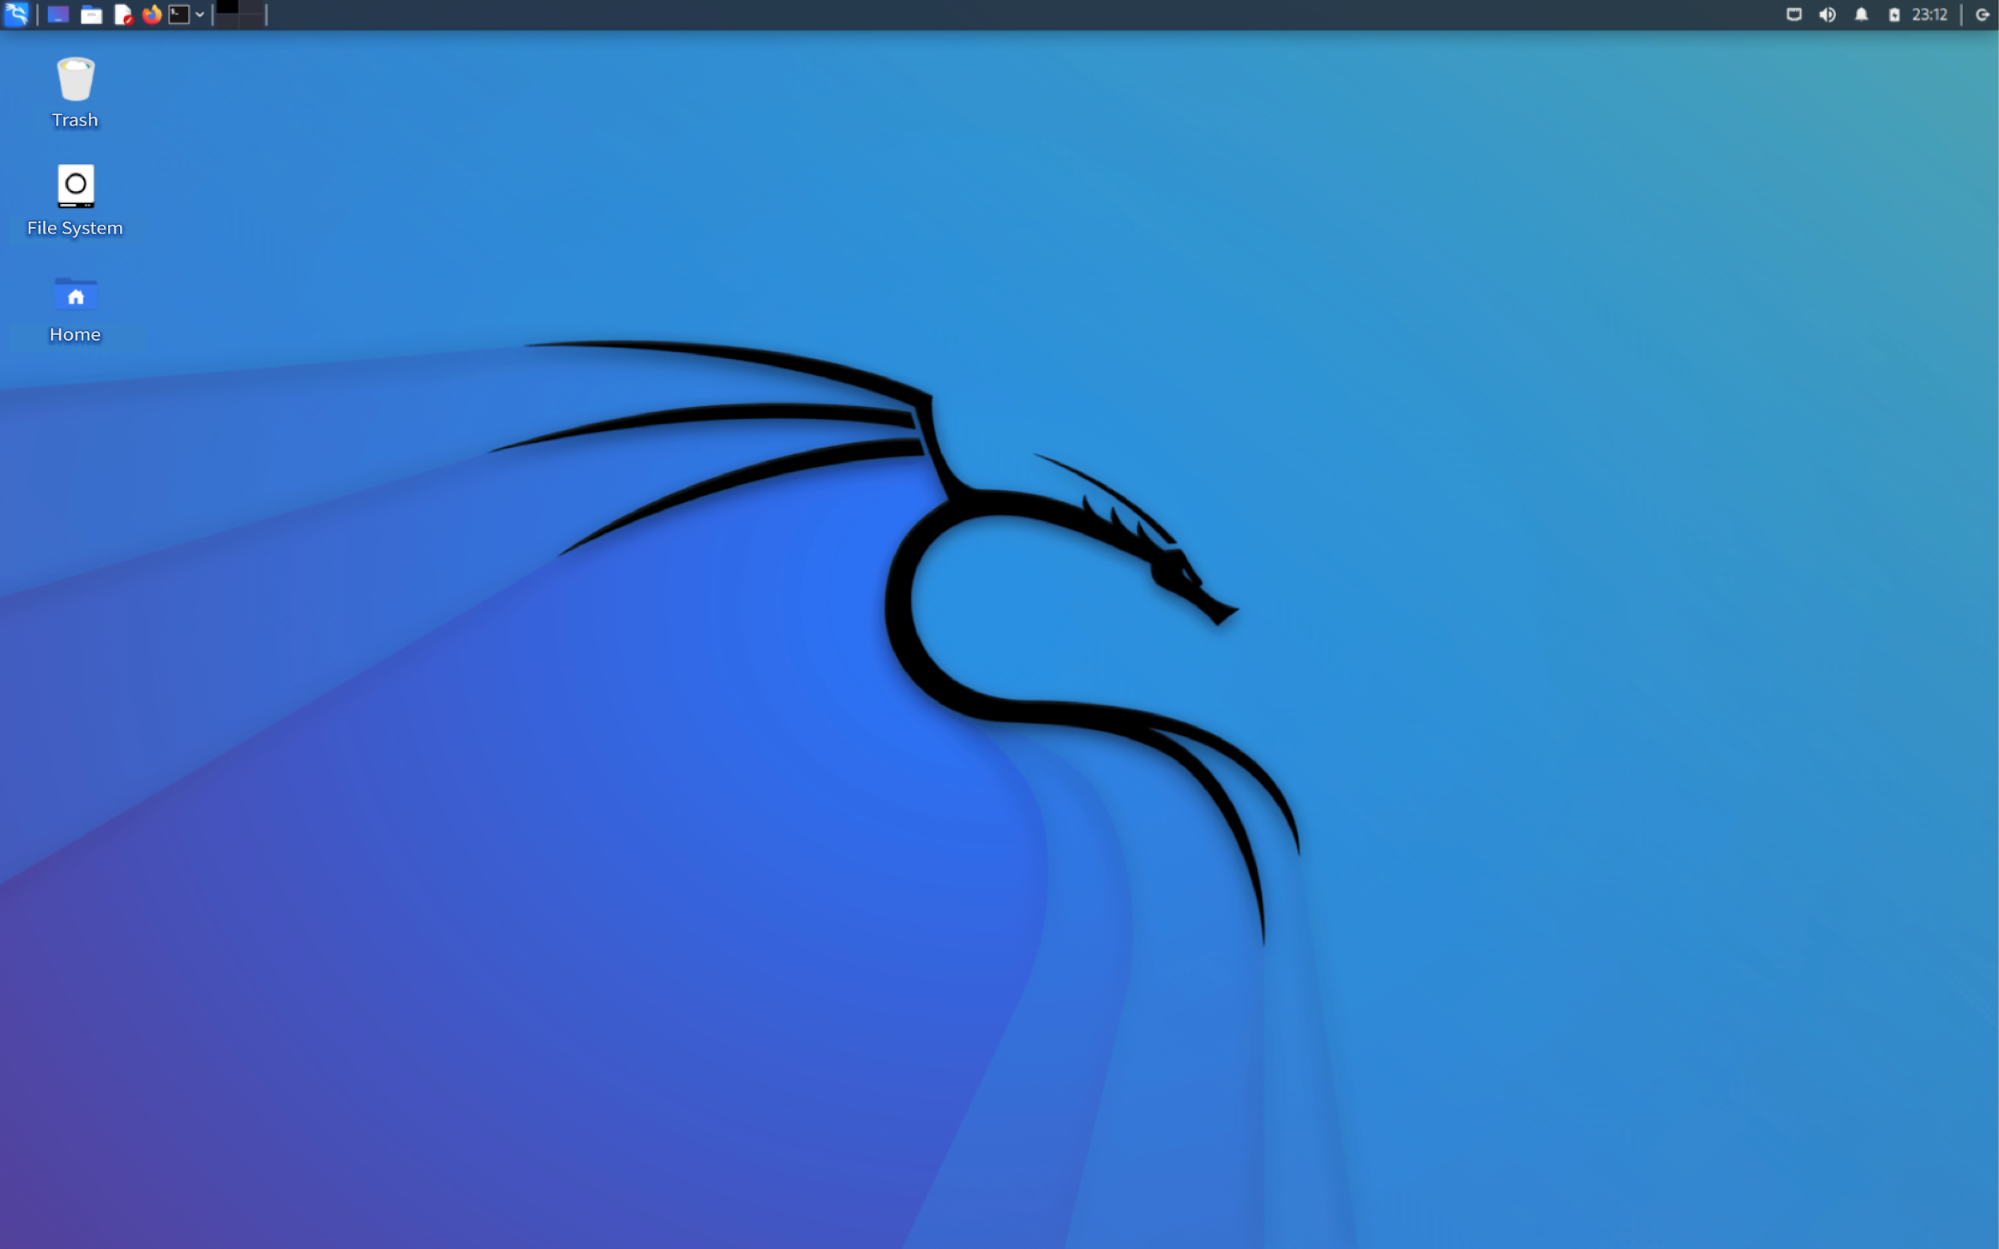
Getting to grips with Kali is a bit like getting to grips with a new operating system (when you switch from Windows to macOS, for example). It takes a little while to get used to it!
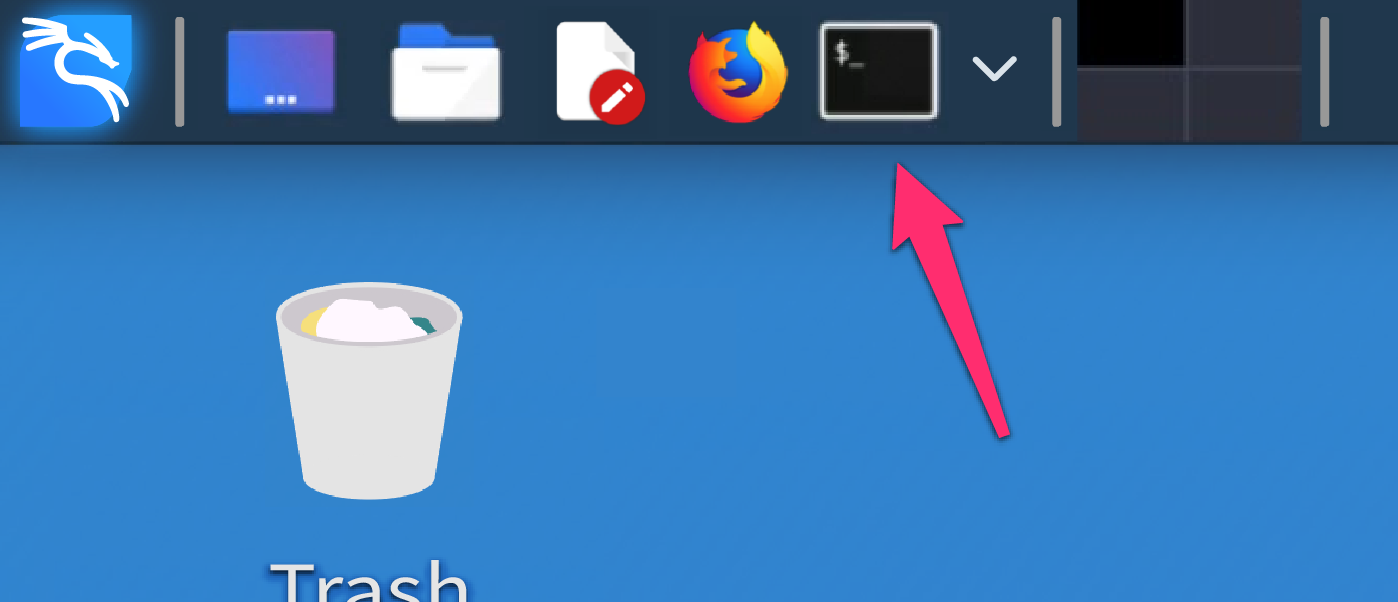
As you’d expect in a Linux system, we’ll be using the terminal and command lines quite a lot. The shortcut to the terminal emulator is in the toolbar.
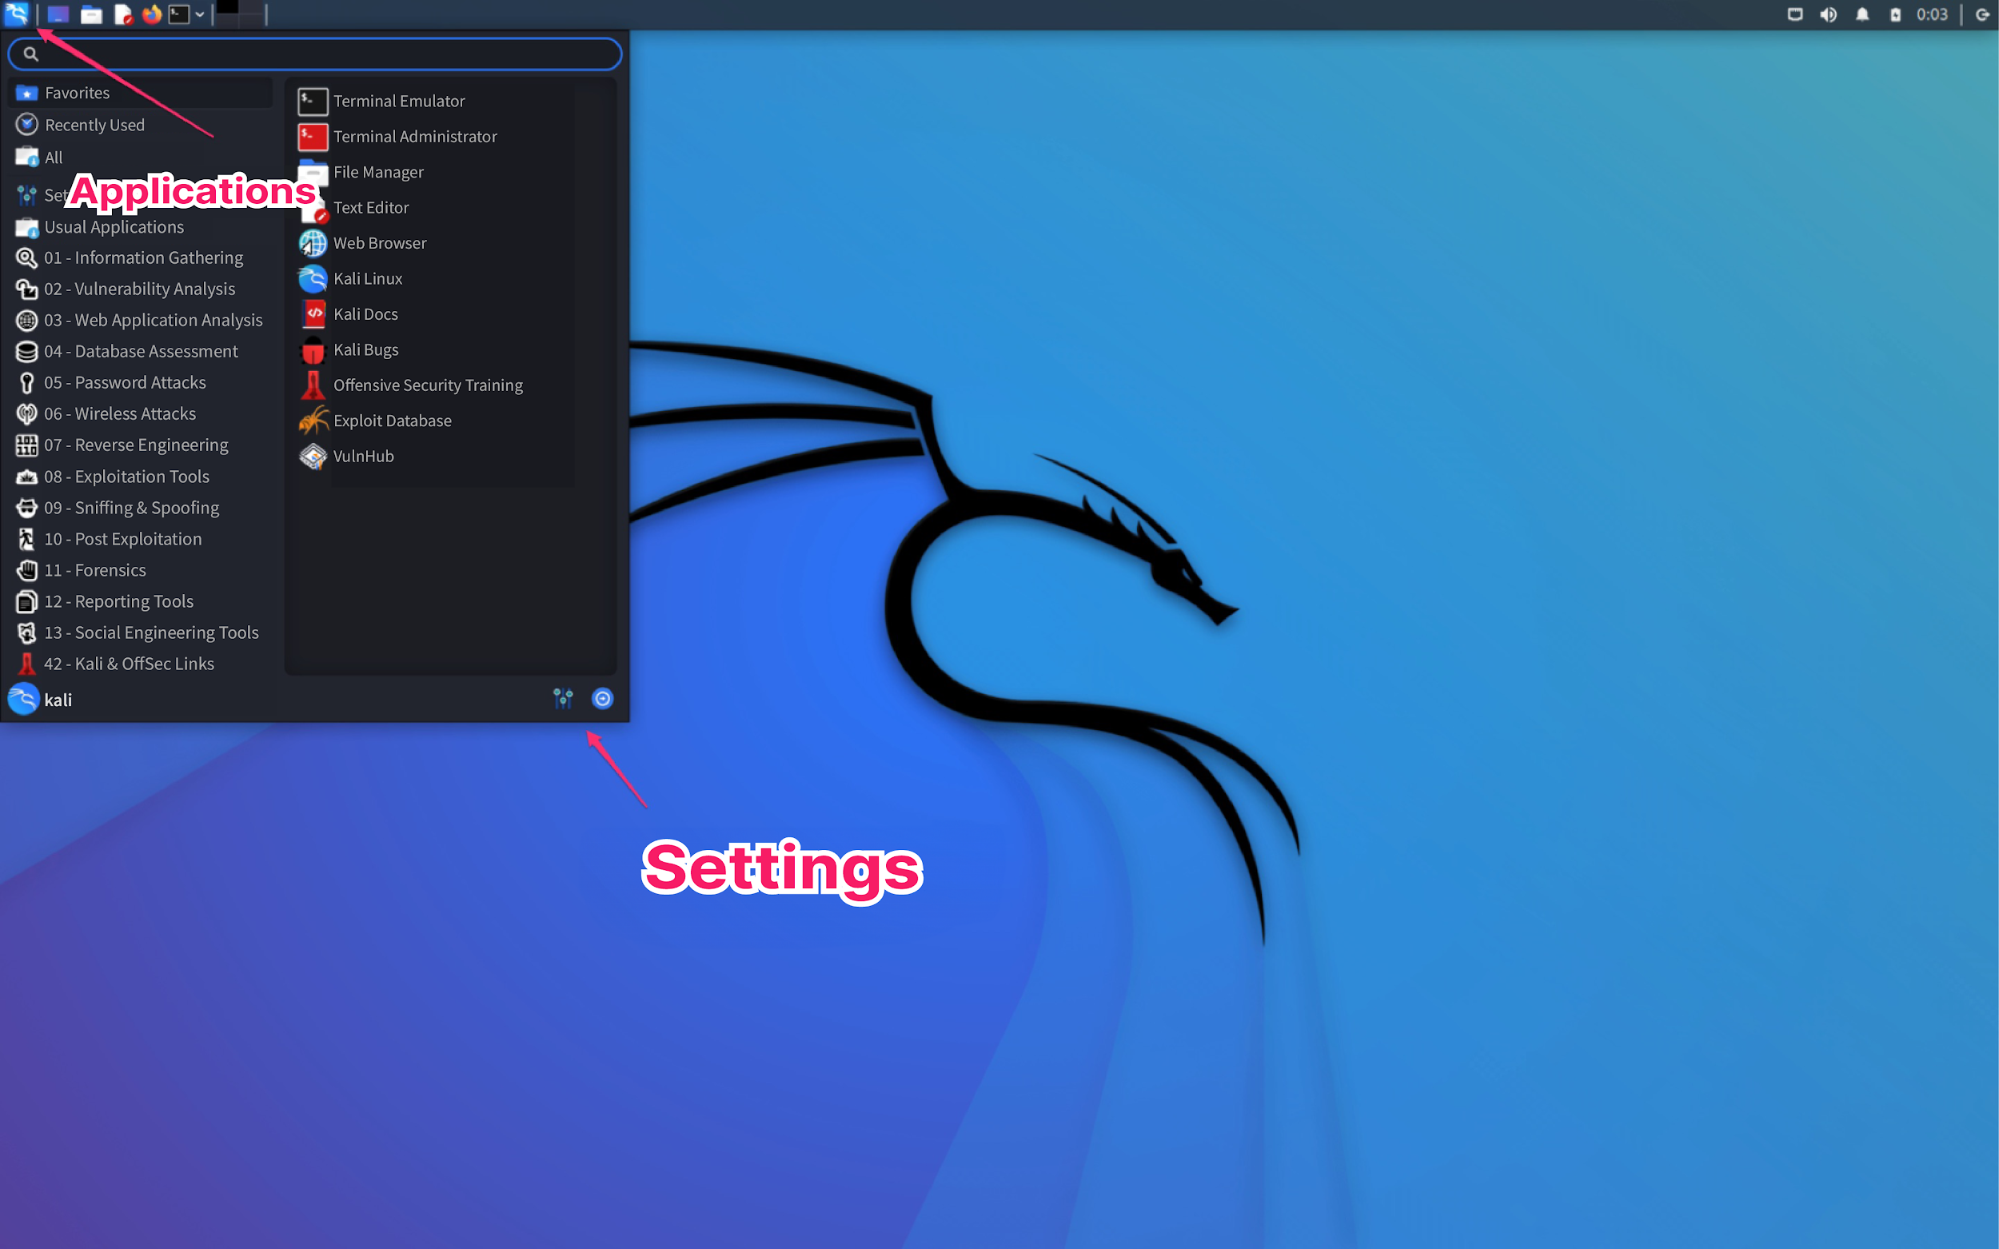
Kali “organizes” the applications installed by default in the top-left corner, in much the same way as the Windows Start menu:
Recognize the Limits of Tools
Just because you’ve installed a distribution designed for offensive security doesn’t mean you’re now an accomplished hacker. Unfortunately, there’s no quick and easy formula for this, but there are a few tips that we’ll be putting into practice:
Before unleashing all kinds of tools against your target, take a look at some of the functions from your browser or test them manually using terminal to see how the application behaves.
Familiarize yourself with your tools and make them your own. There are often multiple tools out there that fulfill the same need. Early on, you may be tempted to do the same job twice with two different tools. Once you’ve familiarized yourself with how a tool “normally” works, any abnormal behavior will jump out at you.
Understand why your favorite tool lets you down. This will give you an even better understanding of the tool and potentially uncover abnormal behavior in the application you’re testing, which could turn out to be a defense mechanism or a vulnerability. In any case, understanding why will help you.
Read the documentation! Sometimes, you may come across certain abnormal behaviors that are:
biases mentioned in the documentation.
issues on GitHub that have been marked as “won’t fix” or as a bug. Issues here are problems or complaints raised by users. The repository administrator then decides whether to fix them or not. It’s their tool, after all!
For the more determined among you, build your own tools. Existing tools just speed up the process, as we’ve already said. Developing your own tools will help you understand the underlying concepts they automate.
Let’s catch up with our pentesters to see where they stand on the use of tools and how they deal with problems:
Document Everything You Do
When you use tools to document what you do, you can:
keep track of what’s been tested, what worked, and what didn’t.
have a record of what you did when. If something goes wrong while you’re working for your client, you’ll be able to prove that it wasn’t you (if, of course, it wasn’t).
You’ll need to be very rigorous about this. You’ll need a tool for:
taking notes.
taking screenshots (or even recording videos for those sometimes complex screen sequences).
Take Notes
Pick a tool you’re comfortable working with: a word processor like Word or a presentation program like PowerPoint; Markdown files (e.g., the ReadMe file format used on GitHub); or a tool like OneNote. It’s up to you to choose the one that’s right for you, taking into account any constraints your company or client may impose.
Remember to note down the time of each action you take, especially those that could have an impact on the system. If any problems arise, you’ll be able to tell your client whether it was your fault or not. This will avoid having to trigger security incident management, for example.
Take Screenshots
Take lots of screenshots, even if you think they’re not particularly relevant. I’ve witnessed far too many pentesters saying to themselves while they’re writing their report, “Darn, I don’t have that screenshot to prove the vulnerability exists.” And I can assure you that, without evidence, it’s much more difficult to make your case to a client who insists there is no vulnerability.
Let’s Recap!
We’ll be using the Kali Linux work environment to carry out the technical tasks in this course, and you’ll use it more generally when you become a pentester.
Tools only speed things up, and they can let you down. Keep this in mind when conducting a pentest, and be on the lookout for unexpected behavior.
Note-taking is vital when pentesting because you’re going to be testing a lot of things. It will be very difficult to remember everything—and impossible to prove—if you haven’t taken any screenshots. Don’t make this mistake!
In the next part of the course, we’ll start the first phase of our penetration test: the discovery and reconnaissance phase. Ready? Then let’s get started!
