Organize Your Containers
This morning, Sarah sends you an unusually enthusiastic message:
We’ve just signed a new hosting partnership with MythiCloud! They’re providing us with machines equipped with cutting-edge SSDs! Exactly what we need to optimize Libra’s performance! Now we just need to figure out how to place the storage services on those machines…
You, of course, already know the answer: it’s time to optimize the topology of our containerized infrastructure!
Make the Most of the Technical Resources at Your Disposal
In a Docker Swarm infrastructure, nodes can have different specialties—storage, compute (HPC), or data processing. Maximizing your cluster’s efficiency requires managing these specialized nodes carefully.
For example, imagine:
Storage nodes: Some machines may have fast, high-capacity disks. These are ideal for deploying services that perform frequent read/write operations, such as databases or distributed file systems.
Compute nodes: Other machines may have powerful CPUs and large amounts of RAM. These are best for compute-intensive workloads such as video processing, scientific calculations, or large-scale data analysis.
Specialized nodes: Some services—like AI workloads or cryptocurrency tasks—may require specific hardware such as powerful GPUs or ASIC chips.
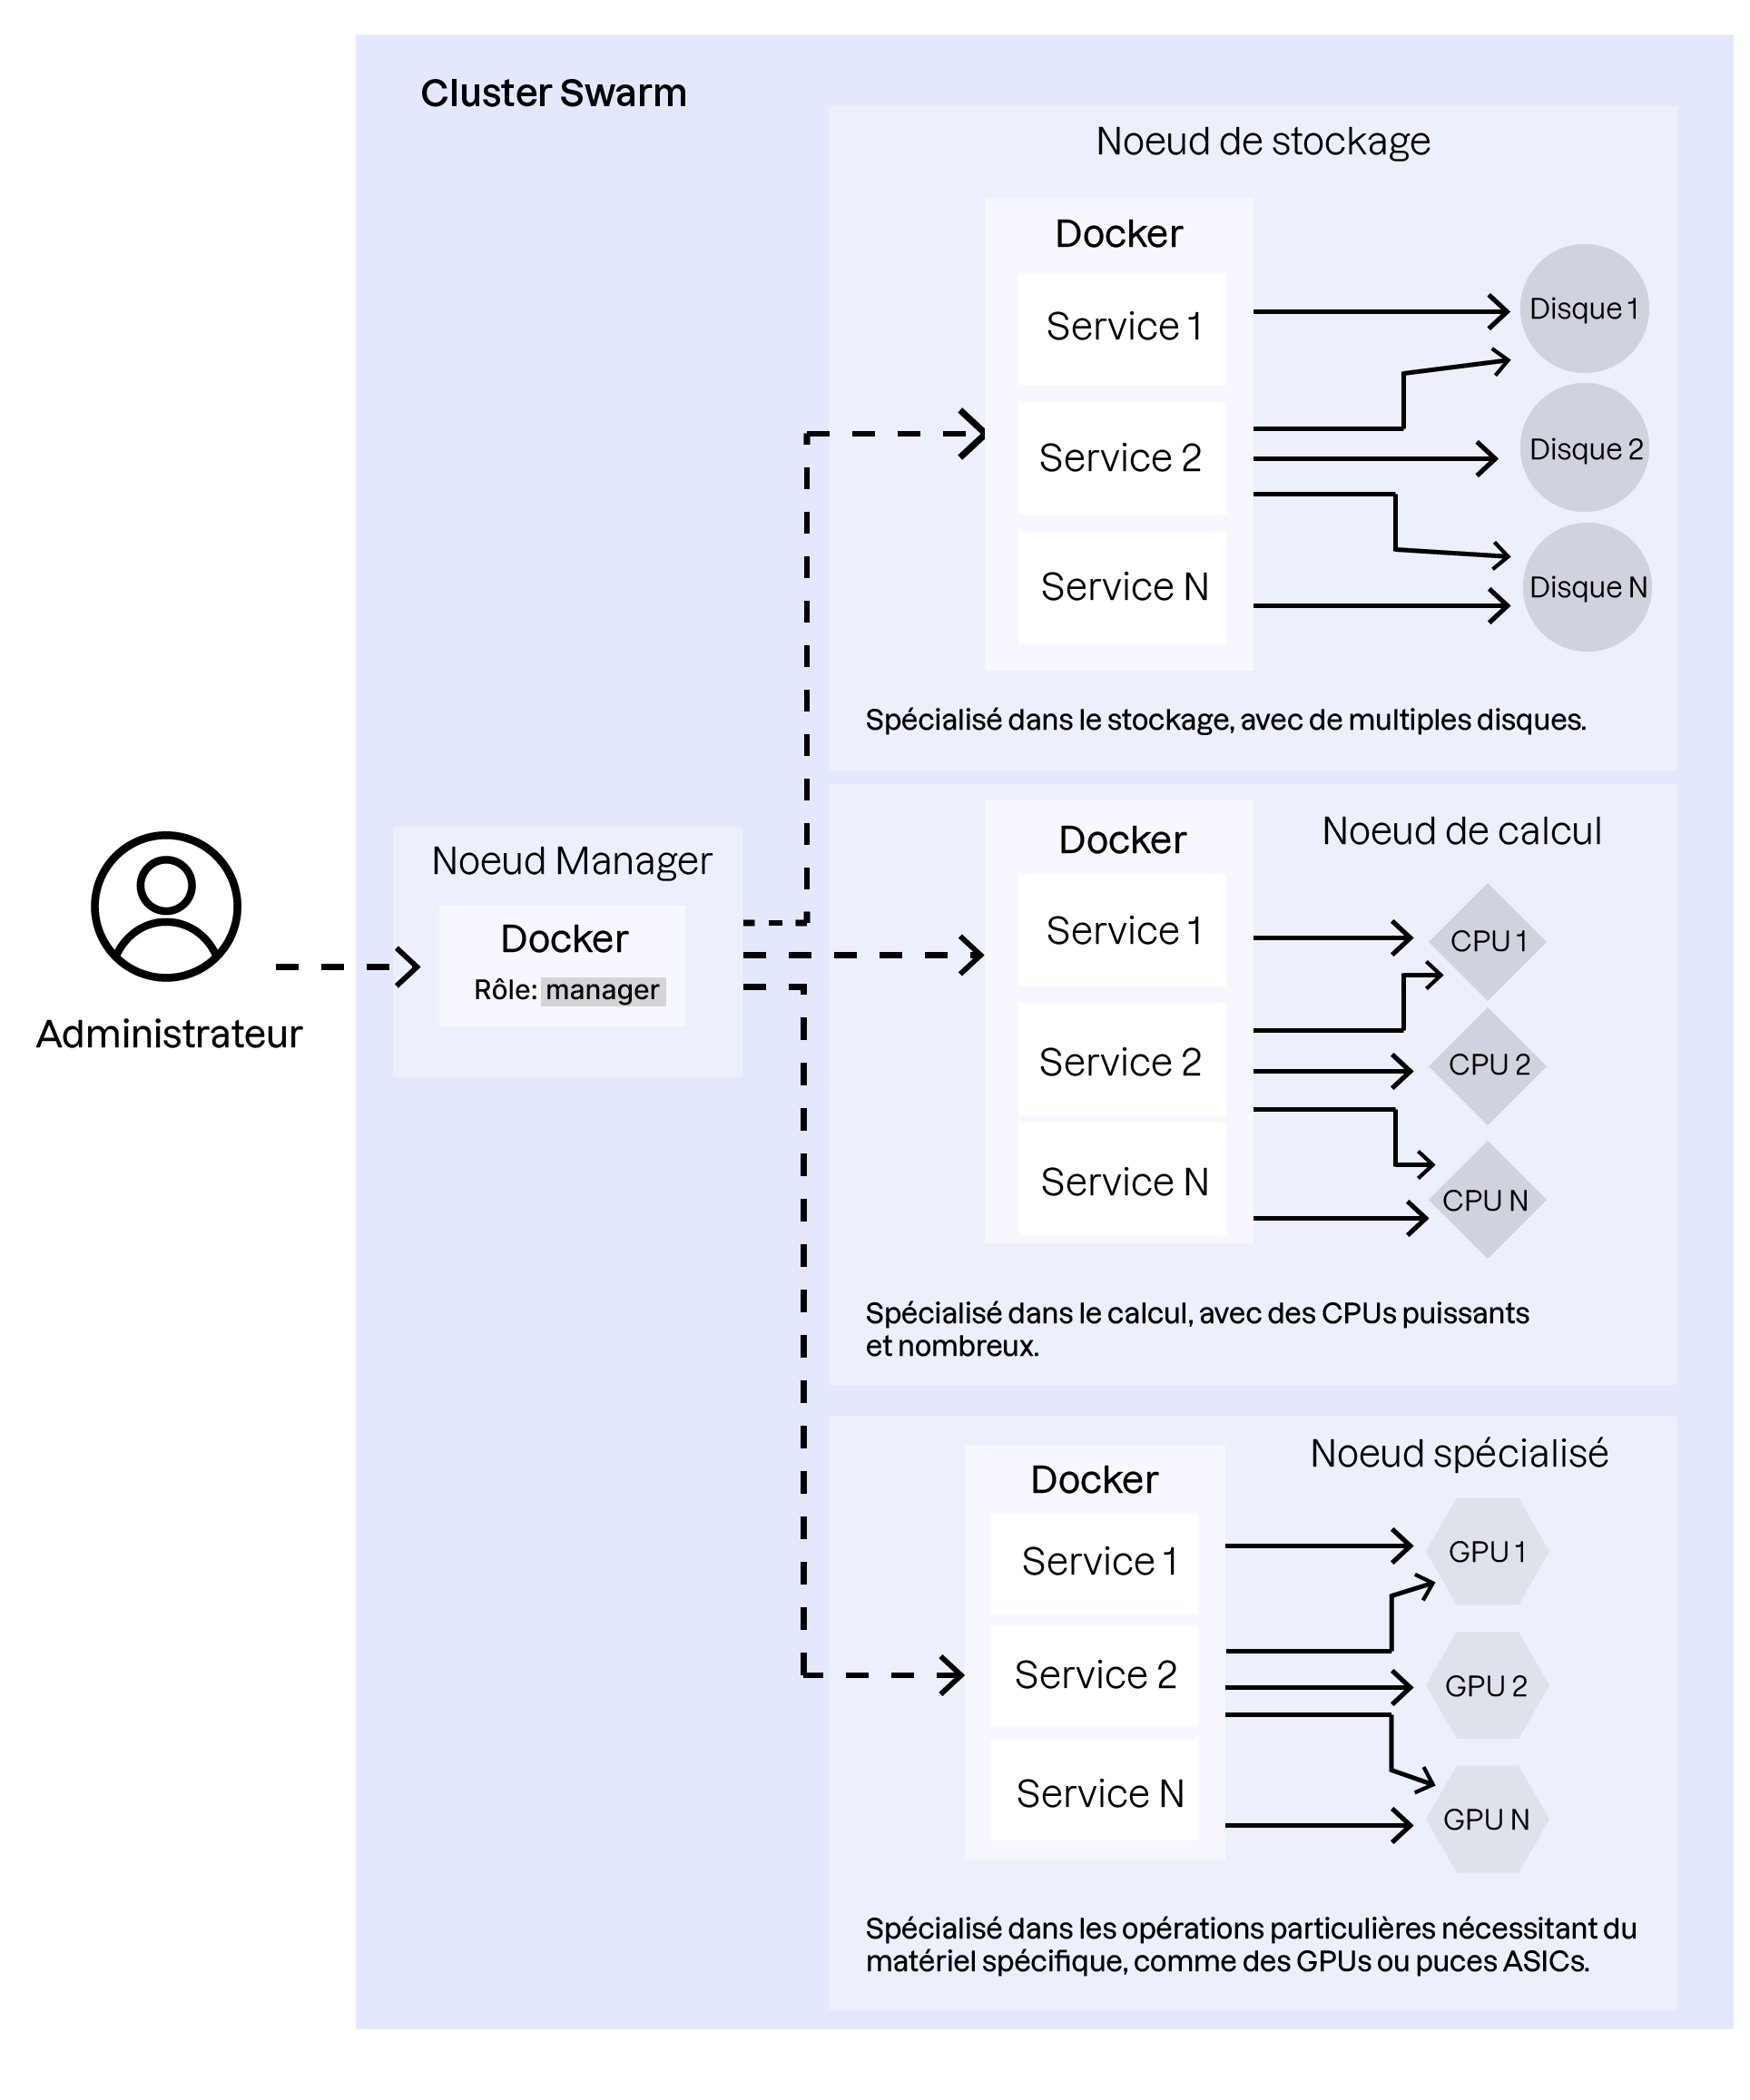
It’s essential to distribute containers according to their role so they run on the most appropriate nodes and achieve optimal performance.
Beyond specialized roles, keep in mind that a containerized environment relies heavily on its network layer, since containers communicate through it. This means you must also consider container placement to reduce the “distance” between services that frequently interact.
Fortunately, Docker Swarm provides mechanisms to help optimize container placement: node labeling and placement constraints.
Create a Strategy for Labeling and Distributing Containers Across the Cluster
Controlling node labels and placement constraints is central to optimizing communication times between containers that need to interact frequently.
For the Libra application, for example, it makes sense to place application containers and file-storage services near one another to improve responsiveness.
Let’s look at how to implement this type of placement strategy.
In this video, we saw:
How to assign labels to the different nodes in a Docker Swarm cluster
How to create placement constraints on Swarm services so their containers run only on nodes that meet those constraints
How to apply updates to a Swarm stack and visualize how the cluster topology evolves after applying constraints
To fully master container placement within a cluster, it’s essential to understand Docker Swarm’s network abstraction layer. This is what allows you to take full advantage of the platform’s capabilities.
Master the Docker Network Mesh
As we briefly saw in the introduction to Docker Swarm, the network mesh enables seamless communication between services deployed on different nodes. It’s a virtual network interconnecting all service containers, allowing them to communicate without complex networking configurations.
To recap, Docker Swarm’s network mesh provides several advanced features:
Overlay network: Overlay networks allow containers on different hosts to communicate. These networks are created automatically and span the entire cluster.
Service discovery: Containers can reach other services by name. For example, a service called
webappcan be accessed usingwebappwithin the overlay network.Load balancing: Built-in load balancing automatically distributes traffic across service replicas.
Let’s take a closer look at these features in the following video:
In this video, we saw:
The service-discovery mechanism and automatic load balancing across replicas of the same service
How to publish a service port so it can be accessed outside the network mesh
Over to You!

Context
In this final exercise, your goal is to configure node labels and placement constraints for the services in the Libra application, so you can optimize how the virtual machines—used as nodes in your Swarm cluster—are utilized.
Instructions
Start the virtualized environment that simulates the Docker Swarm cluster hosting the Libra stack.
Create labels on the various nodes to identify storage nodes and compute nodes.
Edit the
docker-compose.ymlfile to use these labels and place containers on the nodes best suited for their roles.Edit the
docker-compose.ymlfile to publish the Libra application’s port so it can be accessed externally.
Summary
Understanding overlay networks is essential for enabling transparent and reliable communication between services deployed on different nodes.
Use built-in service discovery and load balancing to simplify communication and traffic distribution across service replicas.
Knowing how to publish service ports is crucial for exposing your services to the outside world.
This brings us to the end of this introductory Docker course. I hope it has given you a solid overview of this essential technology. There is still much to learn, but with these fundamentals, you should now feel confident approaching the deployment of a containerized application! Before moving on, I invite you to complete the quiz that follows.
