Add Structure and Style to Your Site With a Base Template, CSS, and Static Files

Separate Site-Wide HTML From Page-Specific HTML
Did you notice at the end of the last chapter that we now have repeated code in our template files? This will become unmanageable as we add more templates to our site: if we want to change the head tag, we’ll need to change it in every template.
Let’s see how to apply the DRY principle - Don’t Repeat Yourself - and avoid repeated code in our templates by using a base template.
To begin, we need to look at our existing templates and ask two questions:
What is different between these templates?
What stays the same?
The common elements between the three templates are:
<html> tag
<head> tag
<title> tag
<body> tag
As these tags are common to every page, we’re going to define them in one place - our base template.
Let’s put this site-wide HTML into a new template file at ‘listings/templates/listings/base.html.’ Note the code we add at line X:
# listings/templates/listings/base.html

<html>
    <head><title>Merchex</title></head>
    <body>

        {% block content %}{% endblock %}

    </body>
</html>
Within our HTML, we added a Django template tag - the block tag. And we’ve closed that tag with an endblock tag.
We’ve given this block a name too: content .
We can look at the block tag as a placeholder, into which we can inject content - in that sense, they are similar to template variables.
So what we want to do next is to inject our page-specific HTML into this block. Let’s return to our page templates to see how.
Extend a Base Template With a Page Template
Open up the ’hello.html’ template. First, remove all HTML that we’re now defining in our base template. (I’m also removing some of the example code I added in the last chapter.) You should end up with something like this:
# listings/templates/listings/hello.html

<h1>Hello Django!</h1>

<p>My favourite bands are:</p>

<ul>
    {% for band in bands %}
        <li>
            {{ band.name }}
        </li>
    {% endfor %}
</ul>
Great, now our page template contains only content that is specific to this page.
Next, add these additional template tags at the top and bottom of the template:
{% extends 'listings/base.html' %}

{% block content %}

<h1>Hello Django!</h1>
...
</ul>

{% endblock %}
The extends template tag at the top tells Django that we want this template to inherit from our base template.
Surrounding our content, we have an opening and closing block tag - and we’ve given the opening tag the same name as our base template: content .
As you may have guessed, Django will take everything inside the content block in our page template and inject it into the block of the same name in our base template. Let’s look at this in action:
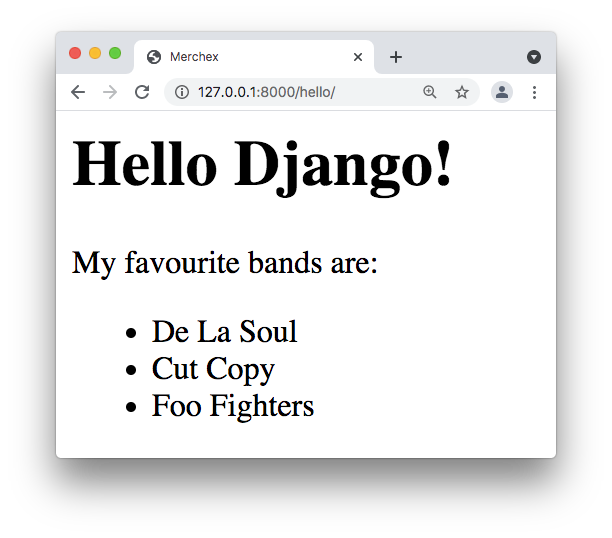
Your page should appear exactly as it did before. We haven’t changed how it looks - but we have changed how things are working in the background. This will make the app easier to manage as it grows.
Of course, now that we have our base template defined, we can use it for all the existing (and future) pages on our site. At the end of the chapter, you'll apply your base template to all of your pages.
Let’s visualize what we just did with base templates:
If you need to check any of these steps further, watch the screencast for a recap.
Style Your Site With CSS
With our site’s <head> tag defined in our base template, now’s a good time to add a stylesheet.
Files like CSS stylesheets are known as static files in Django because they don't change once the application is running.
You put static files in a specific place in an app. Create a folder at listings/static/listings/ - and inside it, create a new file called “styles.css.”
* { background: red }This is not the final stylesheet we’ll use for real in our app - it’s more like the “Hello World!” of stylesheets. It’s going to give every element on our page a red background. This is just to test that our stylesheet is loading correctly!
Open up bands/templates/bands/base.html, and let’s add a <link> tag below the title to load our stylesheet:
<html>
    <head>
        <title>Merchex</title>
        <link rel="stylesheet" href="{% static 'listings/styles.css' %}" />
What do you notice about the href attribute of our <link> tag?
It is another template tag! This static tag tells Django that it should look inside the special static directory we created earlier and find the file we created: ‘bands/styles.css’.
For the static tag to work, we first need to “load” it into this template. We do that by adding a load tag at the very beginning of the file, like this:
{% load static %}
<html>
...
Here are the results in the browser:
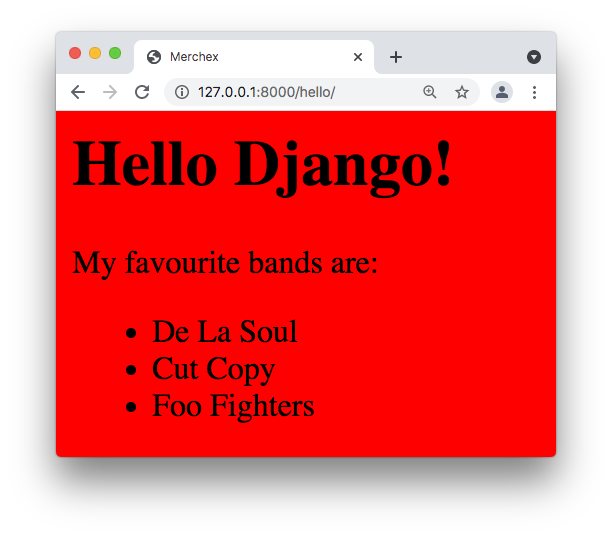
You should see an unsightly red page. This means everything is working!
Once you’re sure your CSS file is loading correctly, you can then edit the CSS file and begin to style your site how you’d like it. This course doesn’t cover CSS, but you can either follow this CSS course or use your existing skills to style your site.
Alternatively, you don’t have to style the site at all - many of the HTML elements we’ll be using in this course will have default styling applied to them by your browser. If you’re happy with that, you can simply use a blank CSS file. This is what I’ll do for the rest of this course.
You can follow along again with the concepts from this section in this screencast:
Now you try! Make All Your Page Templates Extend Your Base Template
Of course, this base template we’ve created can be used for our other pages too - and that’s what I’d like you to do now.
Update each of your page templates, so they all inherit from your base template.
If you get stuck, remember that each of your page templates should end up having:
An
extendstag.A
blocktag.An
endblocktag.
Recap MVT Architecture
We’ve covered the three main components of MVT architecture - the M, V, and T - and you’ve seen how separating our app into these three areas helps you with “separation of concerns” - decoupling the different parts and applying the single-responsibility principle.
Everything in MVT has a proper place: models, views, templates, and even URL patterns are all separated into their own files.
One of the benefits of having templates in their own files is that a front-end developer can work on the template files, while a back-end developer can simultaneously work on the model and view files. This reduces (not eliminates) the likelihood that the two developers’ changes will conflict with each other.
Is MVT/Django always the right choice though?
When I discovered Django, I thought I would never have to learn another framework again! It’s tempting to see it as a silver bullet that solves all of your problems. But it is not always the best choice.
First, Django is a monolith framework. It provides engines for all parts of the application - the template engine for presentation, the ORM for persistence, etc. What if you wanted to swap out one of these parts? It might be better to custom build your MVC/T architecture from parts you choose - like Flask, SQLAlchemy, and so on.
Second, MVC/T is just one architecture style. It’s very well suited to simple CRUD applications. But for enterprise solutions, you could investigate alternatives like clean architecture.
For now, just understand that MVC has its limitations, and you may one day find that you reach one of these limits!
Compare Server-Side and Client-Side Rendering
Server-side rendering is the “old-fashioned” way of rendering the HTML content for a web page, where each page load involves a relatively slow round trip to the server. Today, there are many frameworks for creating rich front-end applications in the browser, where the HTML is generated client-side. Thus, only a minimal amount of data is sent between browser and server, resulting in lightning-fast applications.
But that doesn’t mean that you should ignore server-side rendering! On the contrary, it’s a great place to start. And for many applications, server-side rendering is an adequate solution. It’s simple to understand. It reduces the complexity of the app as it doesn’t require you to build a REST API. And your app can fit in one repo because there’s no need for a separate JavaScript front-end app. That’s why server-side rendering with Django is great for proof-of-concept apps and those with simple interfaces.
If the needs of your application change, you can convert your server-side rendering Django project into a REST API using the Django REST framework.
Let’s Recap!
A base template is a place to define site-wide HTML once, in a single place - keeping your HTML code DRY.
Page templates are then left containing only page-specific HTML code.
Define
blocktemplate tags in your base template - these act as placeholders into which you “inject” the content from your page templates.A base template is an ideal place to load a CSS file using the
statictemplate tag.
And with this chapter, we’ve covered all of the fundamental elements of MVT architecture! Now you'll take a quiz to review your understanding. I’ll see you in the next part of the course!